 I’ve had these stamp information sheets since this LWA RSVP series in 2012. I found them in my vast paper stash while I was geting my desk organized (which is still an ongoing project–so many drawers, so many decisions.) The stamp sheets have pictures and educational bits on one side and are blank on the other, so I figured I could write letters and fold them into makeshift aerograms. The paper is thick and sturdy, perfect for handwriting or typewriters and I knew if I used some washi tape to seal it all up, that the recipients could (hopefully) open their letters easily without cutting into them.
 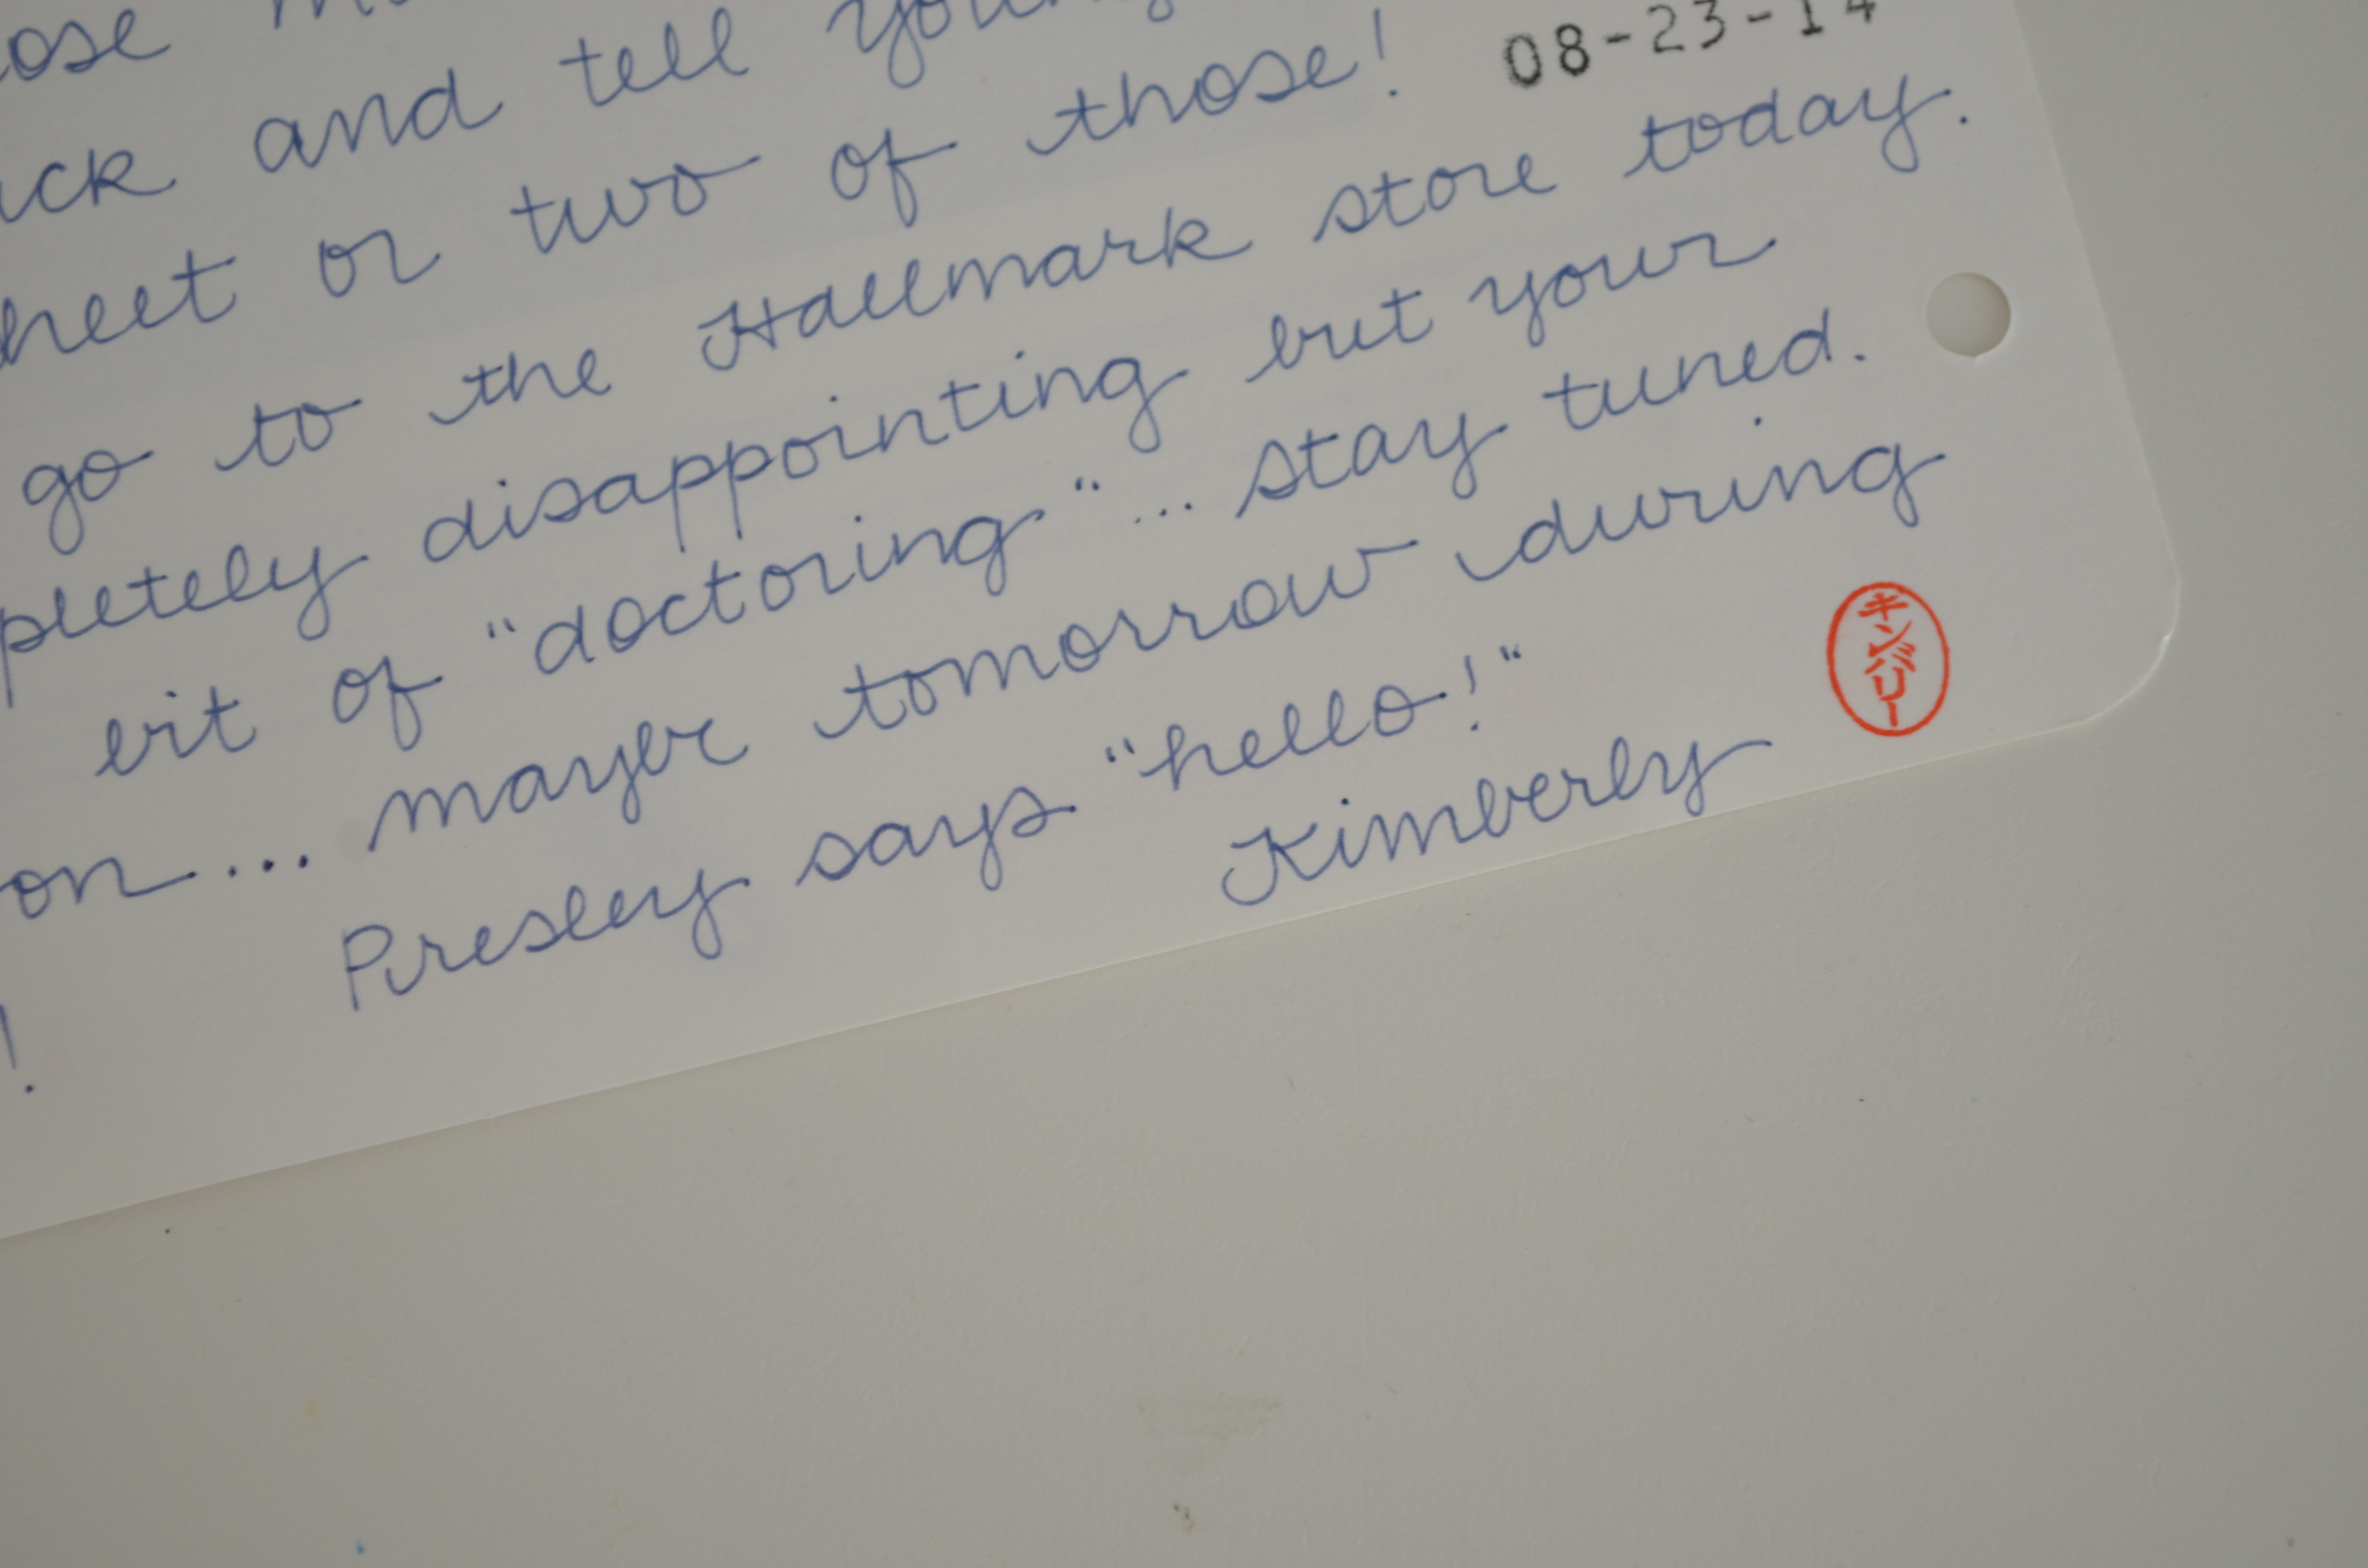 I hand wrote a letter to April on the “Postage Stamps of New Zealand” sheet. Then I folded the sheet into thirds, paying attention to how the back would look. I wanted the title part (seen at the top photo) to be the feature.
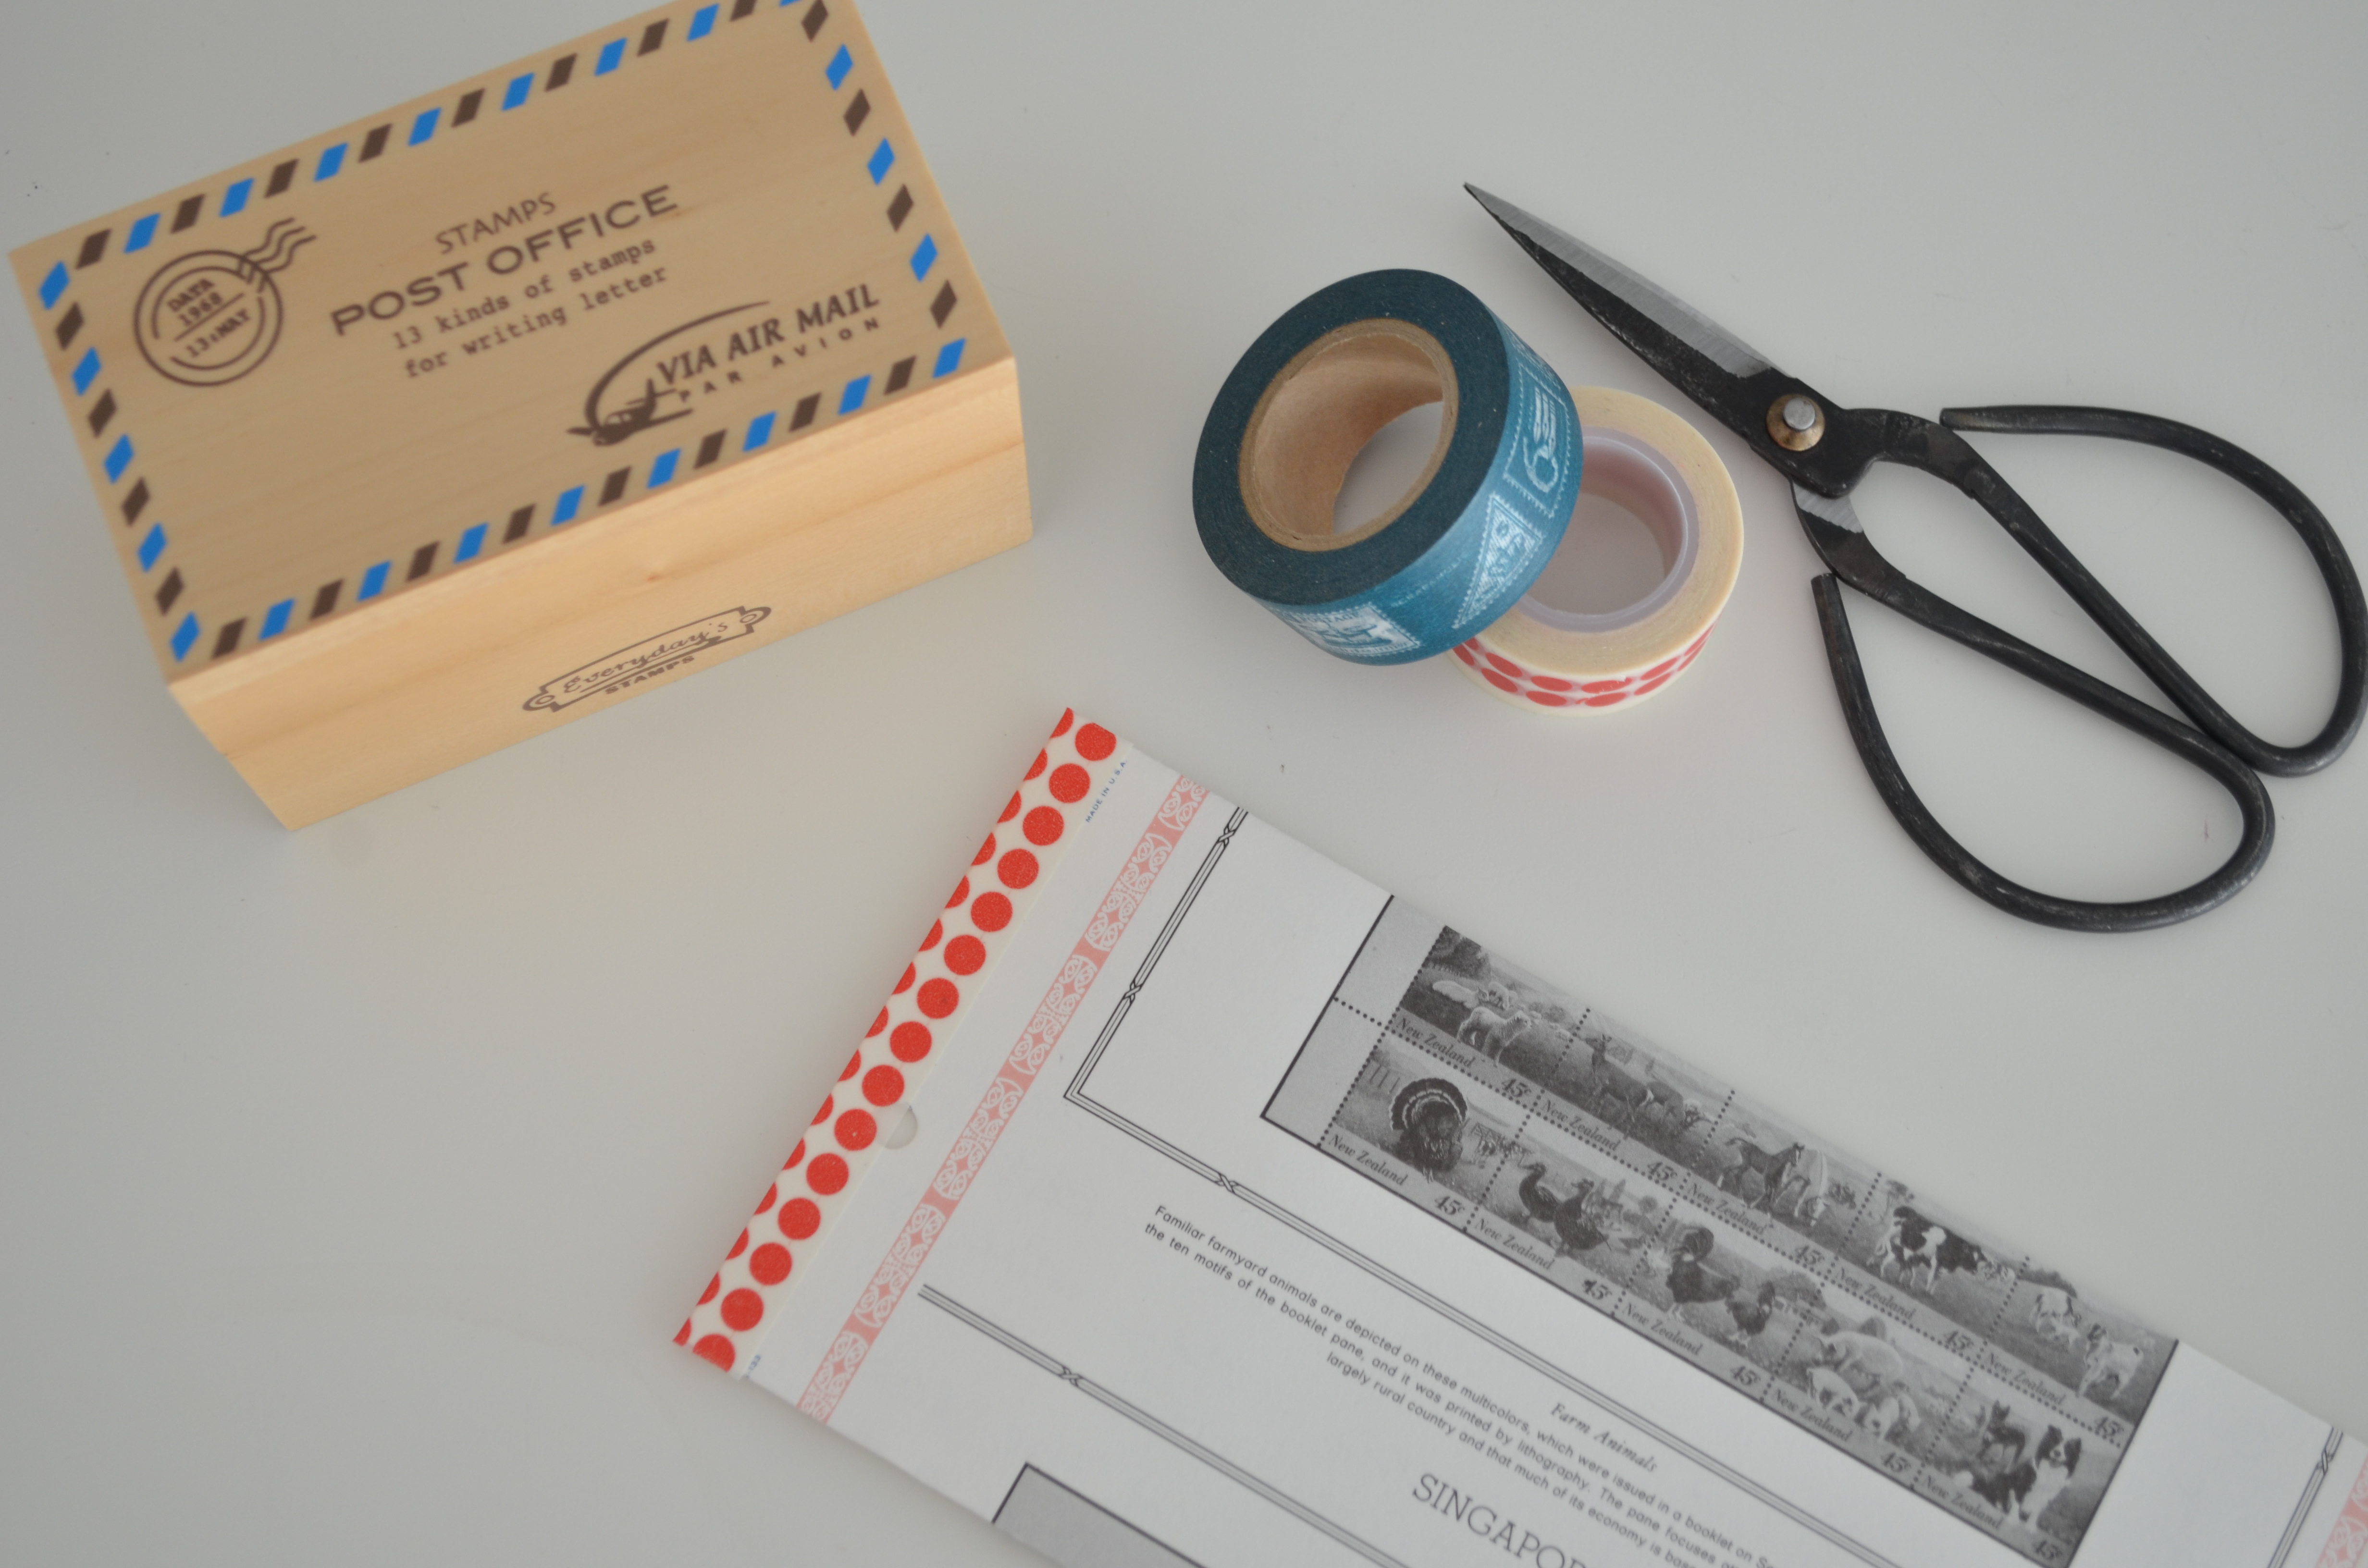 I folded some red paper tape (from Target) over the two ends.
 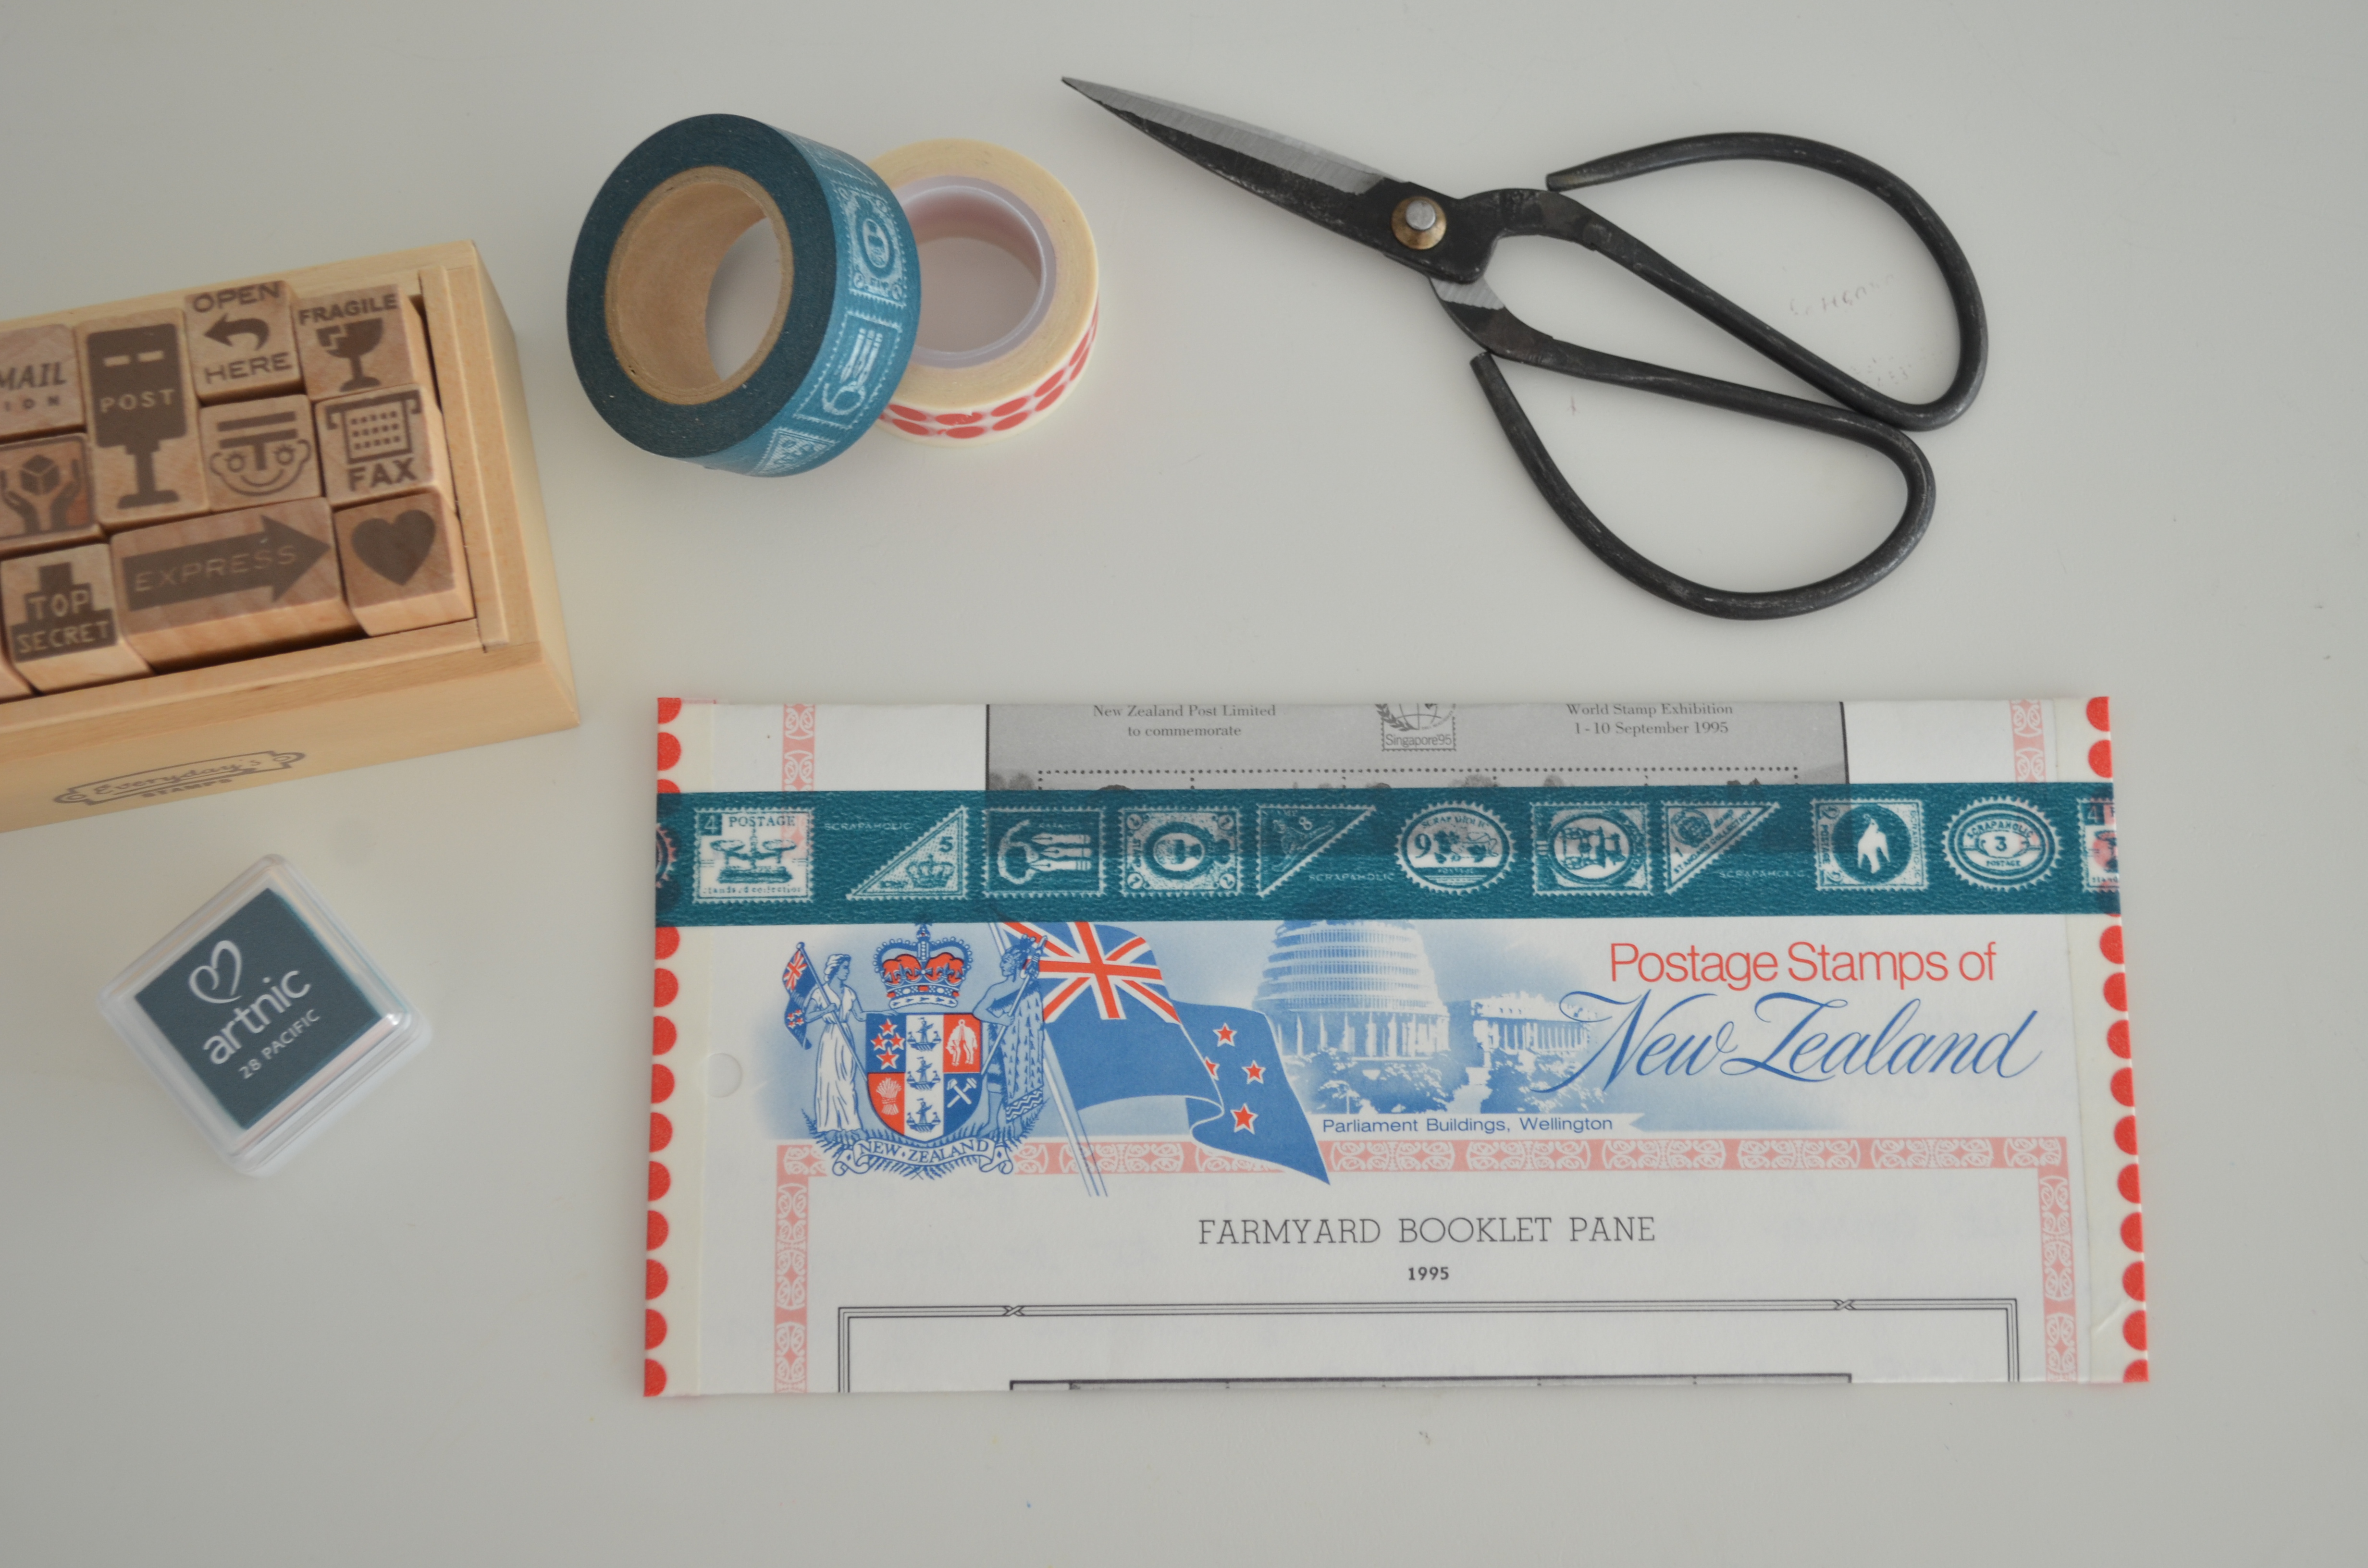 Then I used thick washi tape (from Japan) to seal the top.
  I wrapped the thick washi tape around the front of the envelope and stamped the ends with an “OPEN HERE” stamp (from a set of postal-themed stamps that I bought it Japan). Hopefully, the little directions will prevent the sendees from tearing open the aerogram like an envelope.
 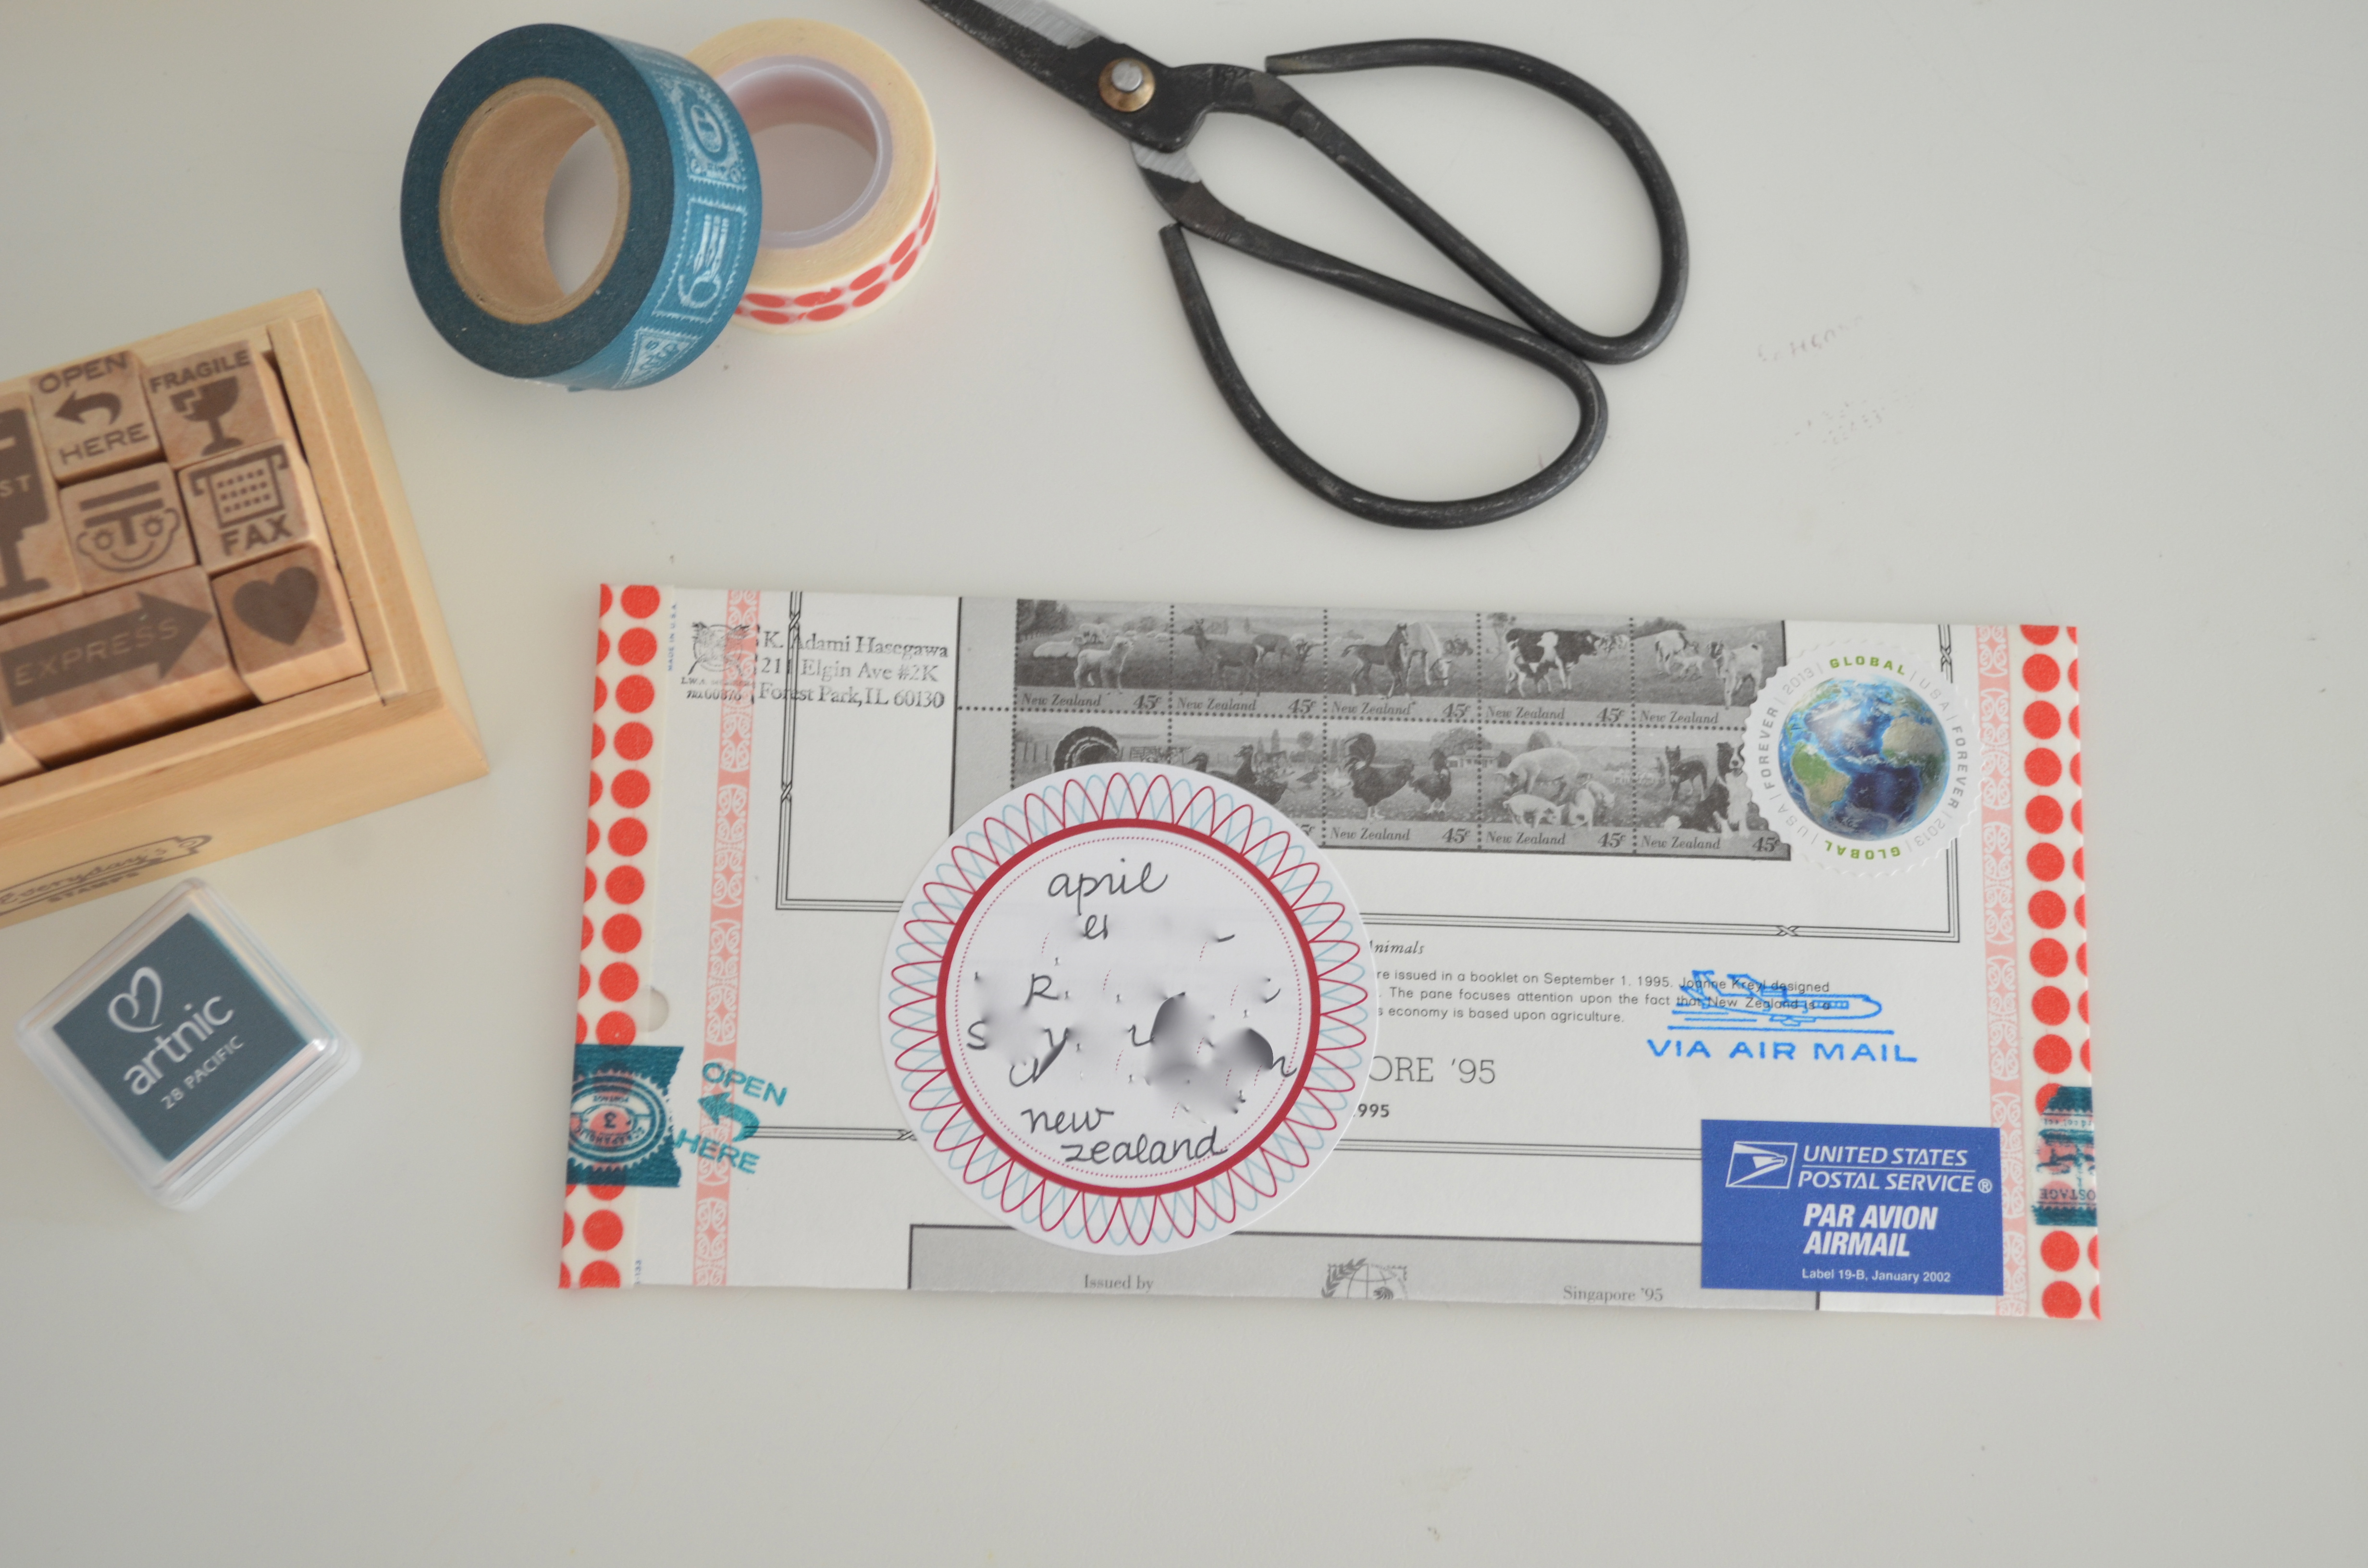 I had so much fun making these and spending out some of my paper hoard. I’m thrilled that I found my letter writing mojo again!
kimberly ah
kimberly at home
Tag Archives: diy
Plot #6 Progress
 Our garden is growing! On Sunday we went down to the garden to plant our last two tomato plants. (My dad gave us four Juliet plants and we couldn’t find anyone to take the extra two, so now we have four Juliets. If they all live and all produce as many tomatoes as our last single Juliet plant did, I will be opening a road side stand this summer.) I need to go buy some more bamboo stakes. Our peas (shown above) are growing nicely, and soon I will need to build my little pea teepee so they don’t grow into a big jungle like they did last year. I also soaked some extra loofah seeds overnight and planted them on National Donut Day…still nothing. I’m sure that the cool days and nights we’ve had recently didn’t contribute to the poor loofah’s growth either since they tend to like hot weather. I’m still holding out hope that we will see a little sprout soon.
 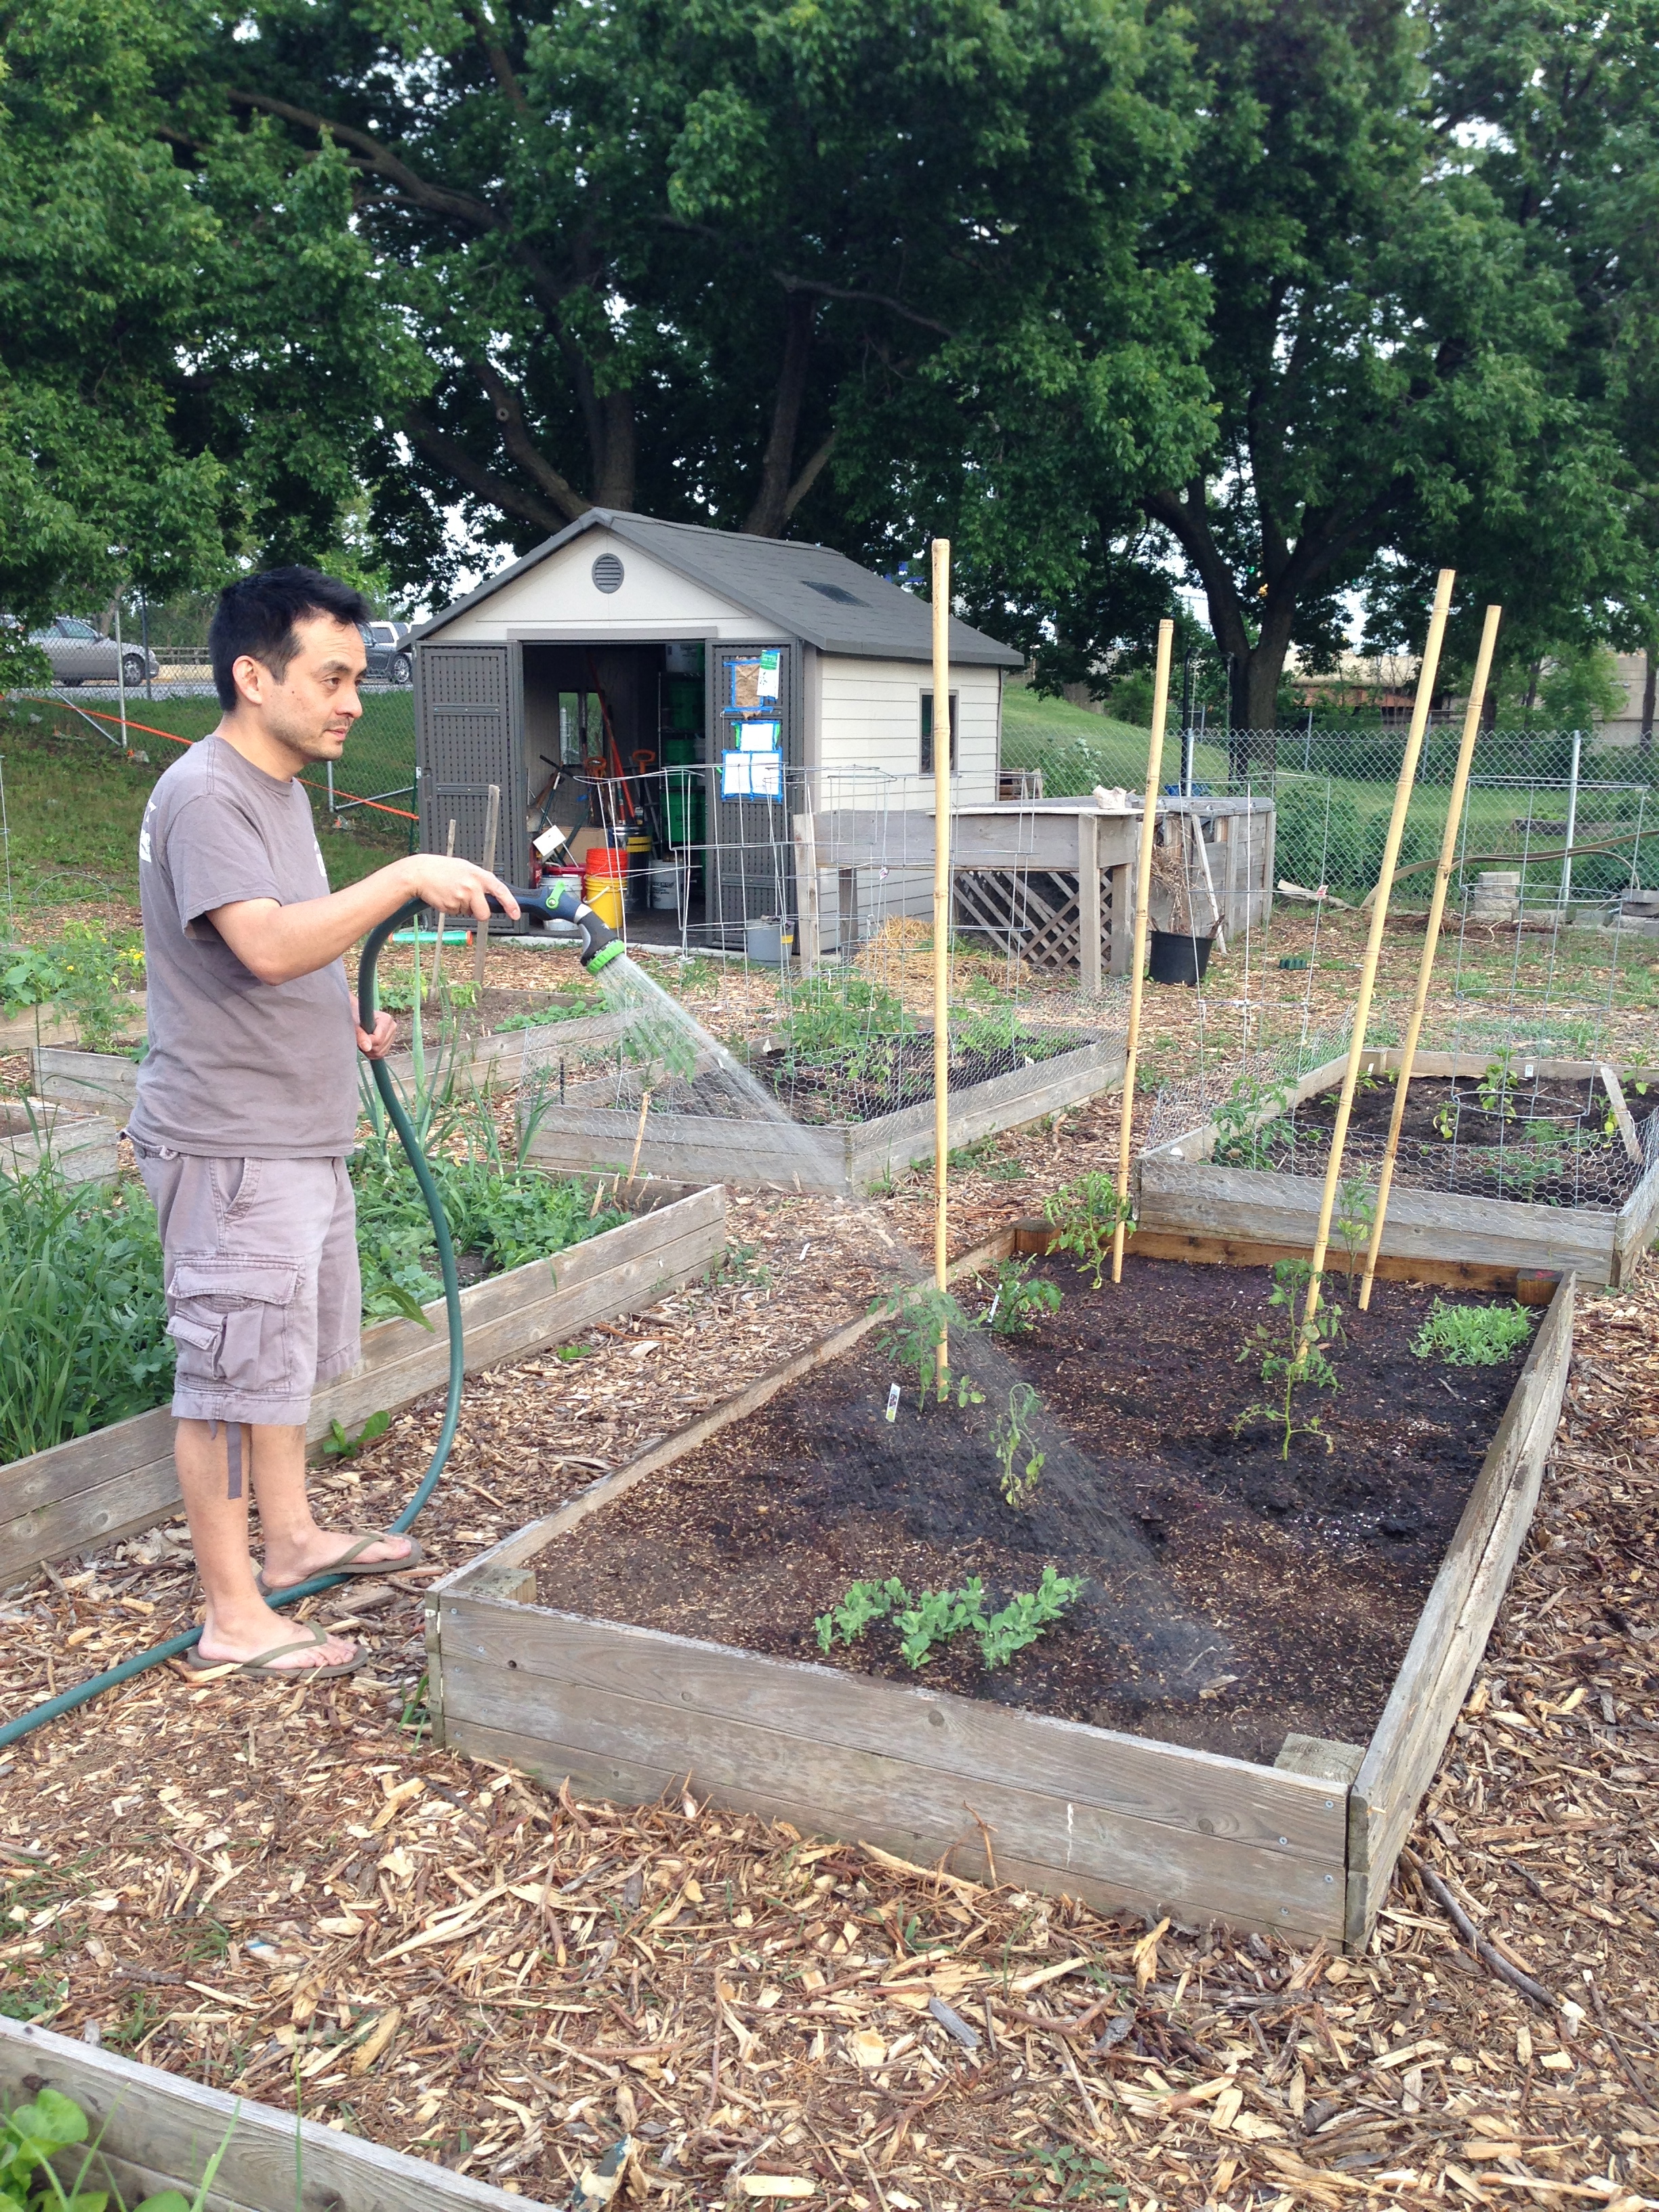 On Sunday, we met our friends Laura and Scott at the garden for the first time this season. Laura planted some delicious radishes last month and we tried her harvest…it made us regret not planting any radishes. So, maybe I’m going today to buy a seed packet or two…
There’s just something about gardening that turns me into an optimist!
P.S. Happy Loving Day! In case you missed it, here’s a post I wrote about our experiences with interracial marriage last year.
Balcony Mail Art Afternoon
 Last week the weather was perfect: low 80s, sun shining, breeze blowing… On Tuesday I had my morning coffee on the balcony and decided to stay outside and work on some mail art. I grabbed a big sunhat and my mail art kit from the LWA Lab and decided to use all of the components up and make as many envelopes as I could. I brought out part of my washi tape collection to supplement, but otherwise almost everything I used was from the kit. Here’s what I came up with…
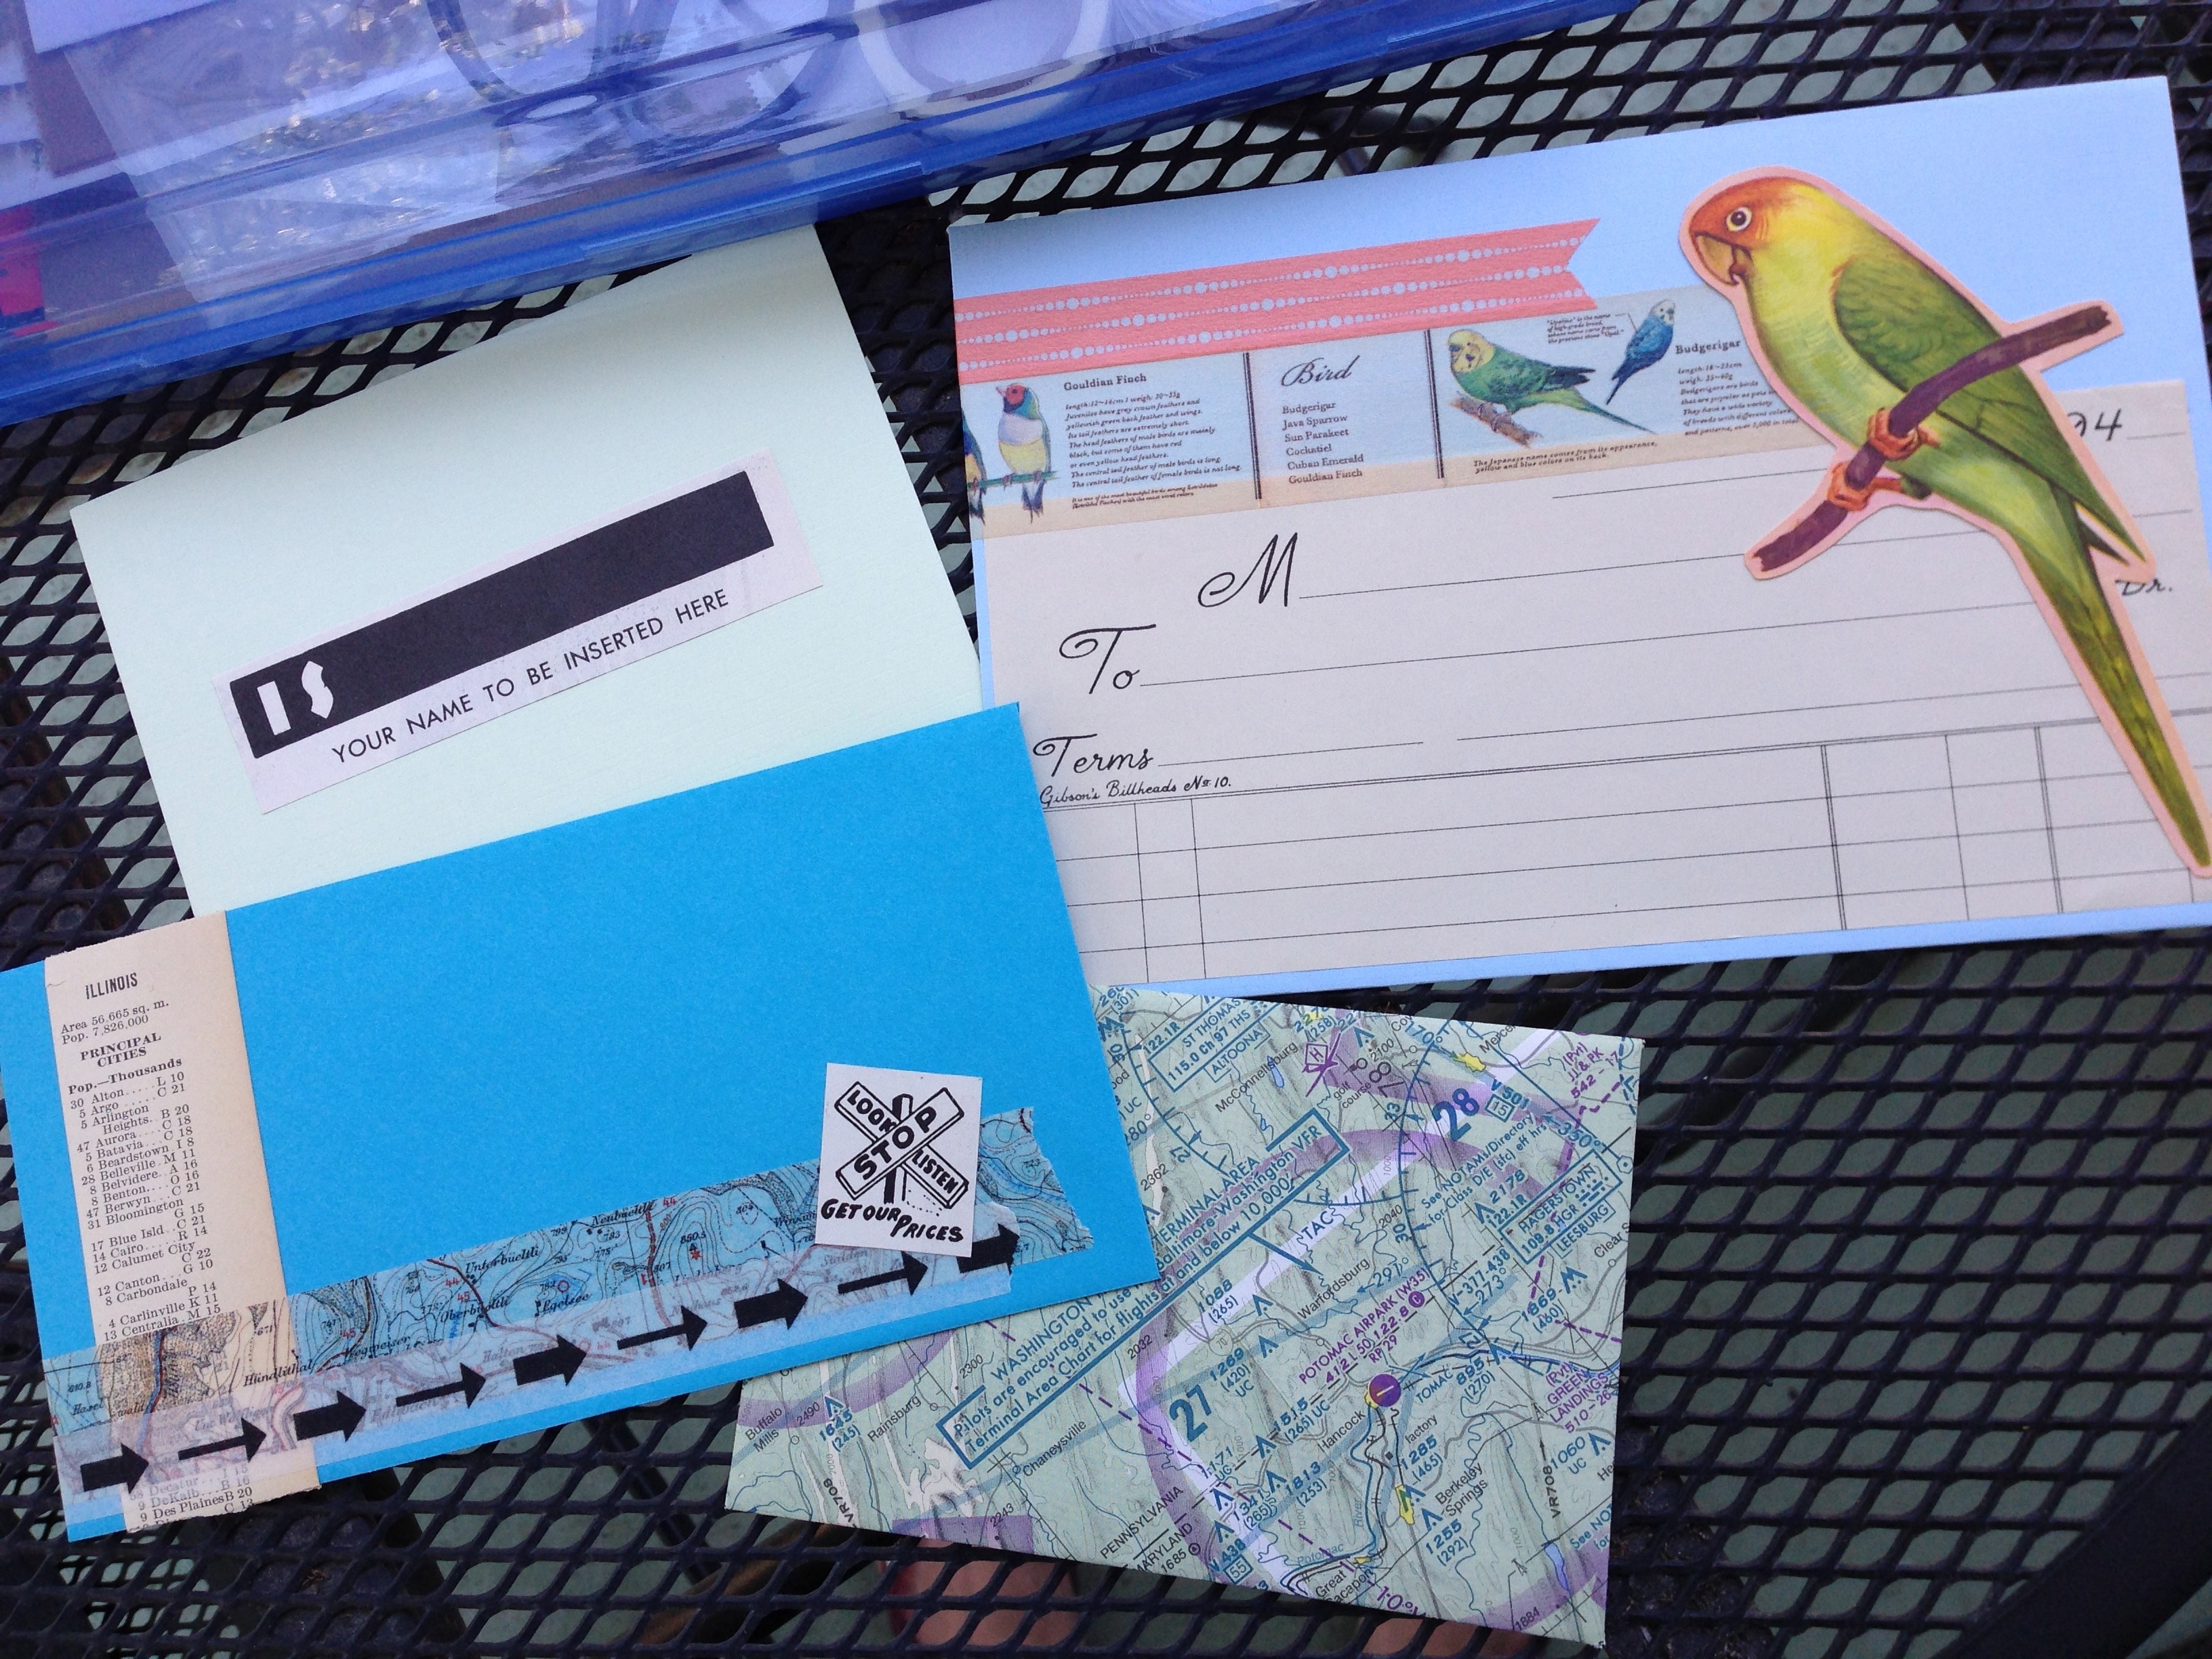
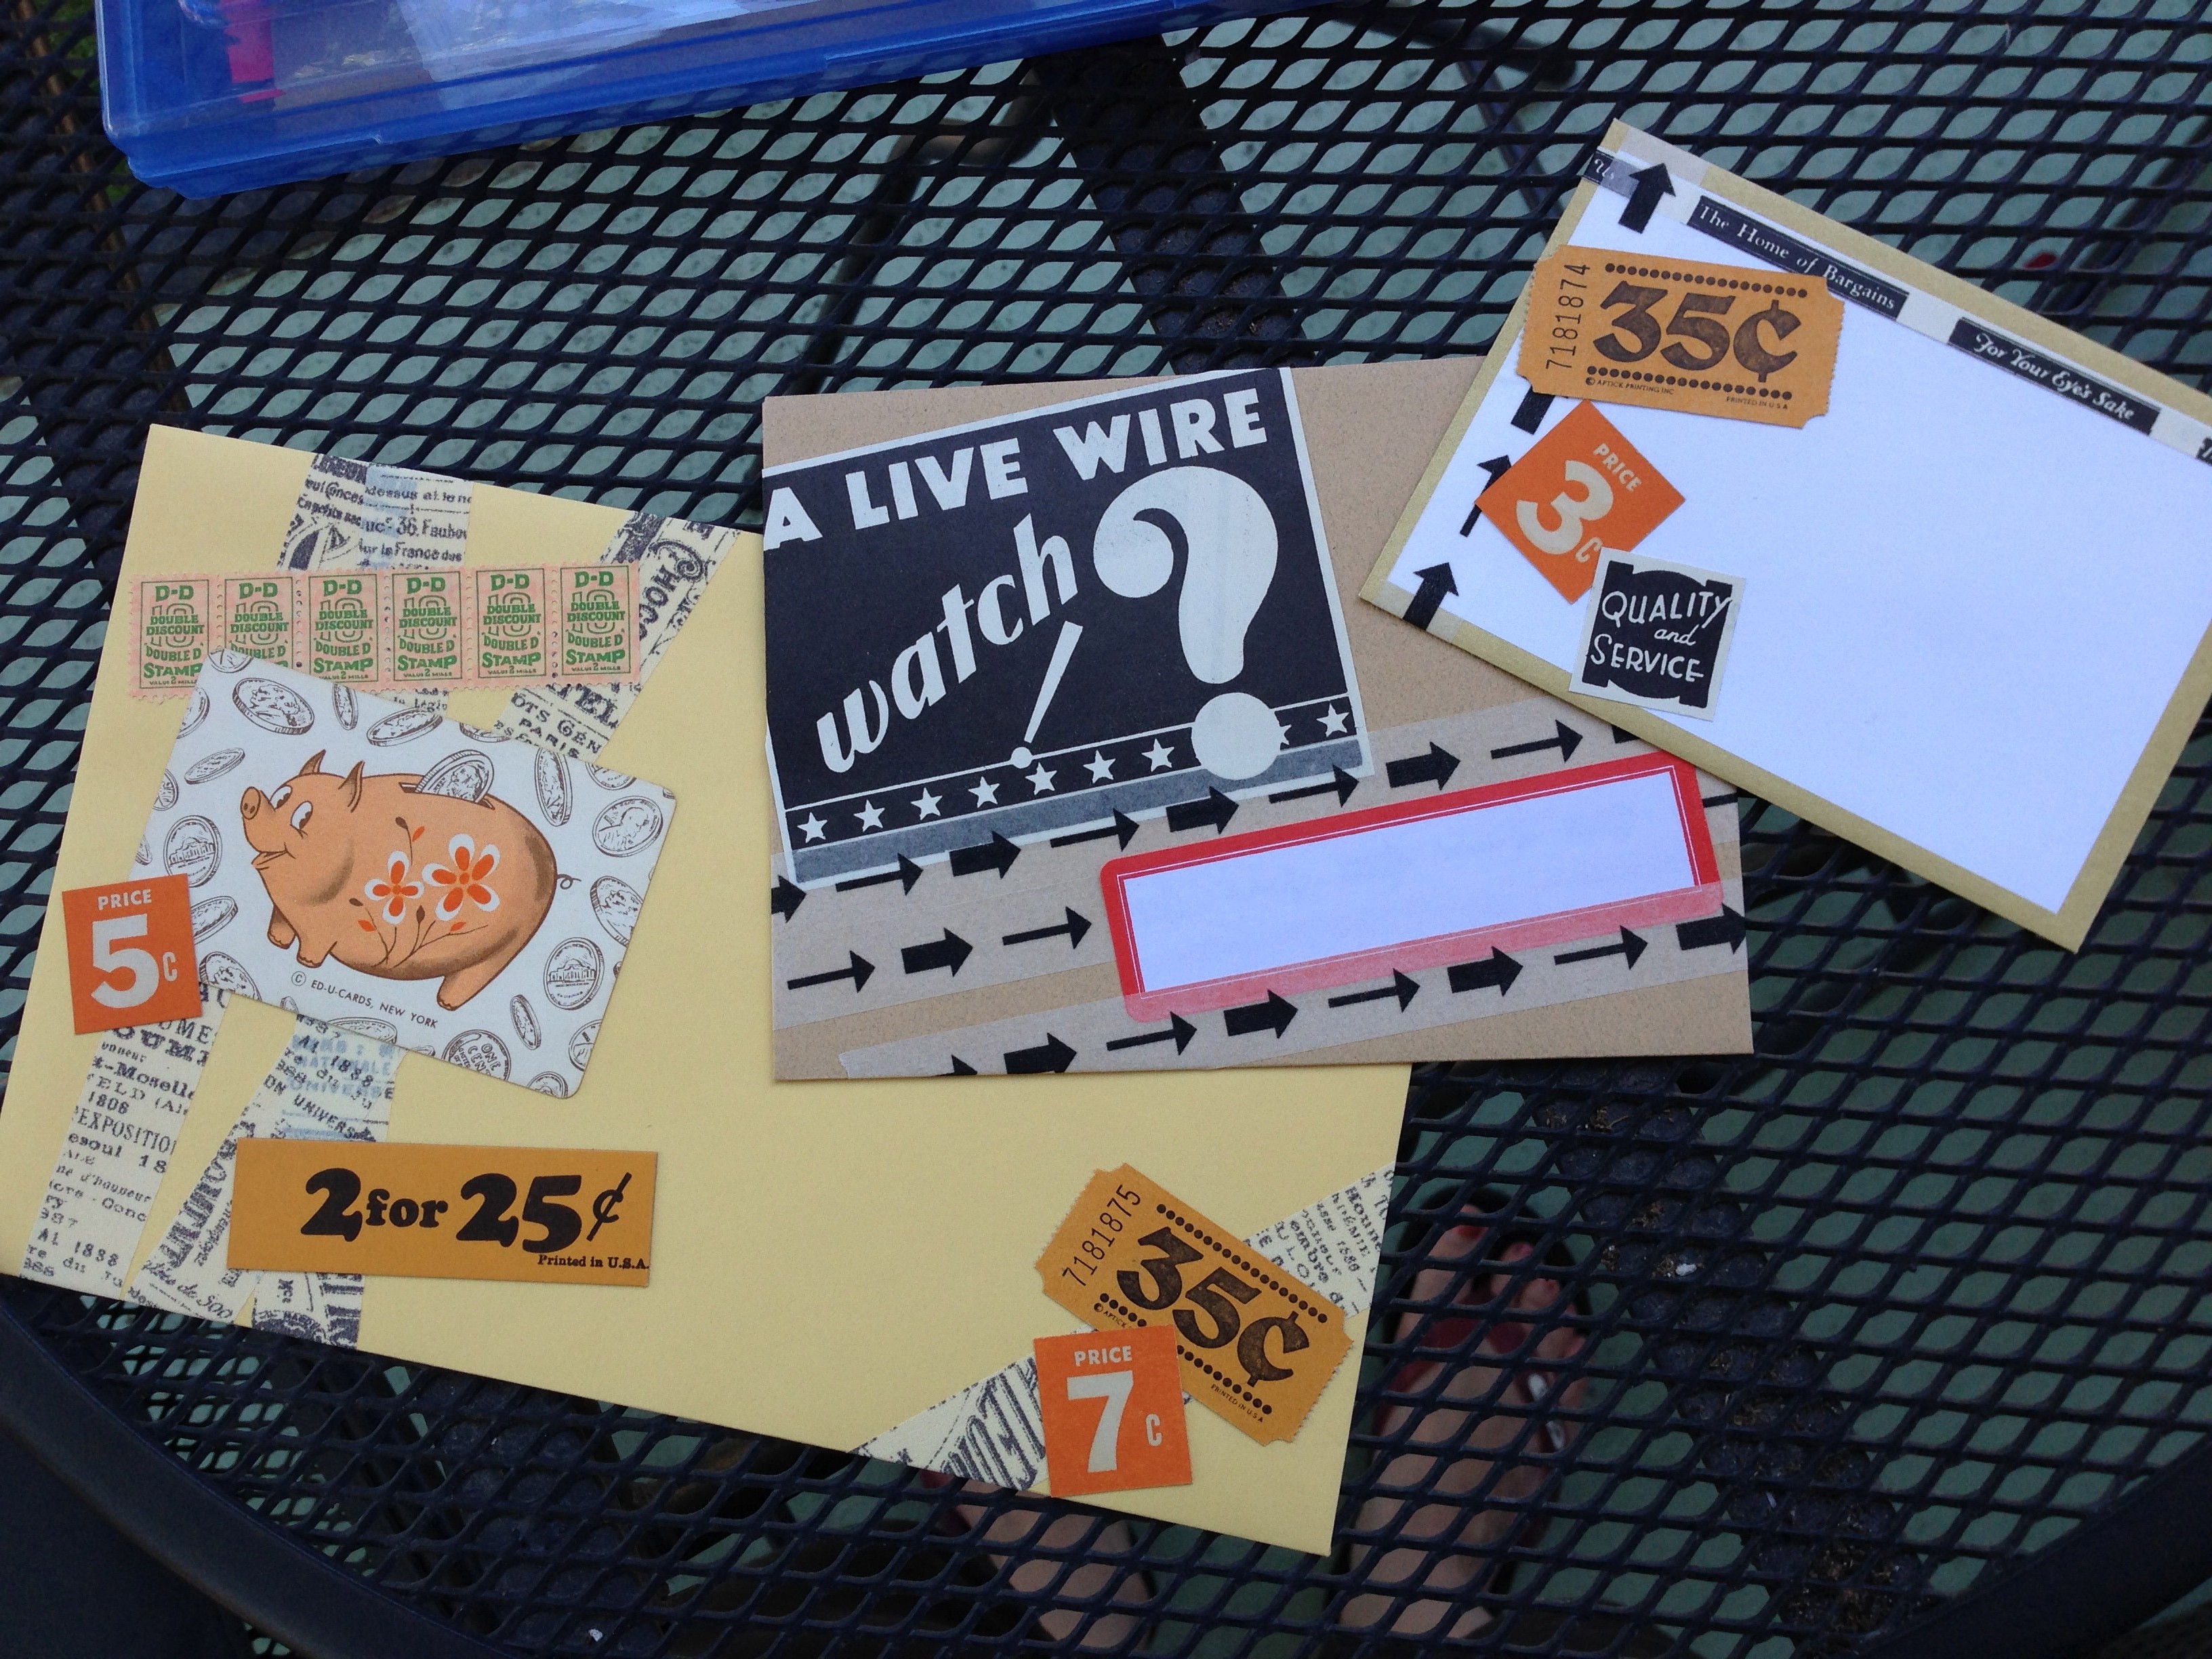
 There were so many great vintage papers in my kit. I was tempted to hoard some of the bits, but making myself use them up was quite satisfying. One of Donovan’s mail art tips was to limit yourself on supplies so you’re not overwhelmed with choices. I think limiting myself to the kit and a few rolls of washi tape made this mail art afternoon more fun and productive than some of my other mail art making sessions. The weather didn’t hurt either… I still have a couple of leftover envelopes and a huge map to work with on later mail art projects. Now…I just need to write some letters to fill those envelopes!!
LWA Lab: Mail Art Master
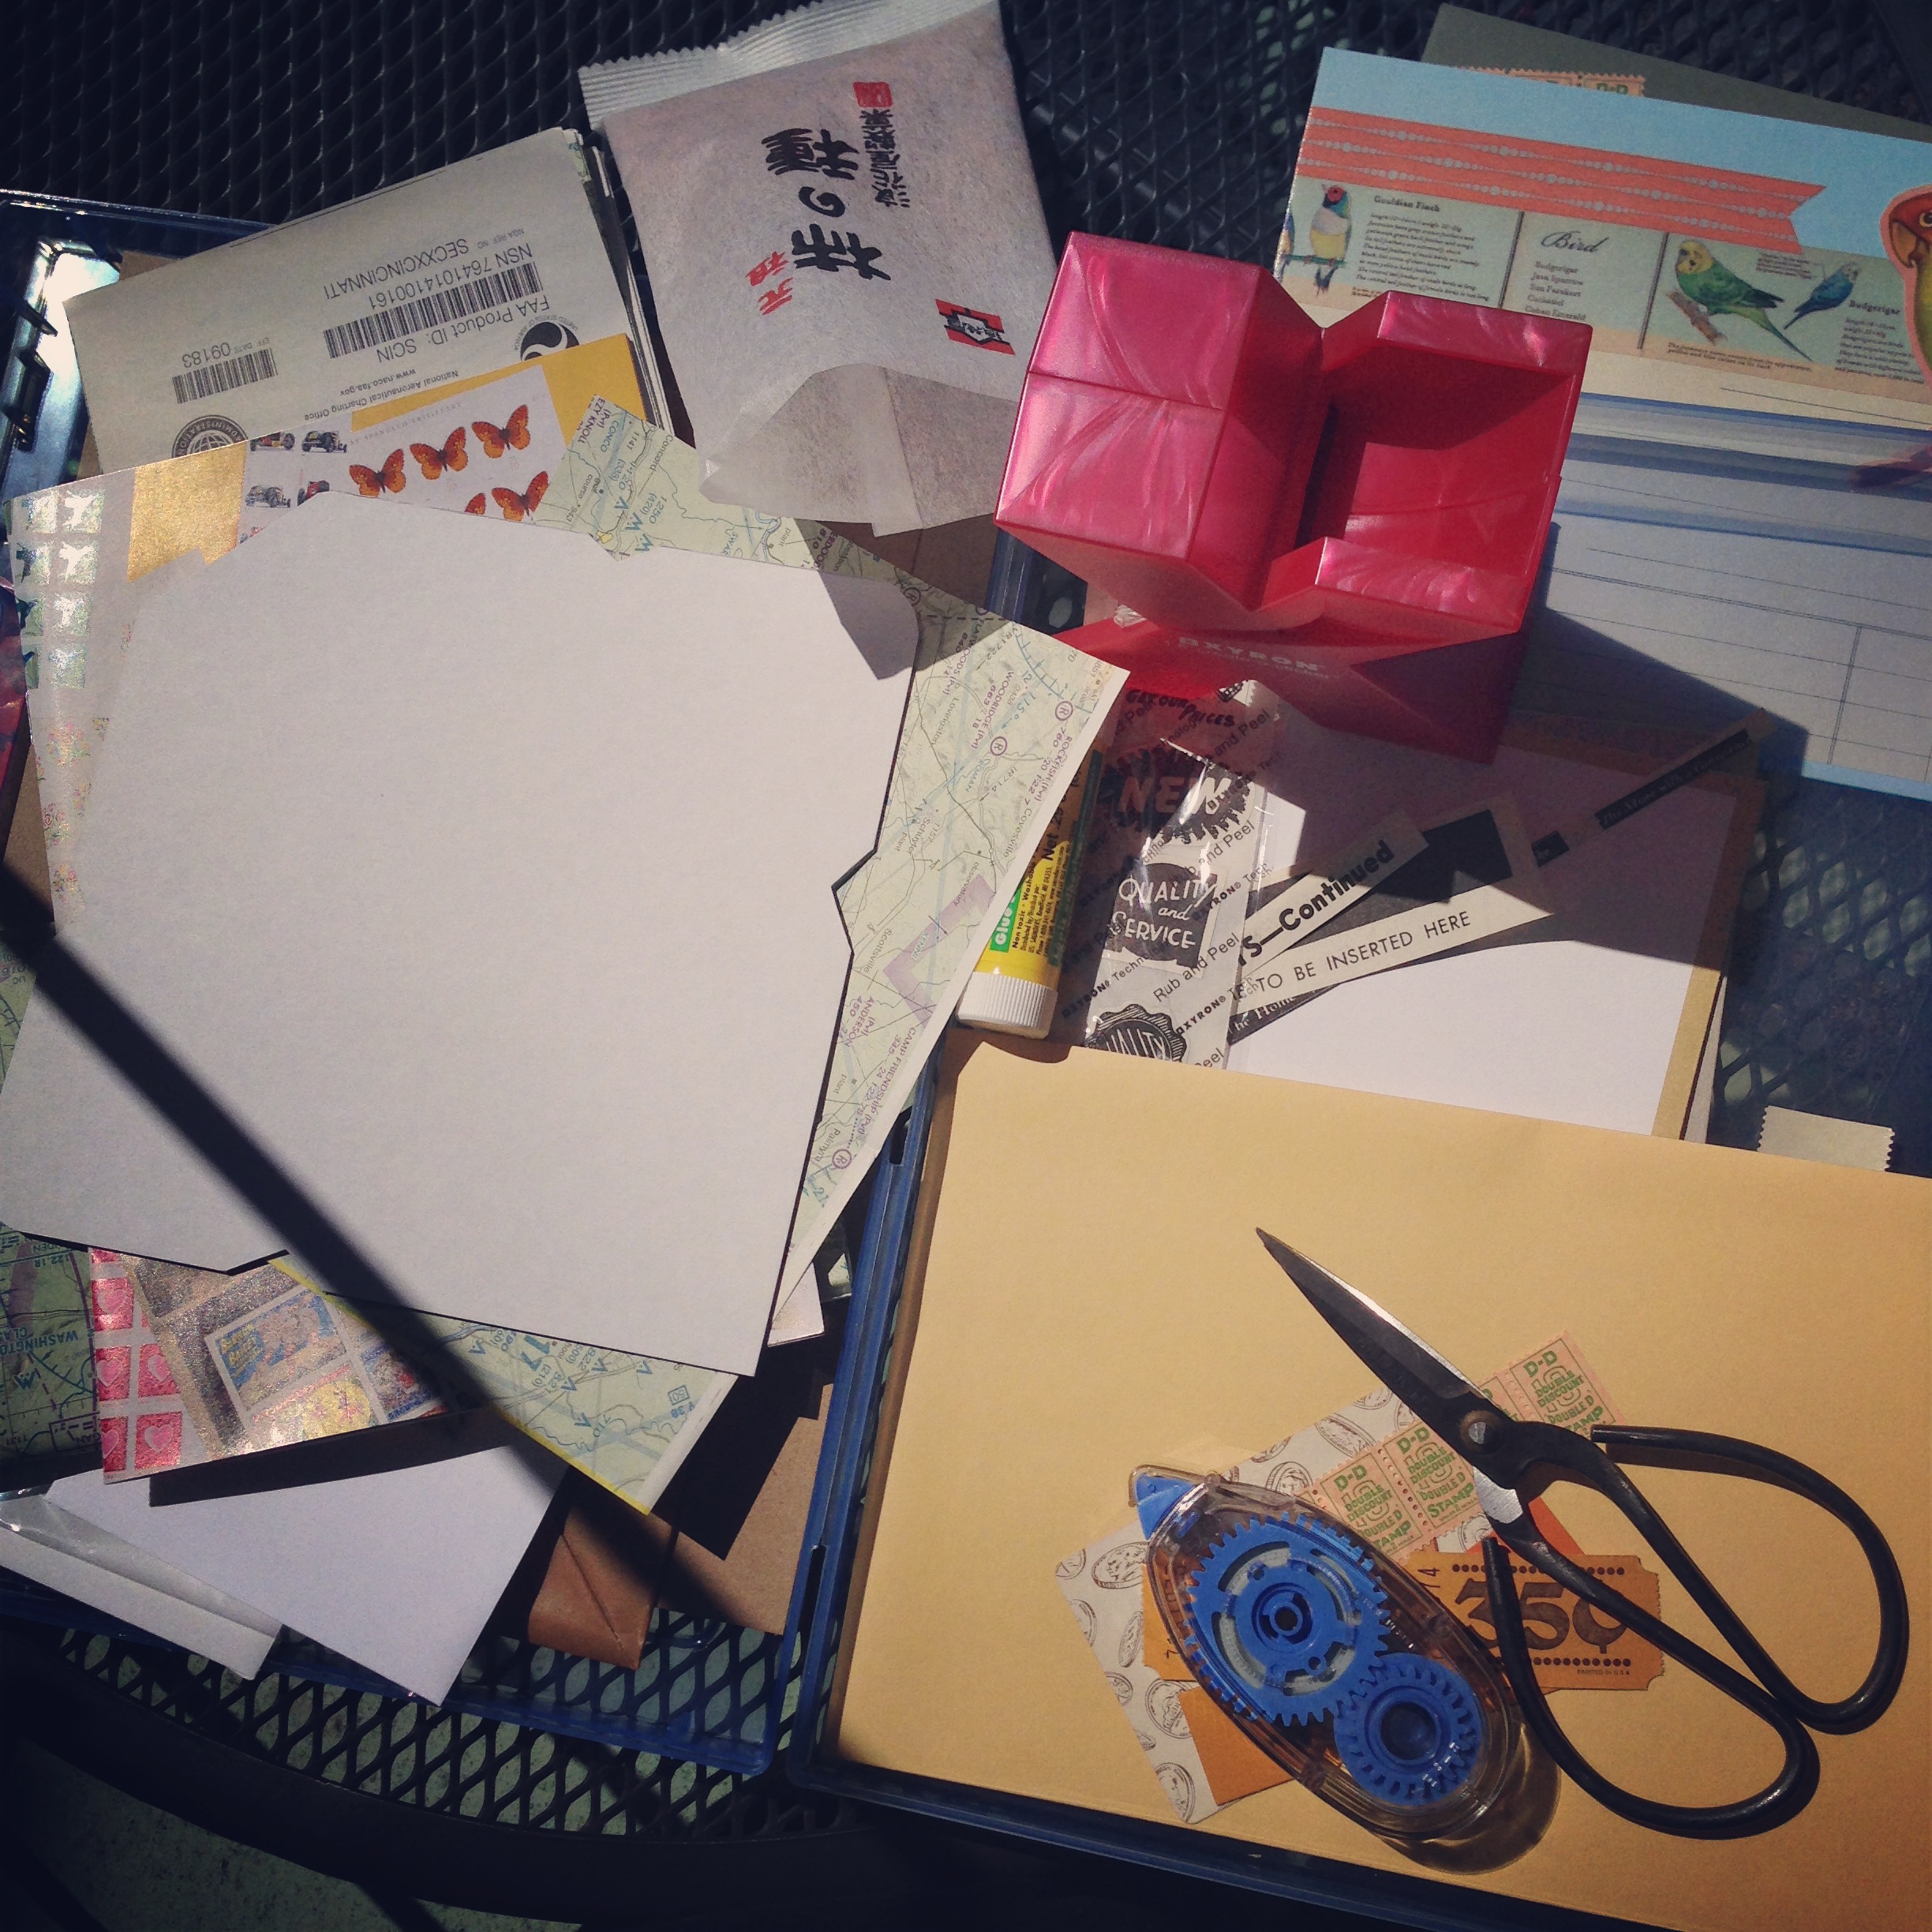
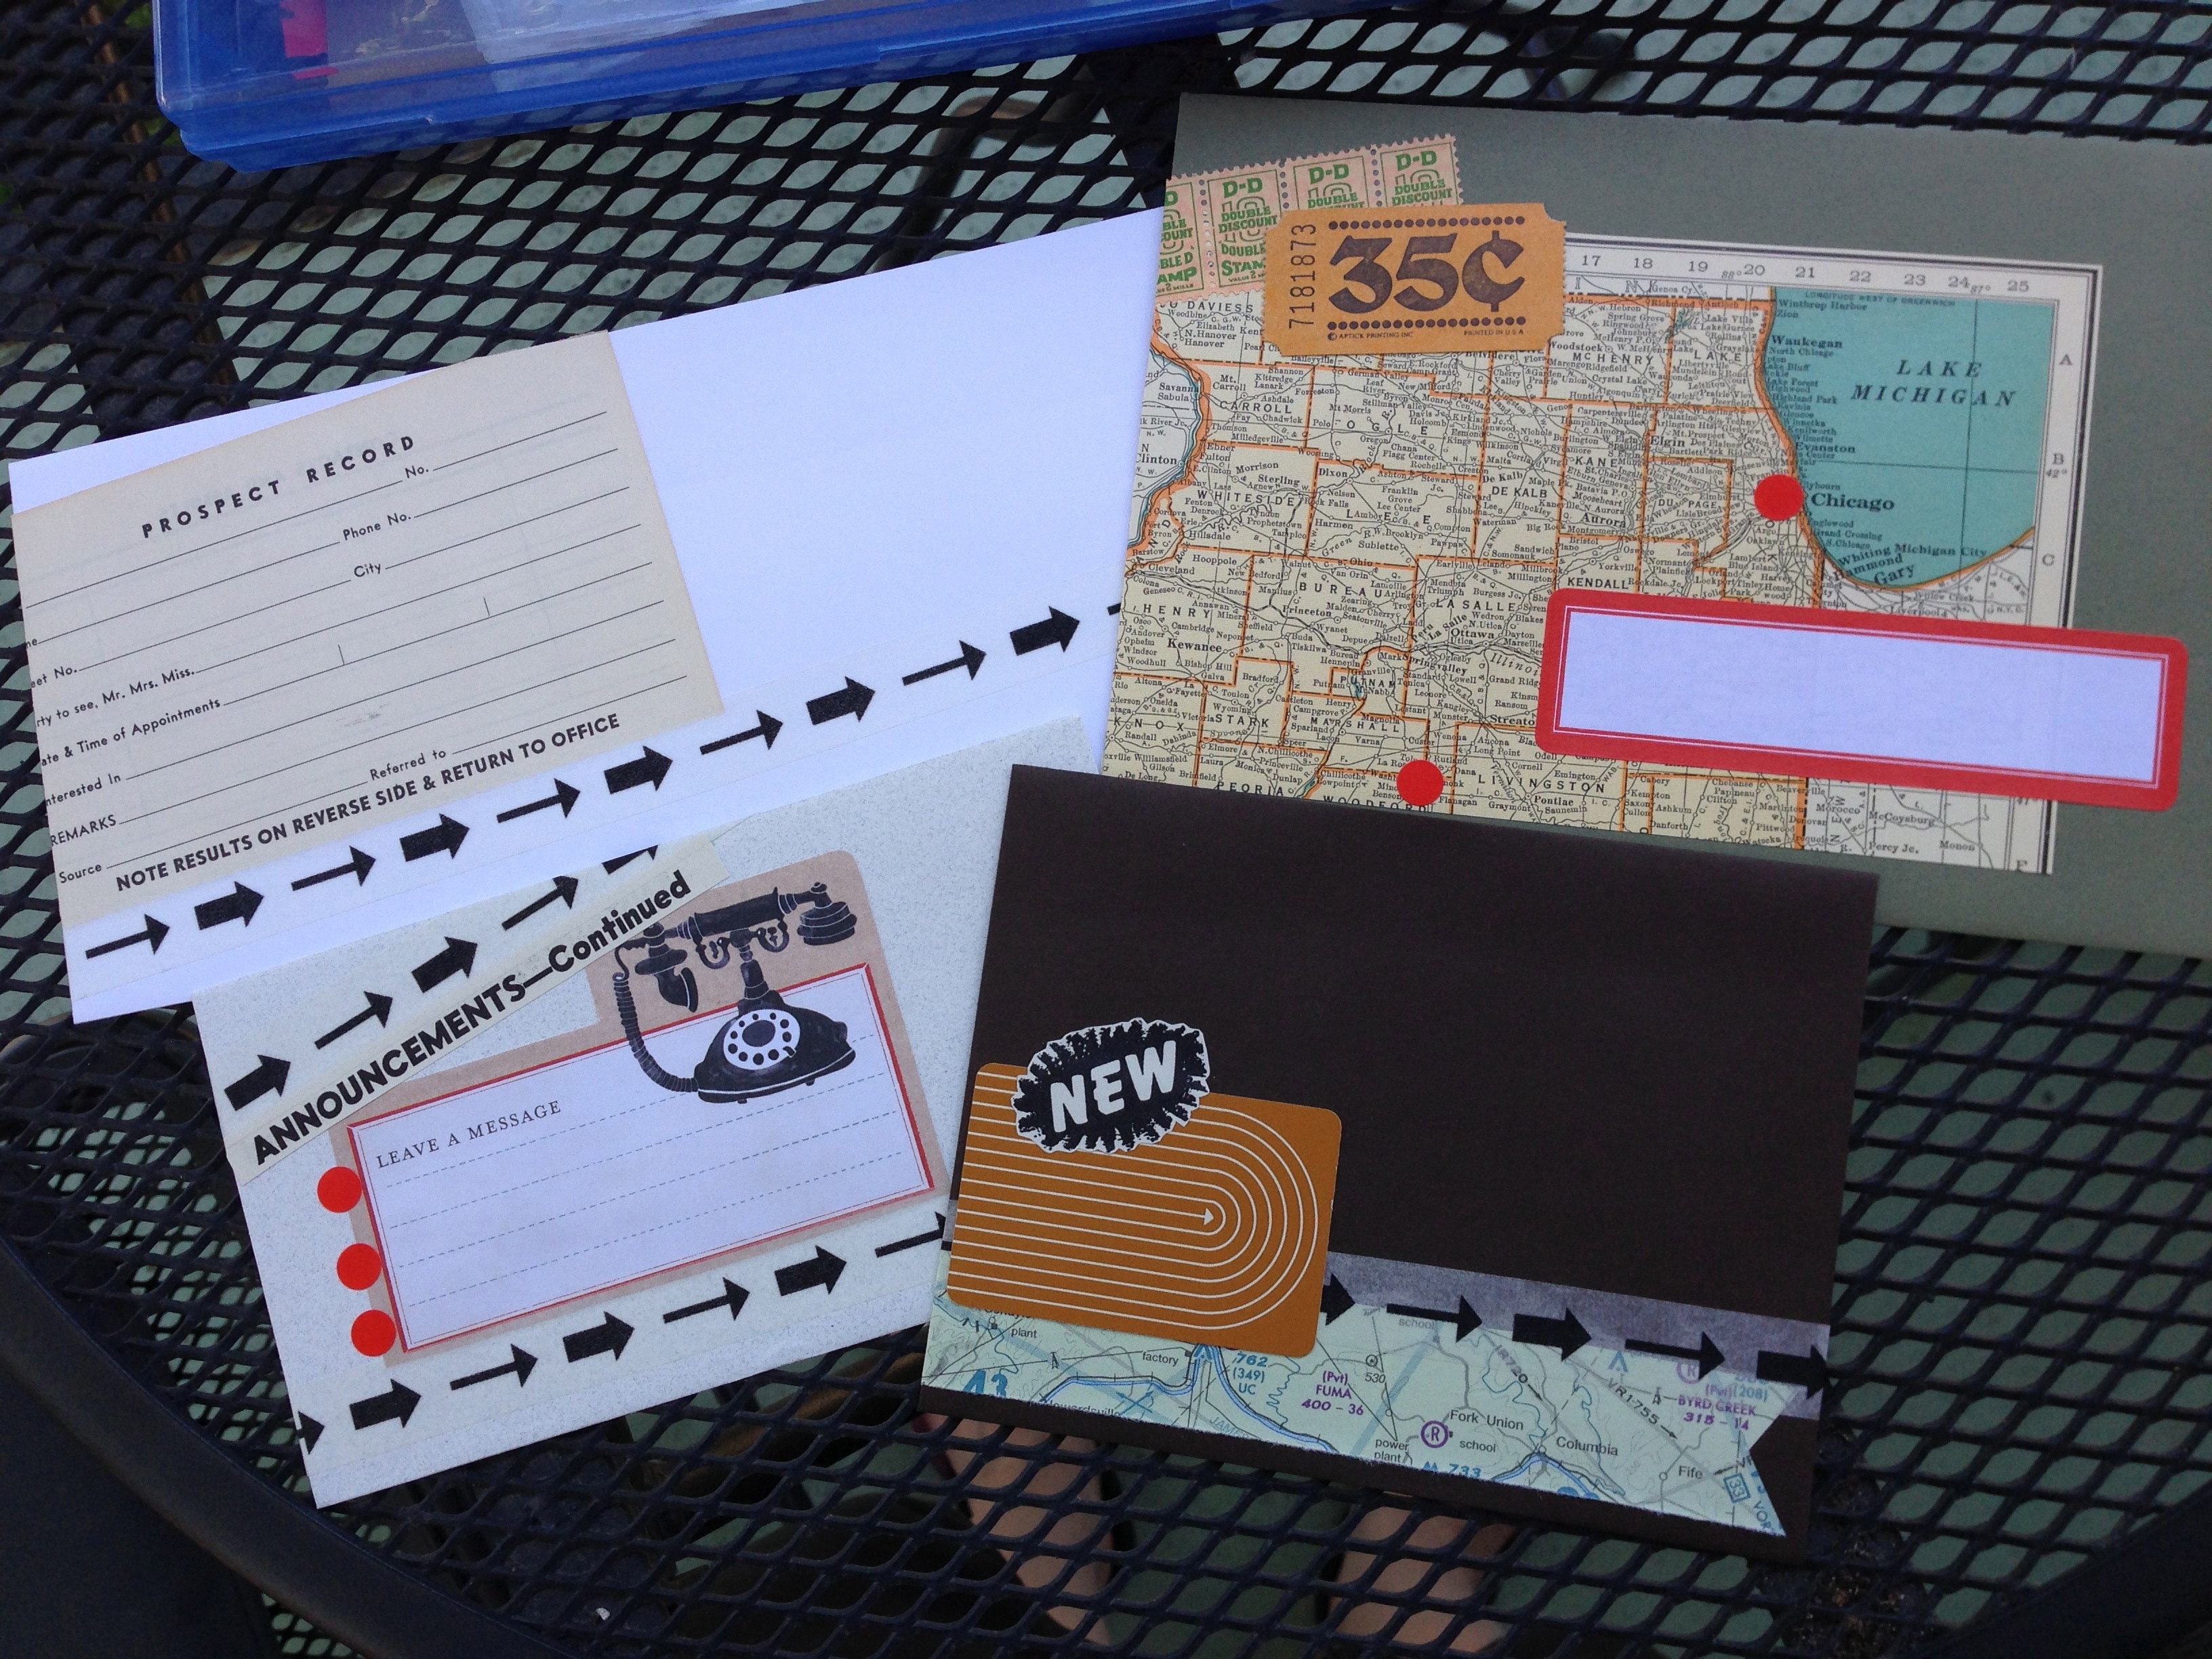
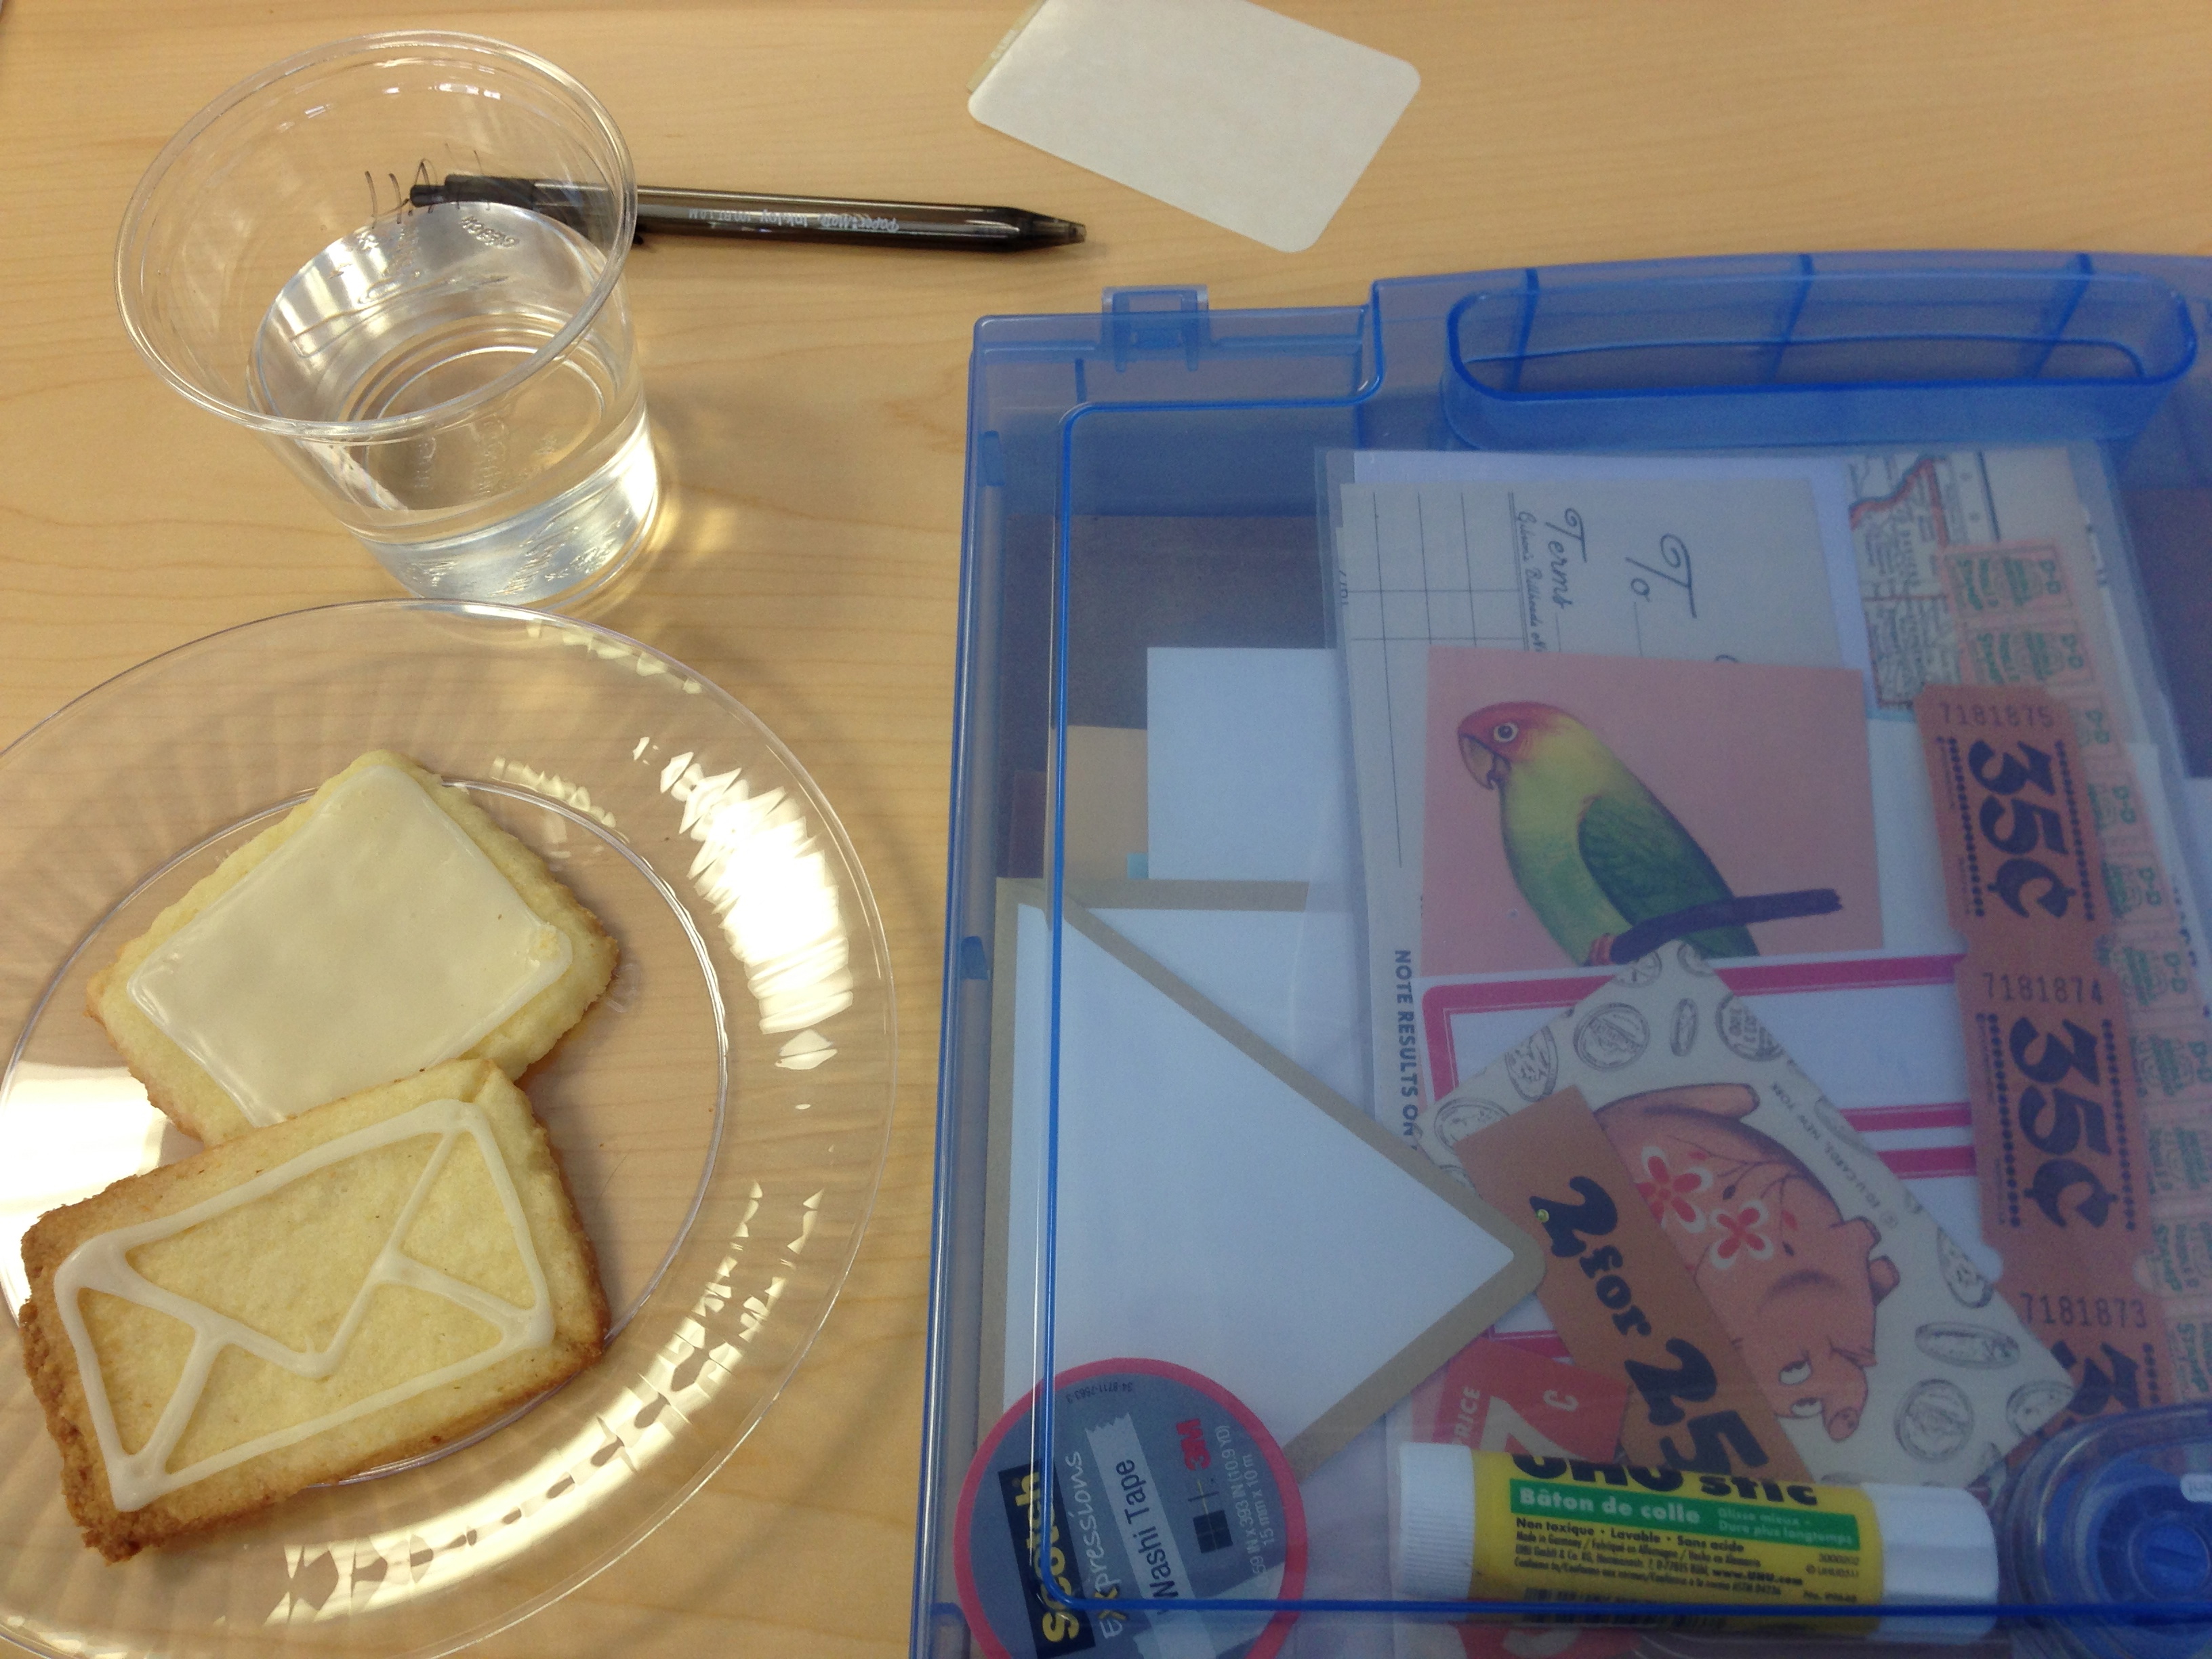 On Sunday, my friend Karen and I went to the very first ever Letter Writers Alliance Laboratory. We drank and ate envelope-shaped cookies and an array of other snacks while Donovan and Kathy wore lab coats and went over the basics and tips and tricks about mail art, encouraging us to push the envelope (pun intended) when it comes to sending mail. As part of the class, we each got a mail art kit, complete with loads of envelopes and vintage paper bits, washi tape, adhesives, a map, an envelope template all in a handy carrying case.
 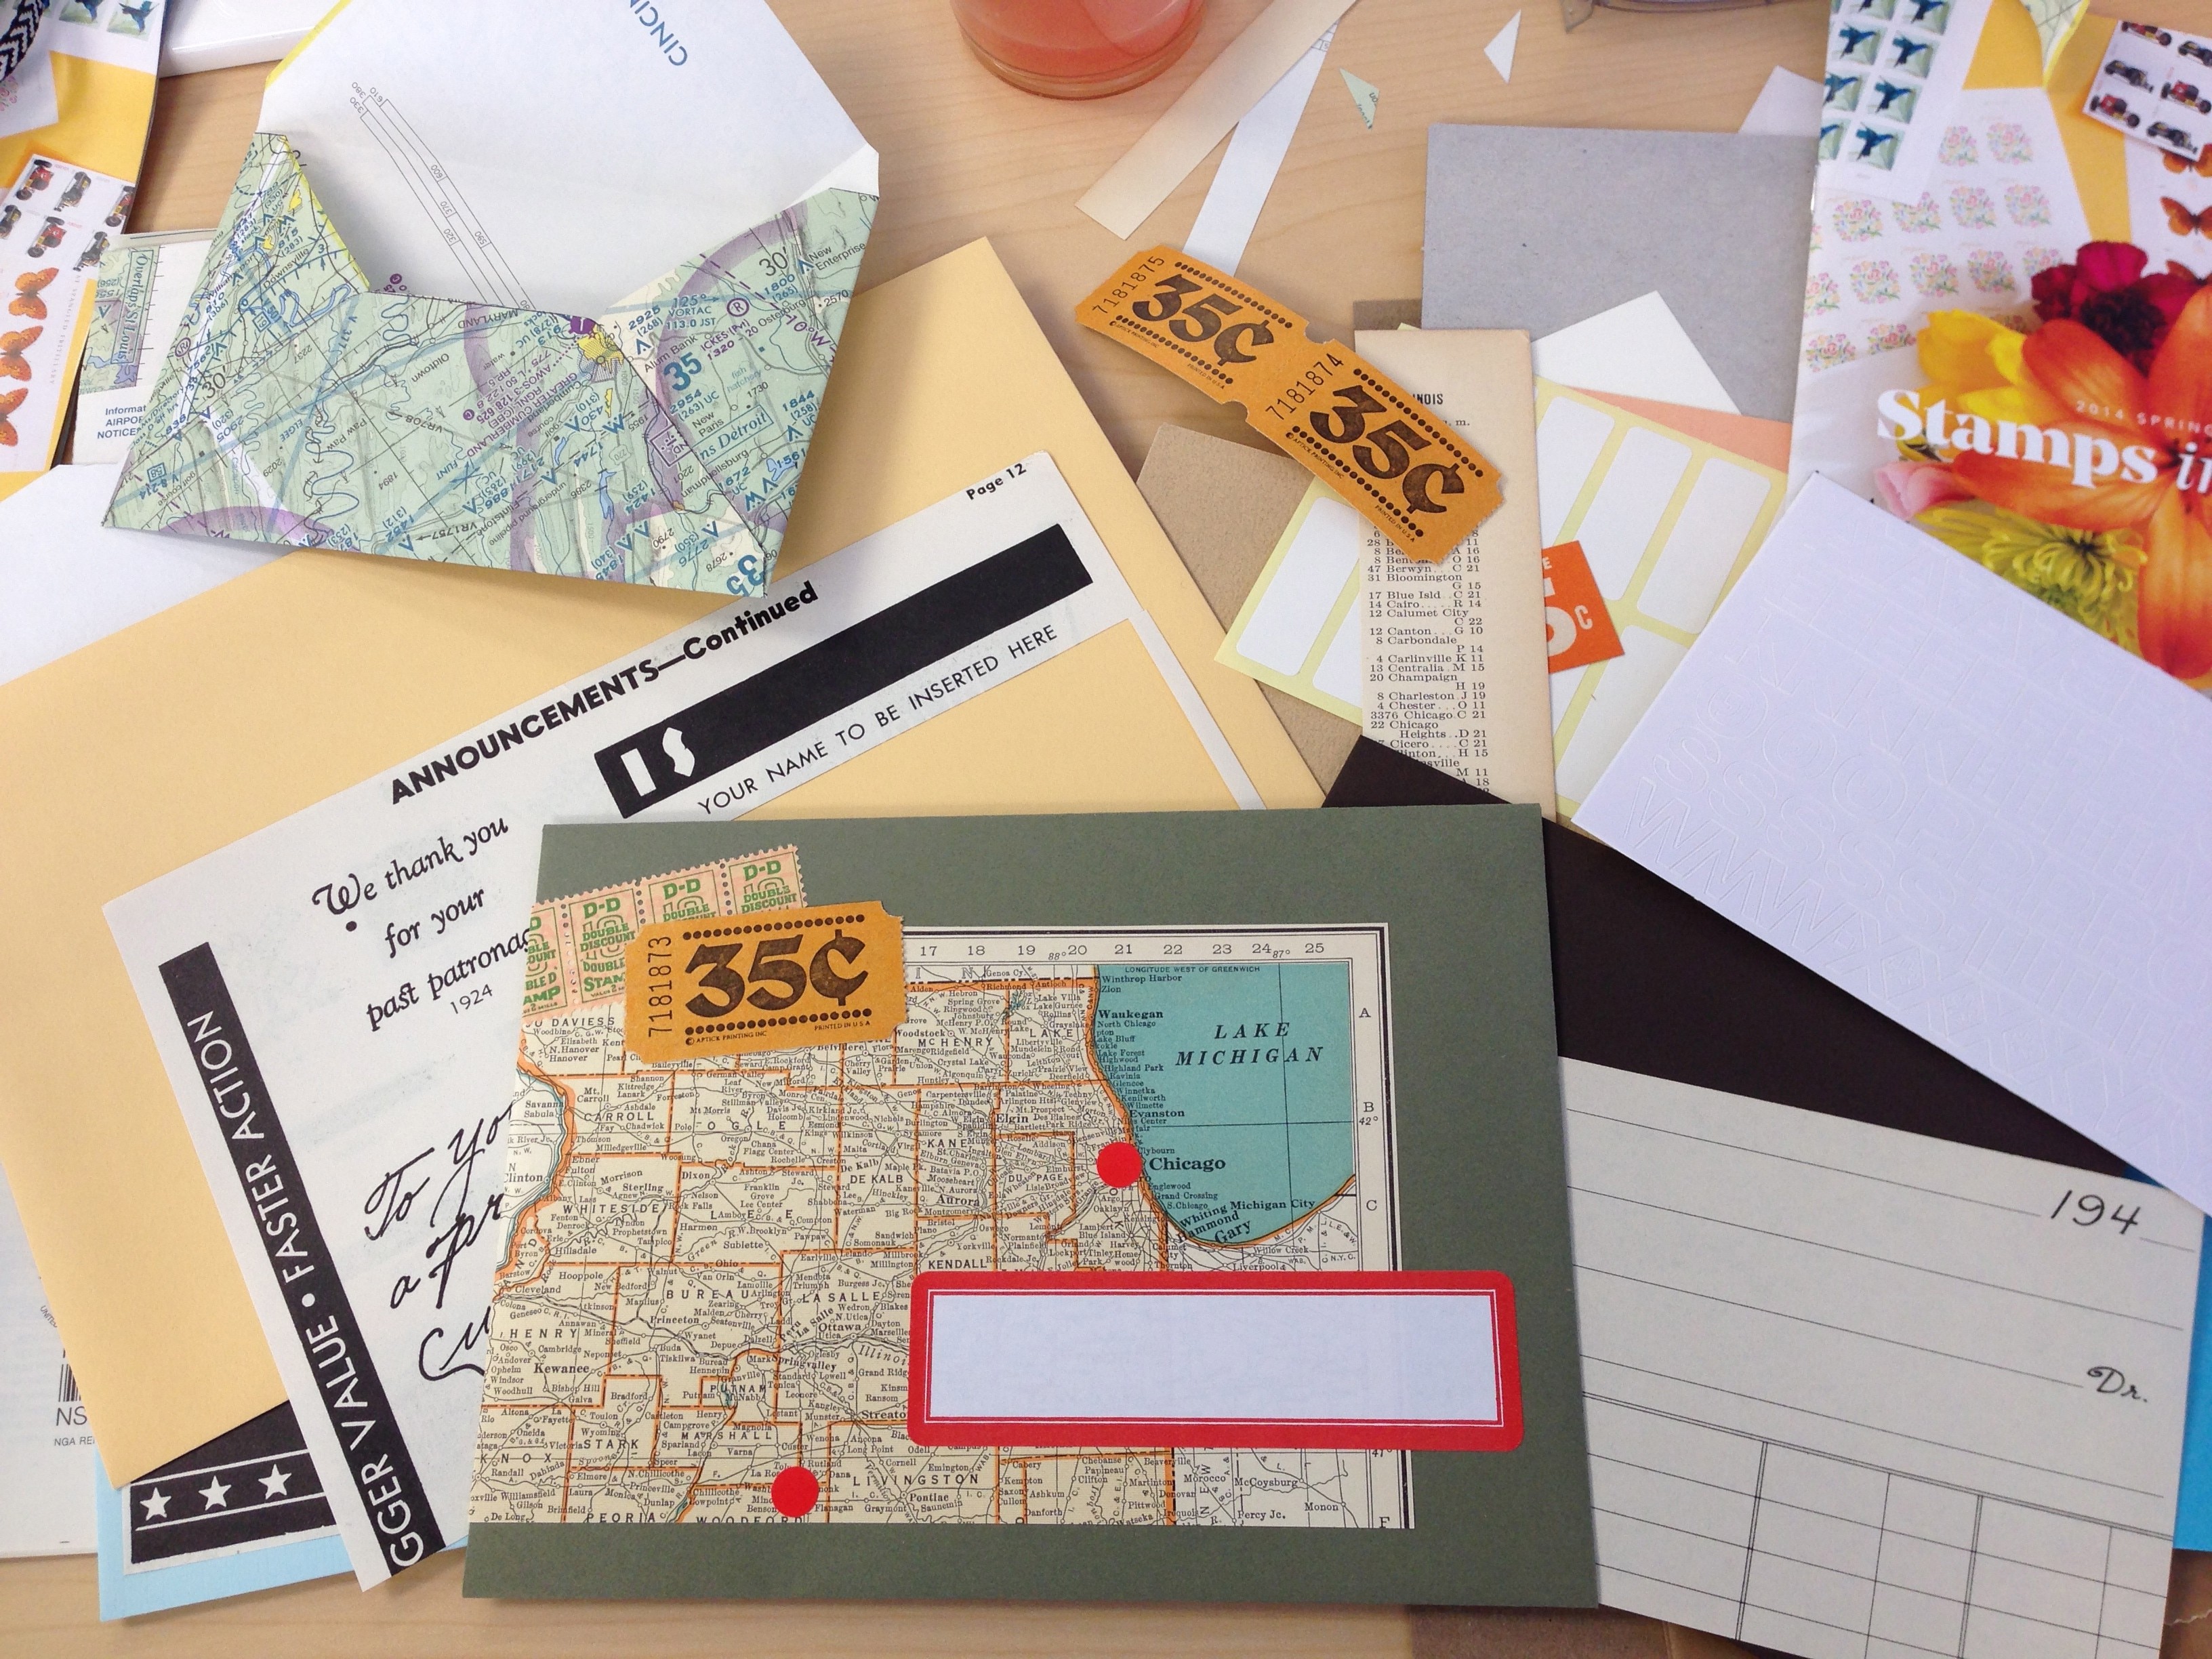 You can see some of my bits above. I sat at the seat with the orange mail art kit. (Everyone got a different color.) All of the kits were amazing, but I’m so glad I picked mine. So many of the pieces inside were perfect for certain pen pals and I got the map of Illinois (shown on the envelope above) which has both my current town and my hometown included in it! (My hometown has a tiny population of 1100…it never shows up on maps!!) I only made one envelope from the template and decorated one envelope during our free time…I was too busy talking and listening to everyone’s fun mail ideas. It’s so much fun gathering with fellow mail lovers outside of my mailbox!
 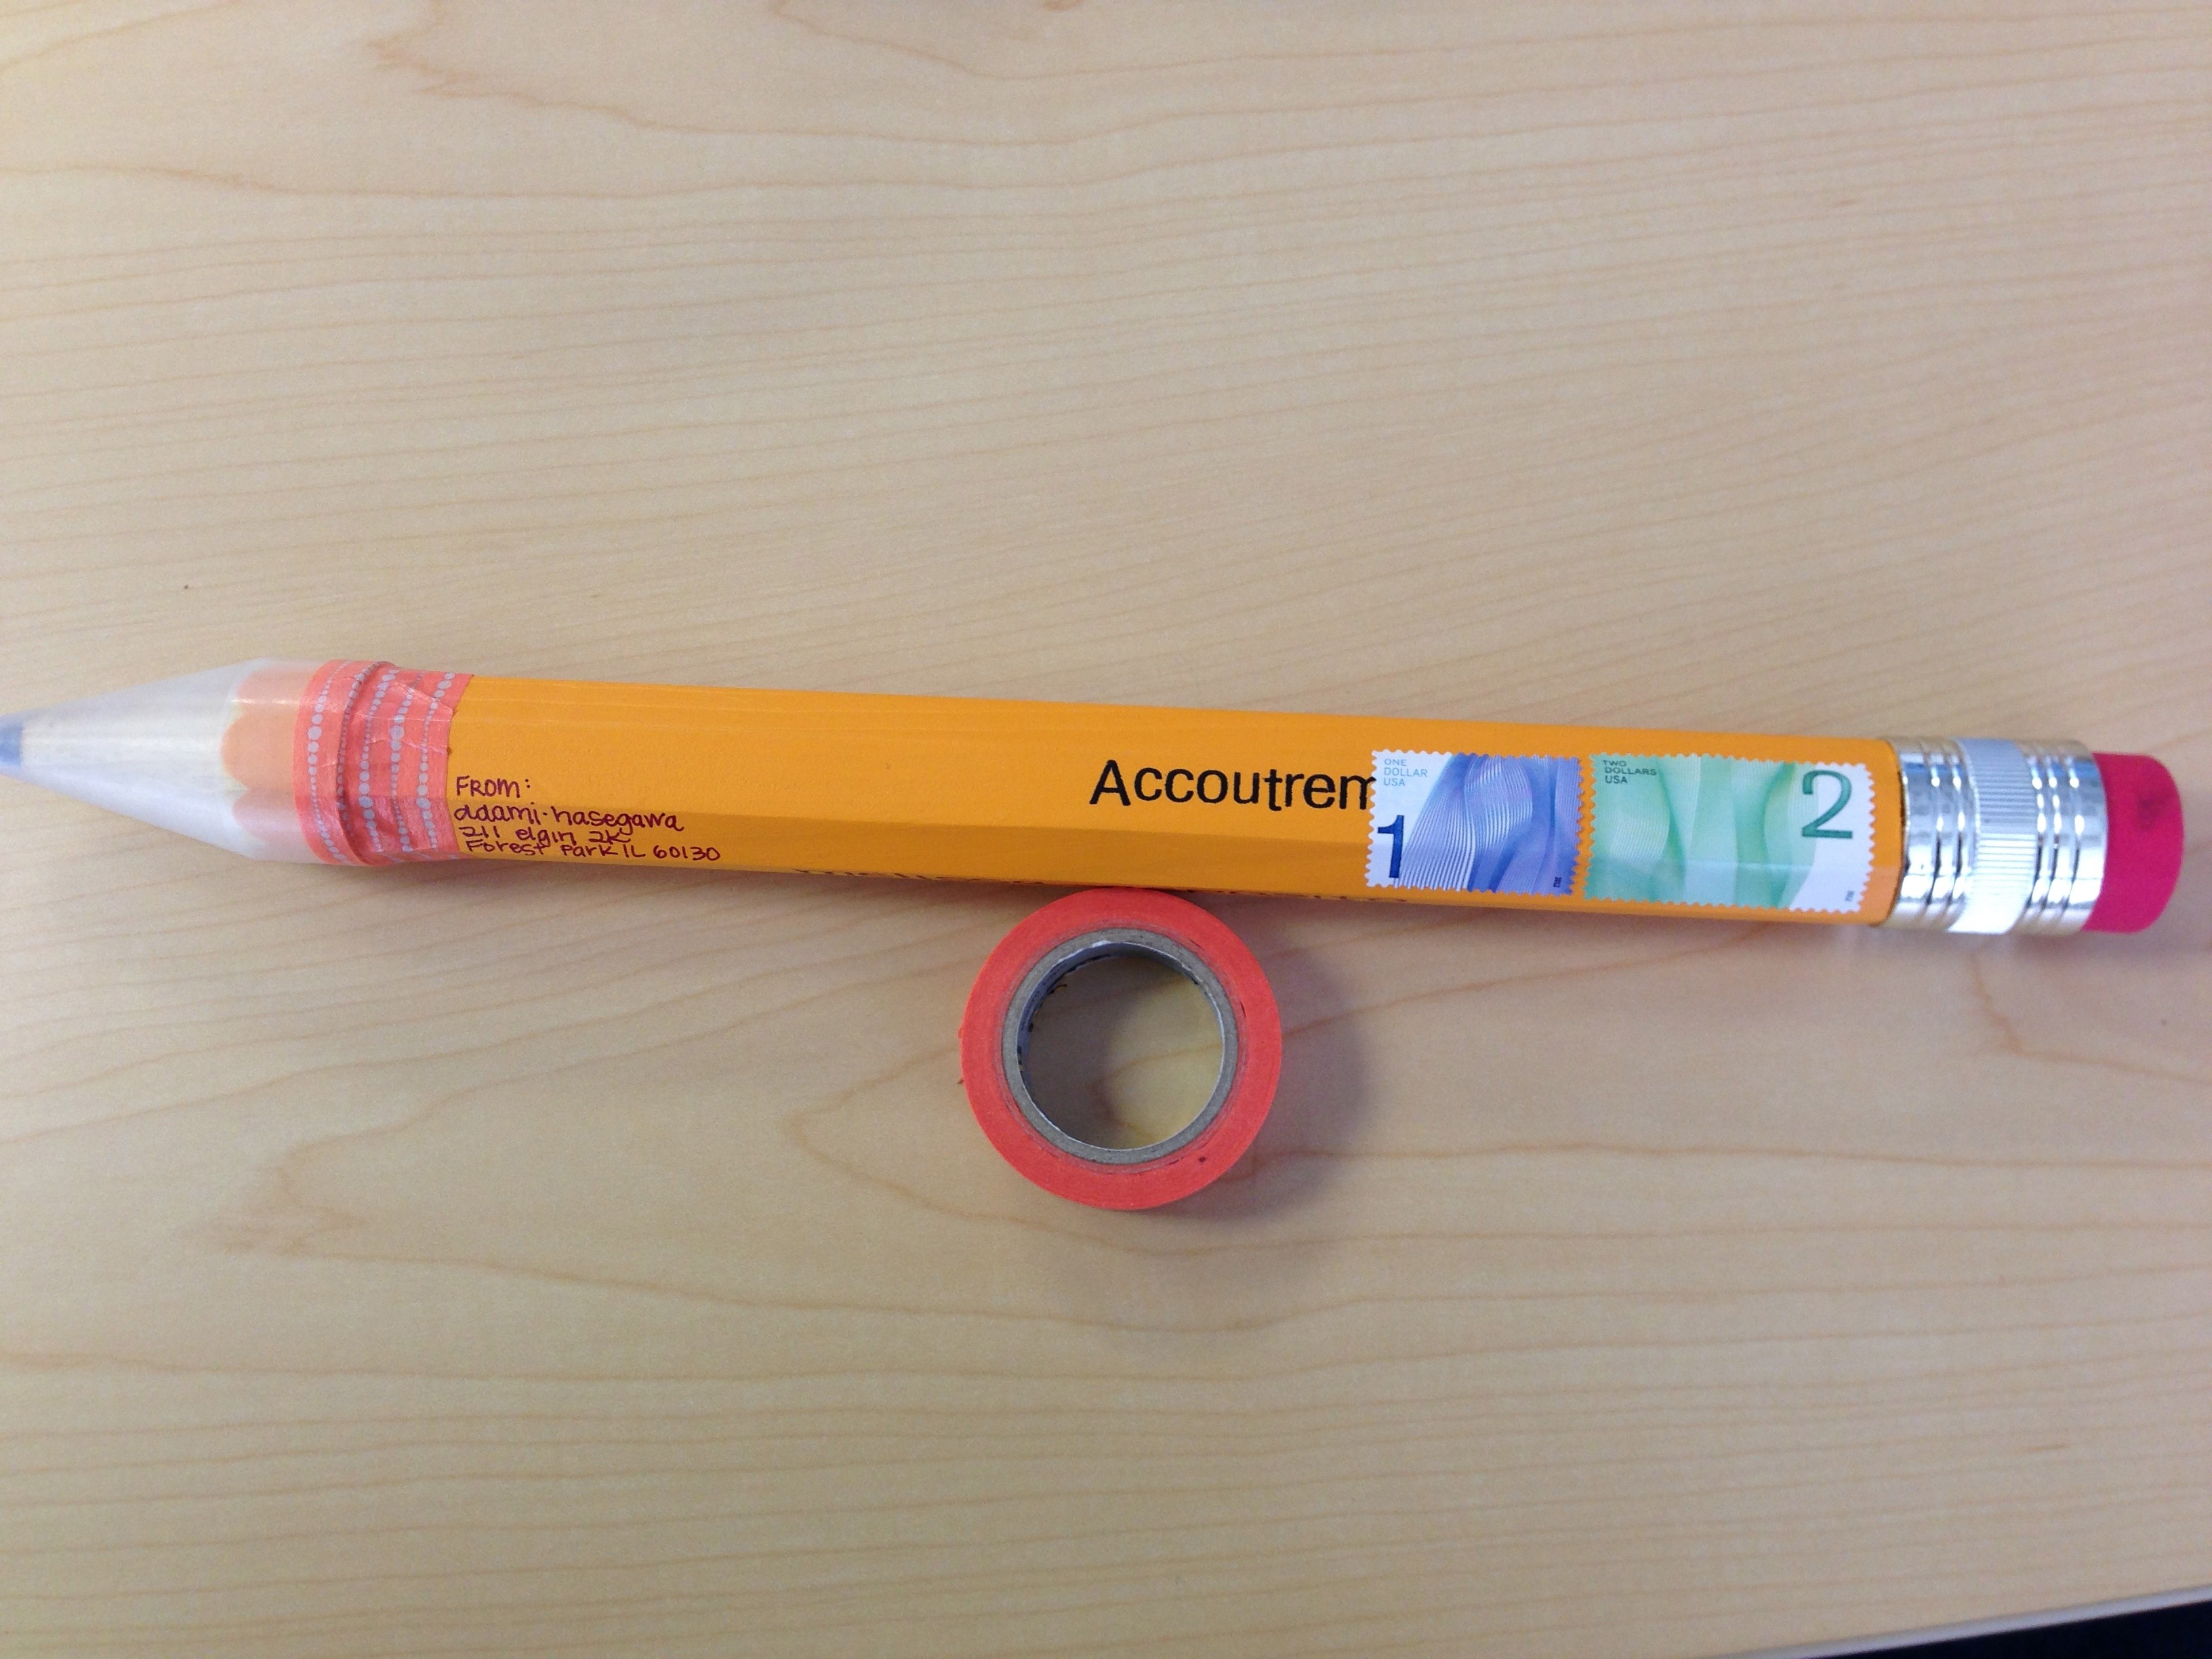 For our last mail art project, we each received a giant pencil to mail. We wrote our recipients’ addresses right on the pencil, posted it with stamps and then later dropped it into a neighboring mailbox.
 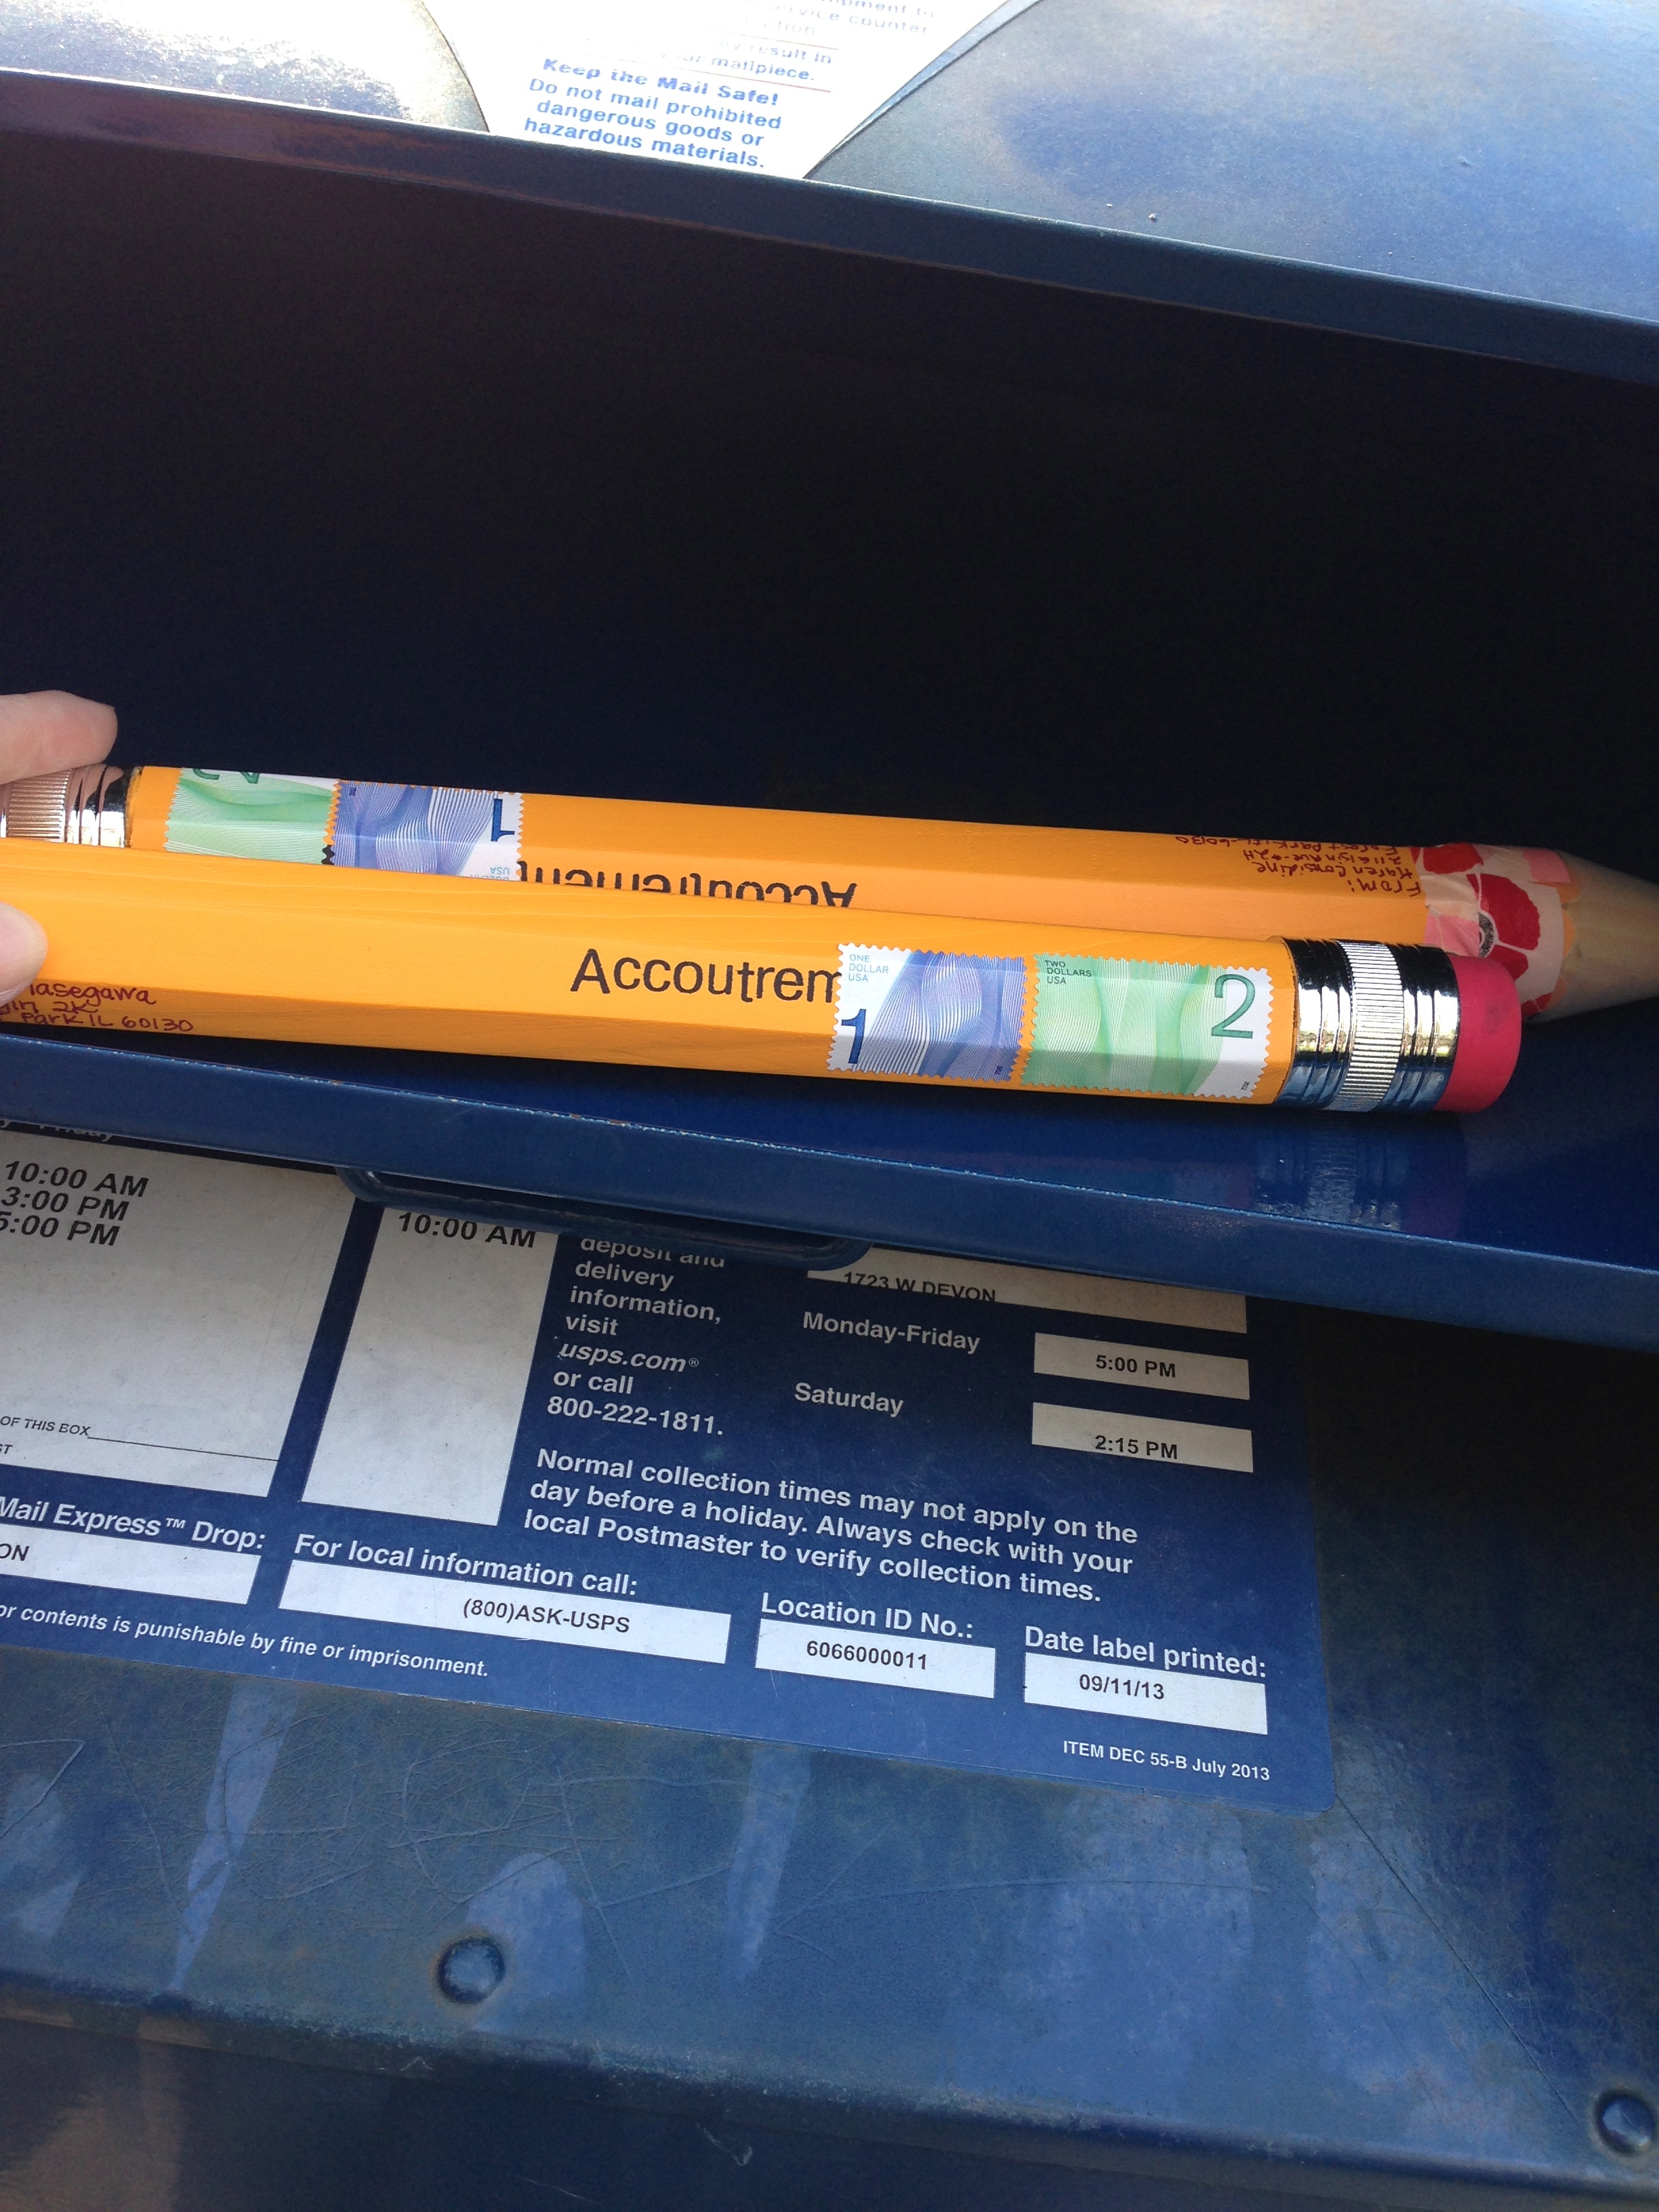 Our pencils dropped into the mailbox with a thump, mingling with all the other pencils from the workshop. I think the letter carrier who empties this box is going to have quite a surprise today!
Thanks for a fantastic afternoon, LWA!
(To see more pictures from the workshop, you can look under #LWALab on Instagram.)
P.S. Remember when I mailed a pigeon?
Behind on the Balcony
 I’m behind on getting our balcony all summer ready.
I looked back into the blog archives to find that in 2012, I was all planted by May 9th. And last summer, I was potting flowers on May 15th. This year…well it’s May 23rd and I’m still not quite started.
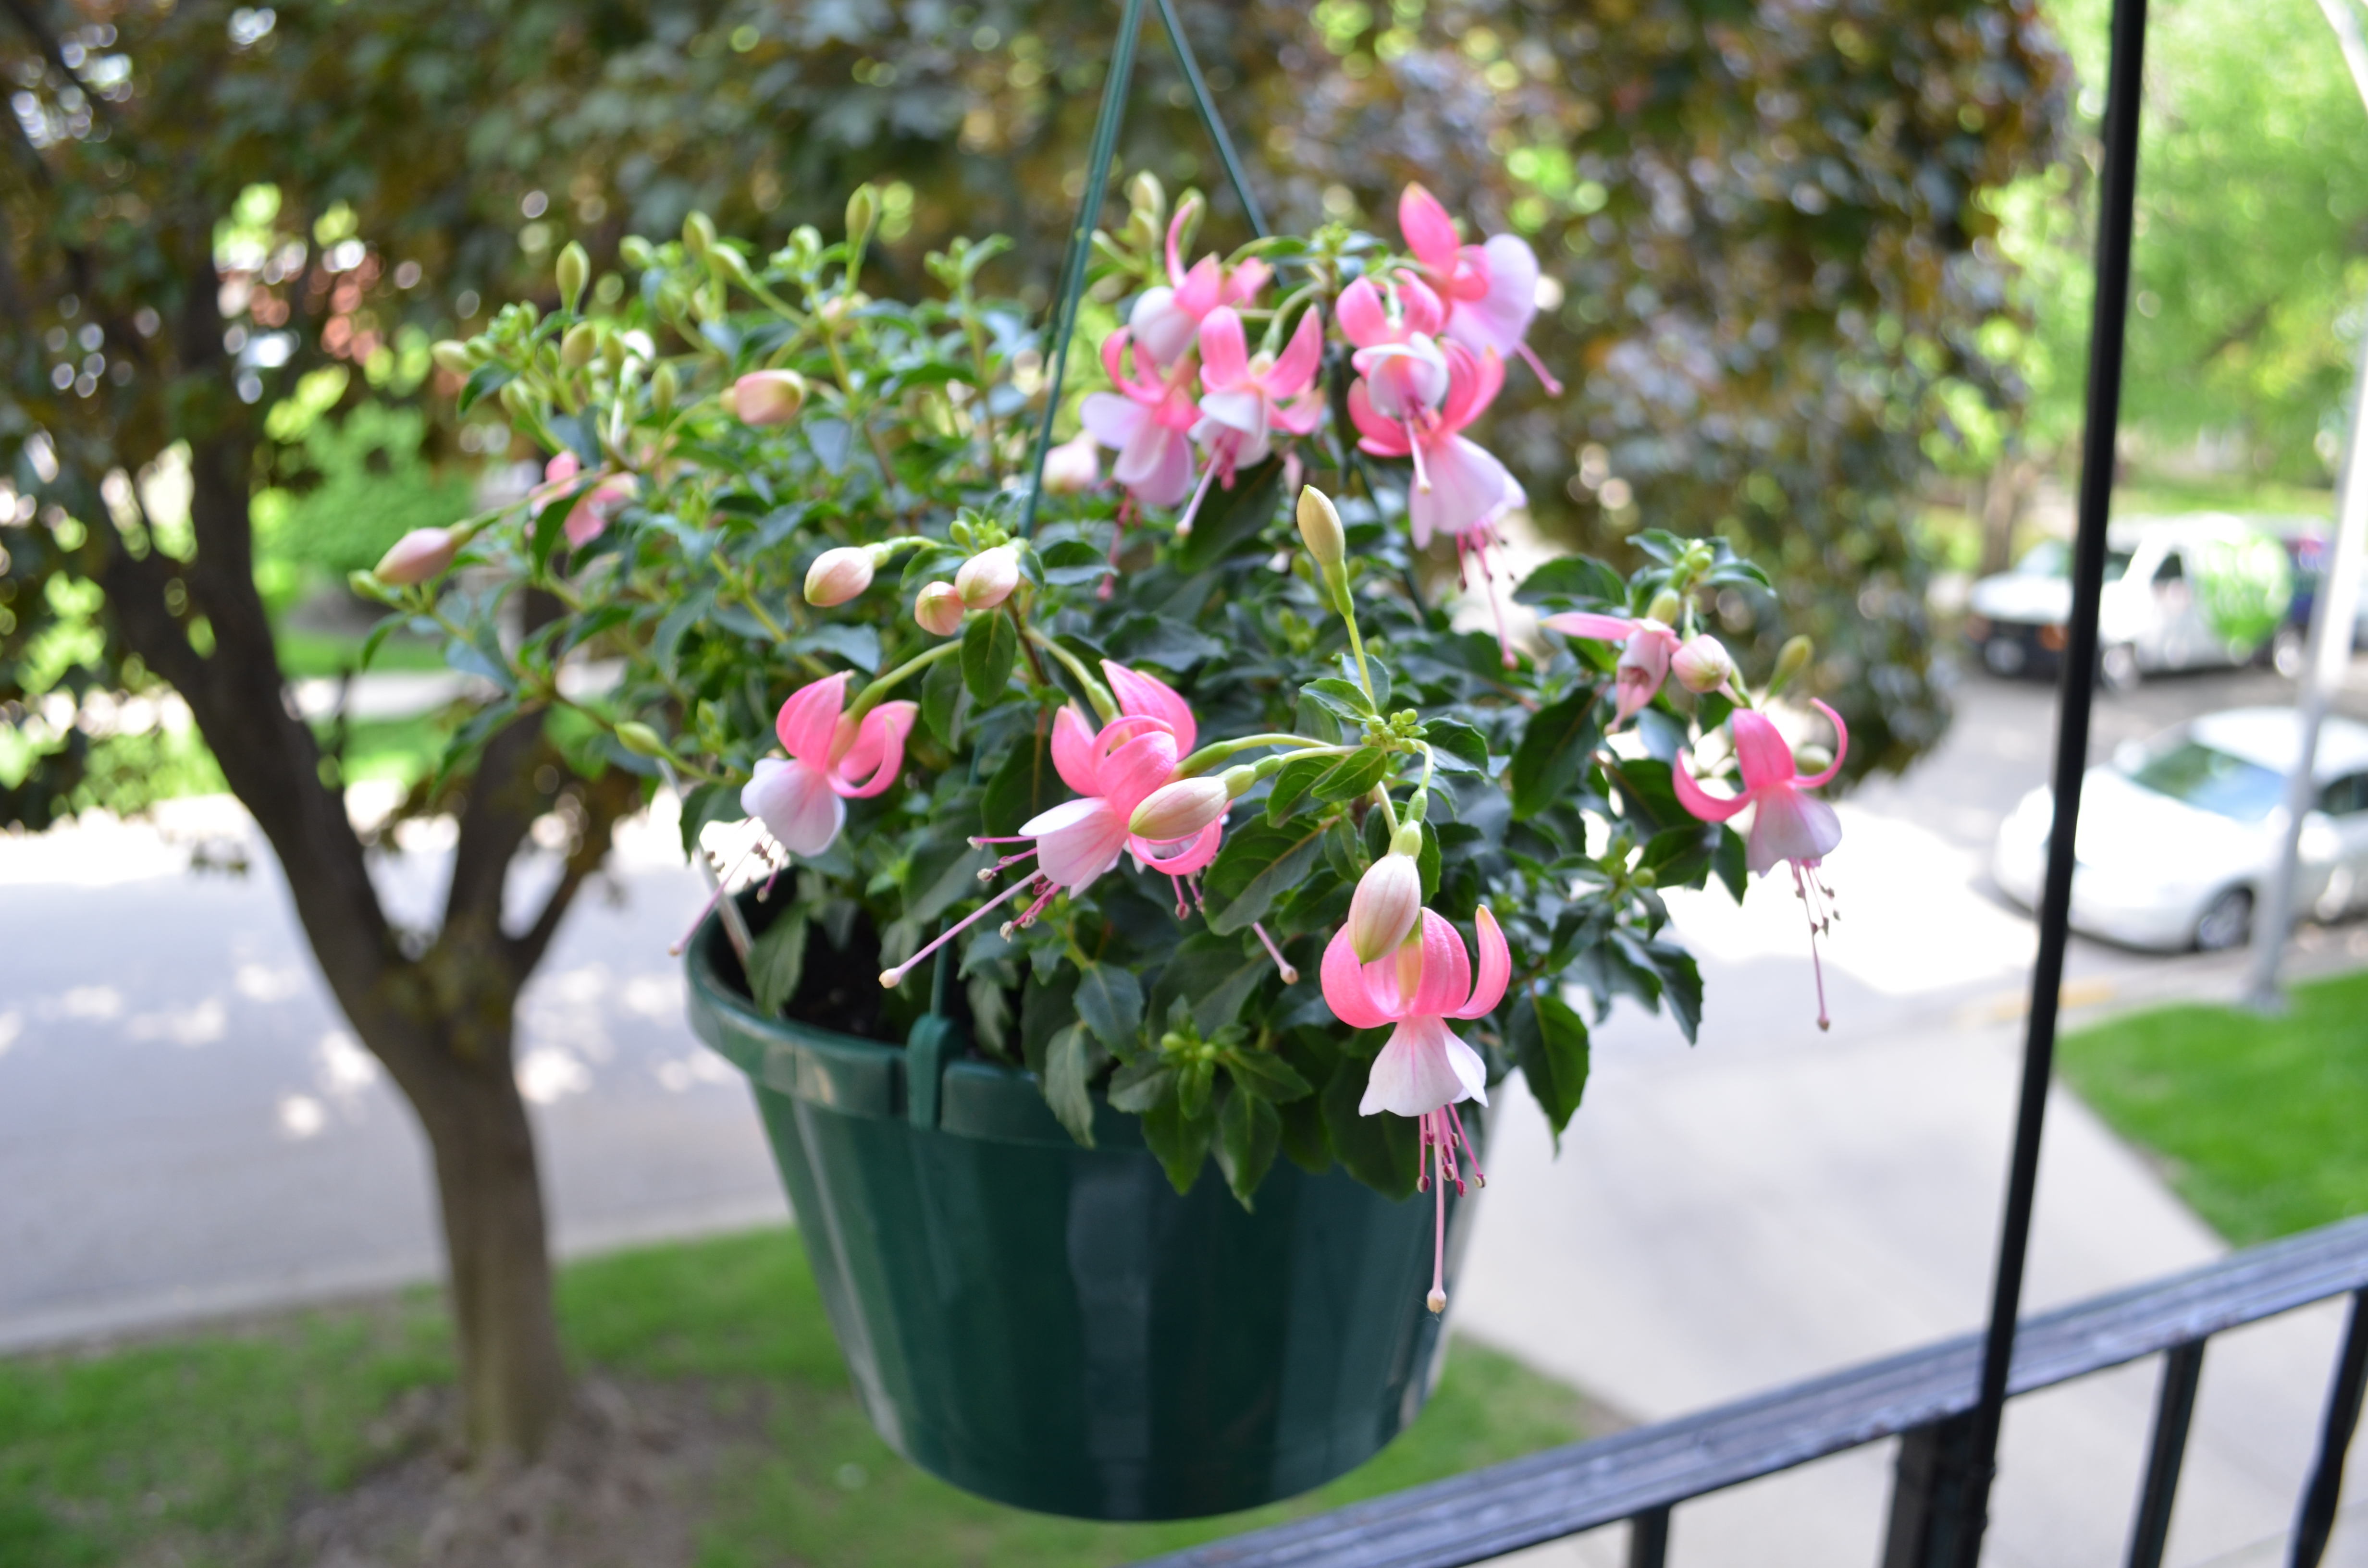
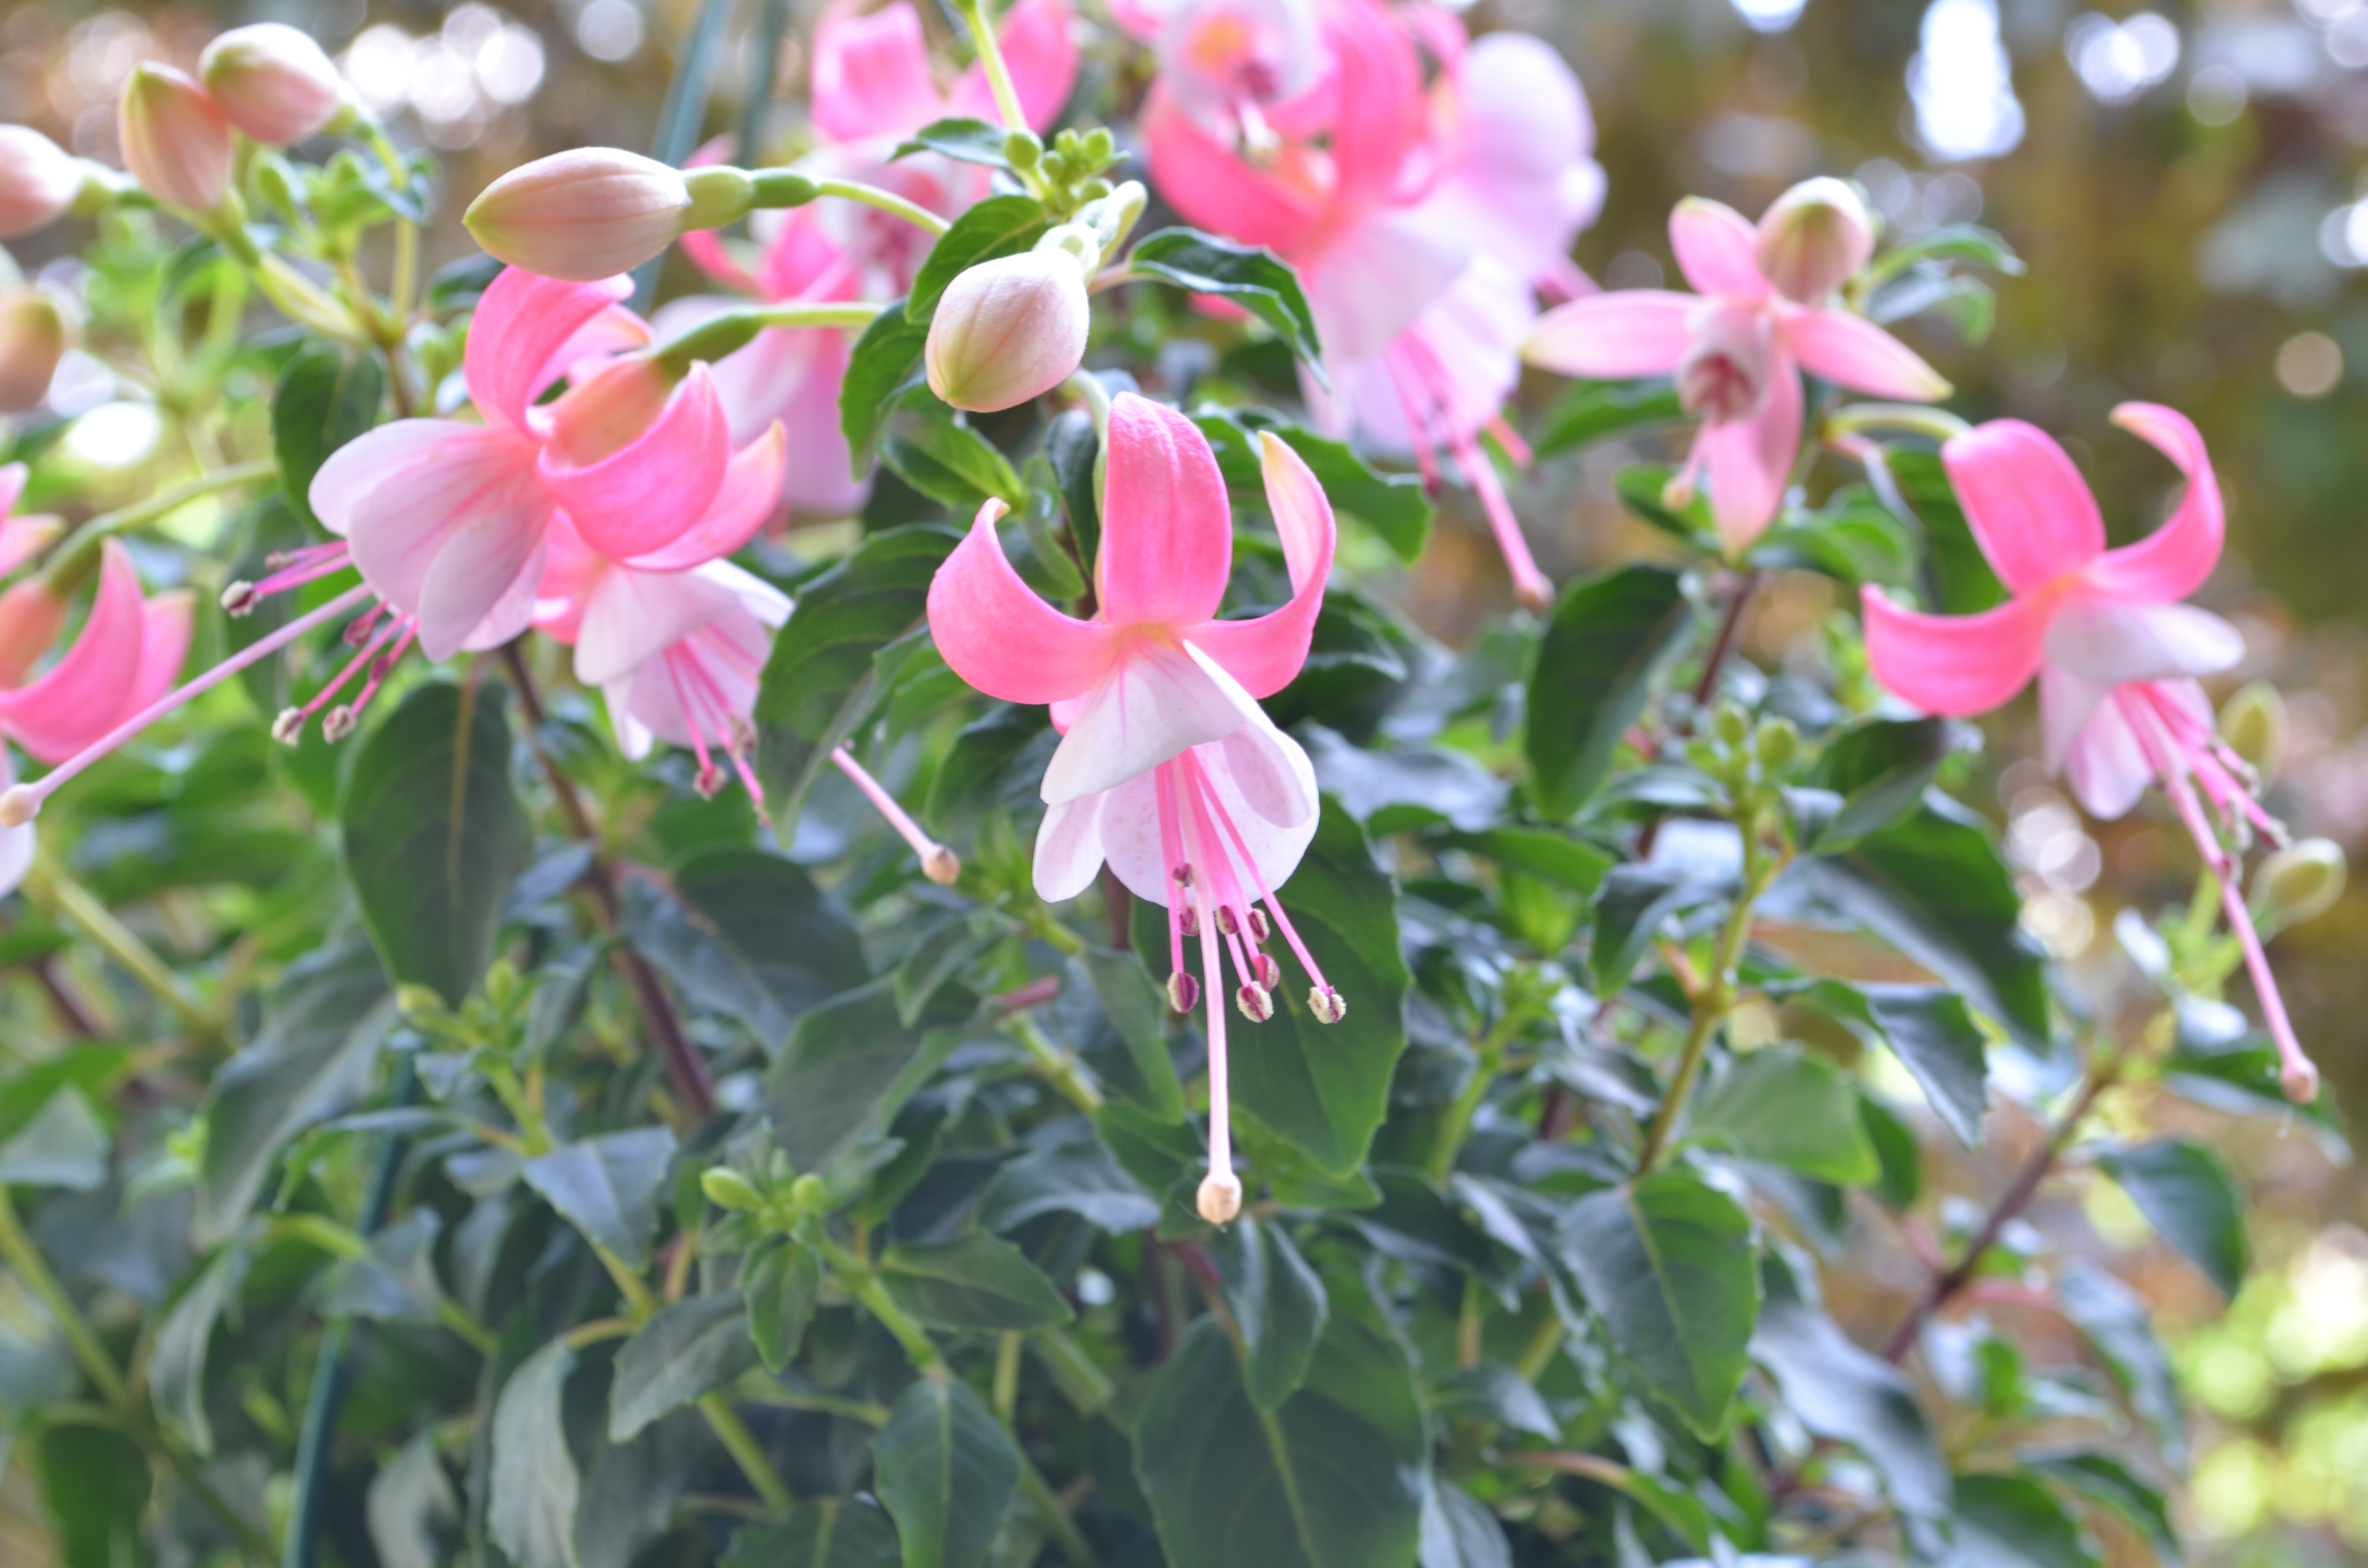 Yesterday I went to look for flowers but came home pretty empty handed. I bought one big hanging pot of geraniums since most of mine didn’t make it through the winter. (They may have been a little bit neglected in the water department.) And last weekend I bought the fuchsia above. Its flowers are so interesting and fun. The two fuchsia plants don’t quite fill out the pot as much as I’d like so I bought an accent plant to tuck into one side. We have a few perennials leftover from last year and two mint plants potted, but it’s looking rather bare out my window at the moment.
Oh and in other devastating news, my hen & chicks, which I’ve had since we moved here in 2010, died this year. I’ve left them out over the winter every year, but this year proved too cold for them. Poor things. I feel like I’ve lost some old friends.
My dad put in an outdoor outlet for us, so we can hang lights and make it a party-like atmosphere out there and I bought some fun new pillows for the love seat. Yesterday I spent some time sweeping up and moving furniture around. Hopefully we’ll make some progress out there this weekend (and in our community garden plot too!) and I’ll have more to share next week!
Have a good weekend!
The Four Treasures: Brushes
 The first and most important of the “four treasures” of calligraphy is the brush. The brush is an extension of the calligrapher. It is said that the writing comes from the calligrapher’s soul, rather than from the stroke of the brush. I think this is a crazy beautiful sentiment, even though, from looking at my brushstrokes, you can tell my soul is intensely nervous and unsure about calligraphy. A calligraphy brush is held much higher on the handle than a “normal” paintbrush. The thinking behind this is that the calligrapher isn’t controlling the brush, but kind of letting the image or the strokes come from within. So much about Japanese calligraphy and sumi-e is about centering the inner self and being at peace and not having control. I think this is why I find it so beautiful yet so frustrating. (I like control.)
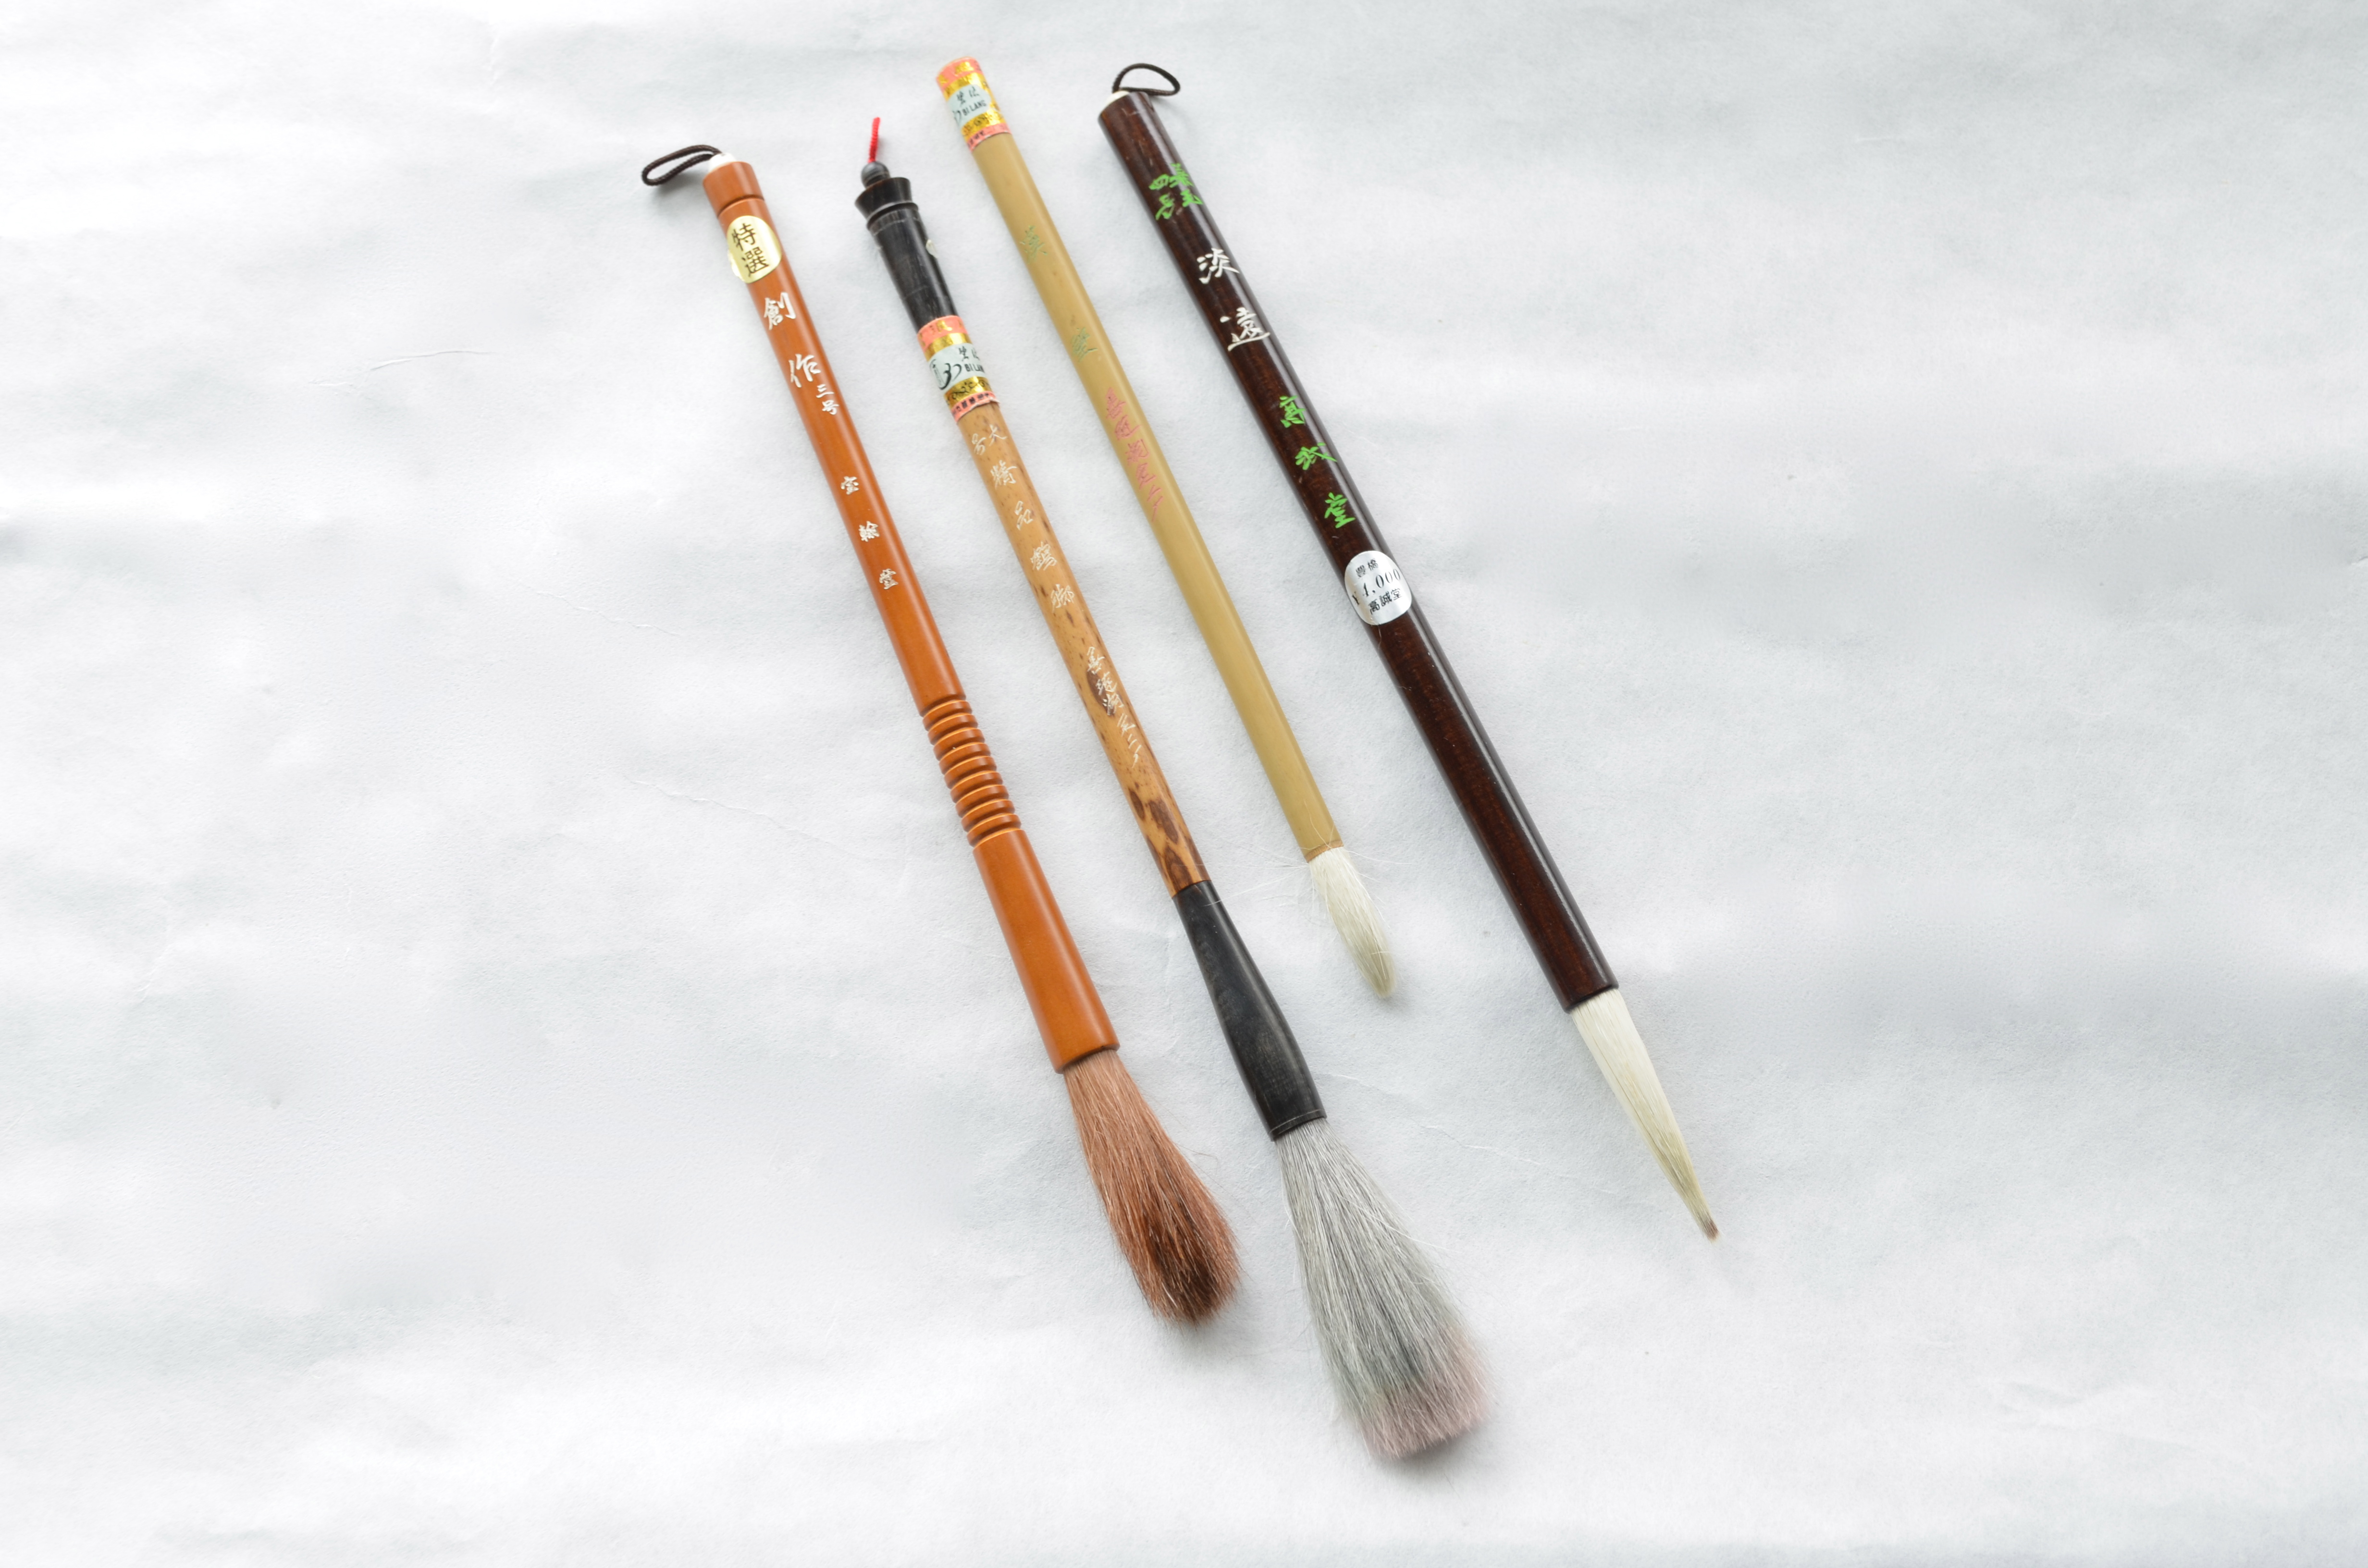
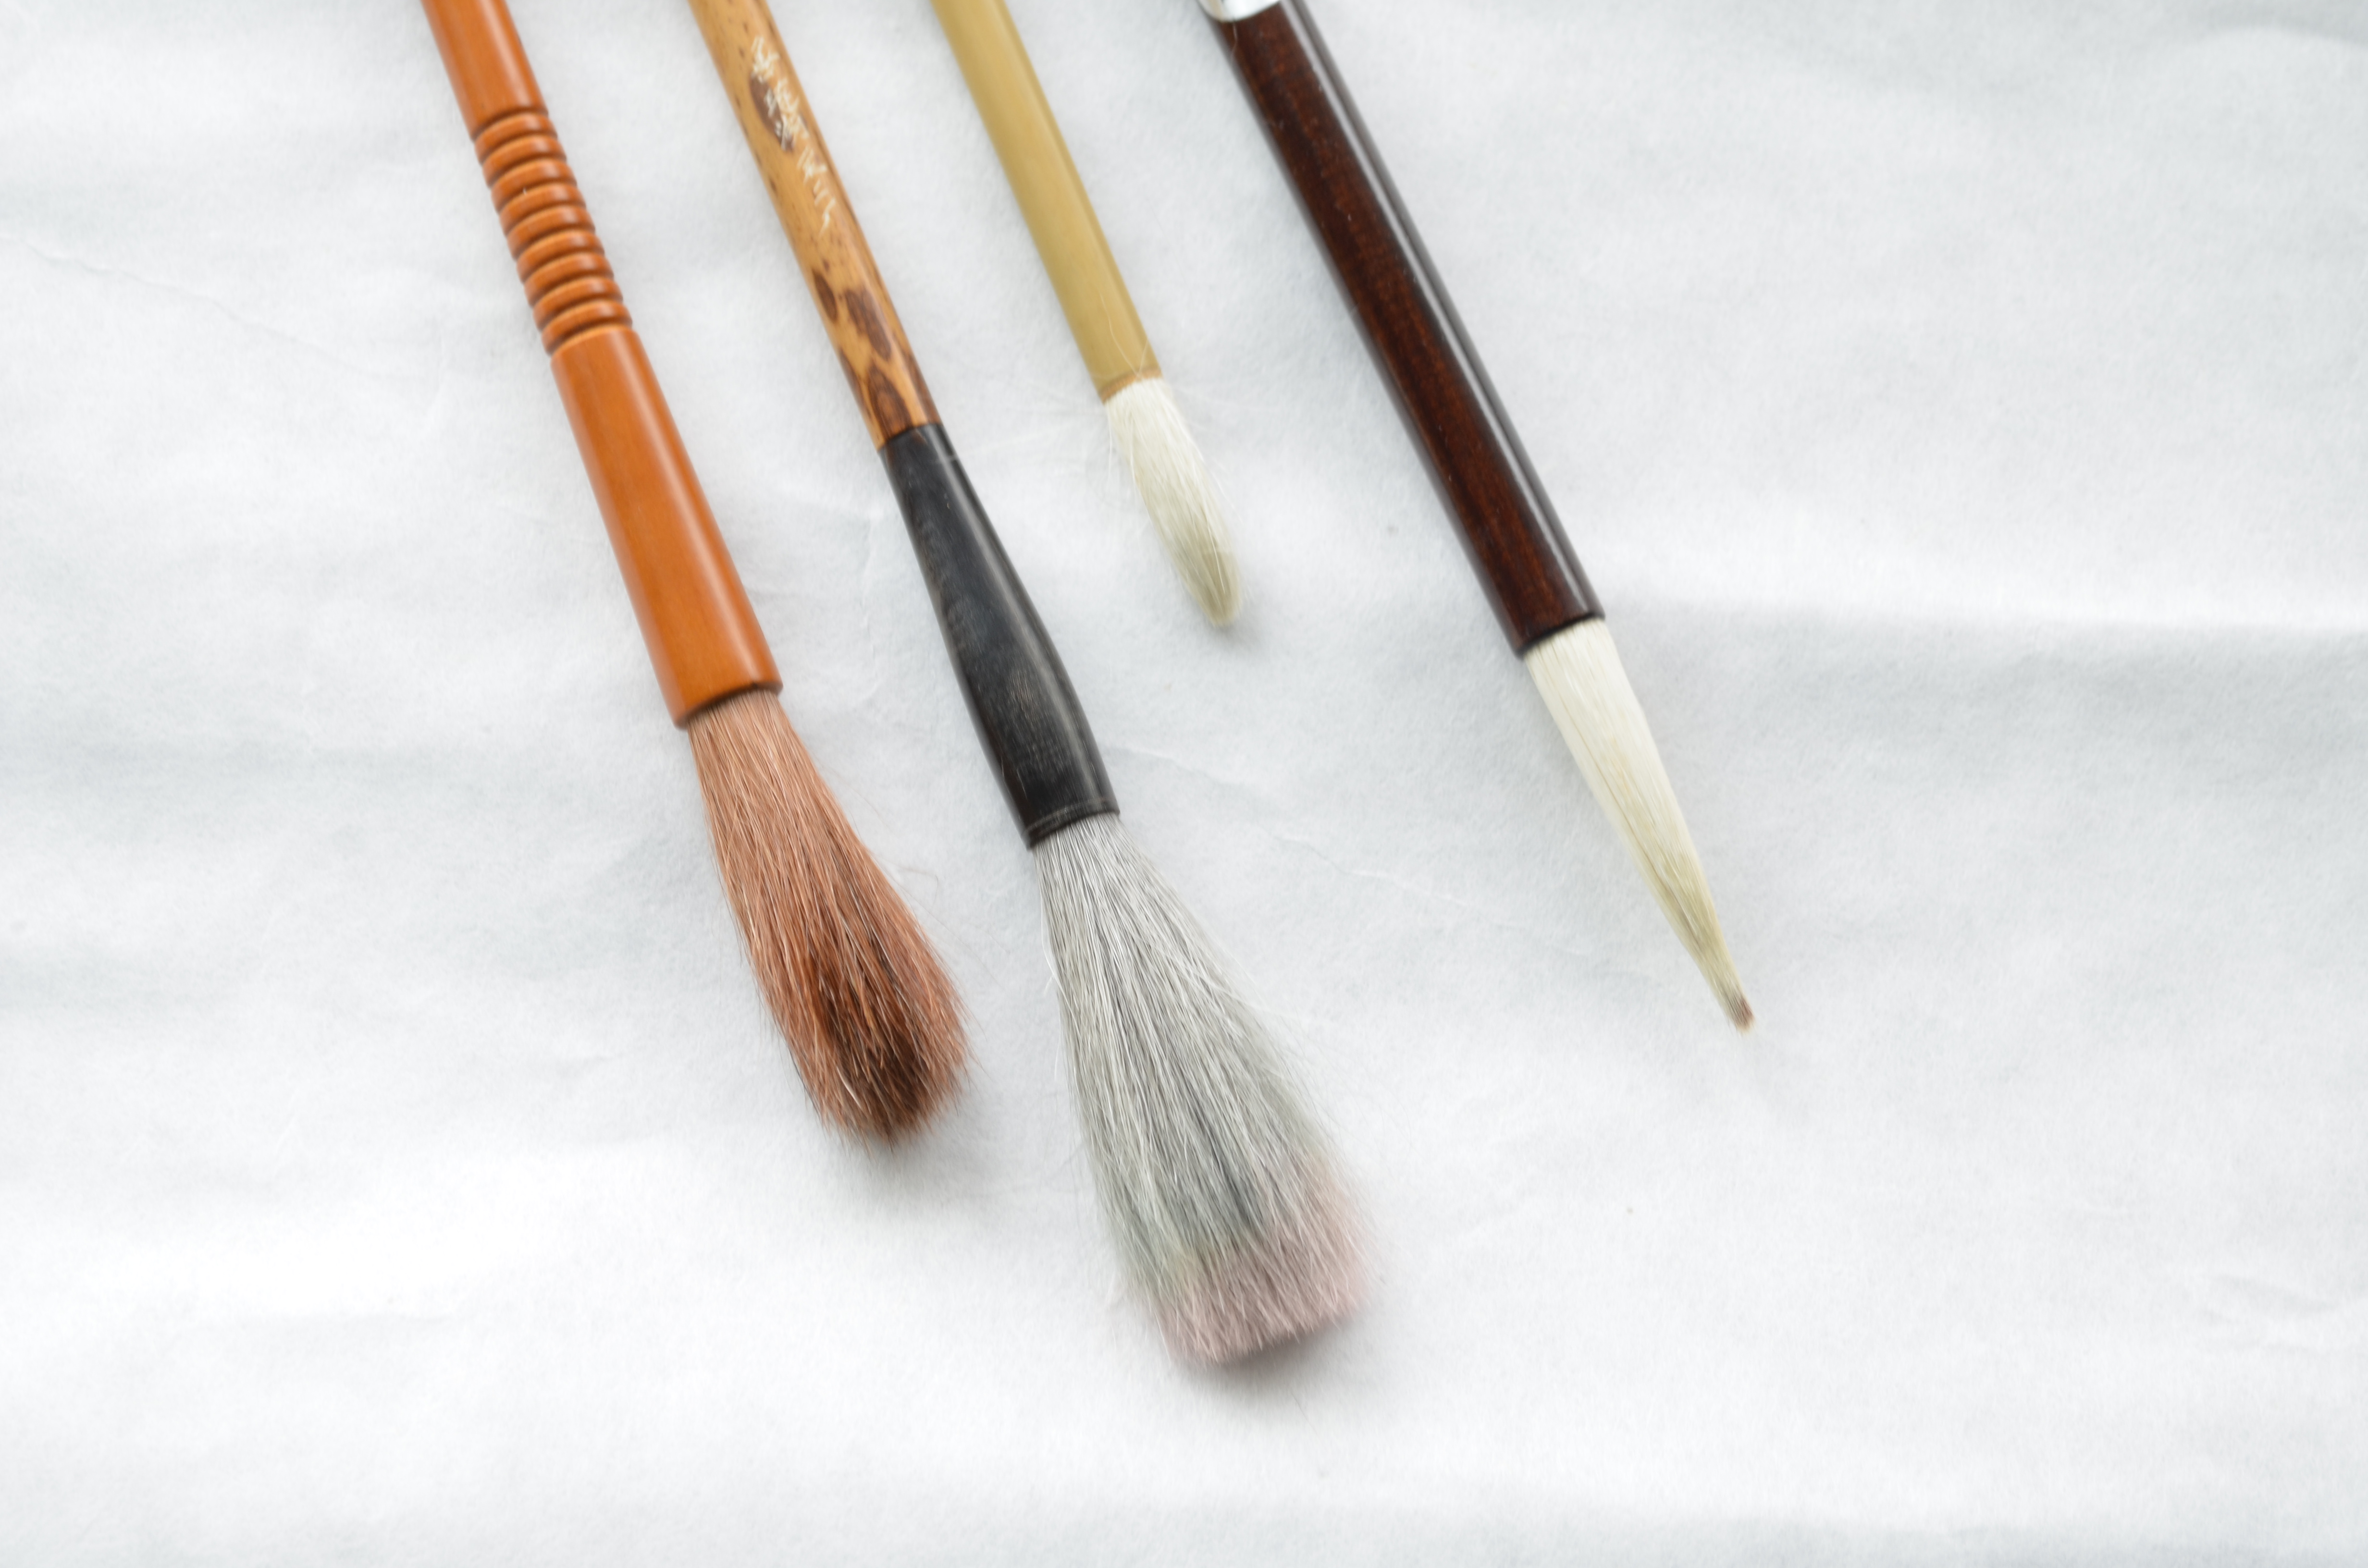 Naoto’s mom gave us several brushes from his aunt’s collection. Some of them are very worn…the ones with bushy bristles aren’t really useful anymore because to do calligraphy well, the brush ends need to come to a nice point. I still use the bushy brushes to do color washes when I’m playing around with watercolors. (Although, I’ve recently learned a calligraphy brush should never be used with anything but calligraphy ink because the bristles are chosen and made to work with those specific inks. Other inks can spoil the bristles. But, since these particular brushes are no longer useful in the calligraphy world, I think it’s nice to use them for something else.)
 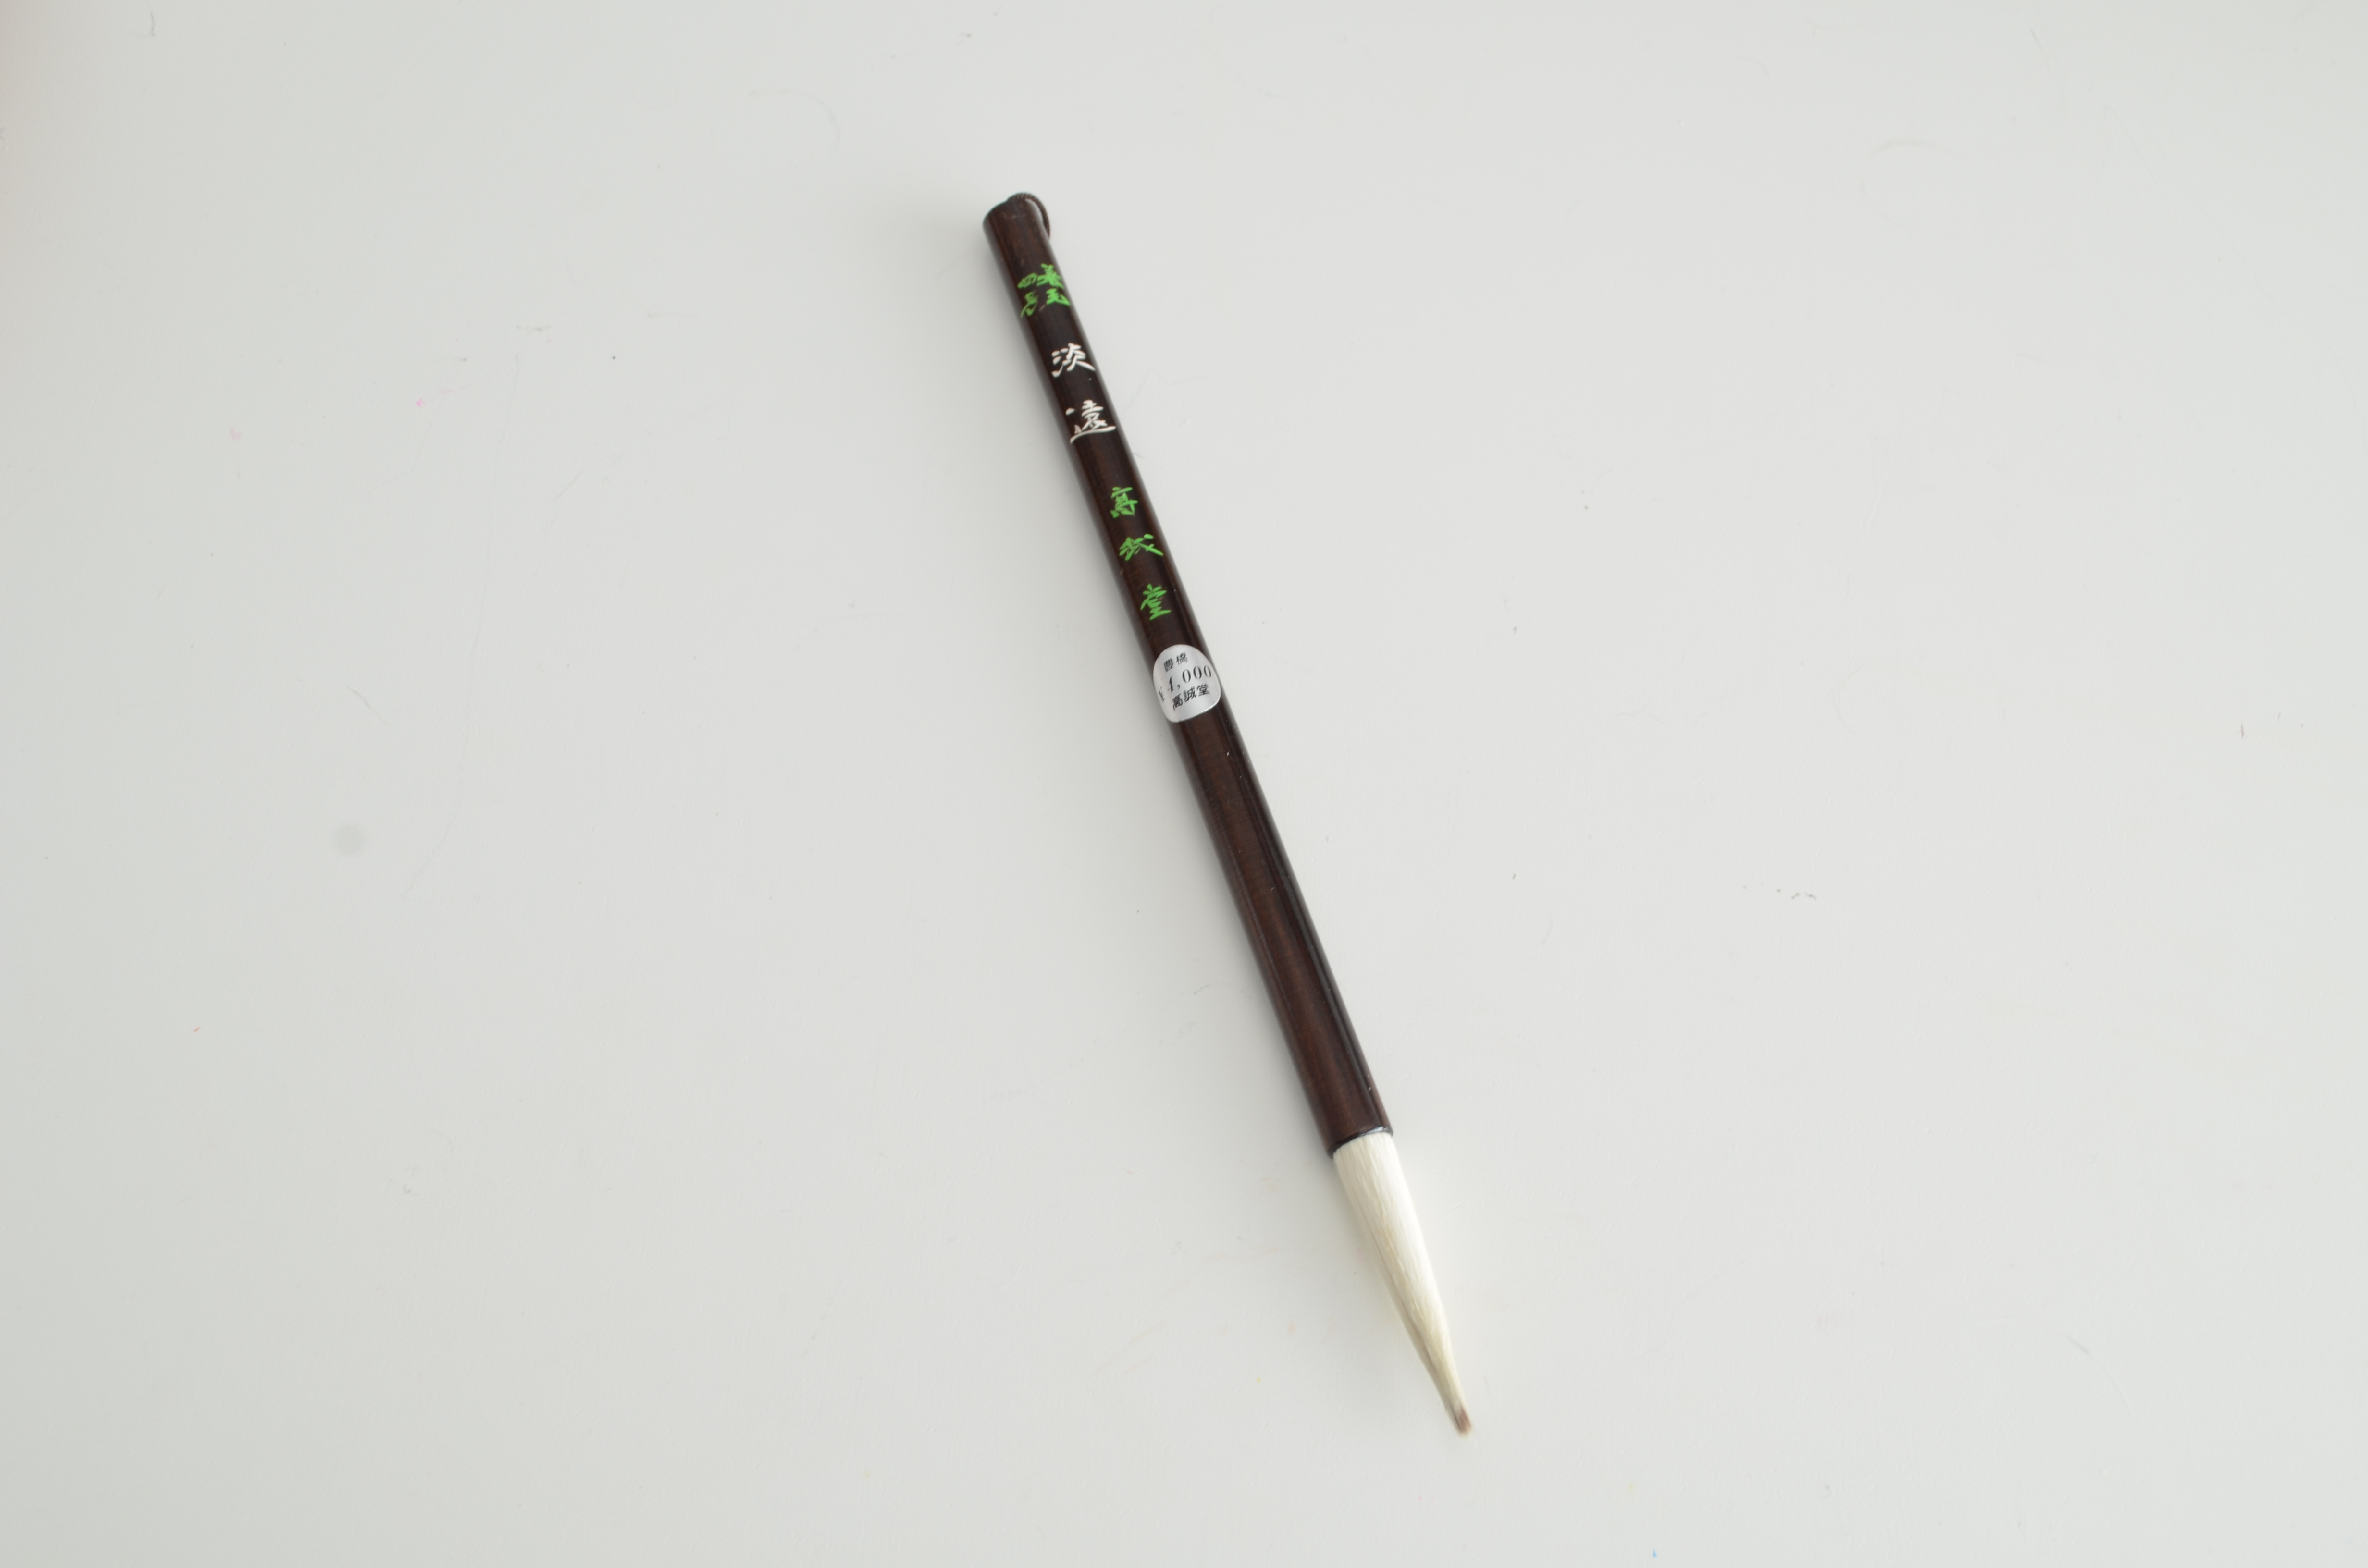 This particular brush is my favorite. I love its dark wooden handle. It’s a lovely brush that has never been used. Naoto discouraged me from using it (he and I both suffer from a fear of using lovely things) until now. I’ve been doing some research on how to prepare a new brush and how to care for a brush properly so I can make sure this one can be used for a long time. Once I feel properly informed and responsible, I’ll start using it.
2014 “Cat Lady” Valentines
 Even though I gave up making my own Christmas cards last year, I’m still going strong in the Valentine-making department. Last year, I did mostly store-bought cards with handmade garlands but this year, I made my cards again.
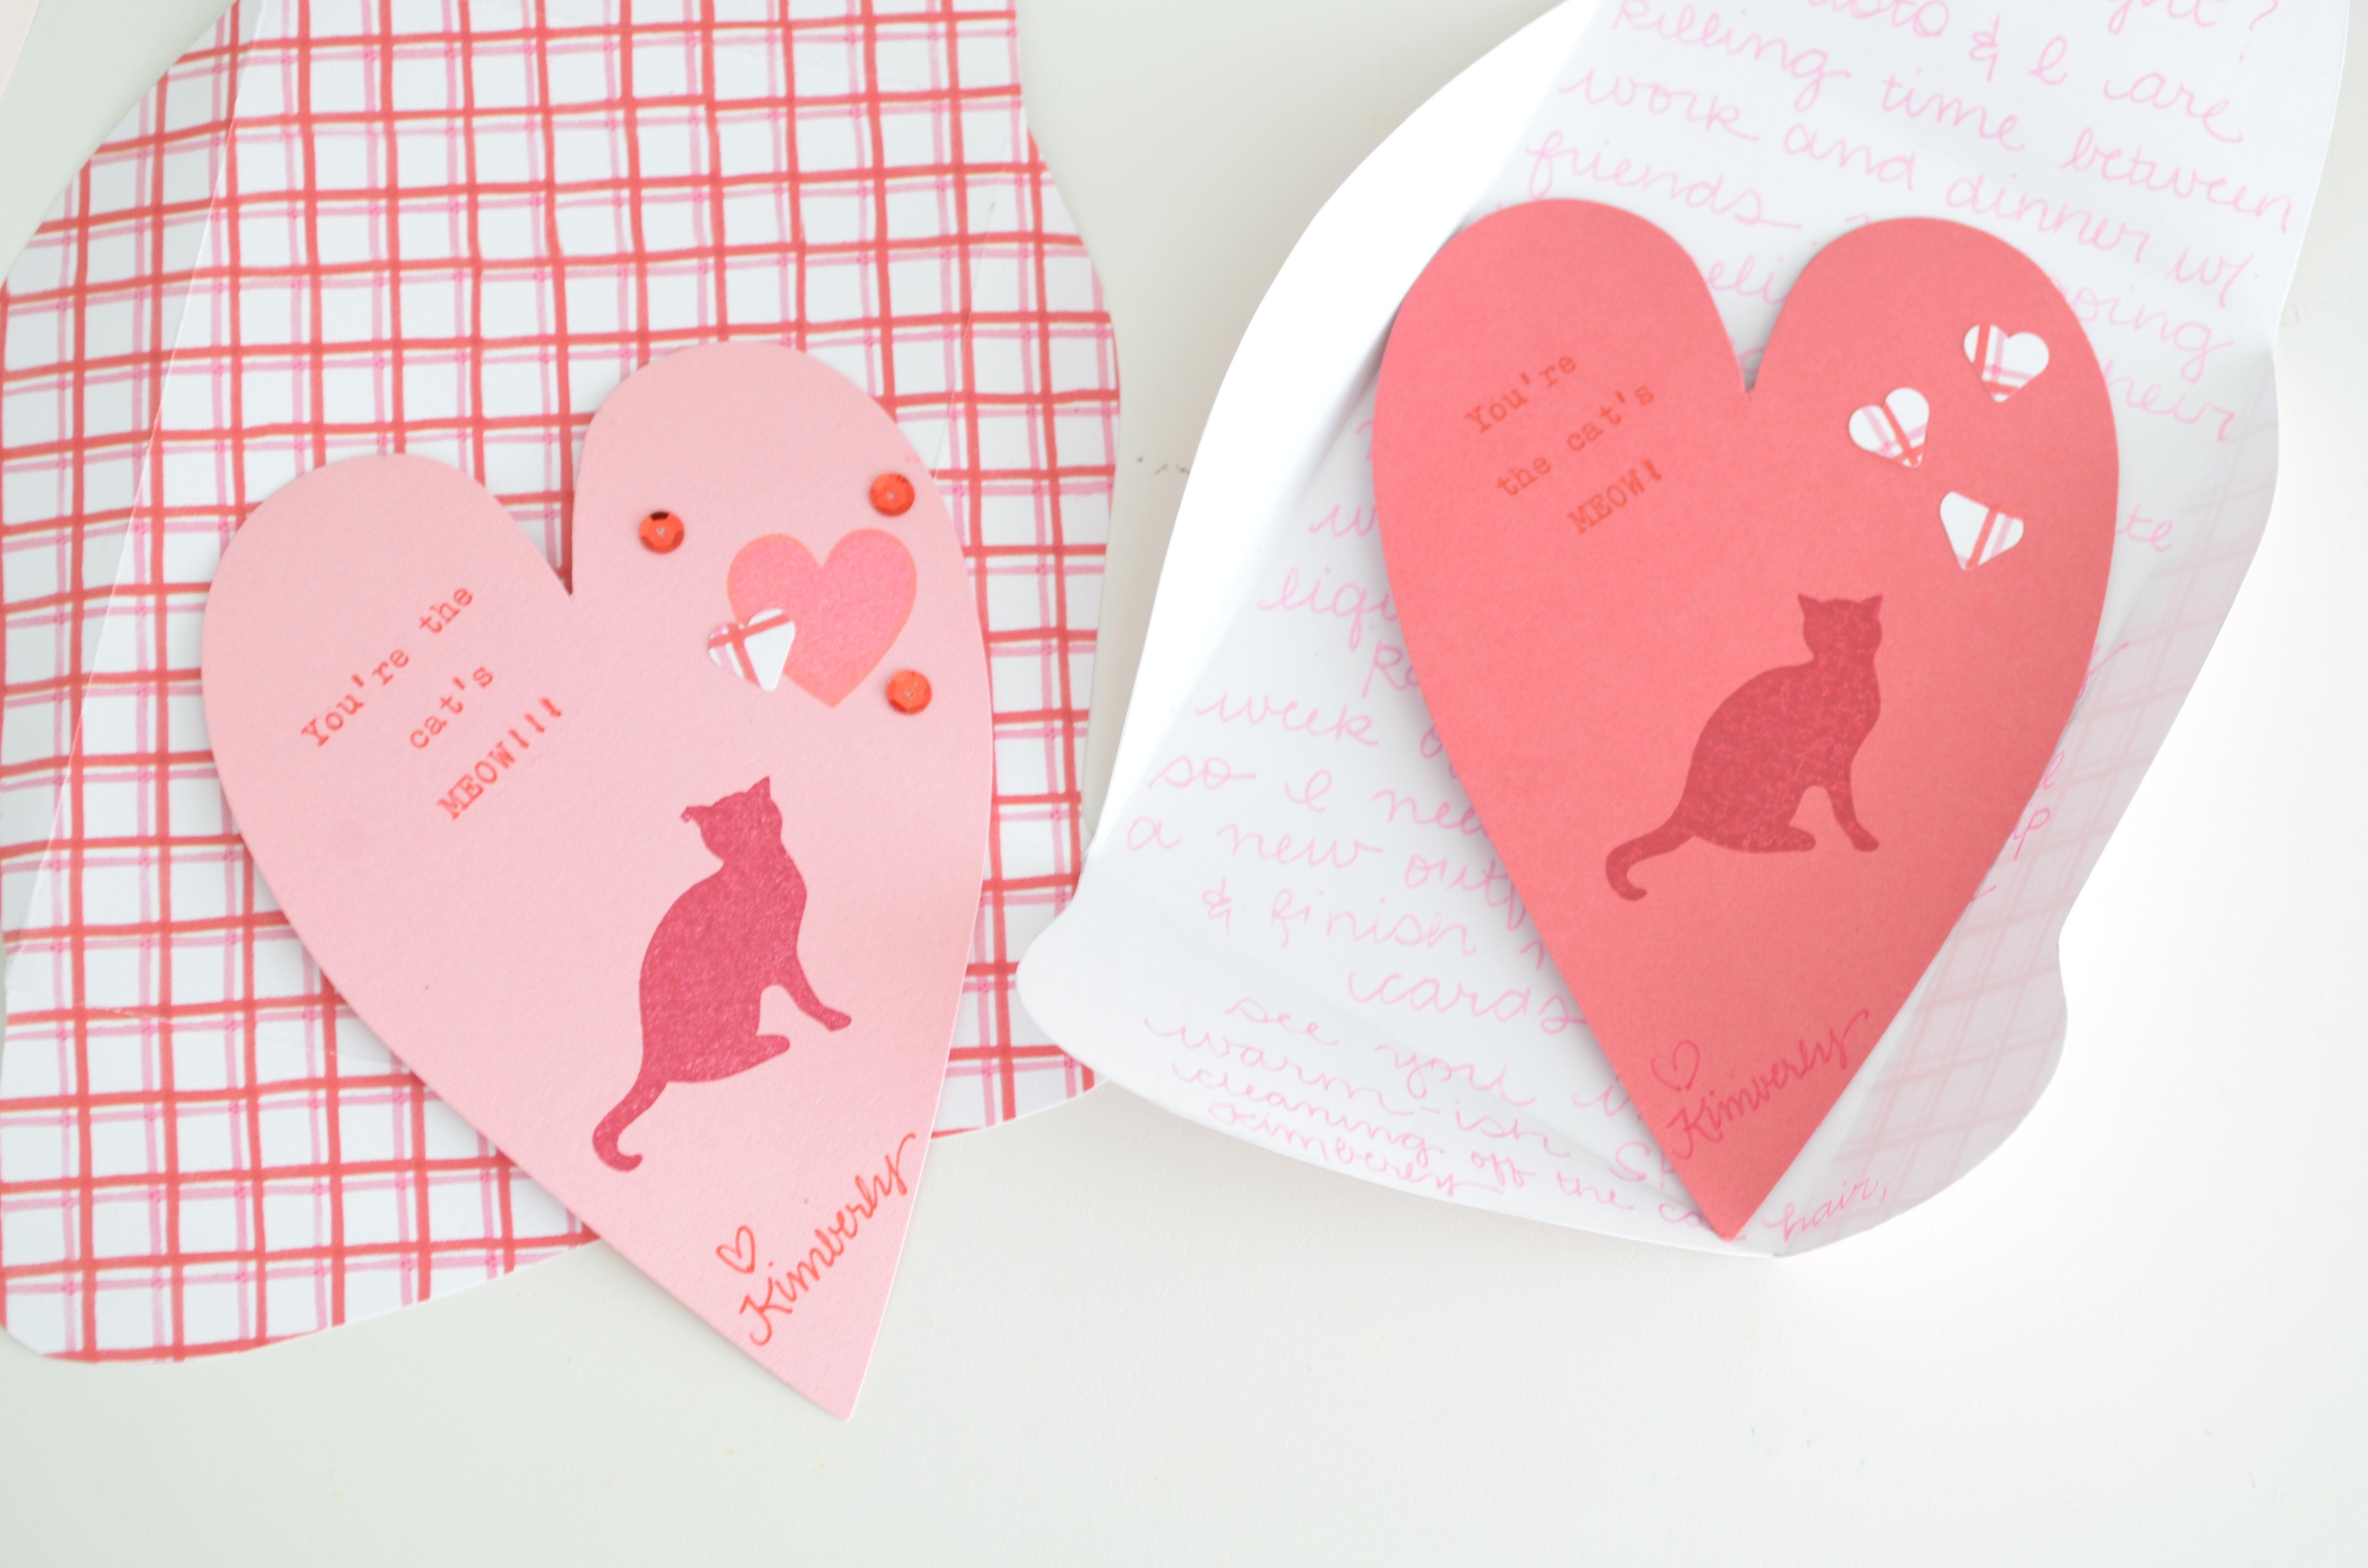
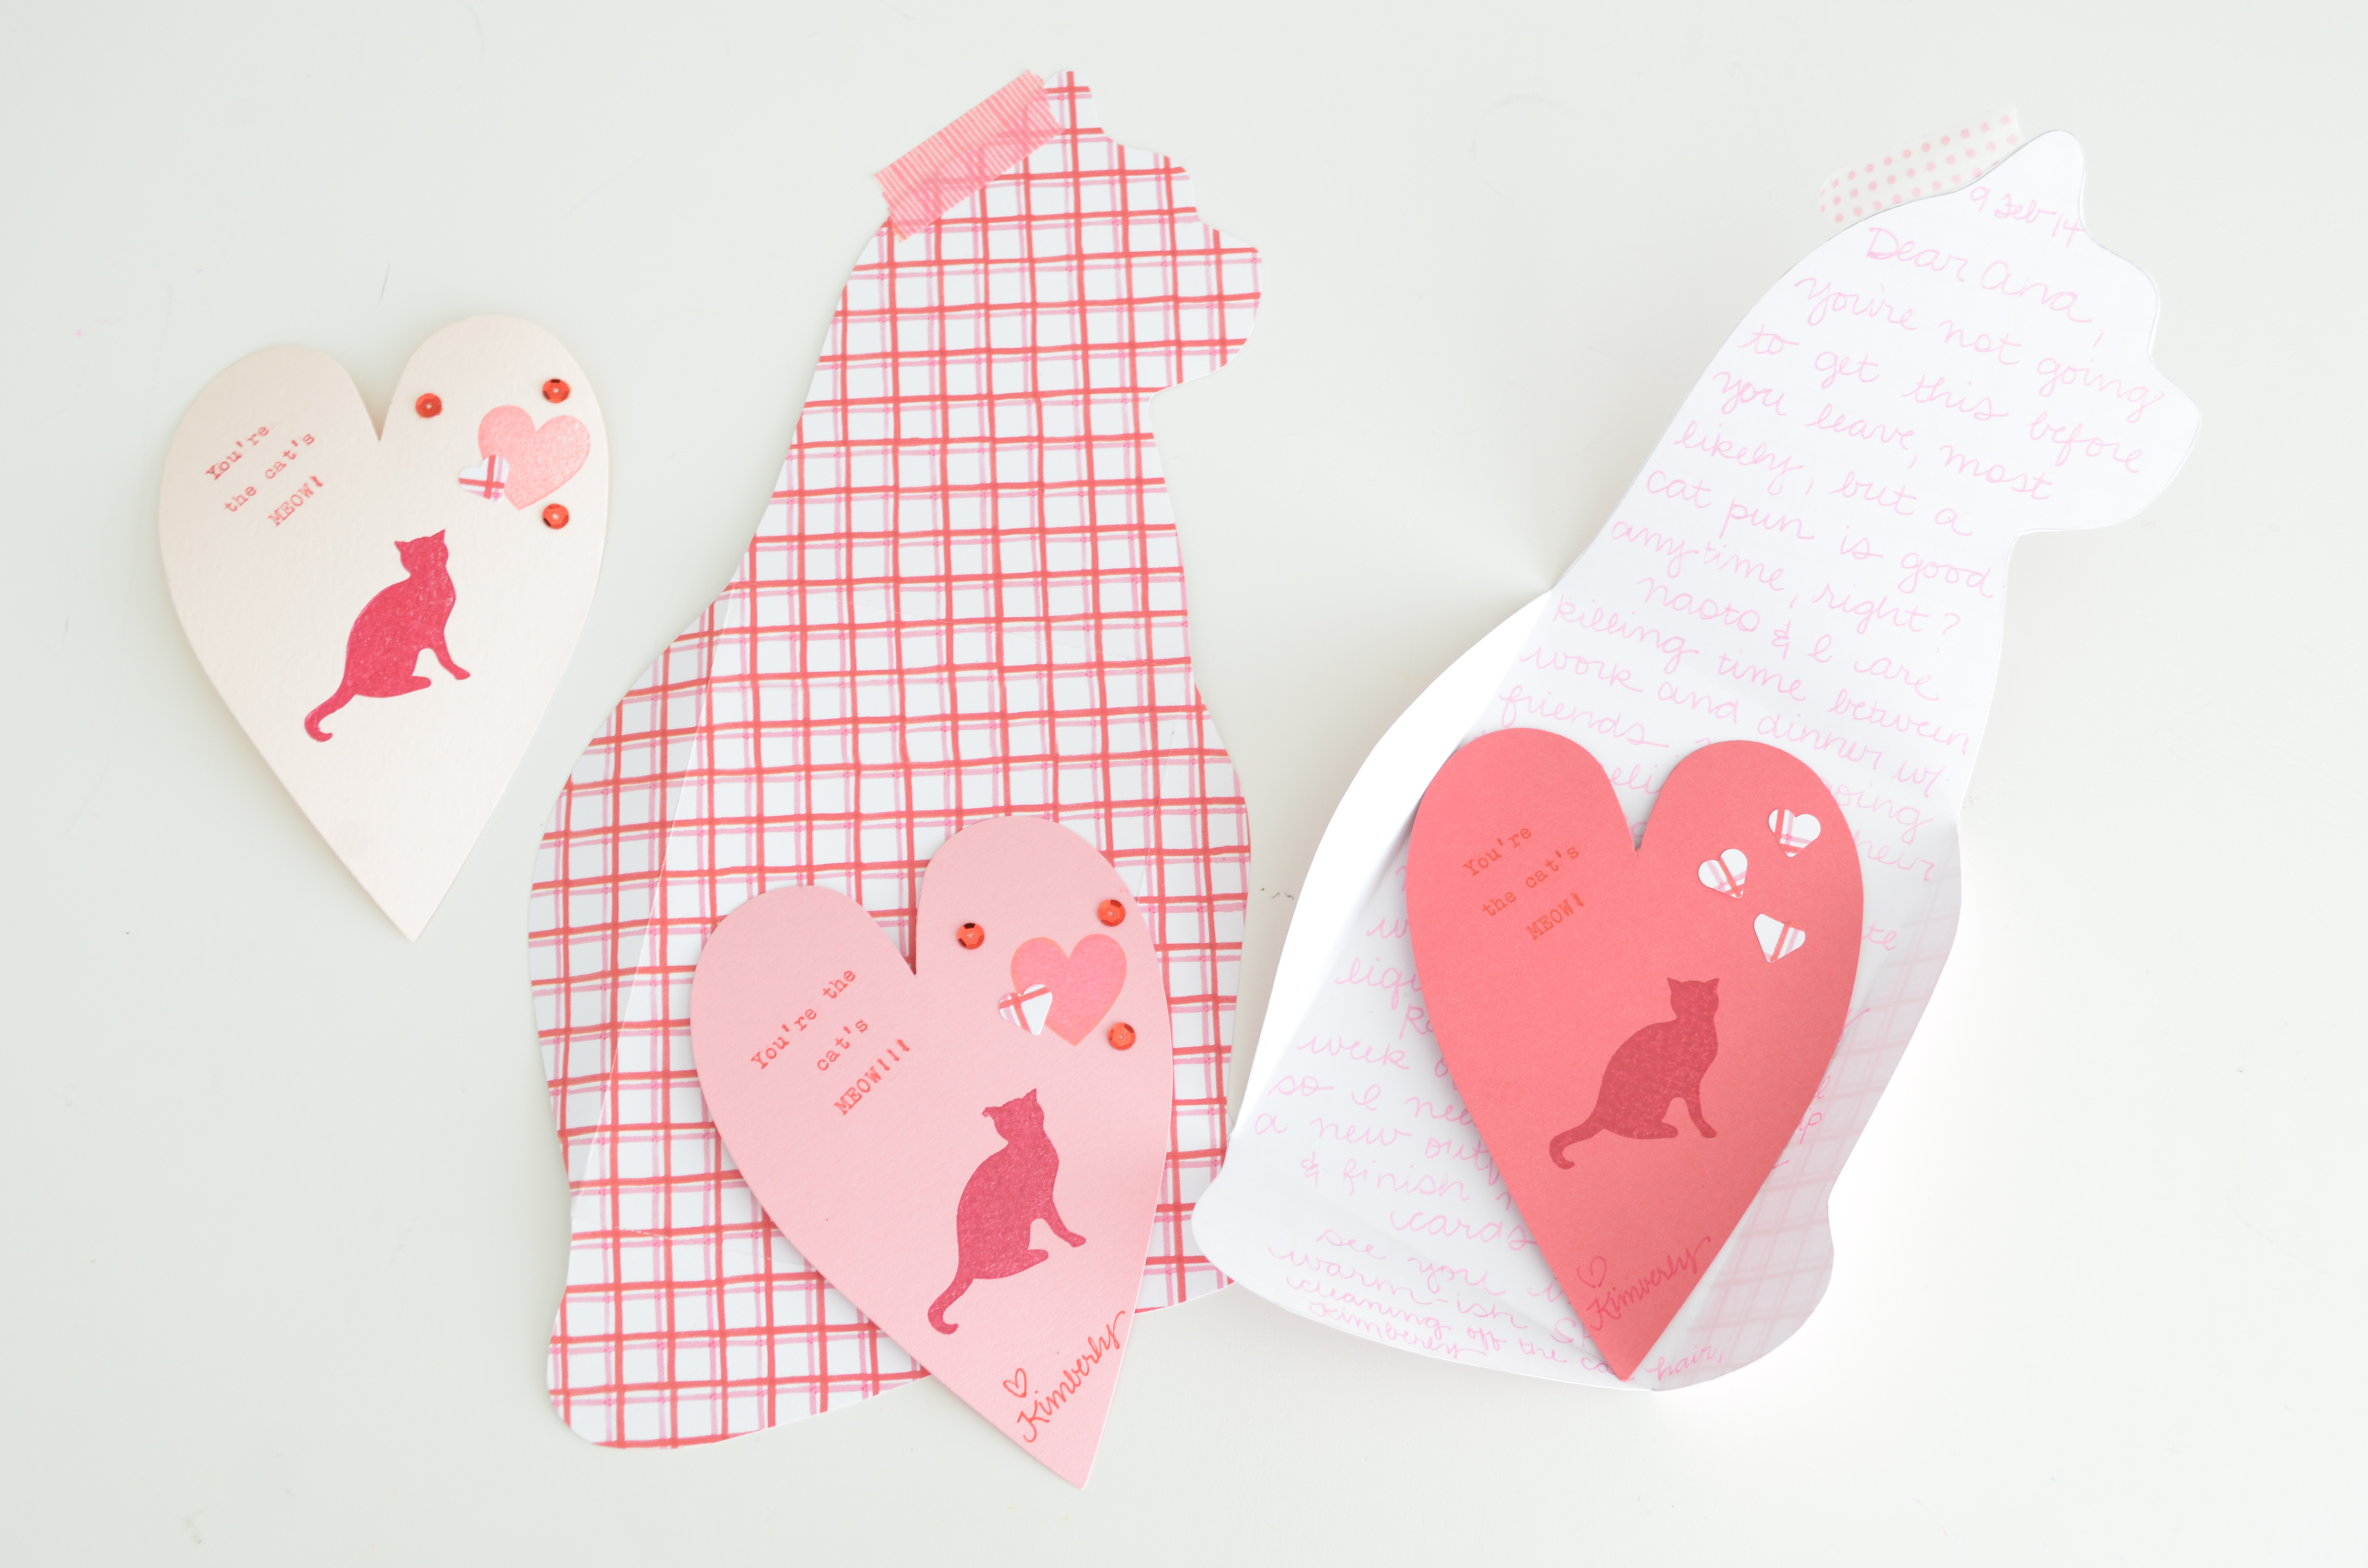
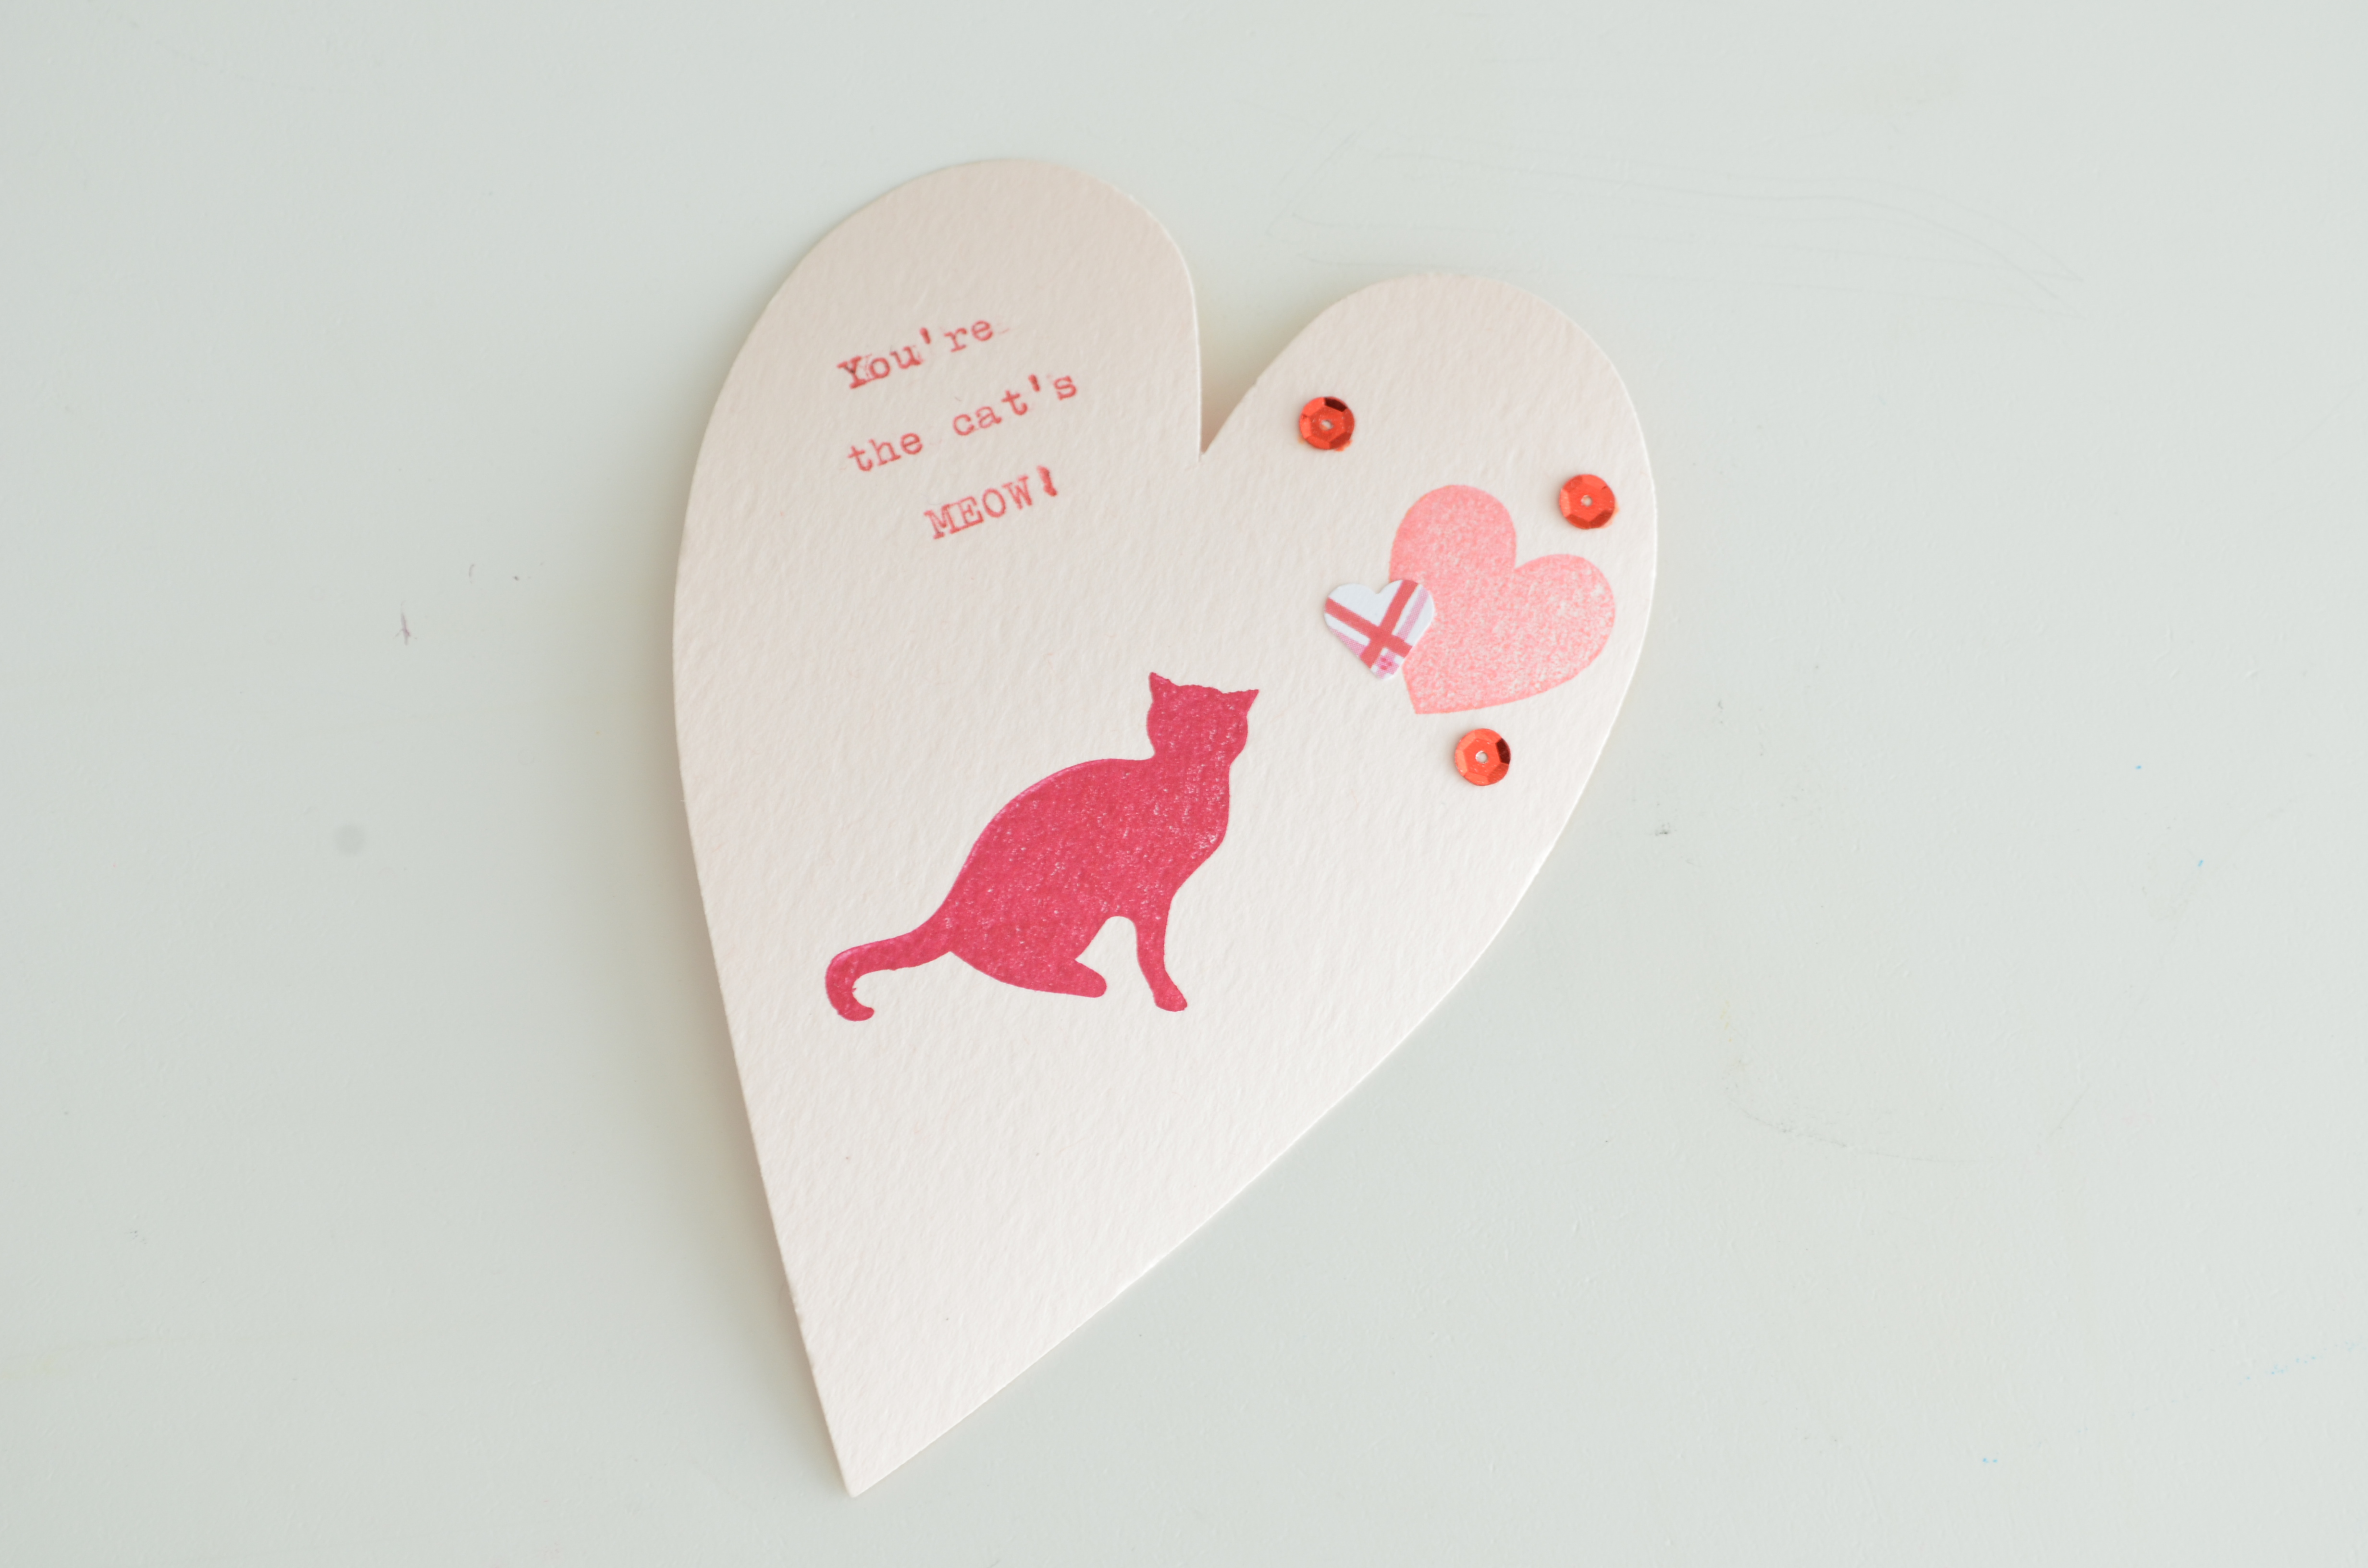 I love a good pun, and I wanted to use my cat template, so I came up with these cat-themed cards for my cat-fan friends. Each one ended up being a little bit different because I was spending out some Valentine papers from yesteryear. I started with a good pun–You’re the cat’s meow!–and typed it up on Paper Source 4-bar heart cards. Then I stamped on a cat and a heart. I had tiny hearts punched out of leftover paper that I glued on, along with vintage red sequins (using my favorite glue pen).
 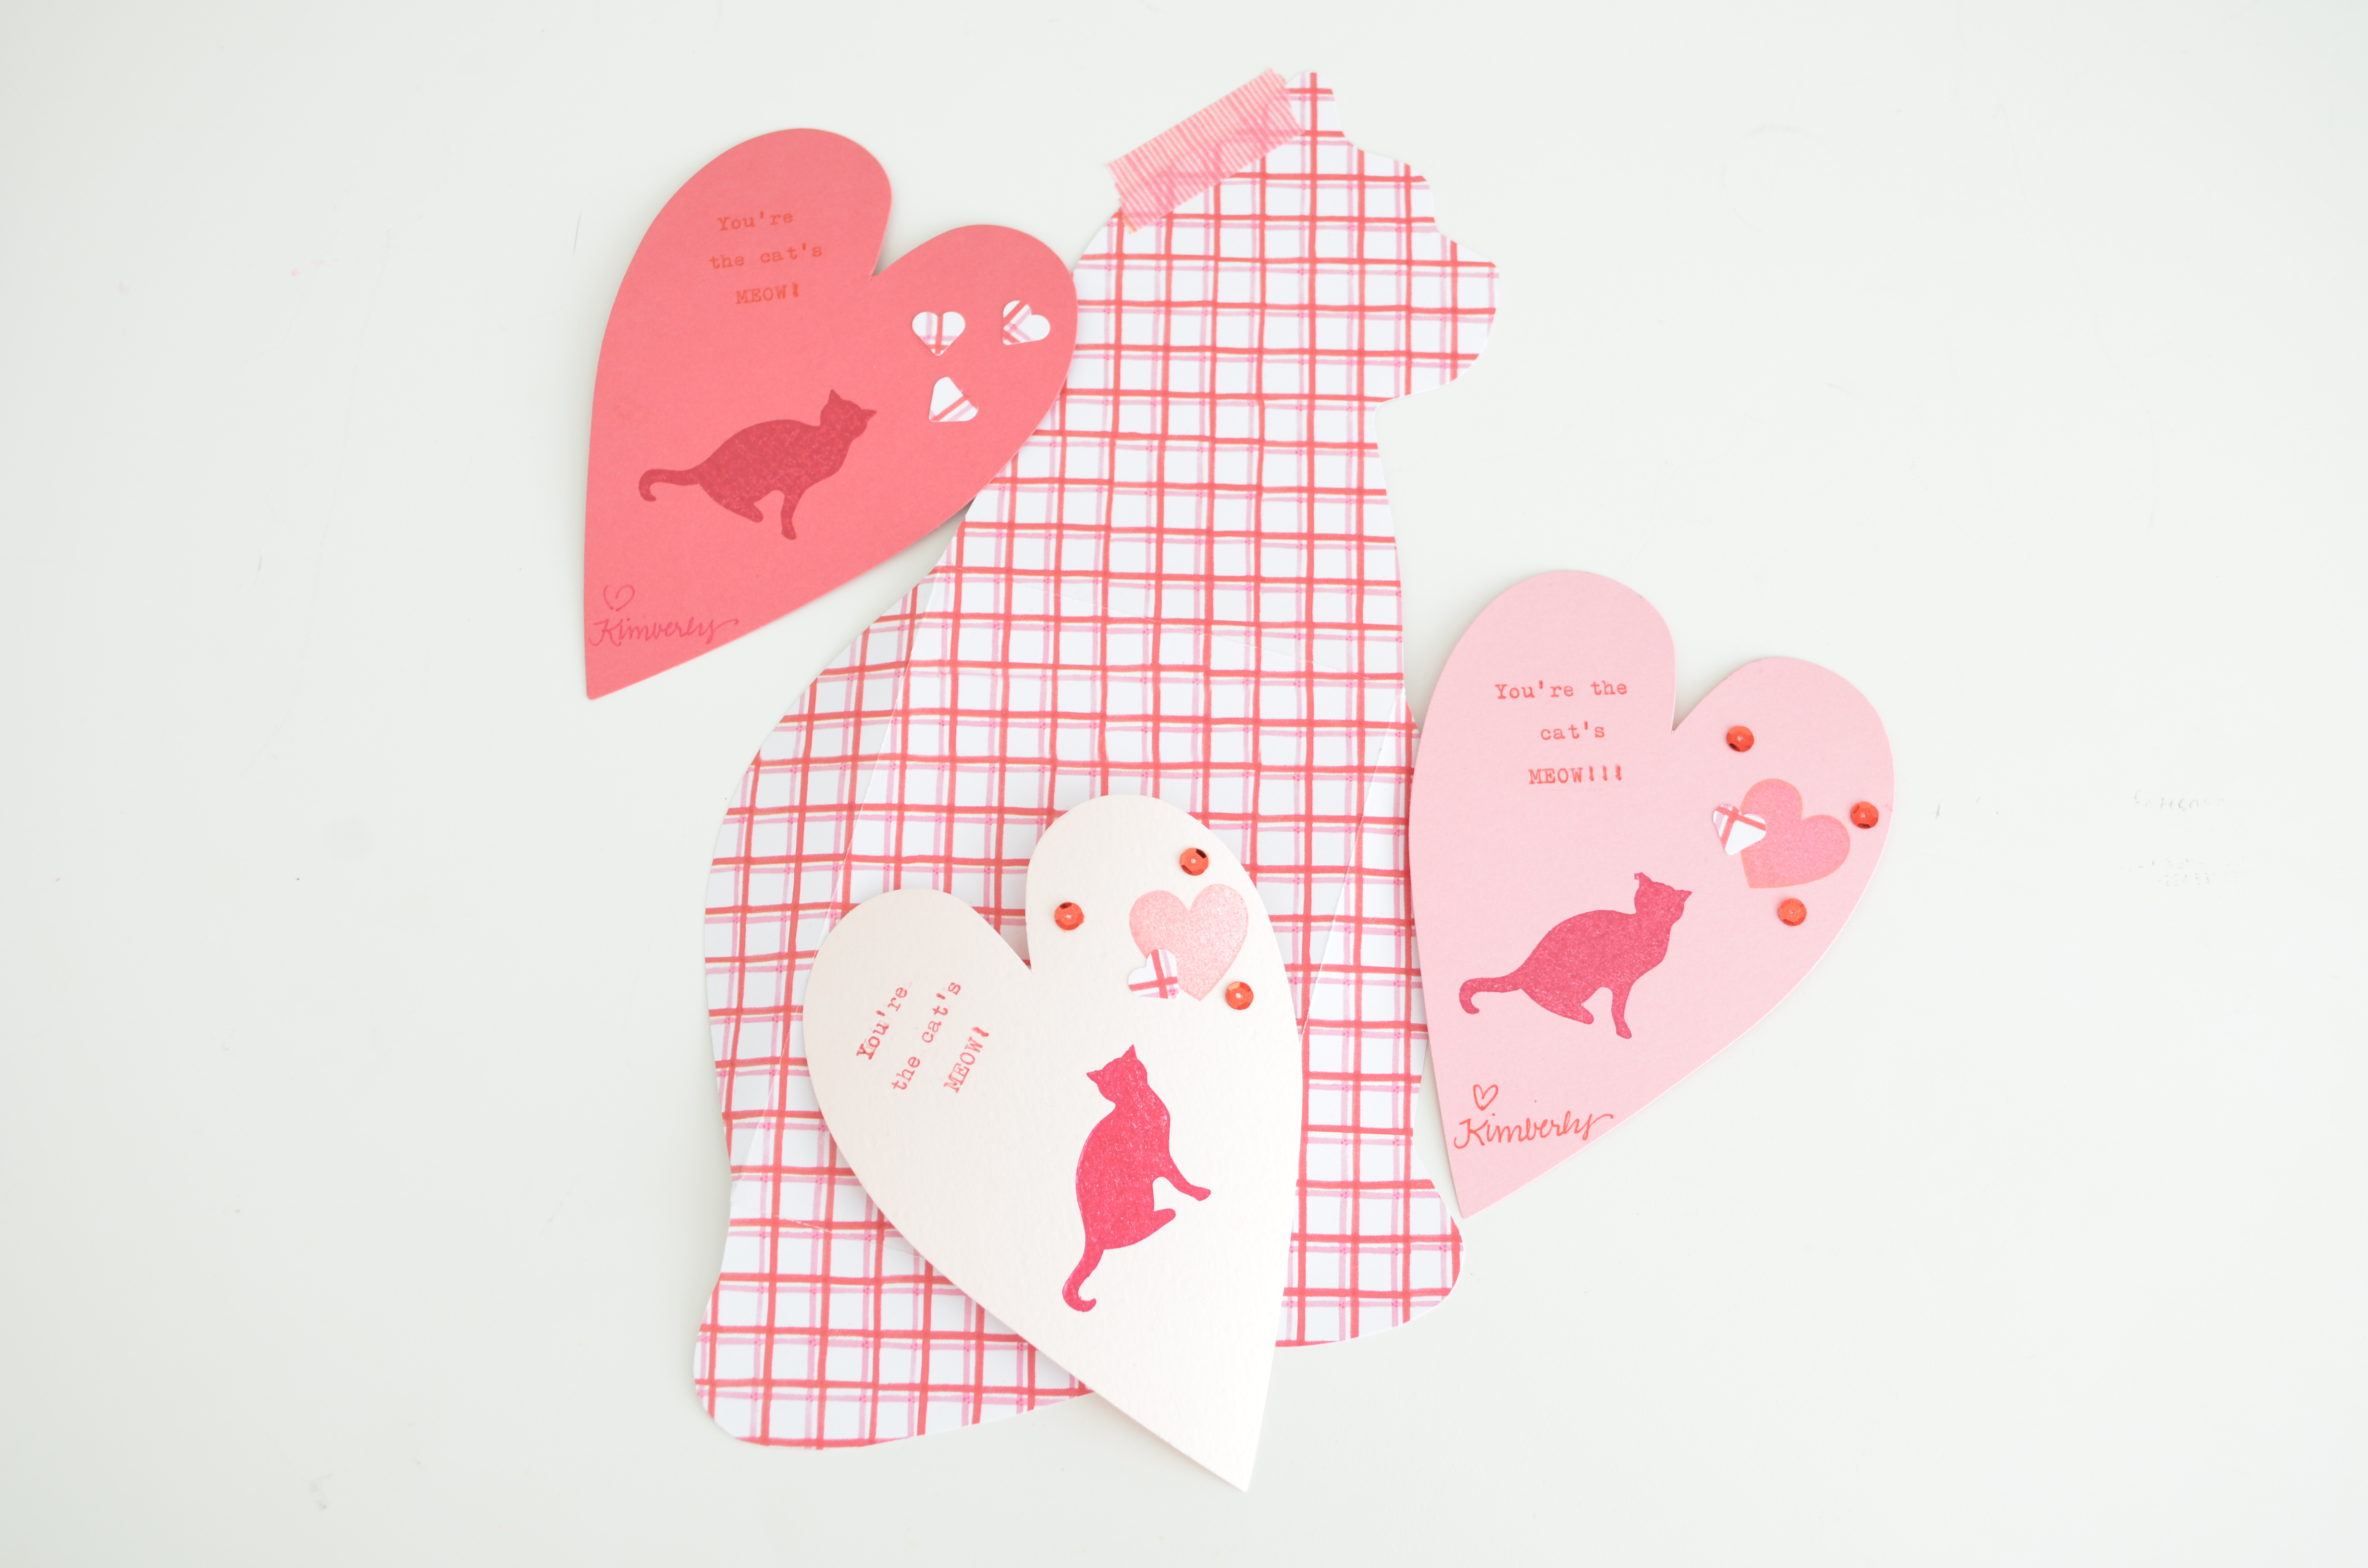 Each card ended up being a little bit different (and each card had varying amounts of Presley fur and coffee spills.)
The non-cat people got the same heart cards stamped with something tea or coffee related…slightly less exciting than cat puns.
Happy Valentine’s Day! I hope your day is filled with love and pink mail!
Whirlwind of Preparations
 Tomorrow morning, I’m leaving for San Francisco! That means today will be a whirlwind of preparations. I’m happy to report that I finished three loads of laundry before nine this morning, and I think I have enough clothes to cover the next four days. (What is it about packing for trips that makes you realize how dull your wardrobe is?)
Most importantly, my calling cards are made, the treats for my friends are packaged (more on that tomorrow) and my address book is updated for postcard writing…the important stuff, you know…
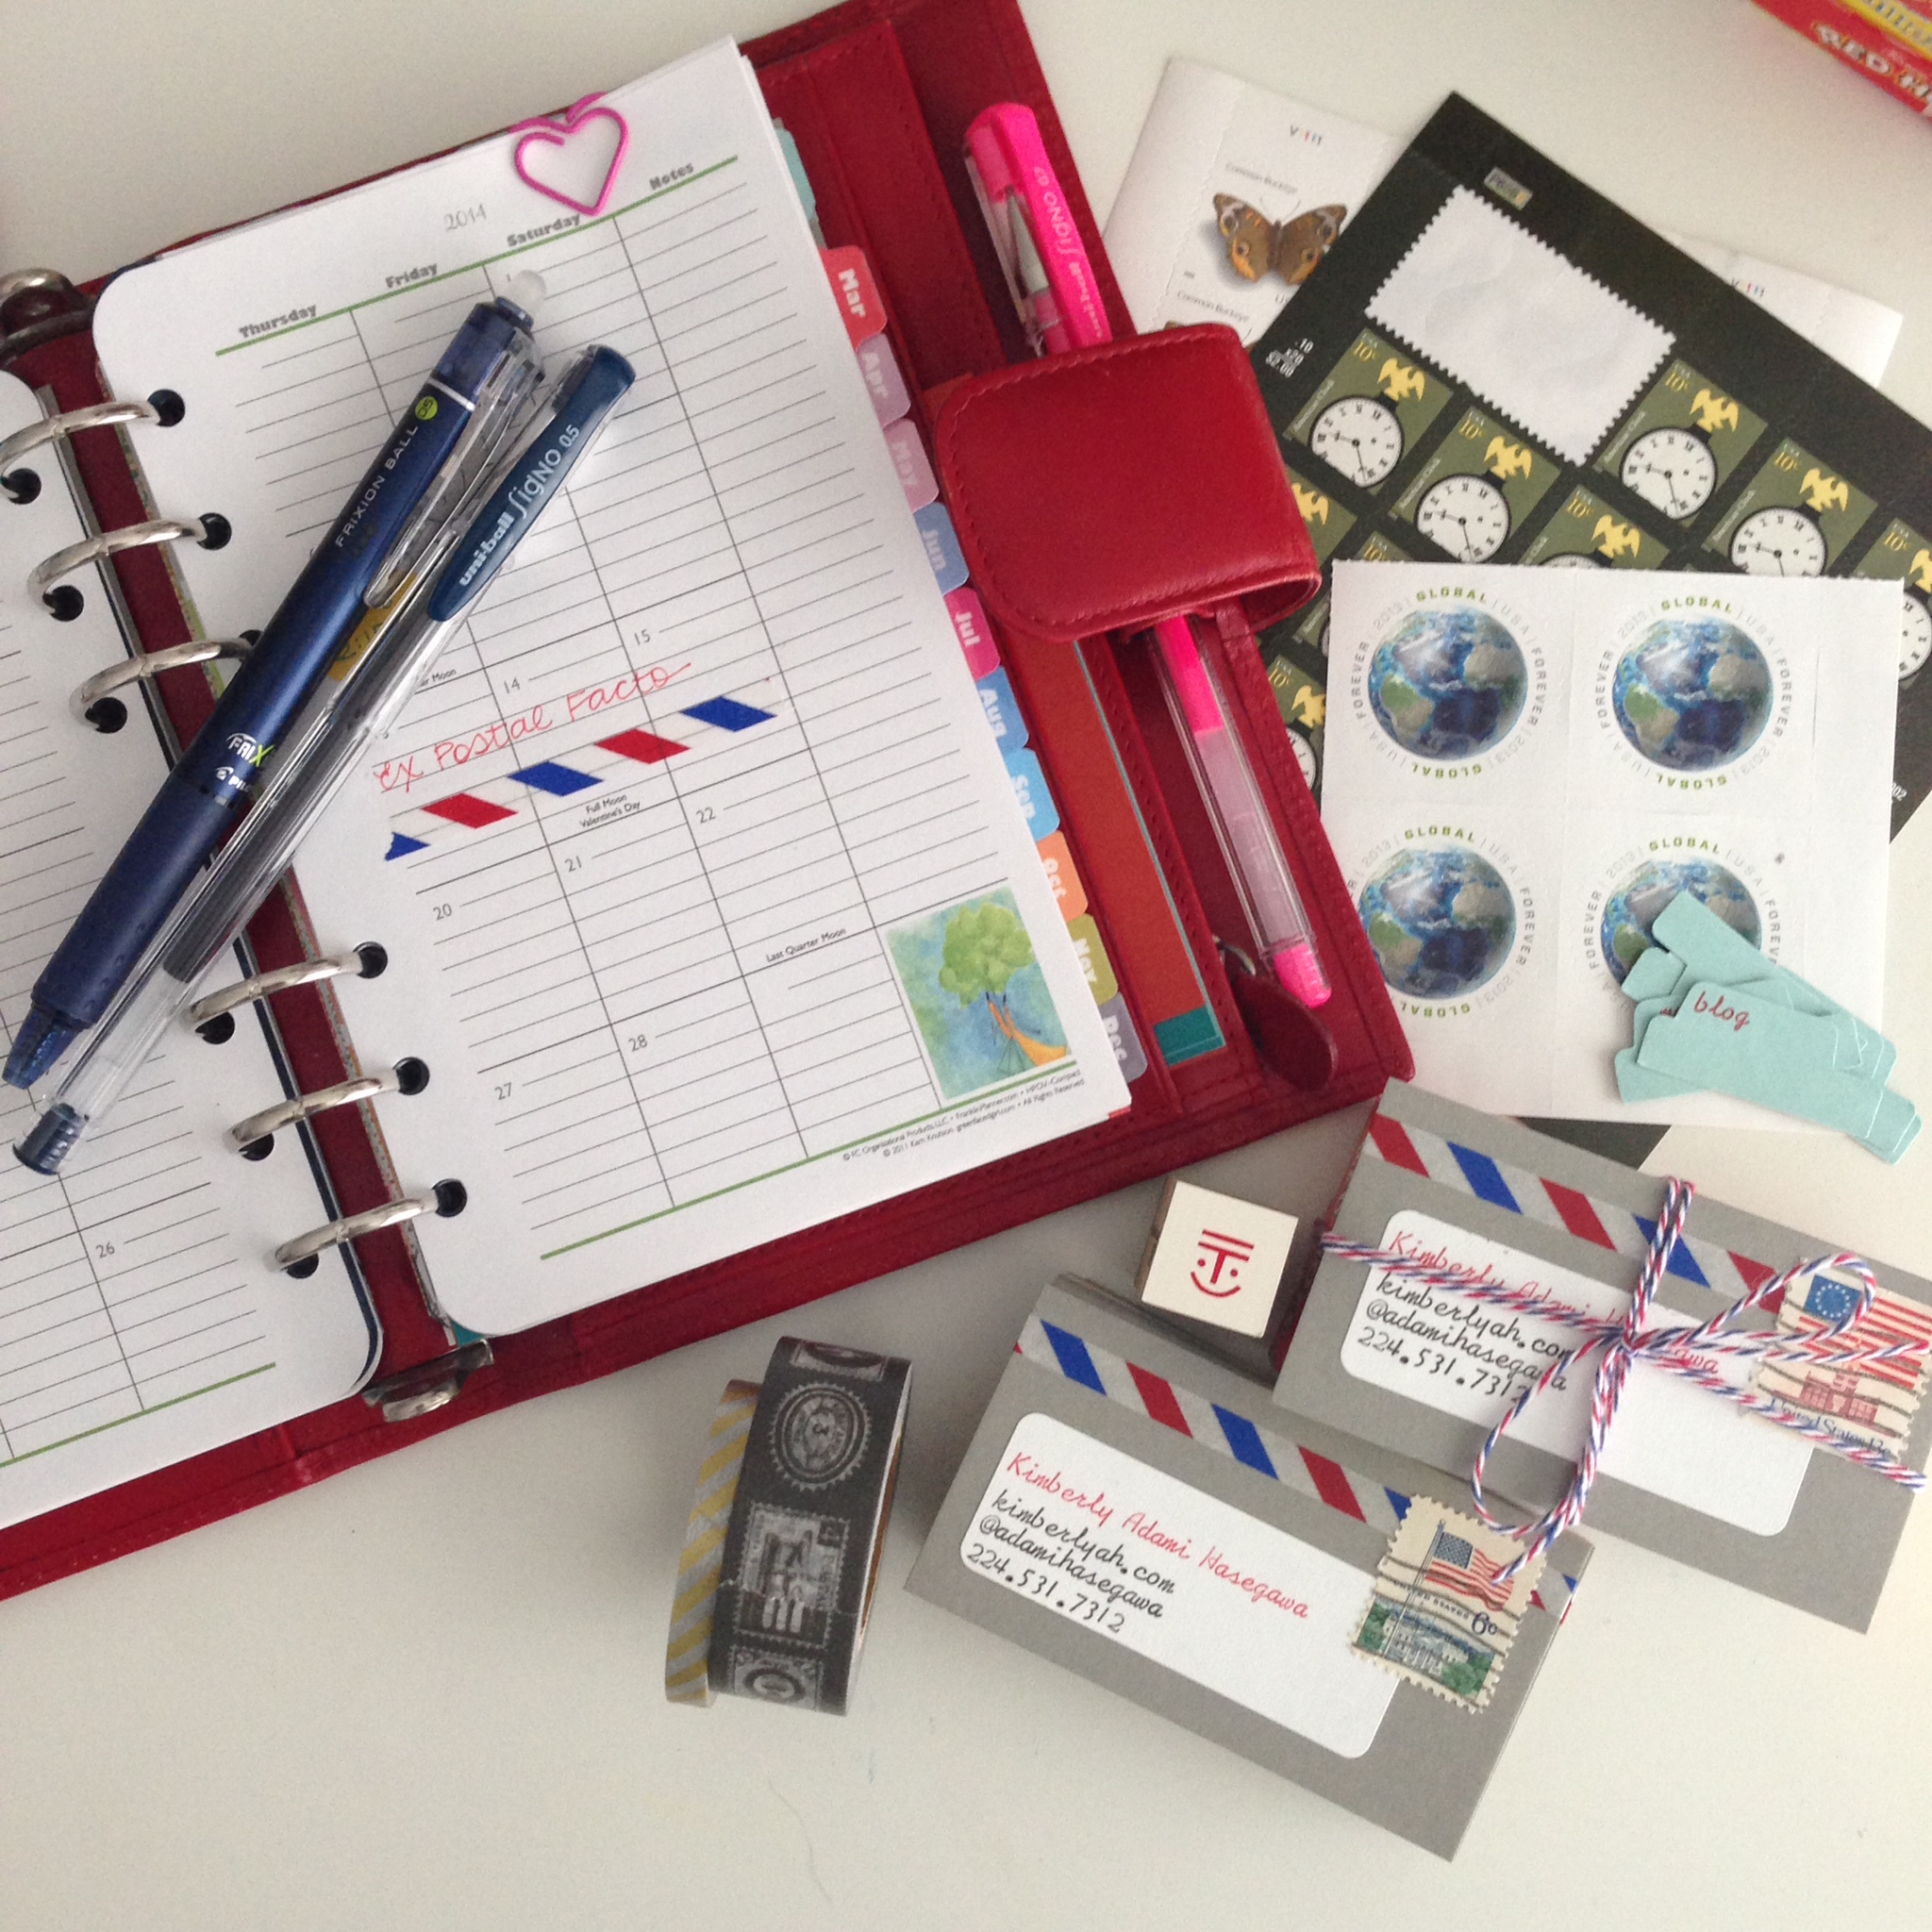
Today I am packing my bag, packing up my mail supplies (while referring to this post) and I’m working on updating my calendar with information I’ll need while I’m gone.
Oh, and I’m cleaning up the apartment a bit…just in case Naoto and Presley throw a party while I’m gone.
If you will be at Ex Postal Facto, let me know so I can look for you during the events!
Mini Olympics Party
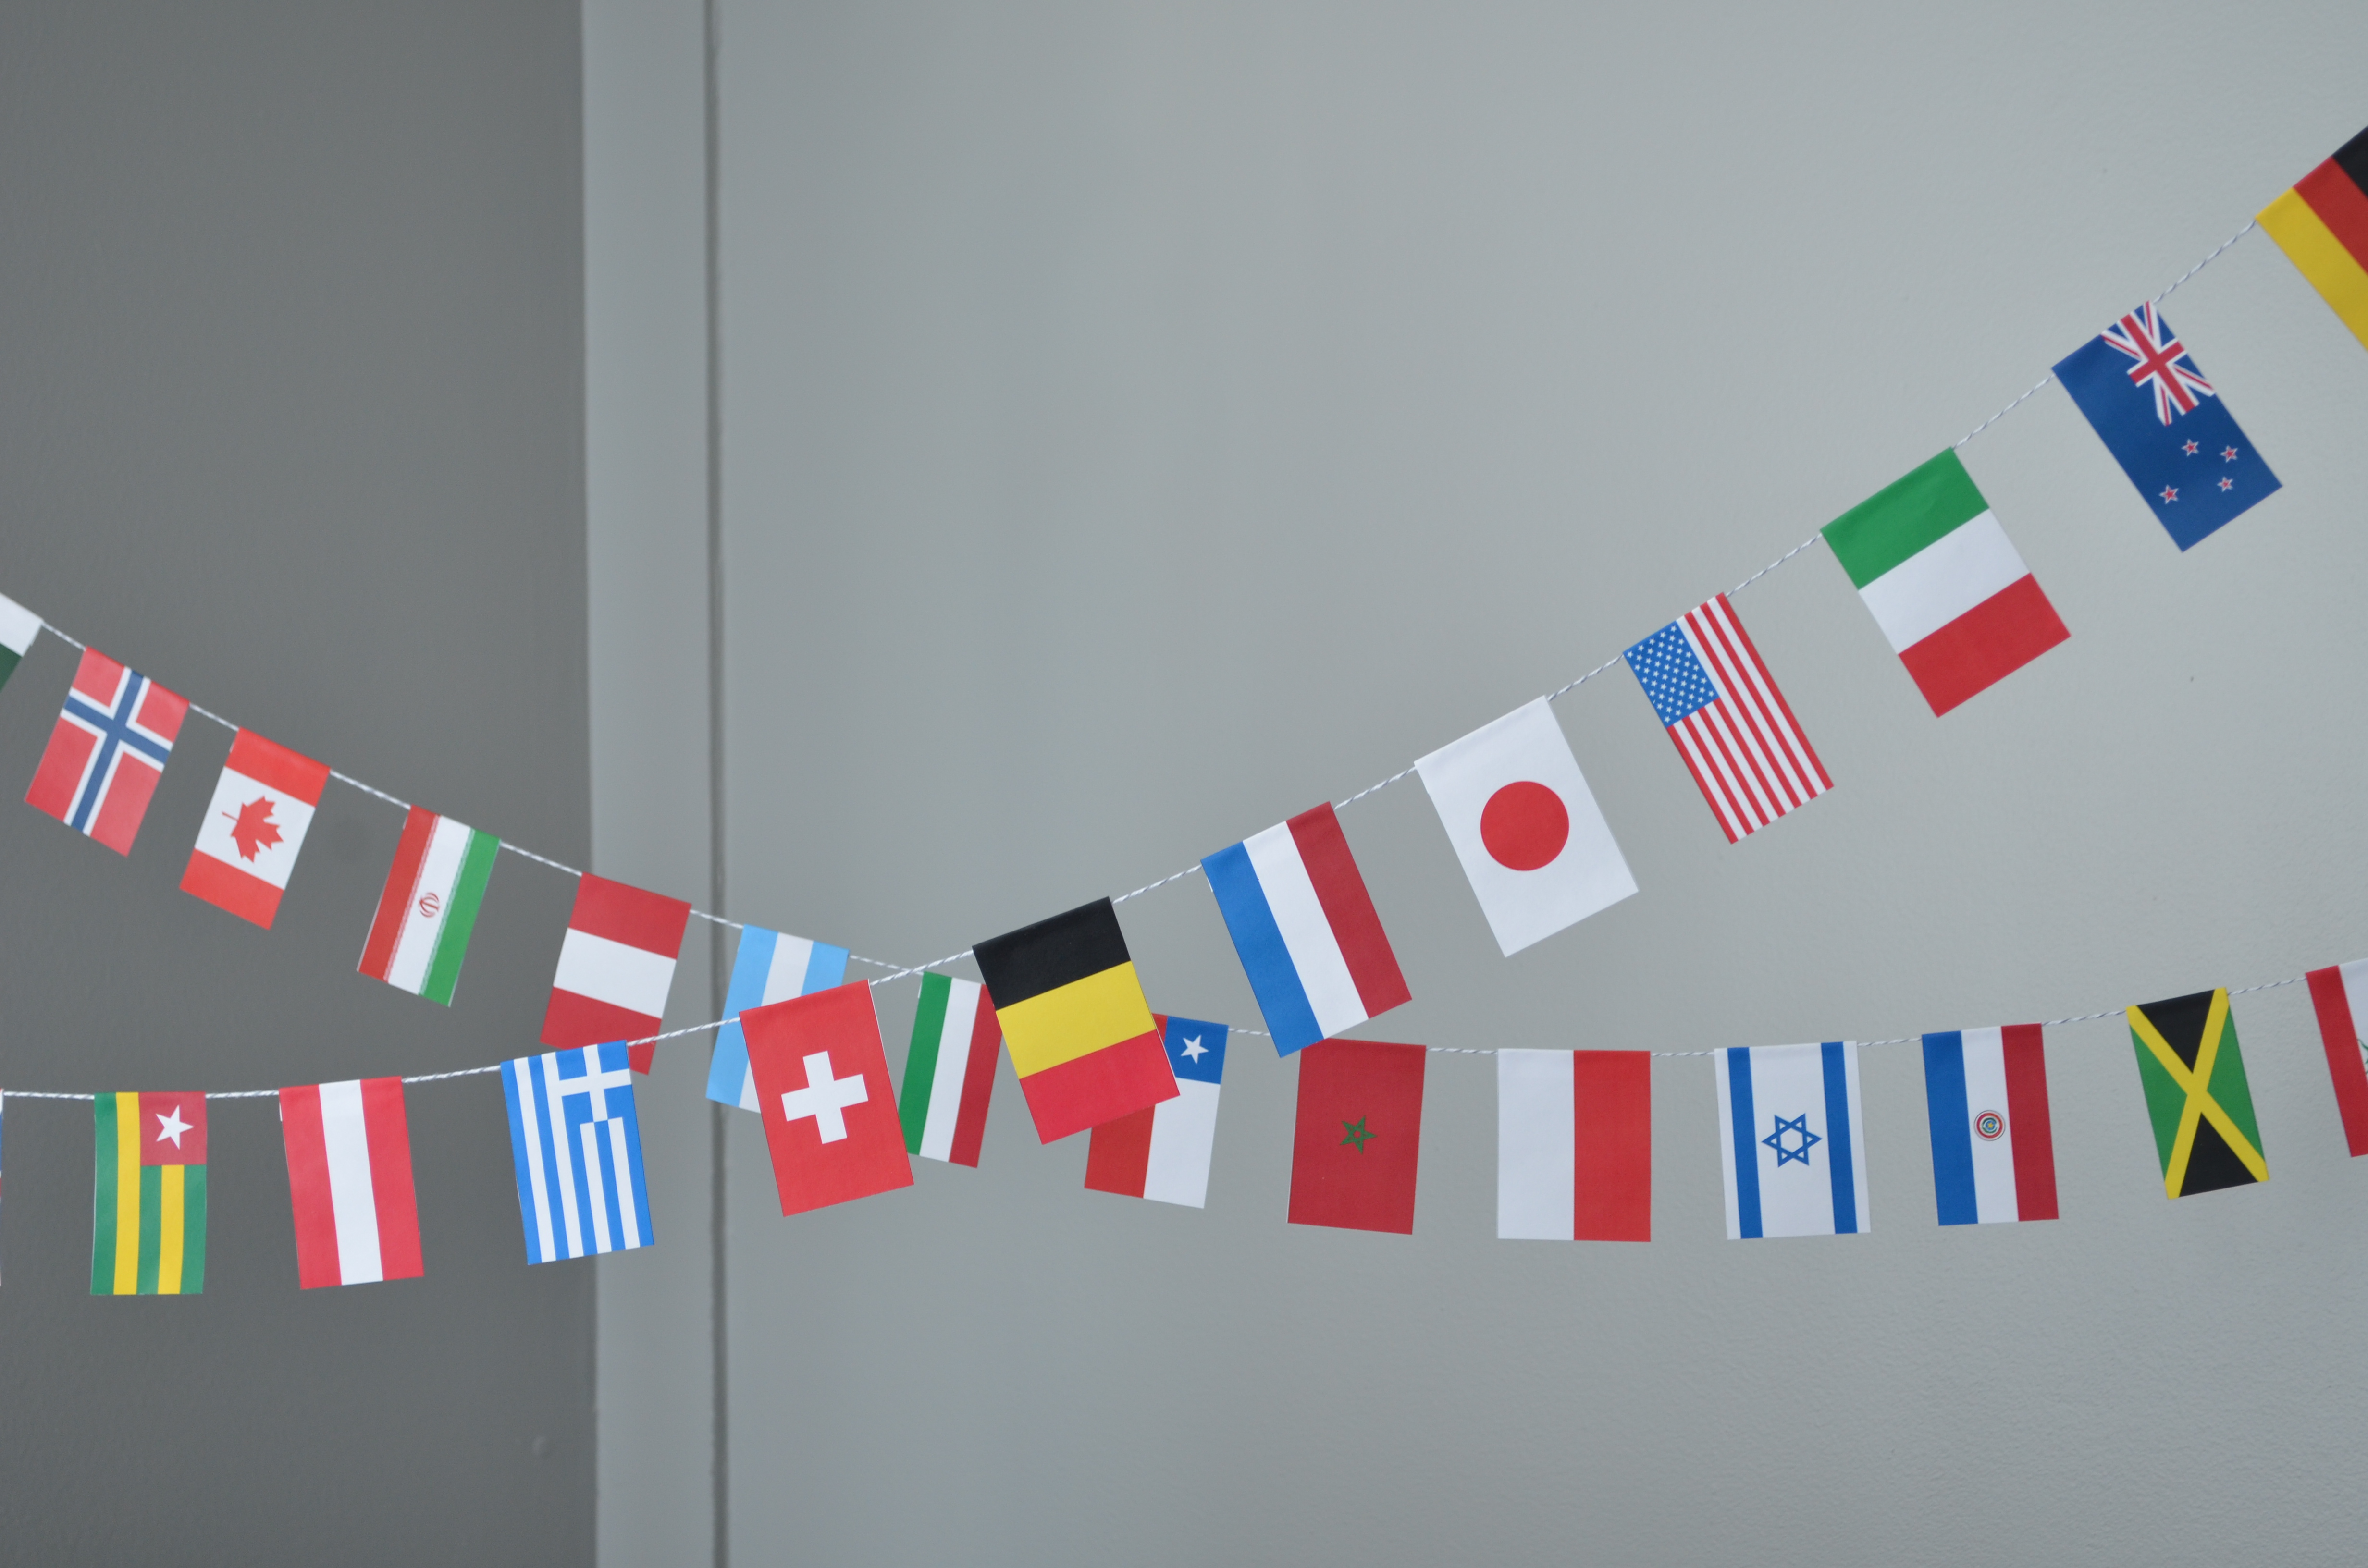 On Friday night, I hosted a mini party for the Olympics Opening Ceremony. Even though it was a small party, I felt compelled to decorate just a little bit. (I find the decorations distract guests from my messy desk.) I searched Pinterest for some ideas and found this fun flag print-out.
 I trimmed out the flags of participating countries (they all weren’t represented, sadly) and pasted them around some baker’s twine. (Presley helped. She’s on Team USA.)
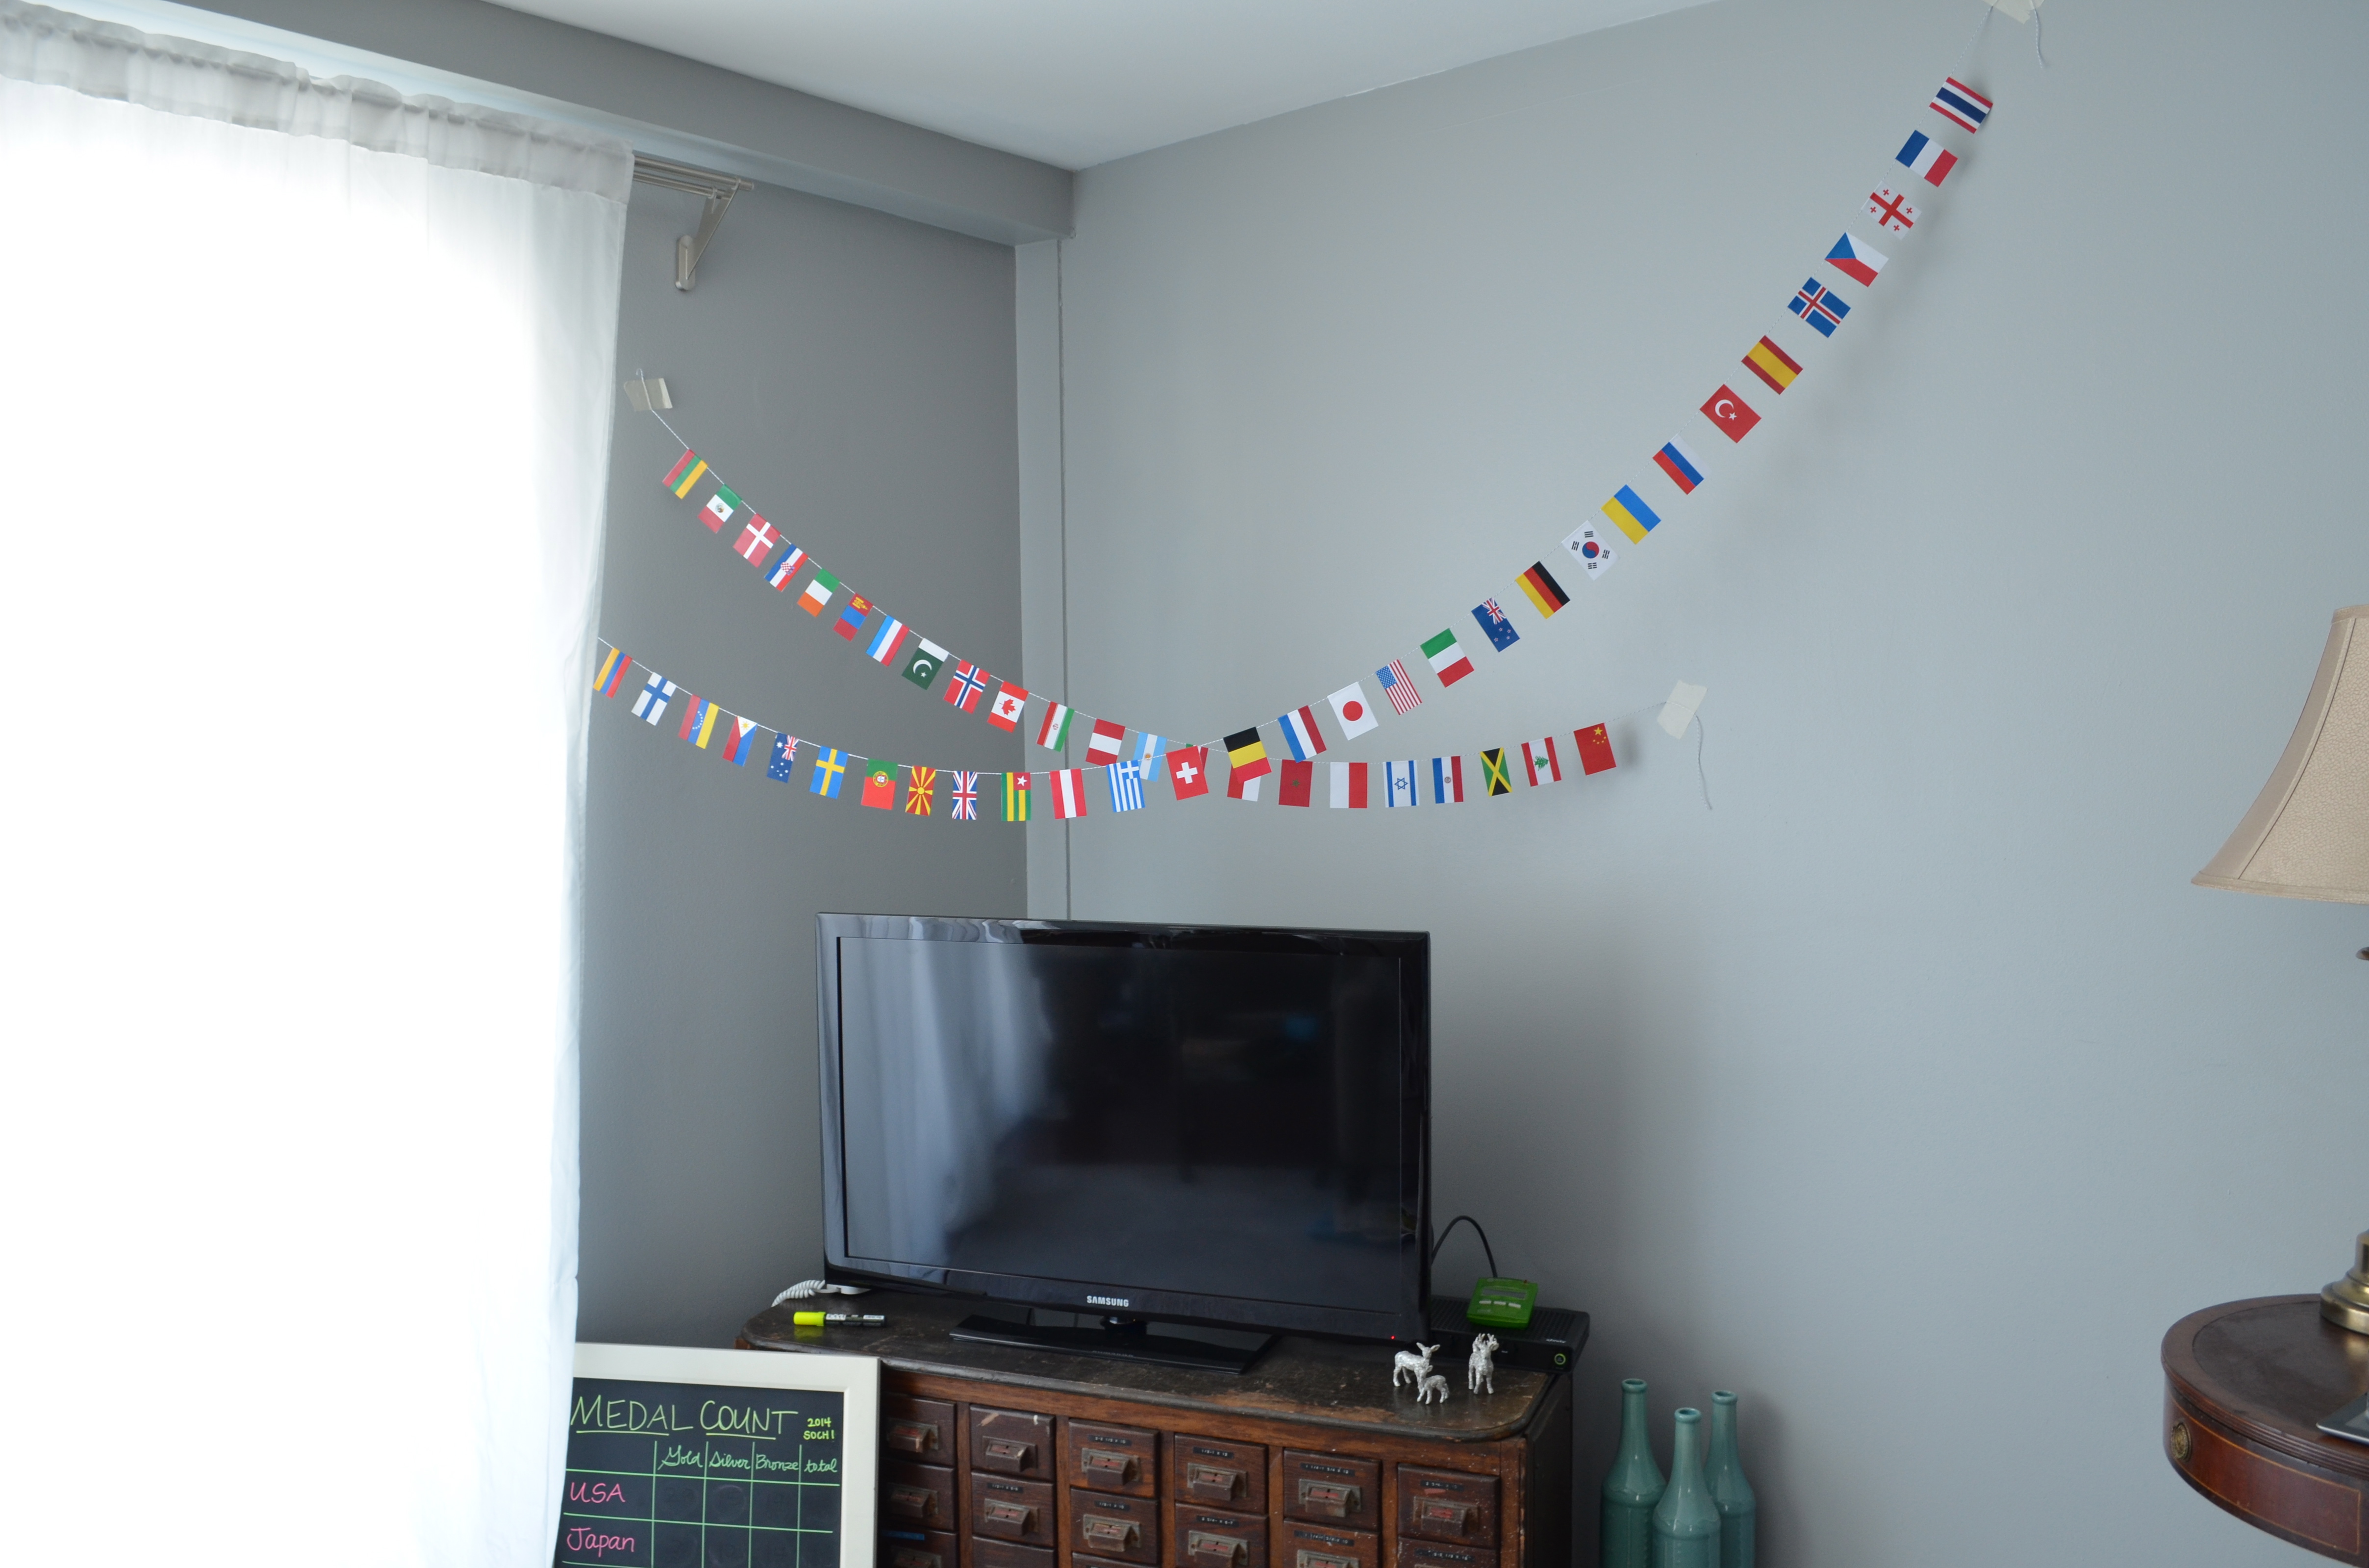 I made two separate garlands and hung them up over the TV–front and center with the Olympic action–and right next to the official Adami Hasegawa Medal Count board. Naoto and I have a medal count competition–USA v Japan.
 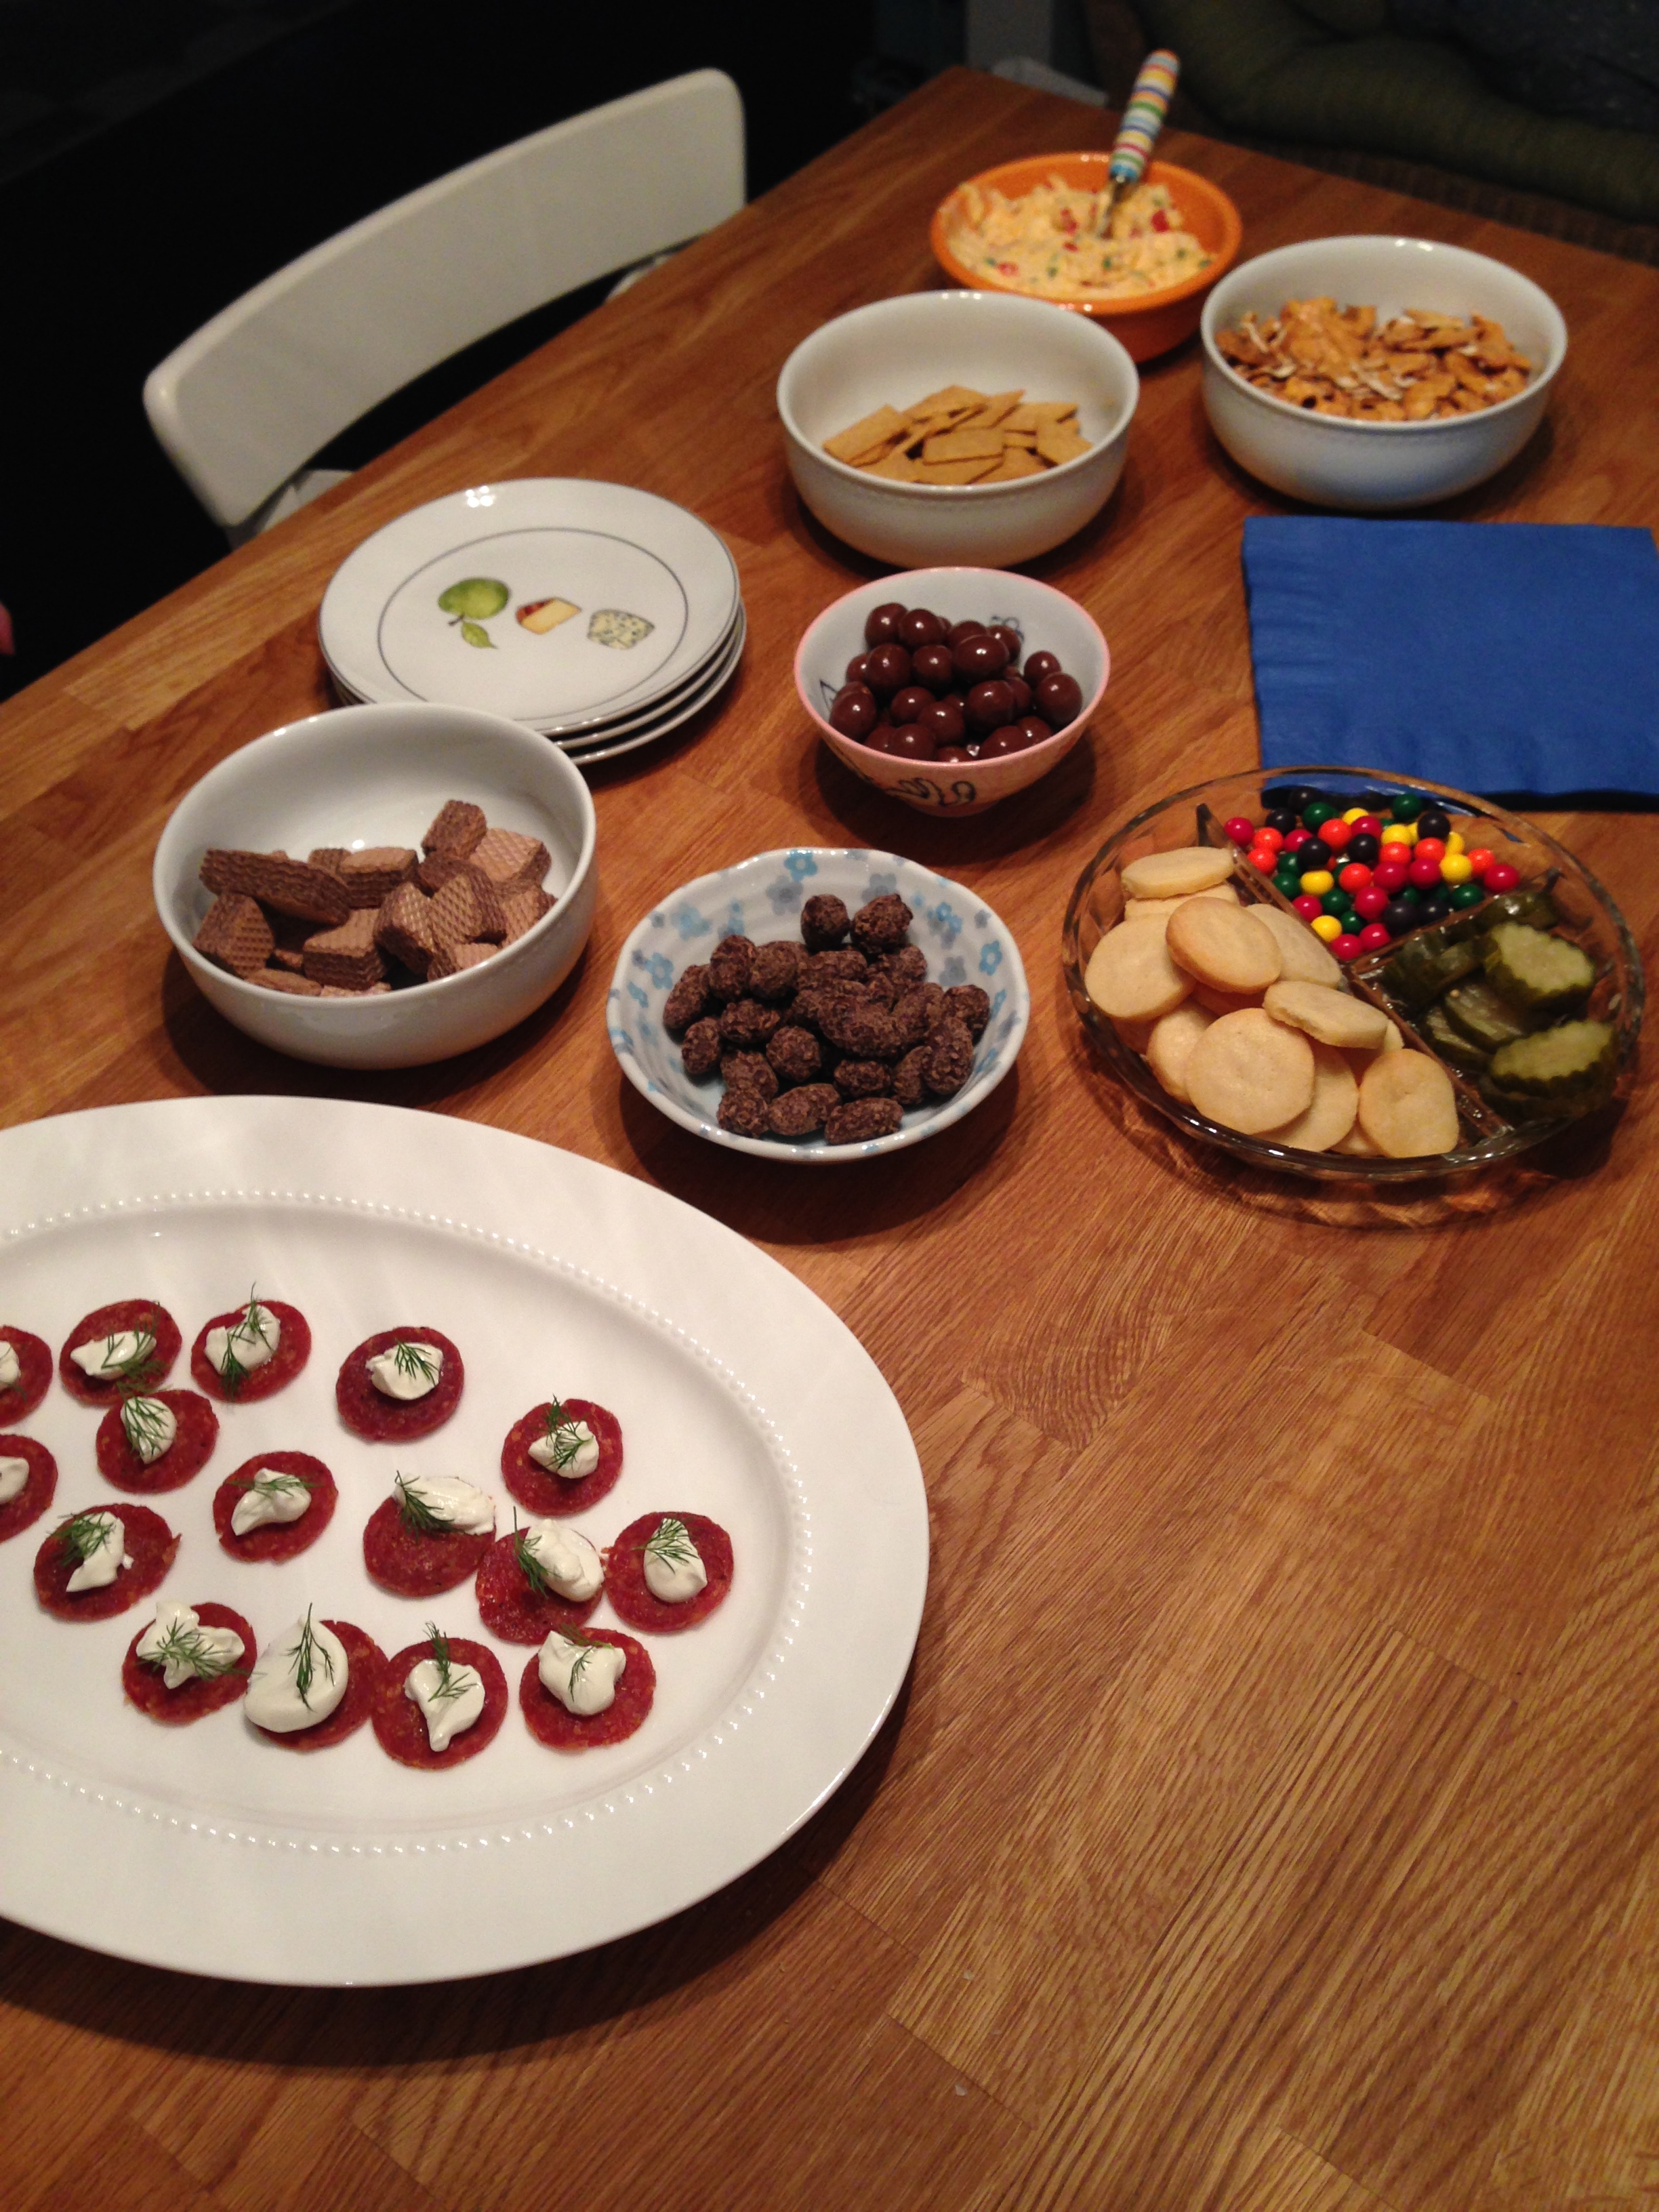 For snacks, I made these cheese crackers and these salami crisps. The cheese crackers were delicious and couldn’t have been simpler. I made the dough early in the afternoon, rolled it into the log and kept it in the fridge. Then, right before the guests came, I sliced the crackers and popped them in the oven. My house smelled delicious and the crackers were amazing right out of the oven.
The sausage crisps were easy too. I used thinly sliced Trader Joe’s Chianti sausage and instead of Giada’s recommended basil, I used dill for topping…I love dill, and I felt like it was more “Russian”.
It was a fun way to welcome back the games and to gear up for two weeks of snow and ice (both on TV and outside…I don’t think our snow is going to melt until April.)
P.S. I really wanted to make these Olympic torch snacks.
P.P.S. For another Olympic party, go here.
More Mail Fun with the Cat Note Template
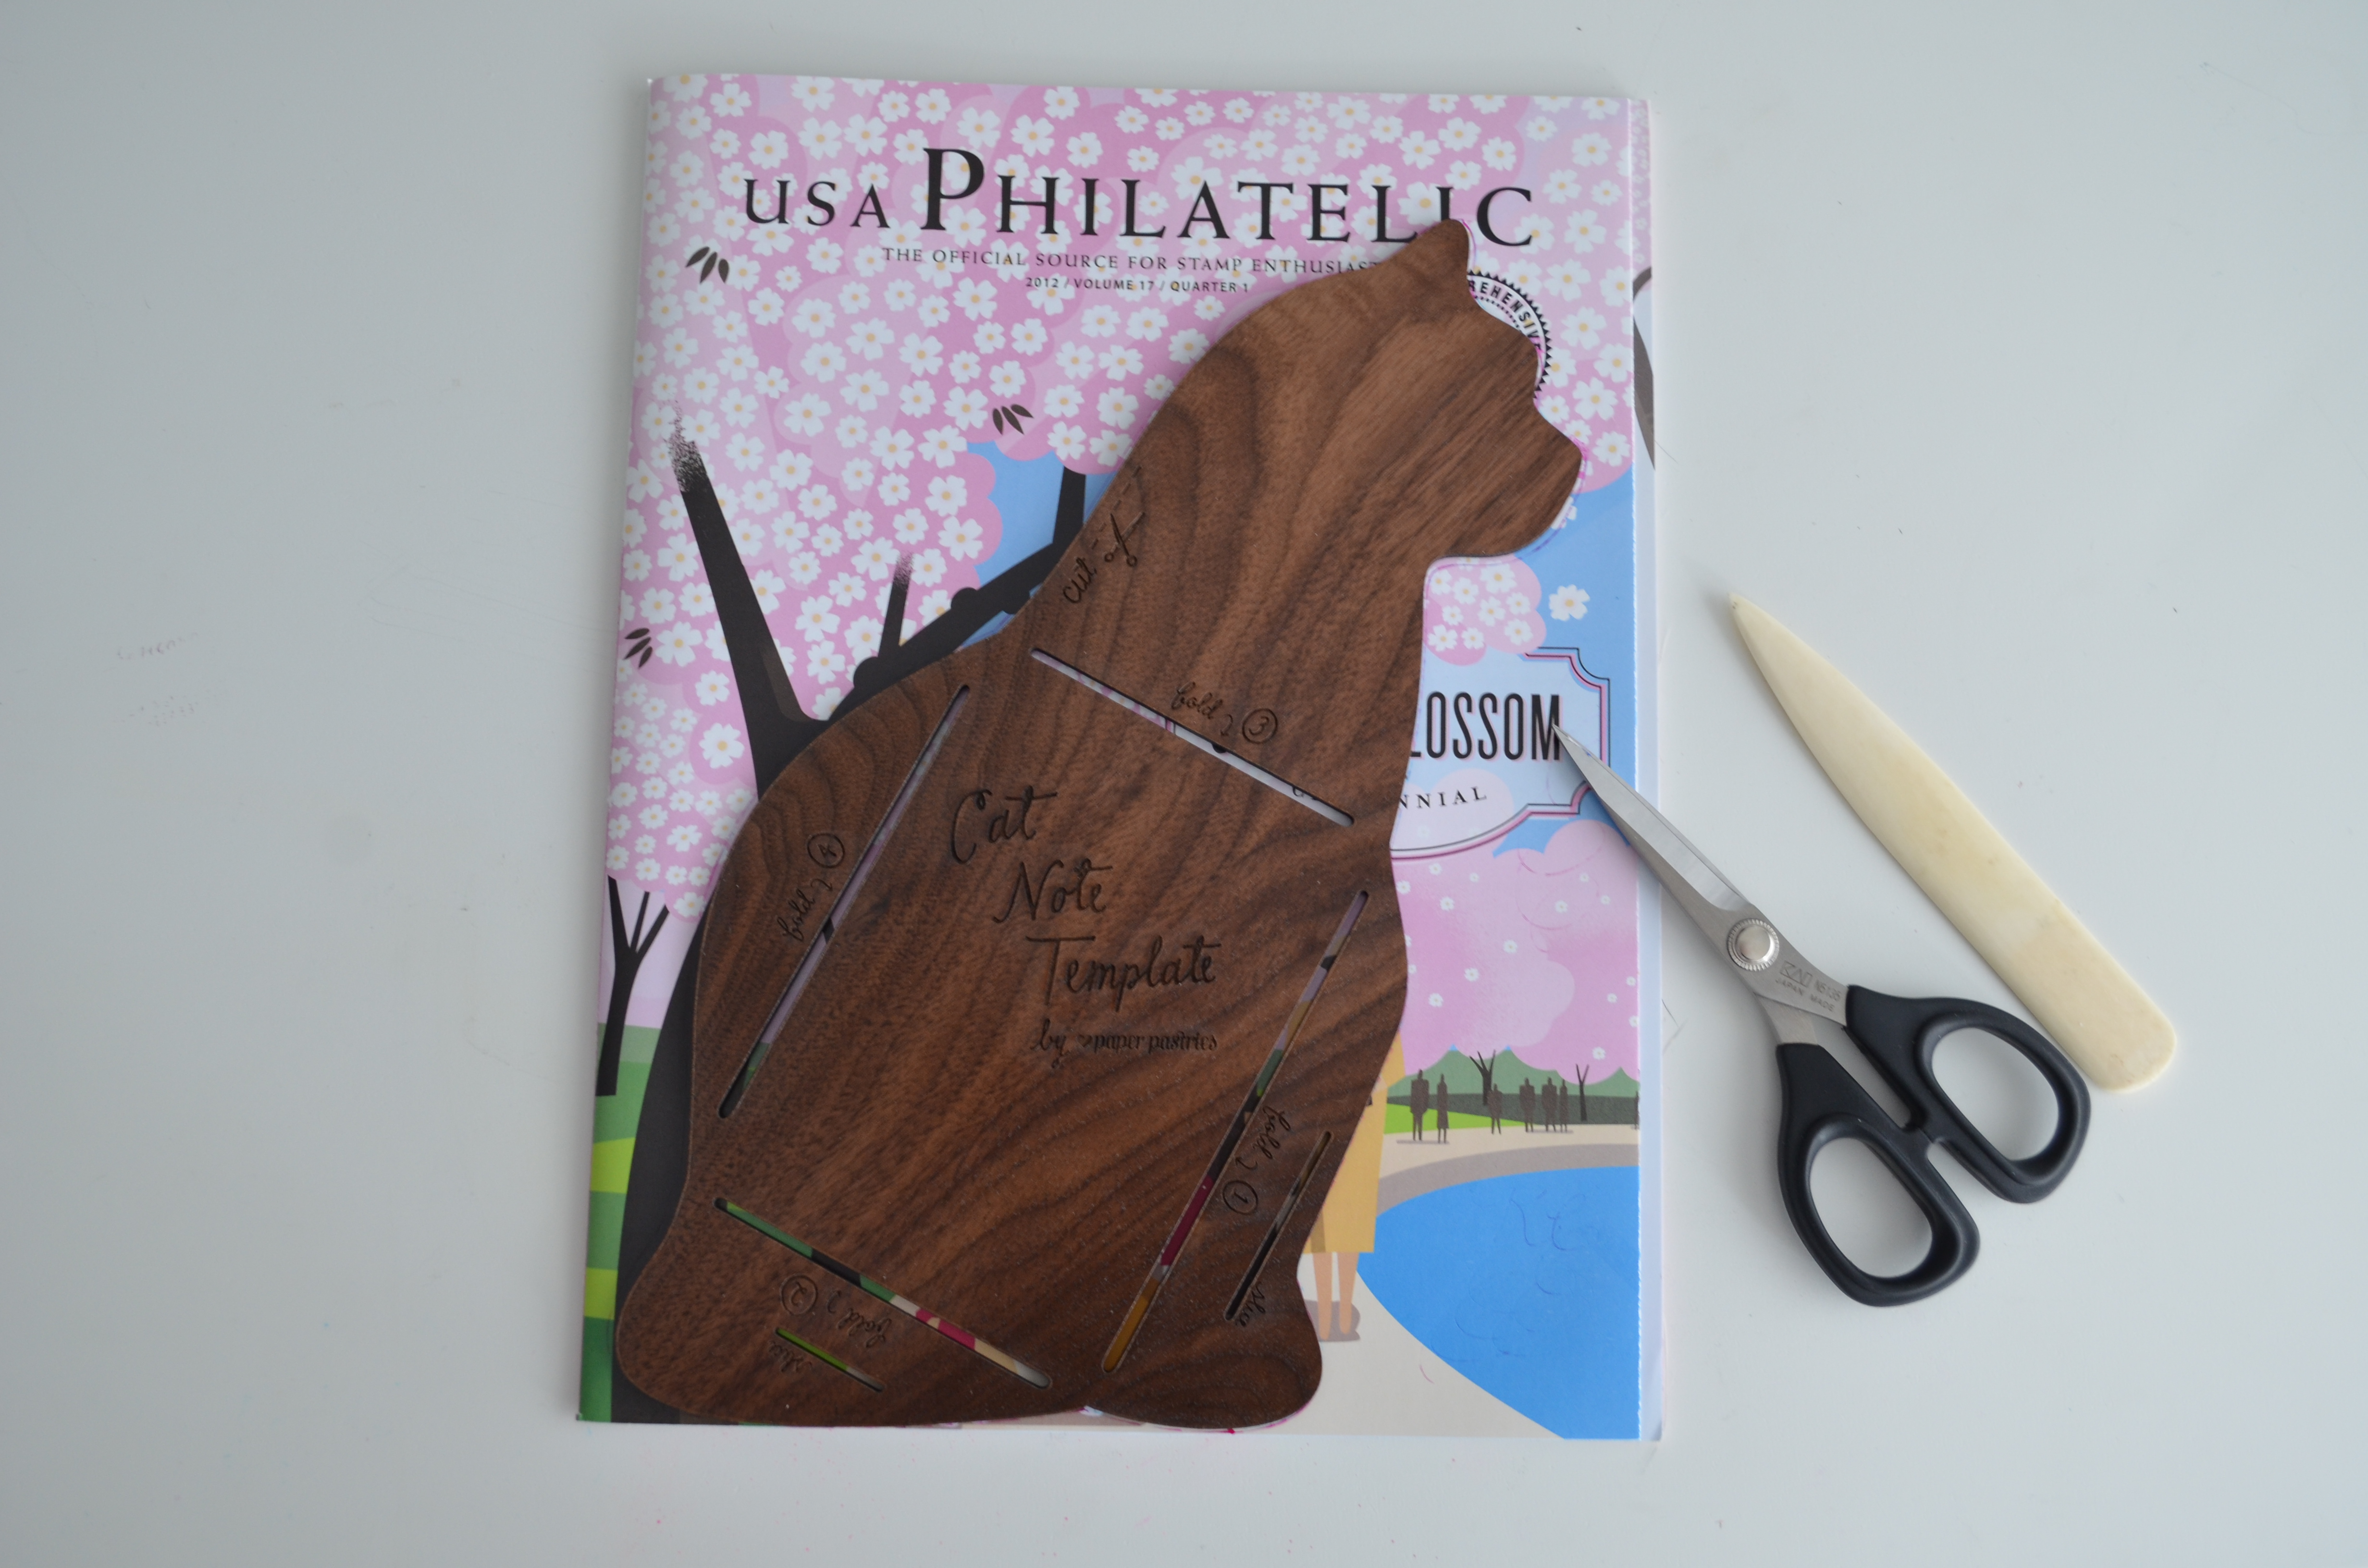 One of my favorite Christmas gifts was this ingenious Cat Note Template from Paper Pastries. It was a gift from Mollie, who knows me well enough to know that cats + letter writing = perfect gifts. I decided to use it for my long-overdue thank you note to Mollie.
Basically, you just trace the template onto any paper of your choice, cut it out, fold it up and it it’s ready to tuck into a 4-bar sized envelope. (Which, at 3 5/8 x 5 1/8, is almost the smallest mailable envelope size.)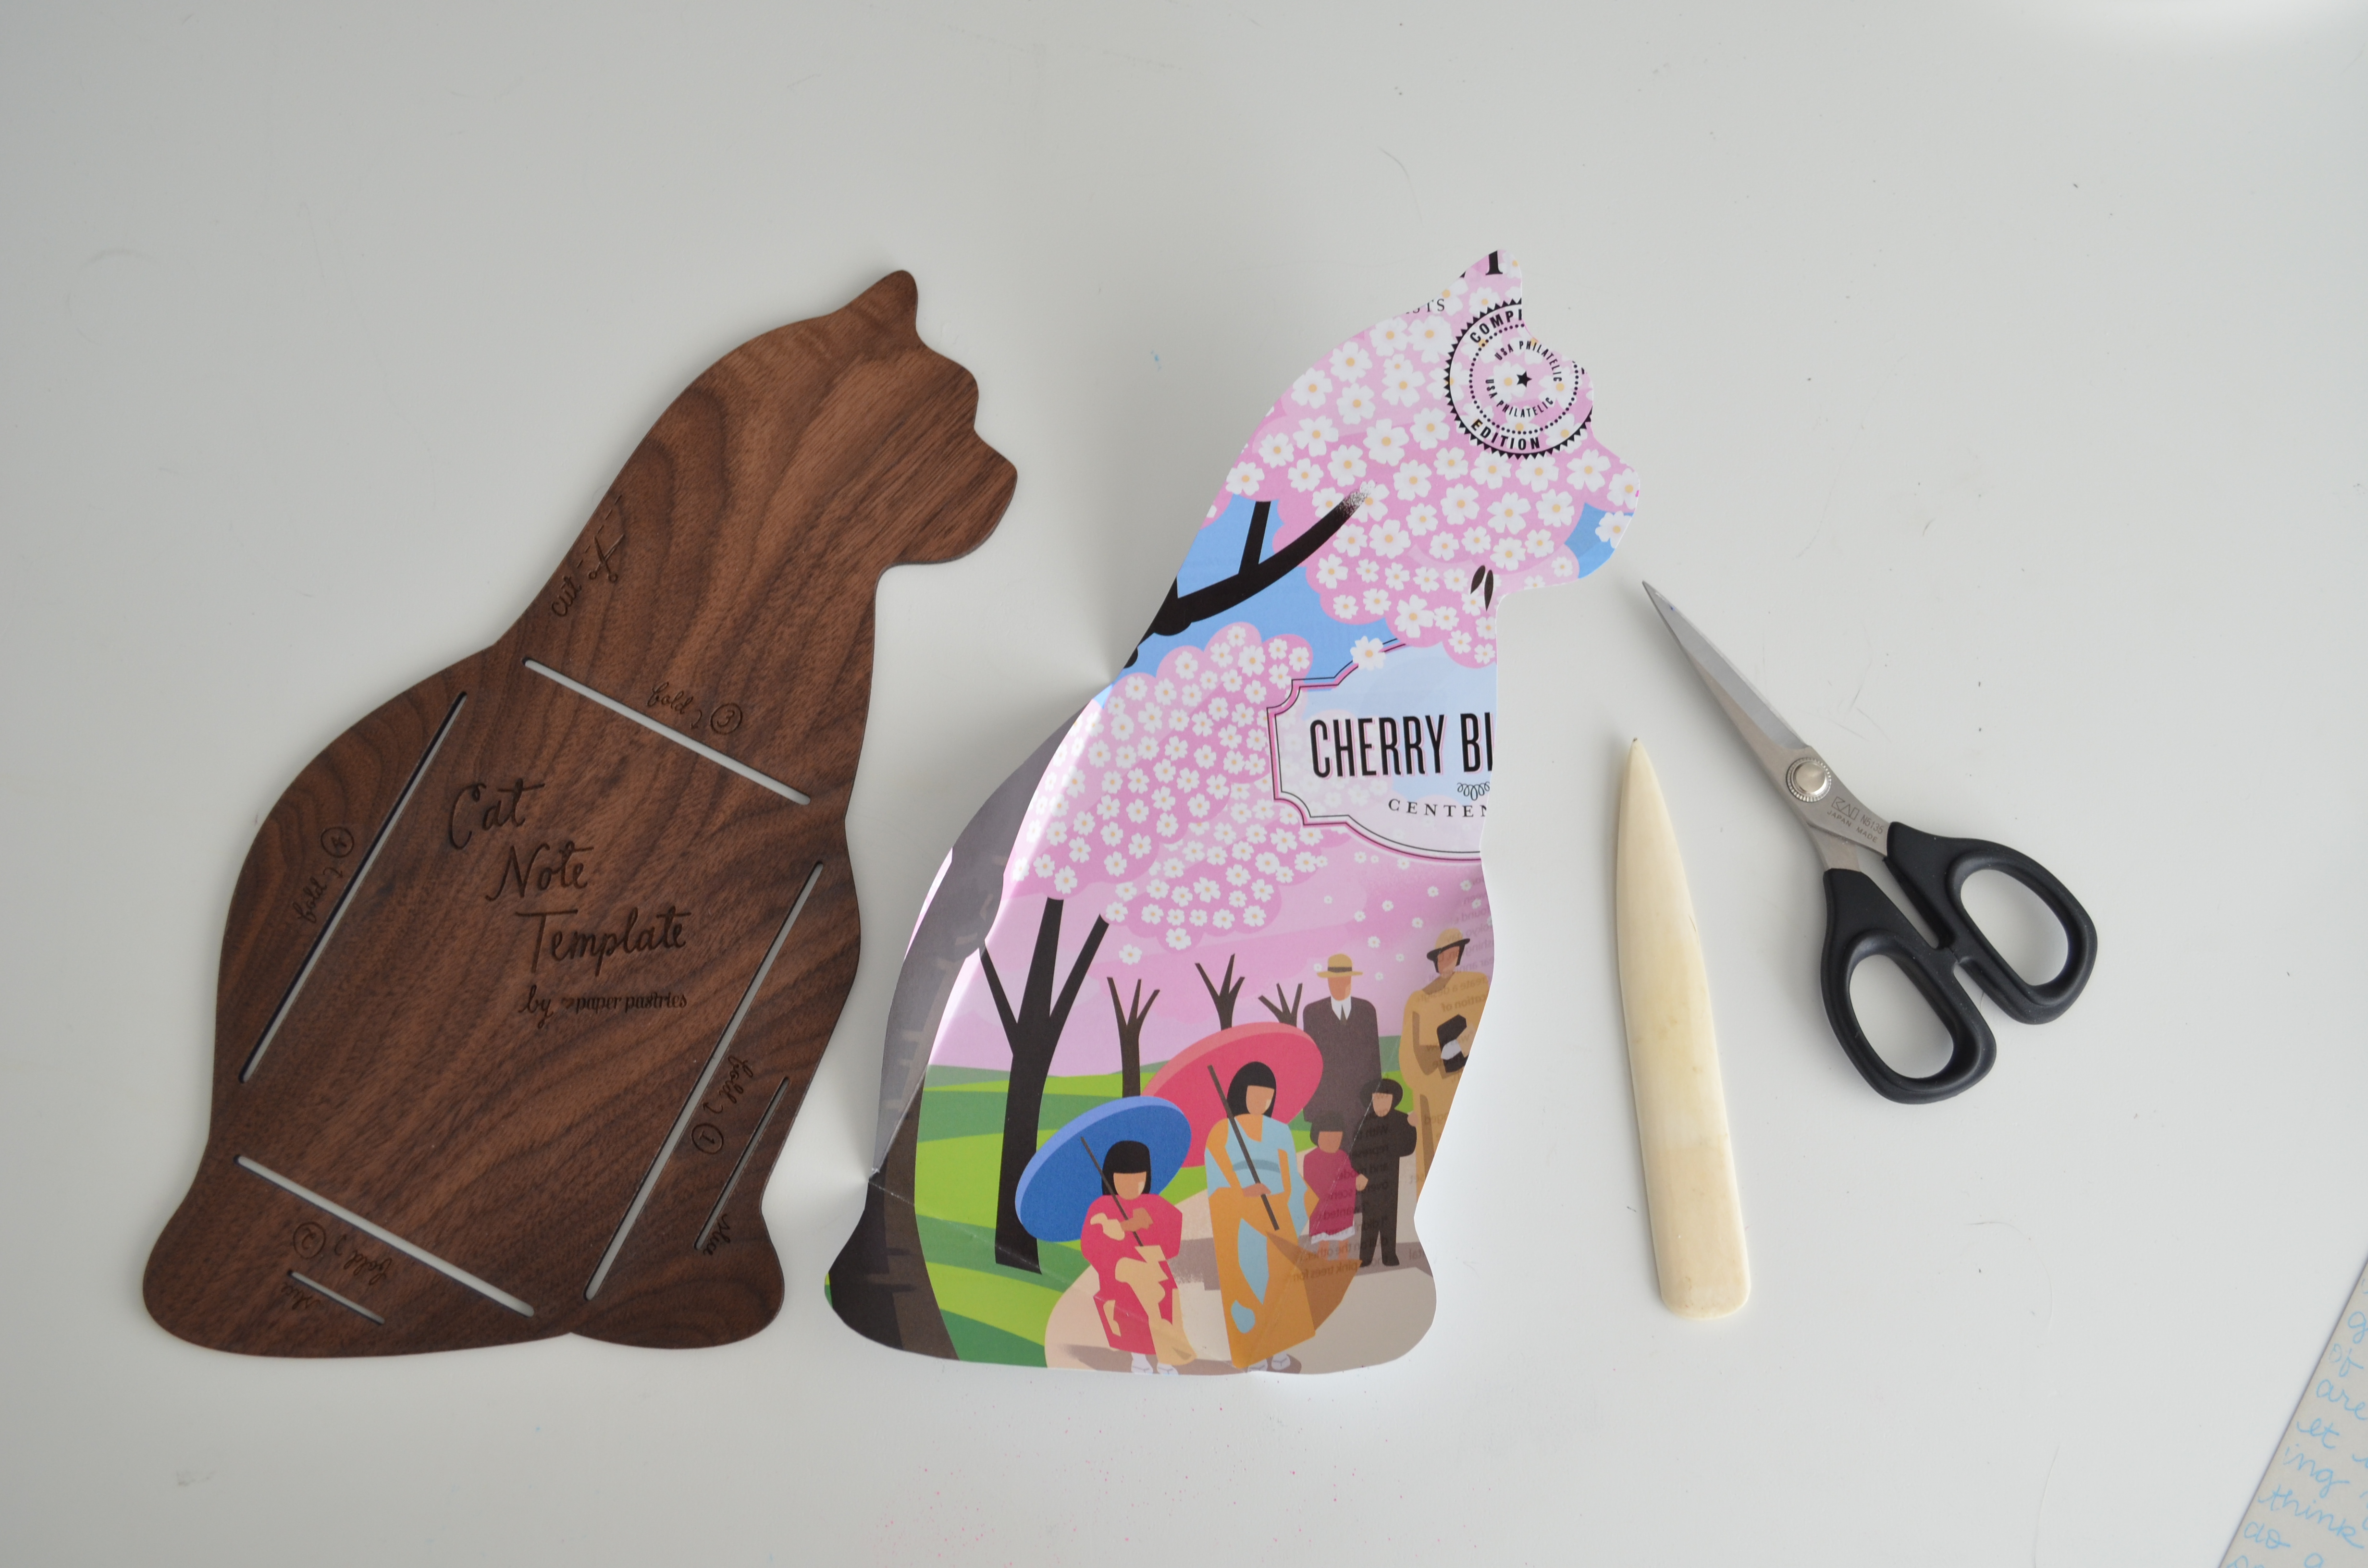
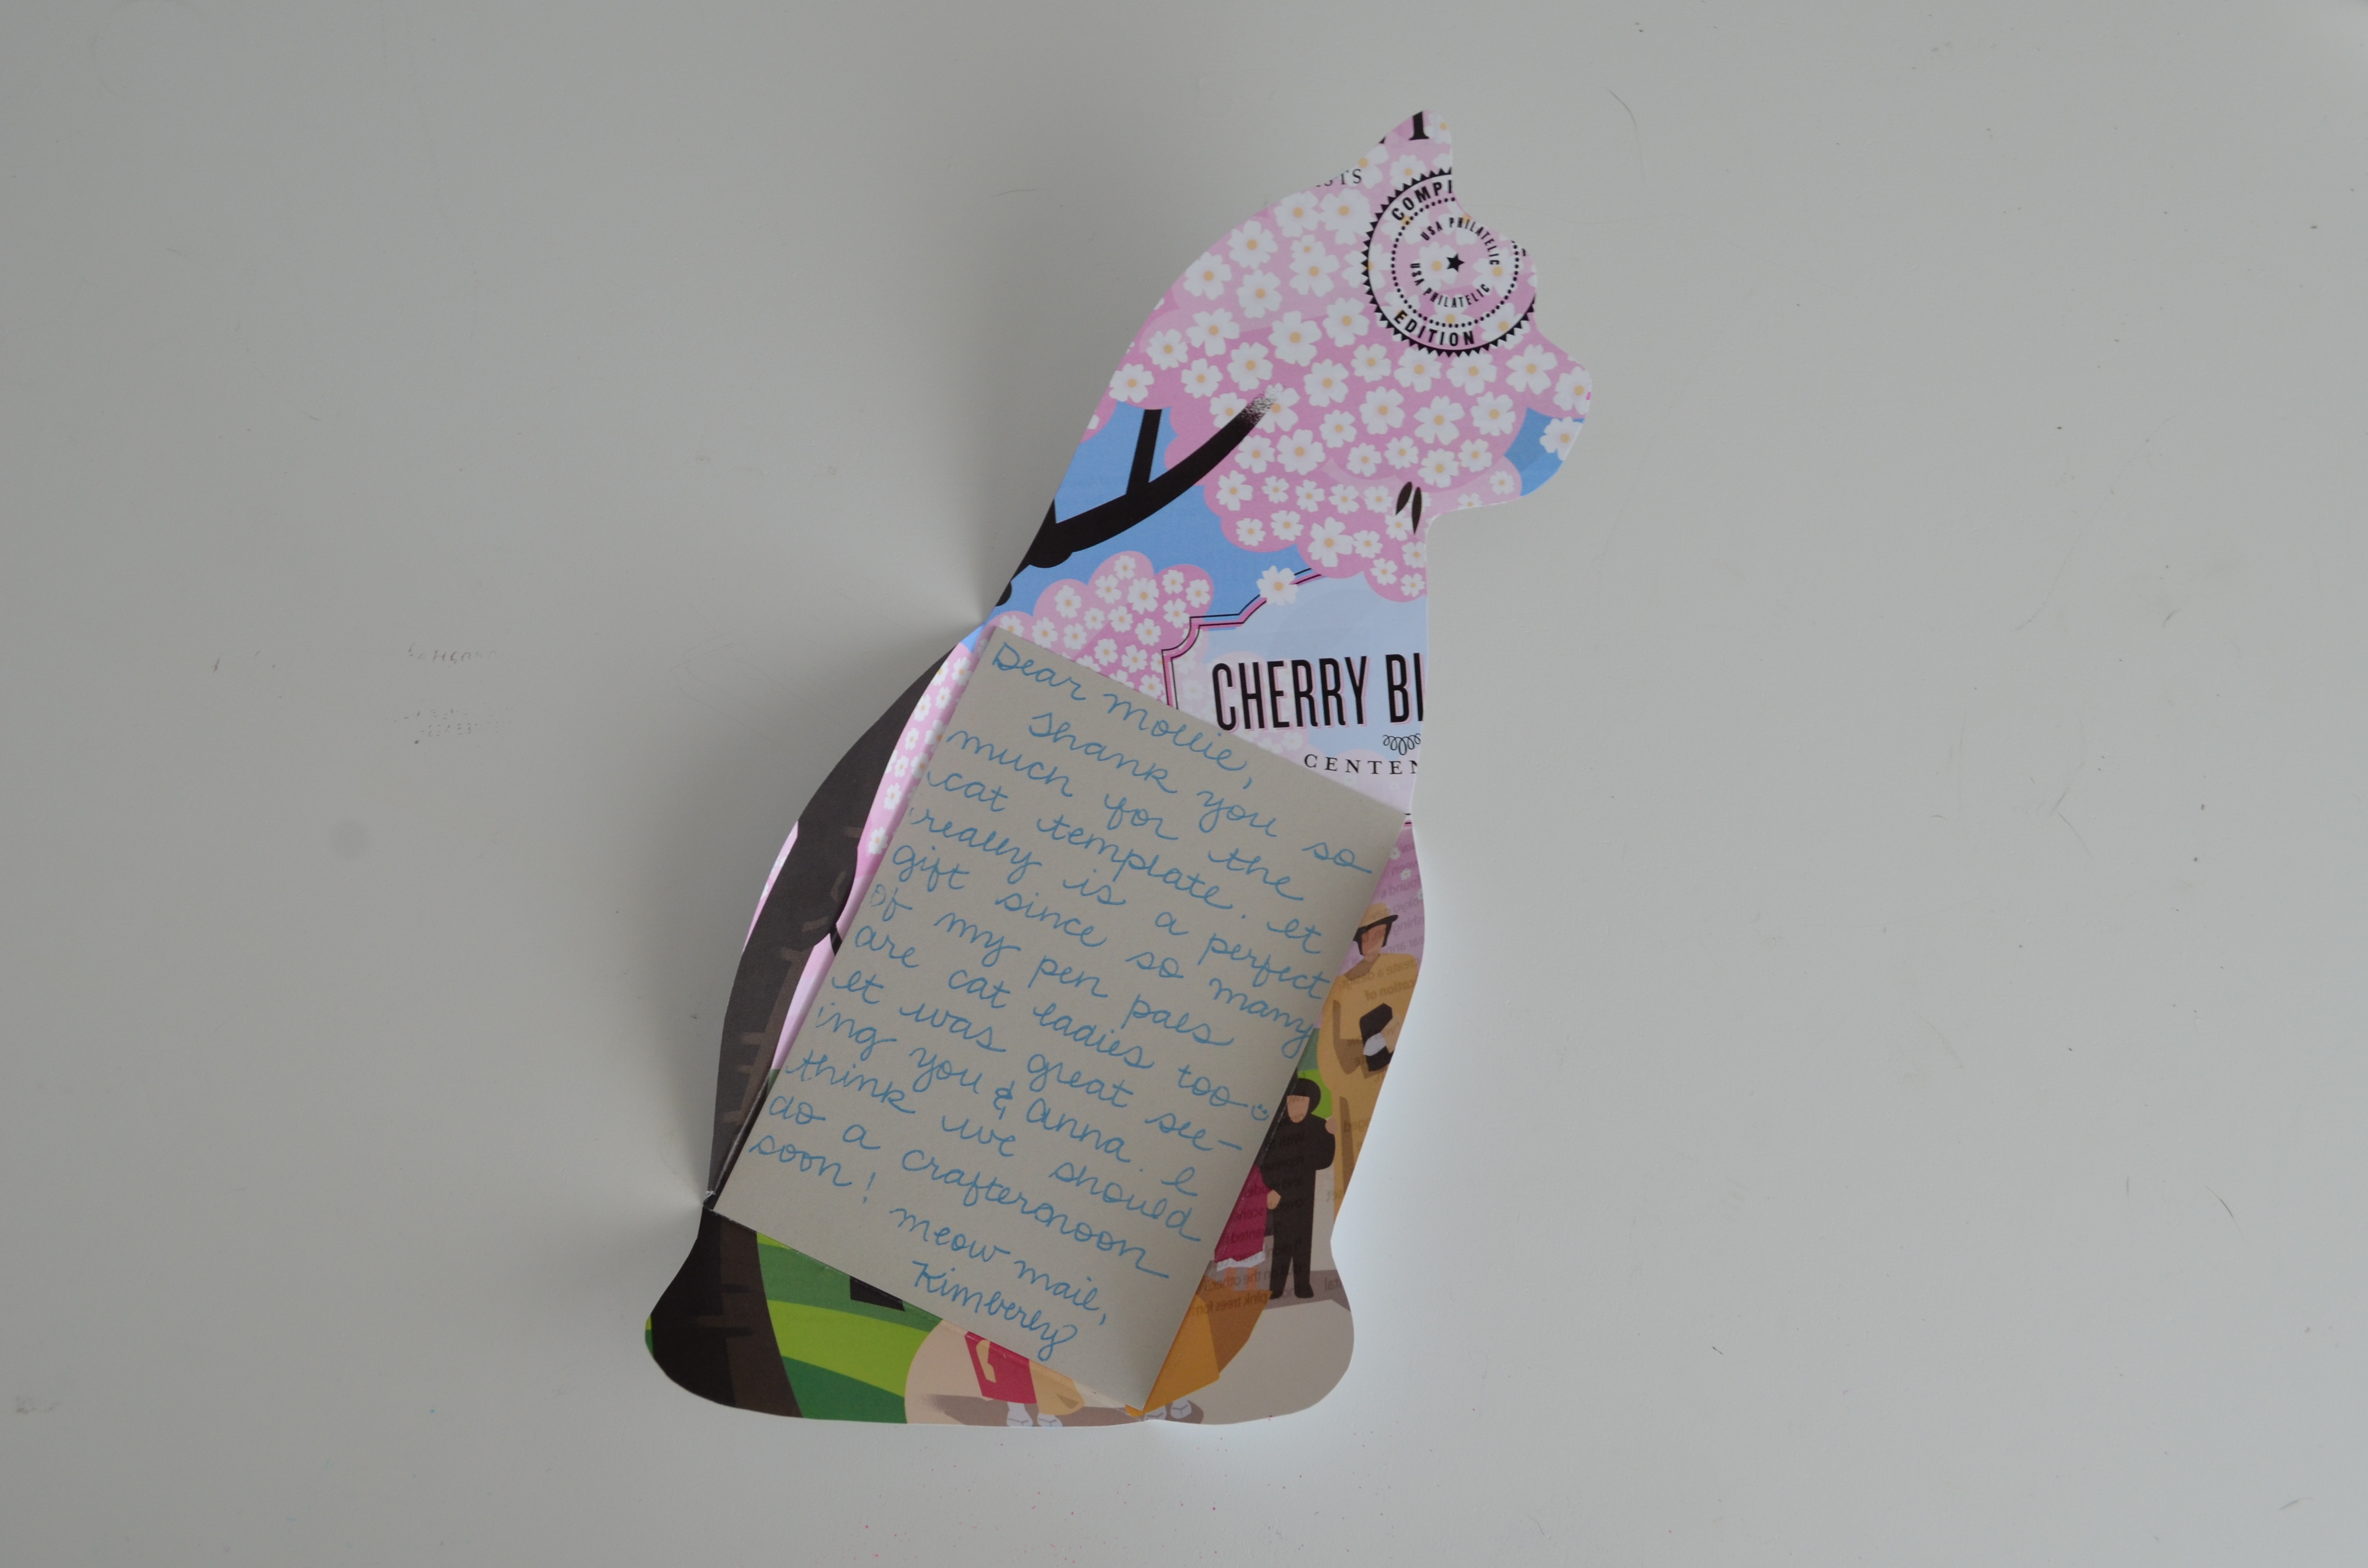
You can use the cat template on plain paper and write your letter directly onto it, but I decided to use the template to make an “inner envelope”. I used an old USA Philatelic magazine as my template paper and then I wrote my note on a 4-bar flat card (from Paper Source). 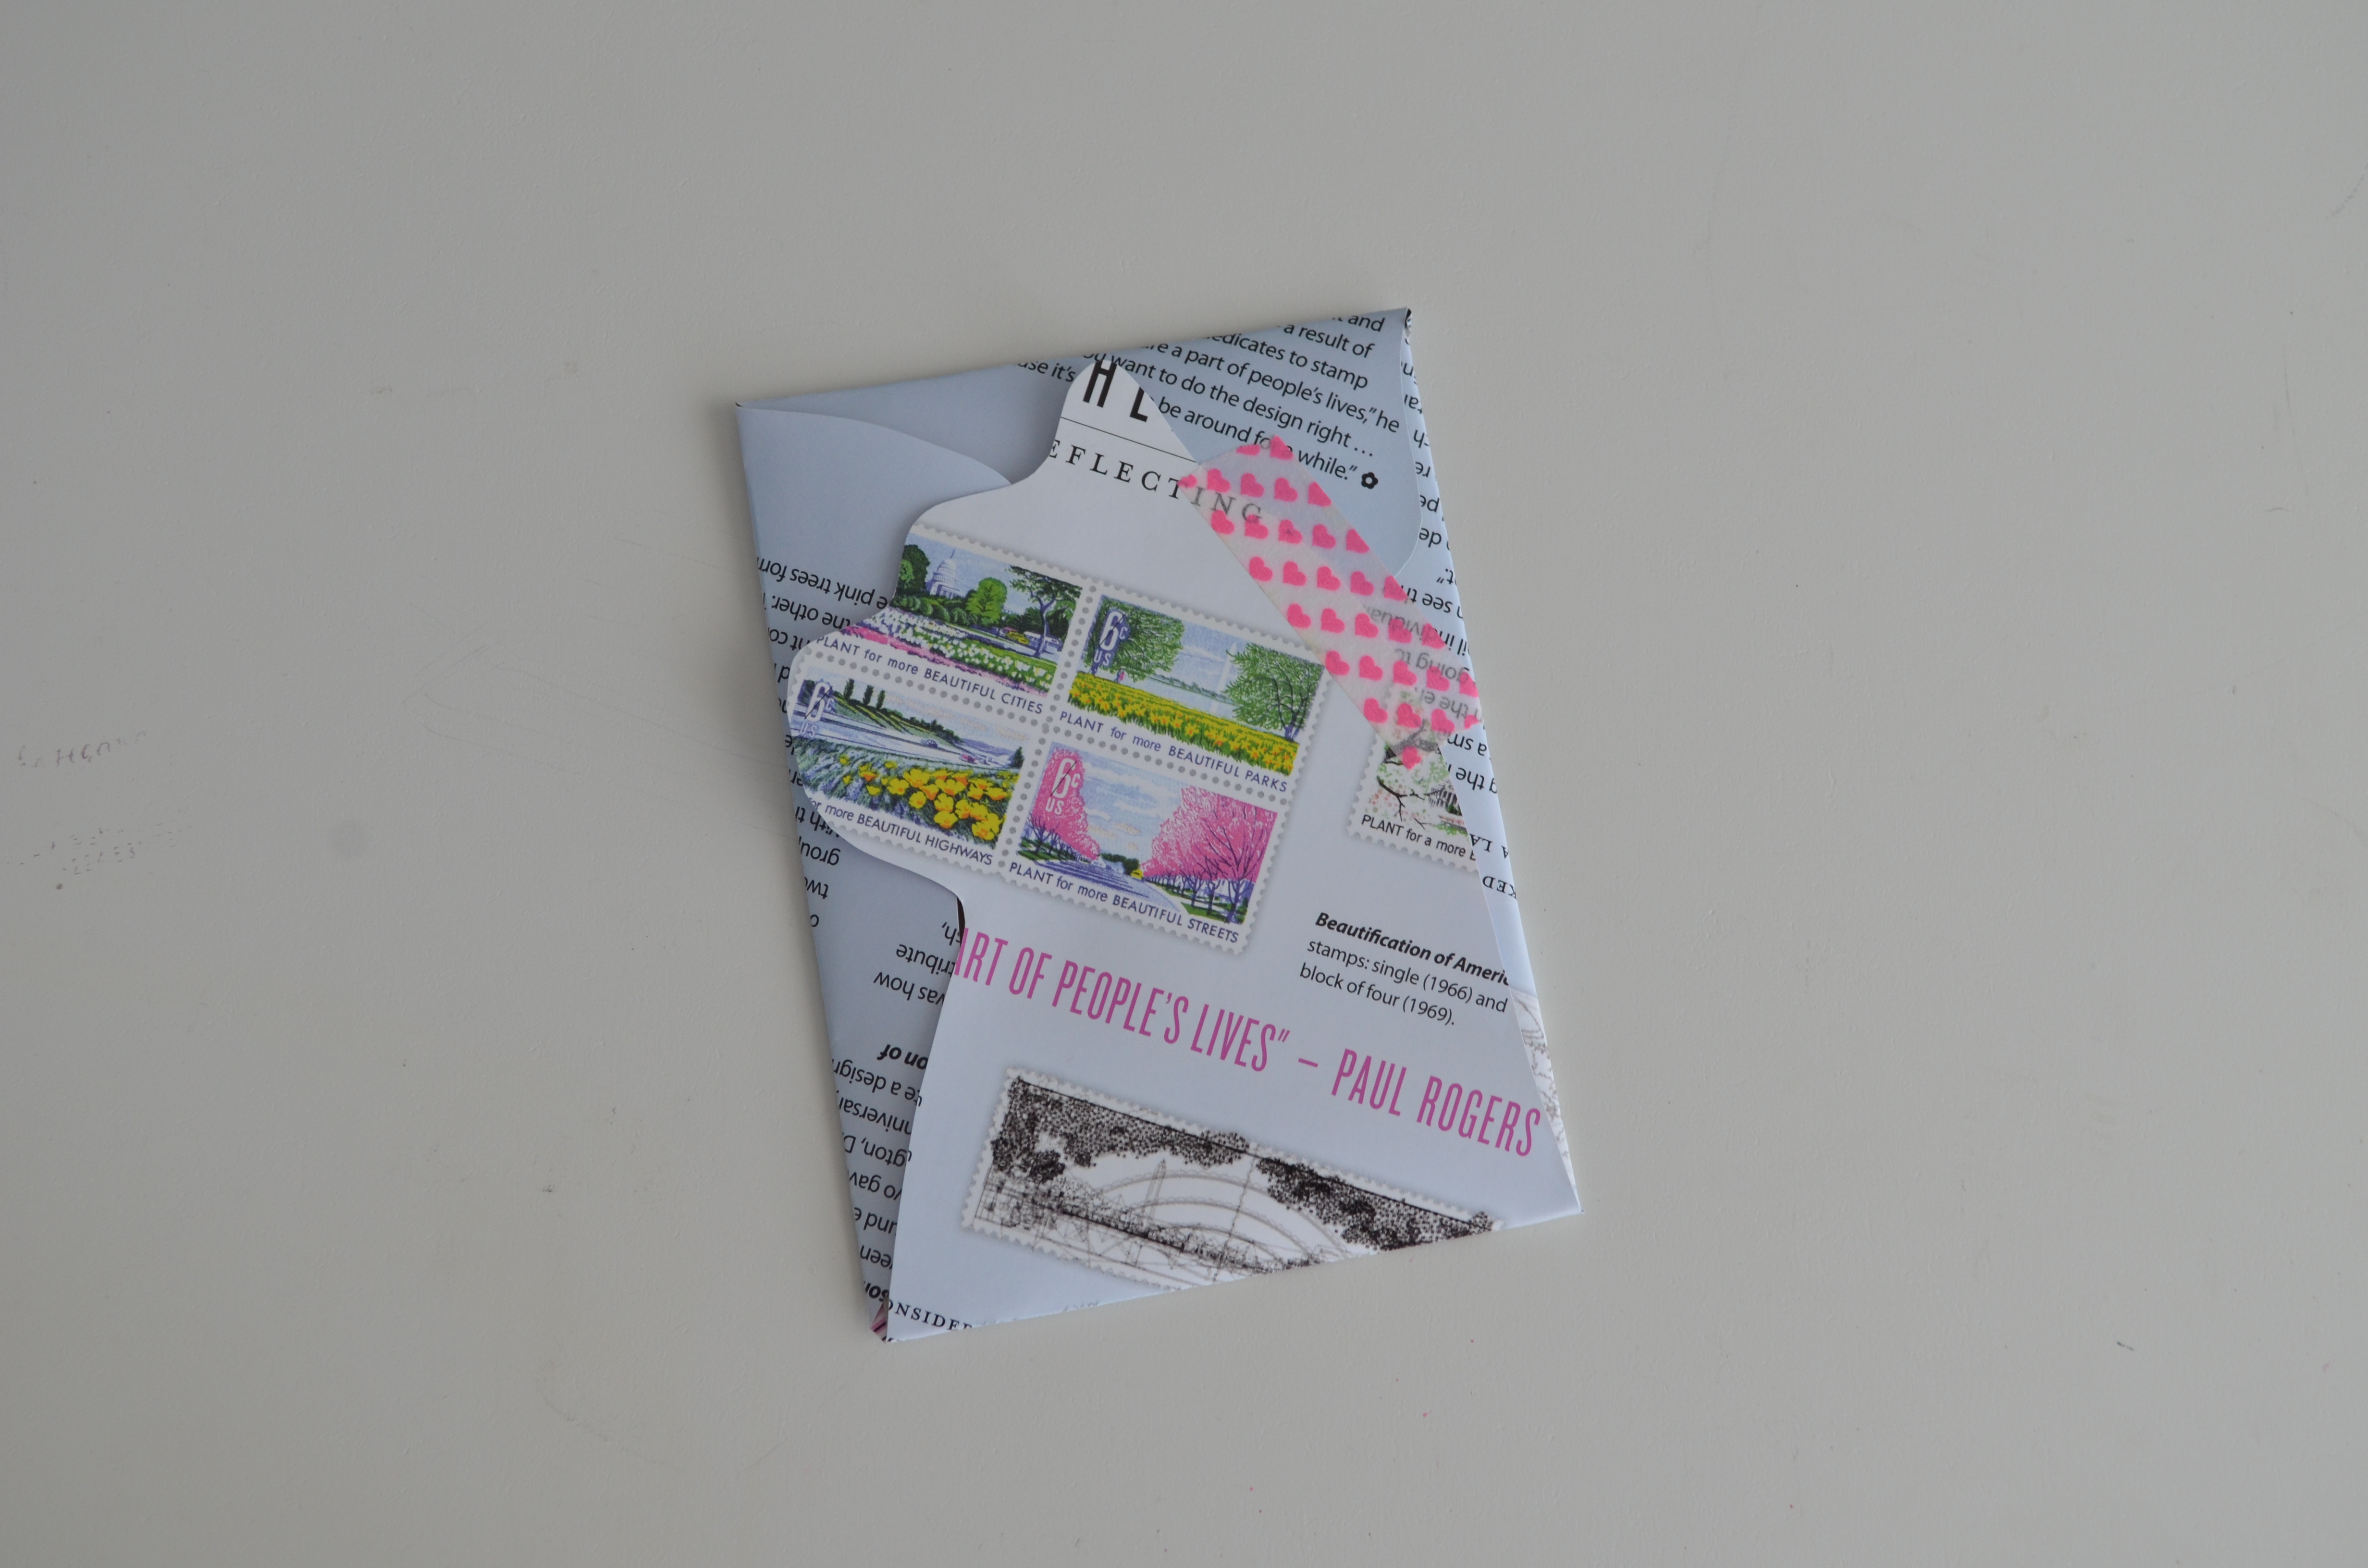 I used my bone folder (more on this tool, soon!) to help crease the edges as I folded the template up with the card inside and I used a piece of washi tape to hold it together. The template comes with marks to make slits so you can tuck the folds into the slits to hold without the help of washi tape, but I like using up some of my washi stash, inch by inch. (You can see the “slit indicators” on the right and bottom sides of the template.)
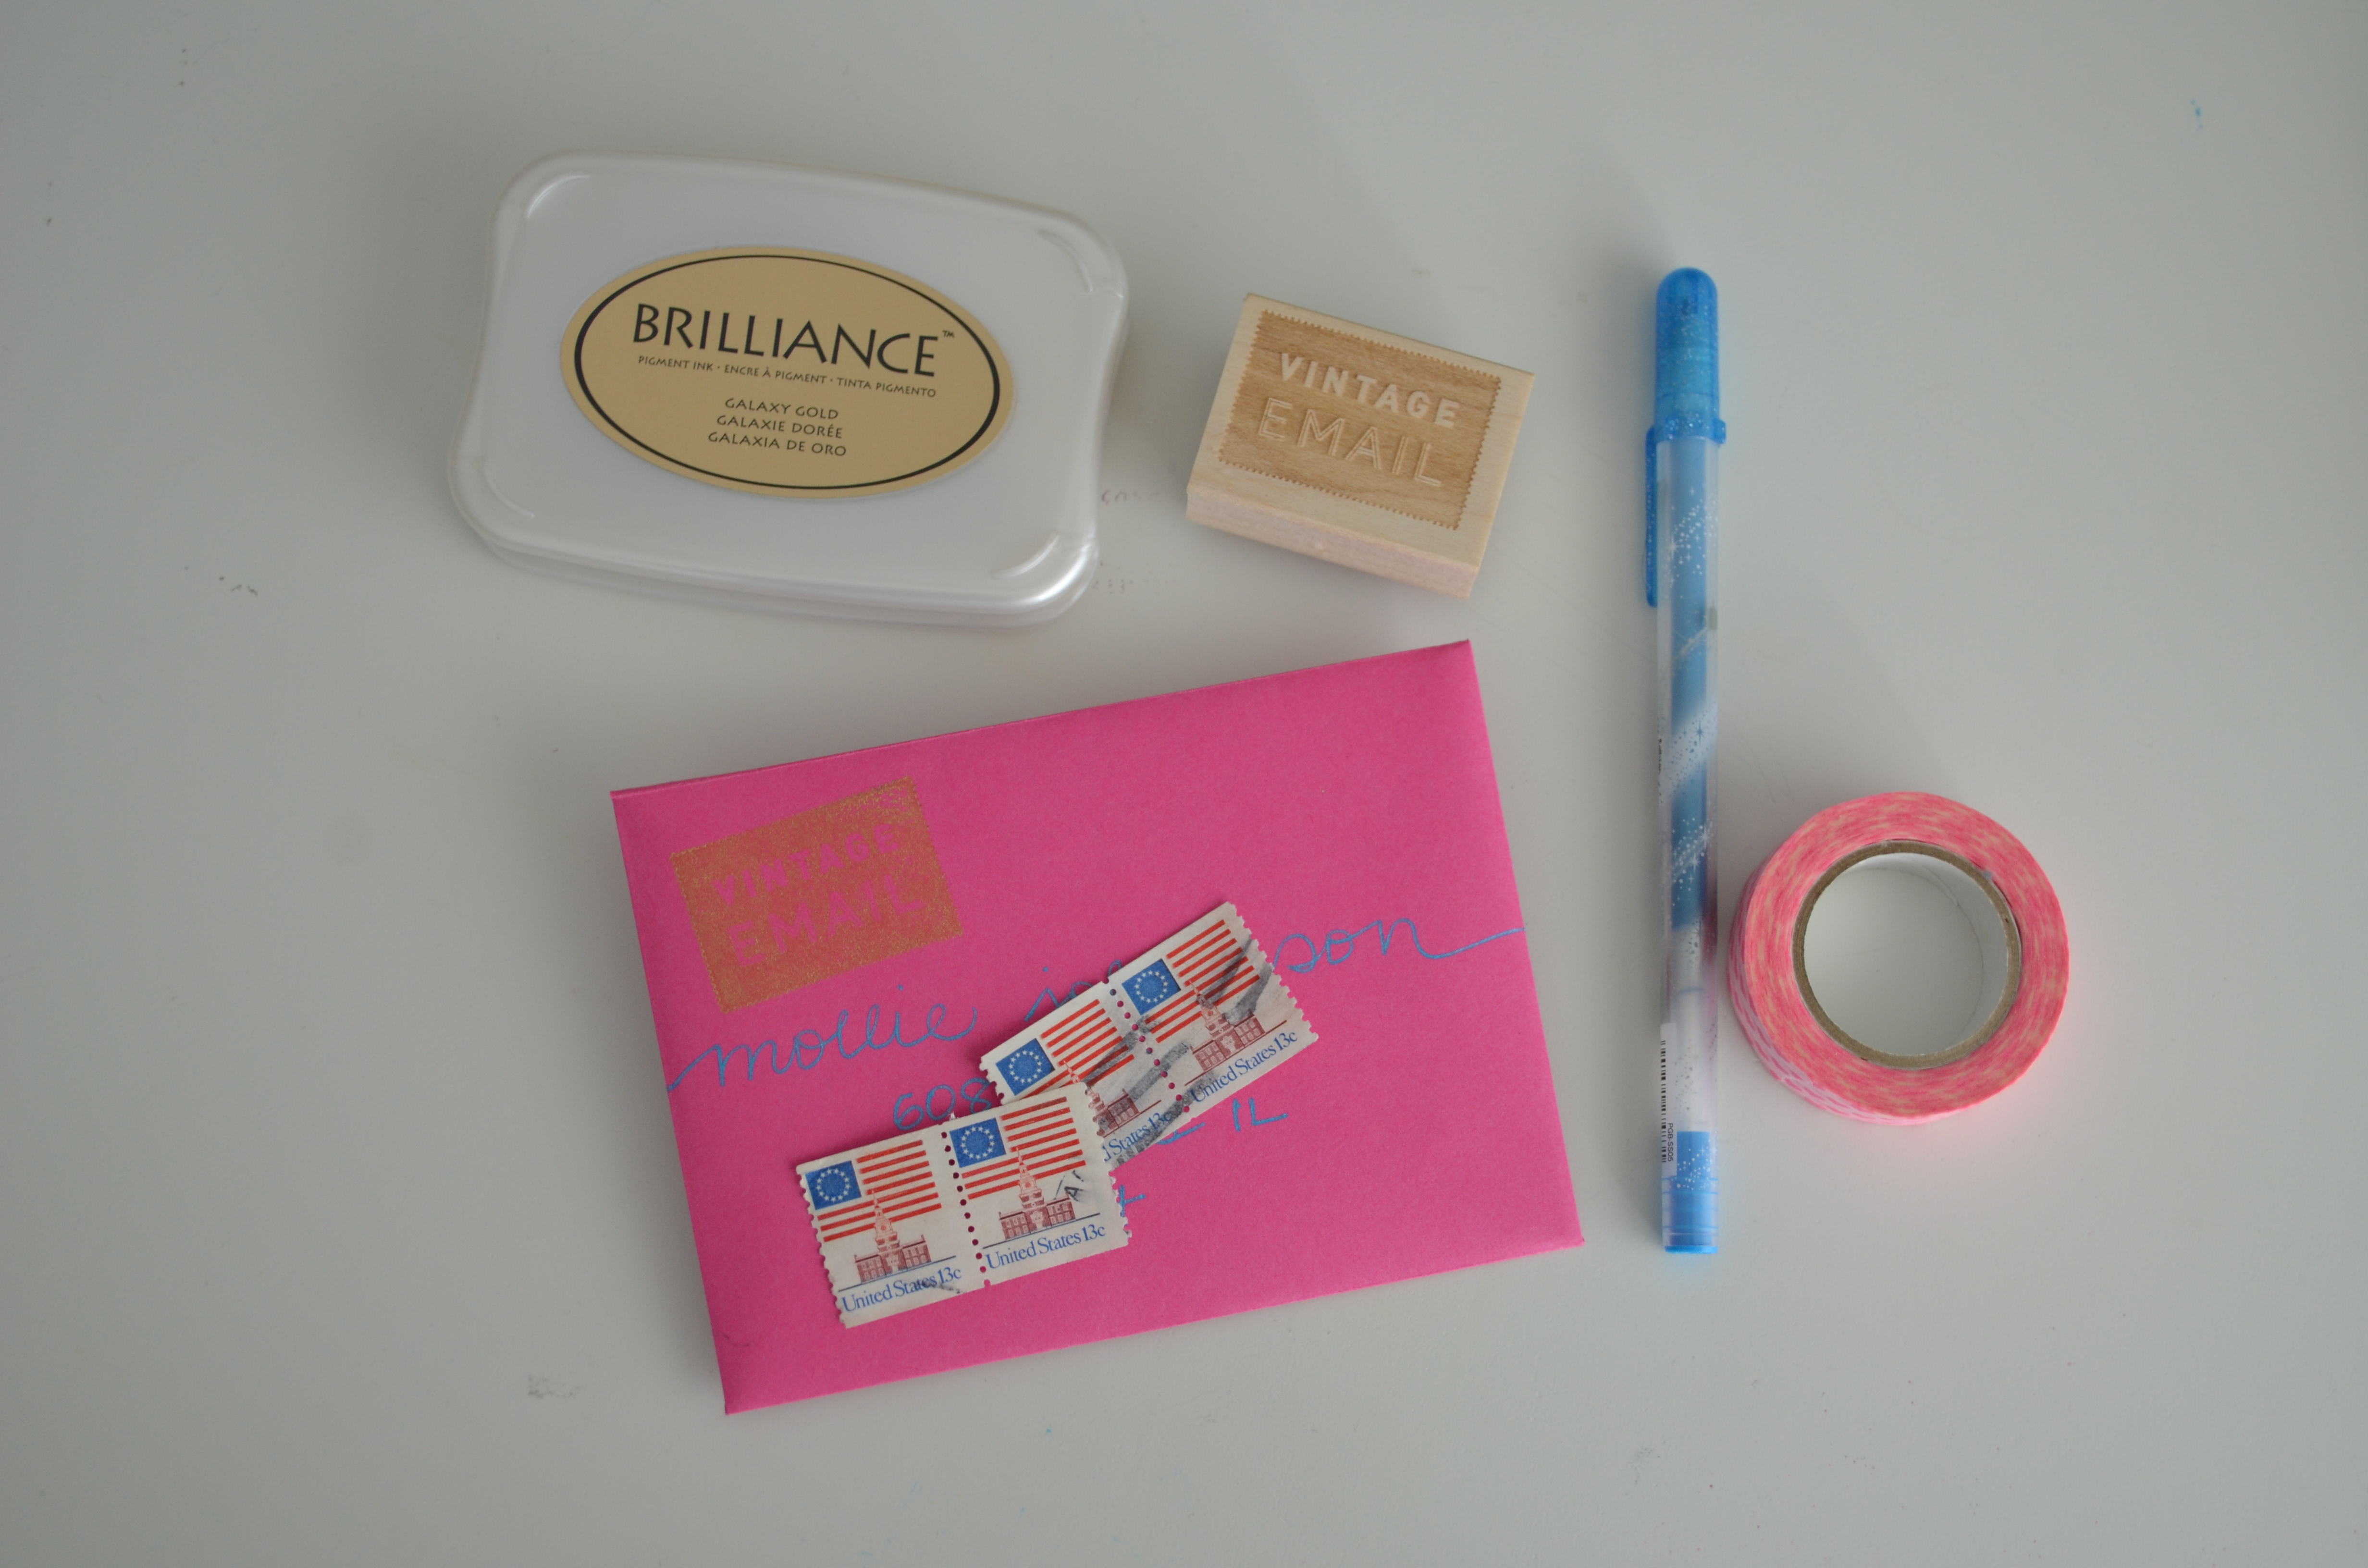 I tucked the kitty in a fuchsia envelope, used my new Vintage Email stamp (clearer picture below…gold is hard to photograph!) and called it done. (Unfortunately, I didn’t get a picture of my corresponding cherry blossom postage stamp before I dropped the thank you in the mailbox.)
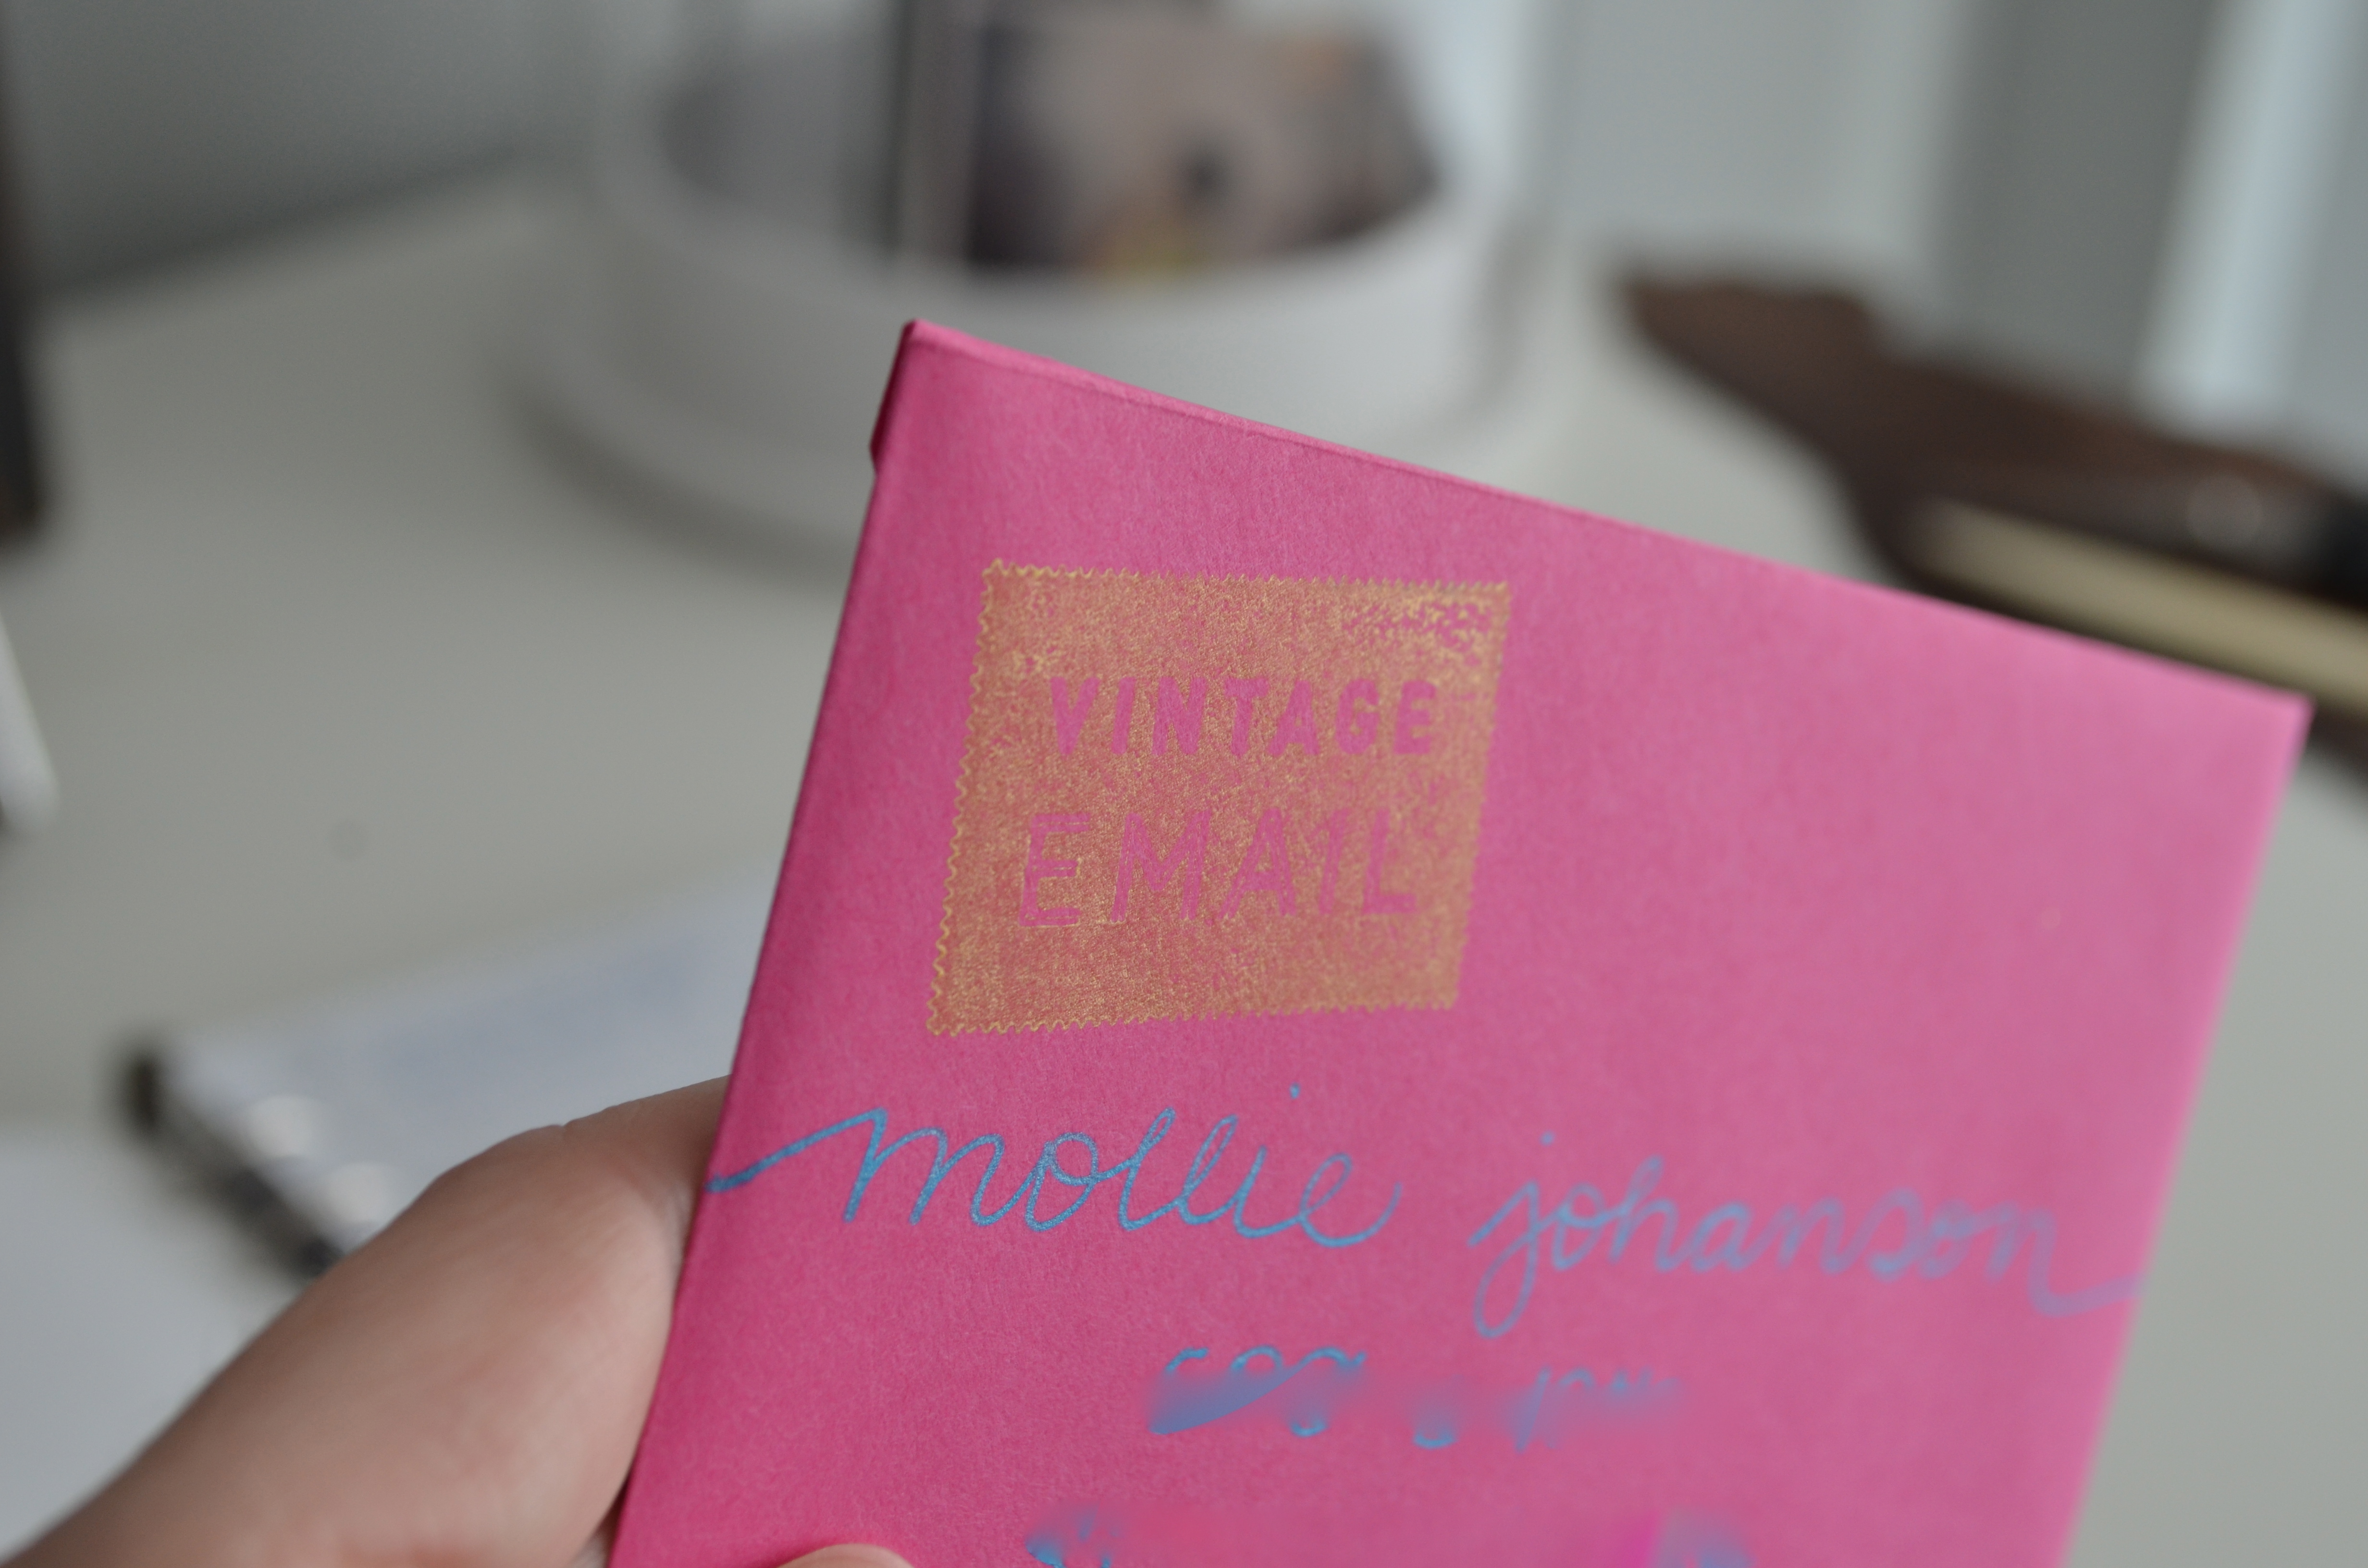 I’m looking forward to creating more cat-themed mail soon!
