Tag Archives: diy

Hasegawa Happy Hour Menu

Hasegawa Happy Hour menu cover
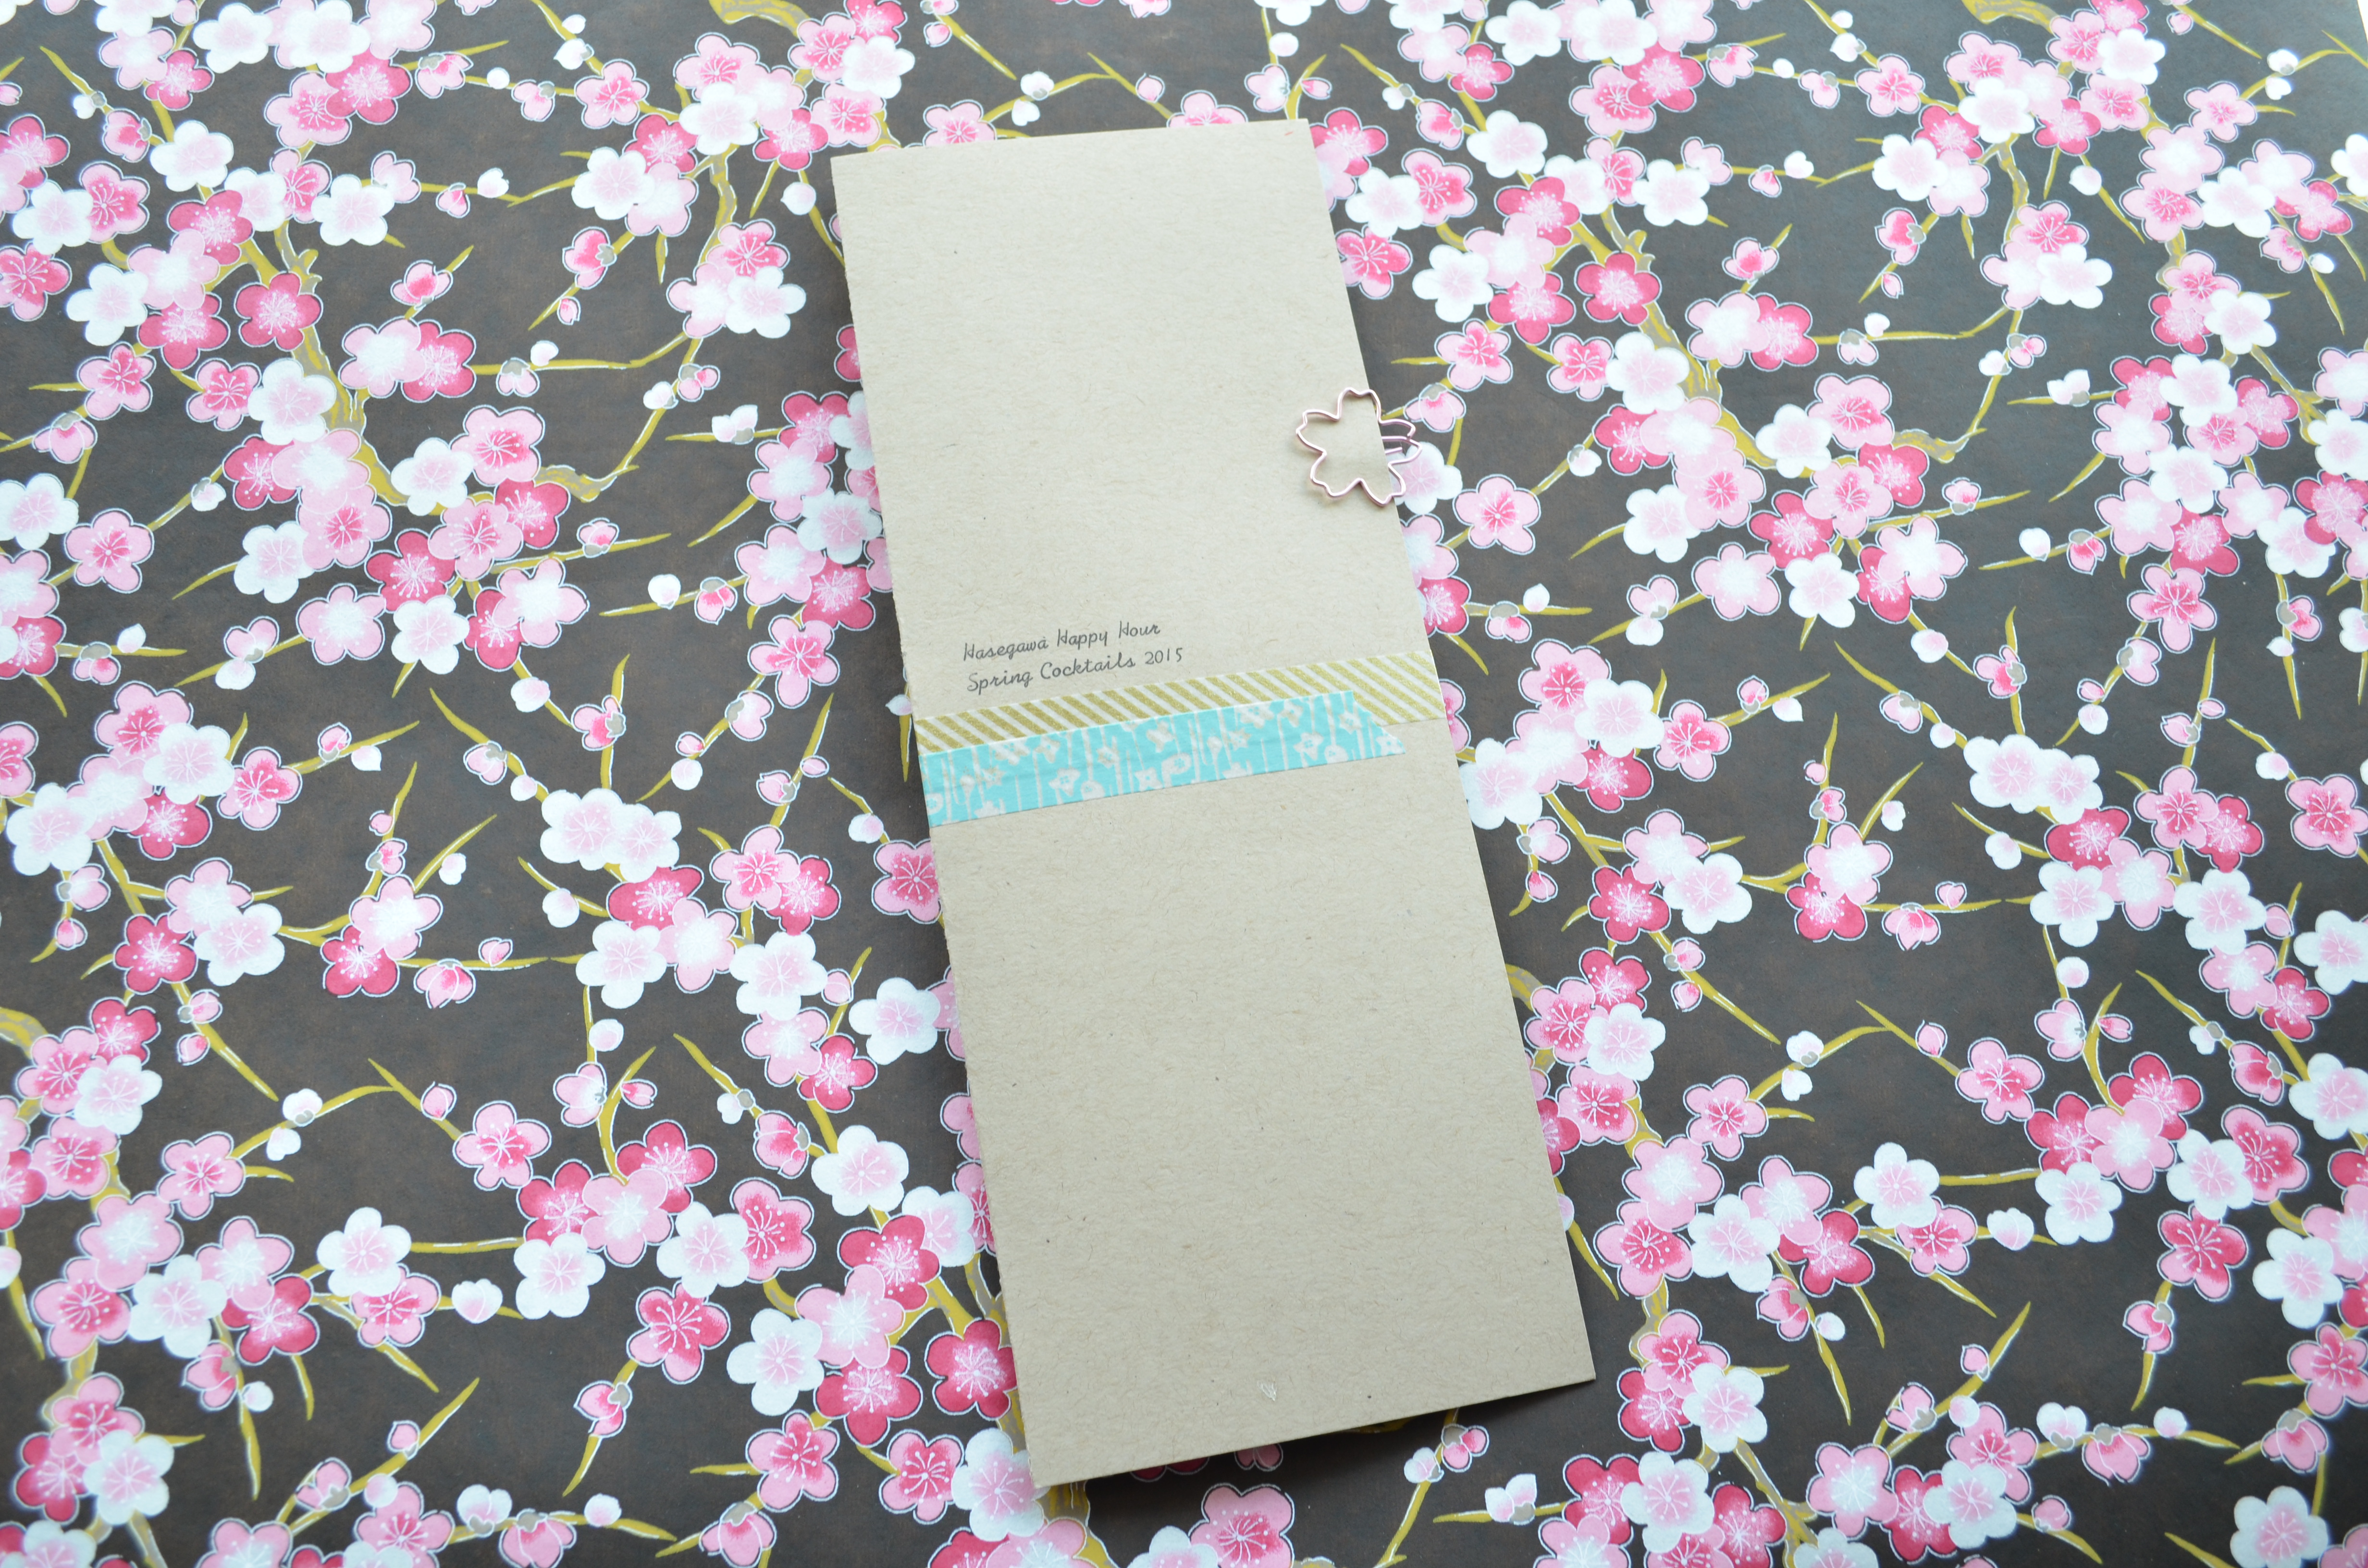
In a sign that I *may* have too much time on my hands (or that I was avoiding doing something productive), I typed up a menu for our Hasegawa Happy Hours. And when I say “typed” I mean typed on the typewriter because that’s how I roll. I know a menu seems weird and excessive, but honestly, if I didn’t have a set cocktail planned for our HHH guests, I was looking through my archives for suggestions. This way, I have all of my favorites in one place. Hasegawa Happy Hour menu open
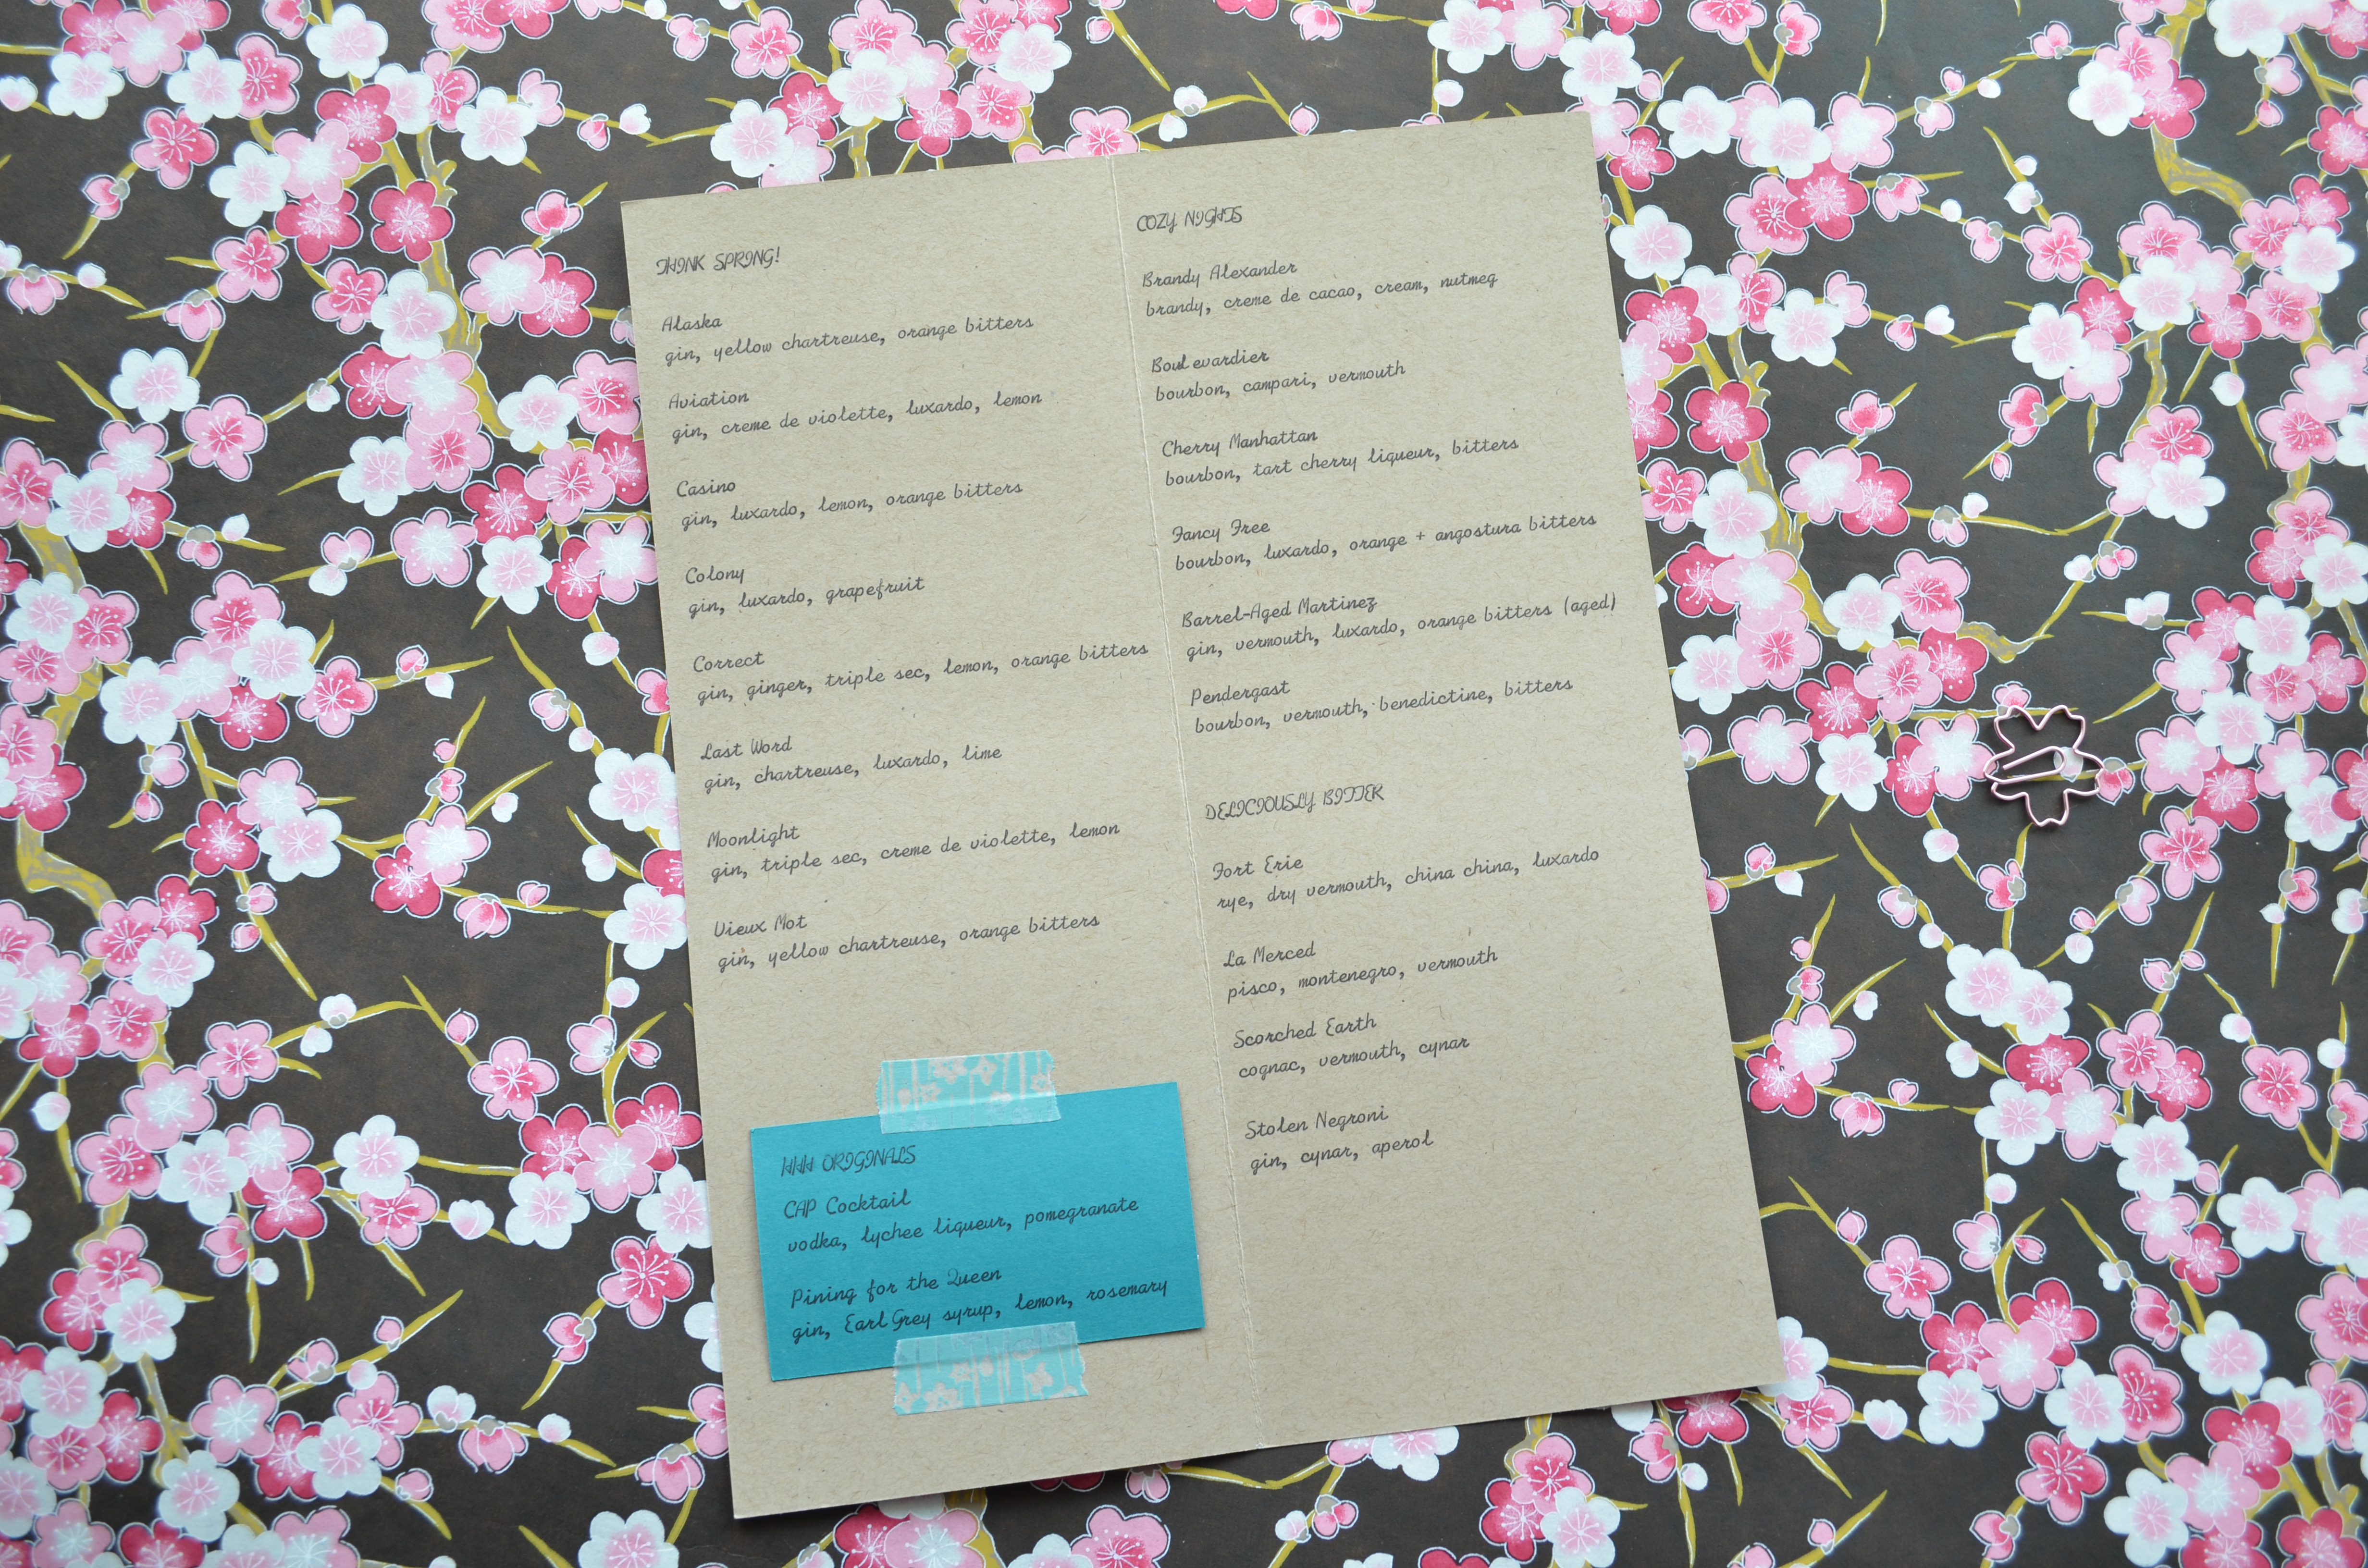
I typed the menu on a piece of 8.5×11 card stock scored and folded the long way. It’s very simply “formatted” since it was done on the typewriter and it’s spring-centric, which means I can type up another one for summer (ooh, for balcony cocktails! I can’t wait!) Hasegawa Happy Hour menu 1I have a section for “Think Spring” cocktails, which are coincidentally all gin-based. (Eagle eyes will notice that I messed up on the Vieux Mot and typed the wrong ingredients. Womp, womp.)Hasegawa Happy Hour menu 2
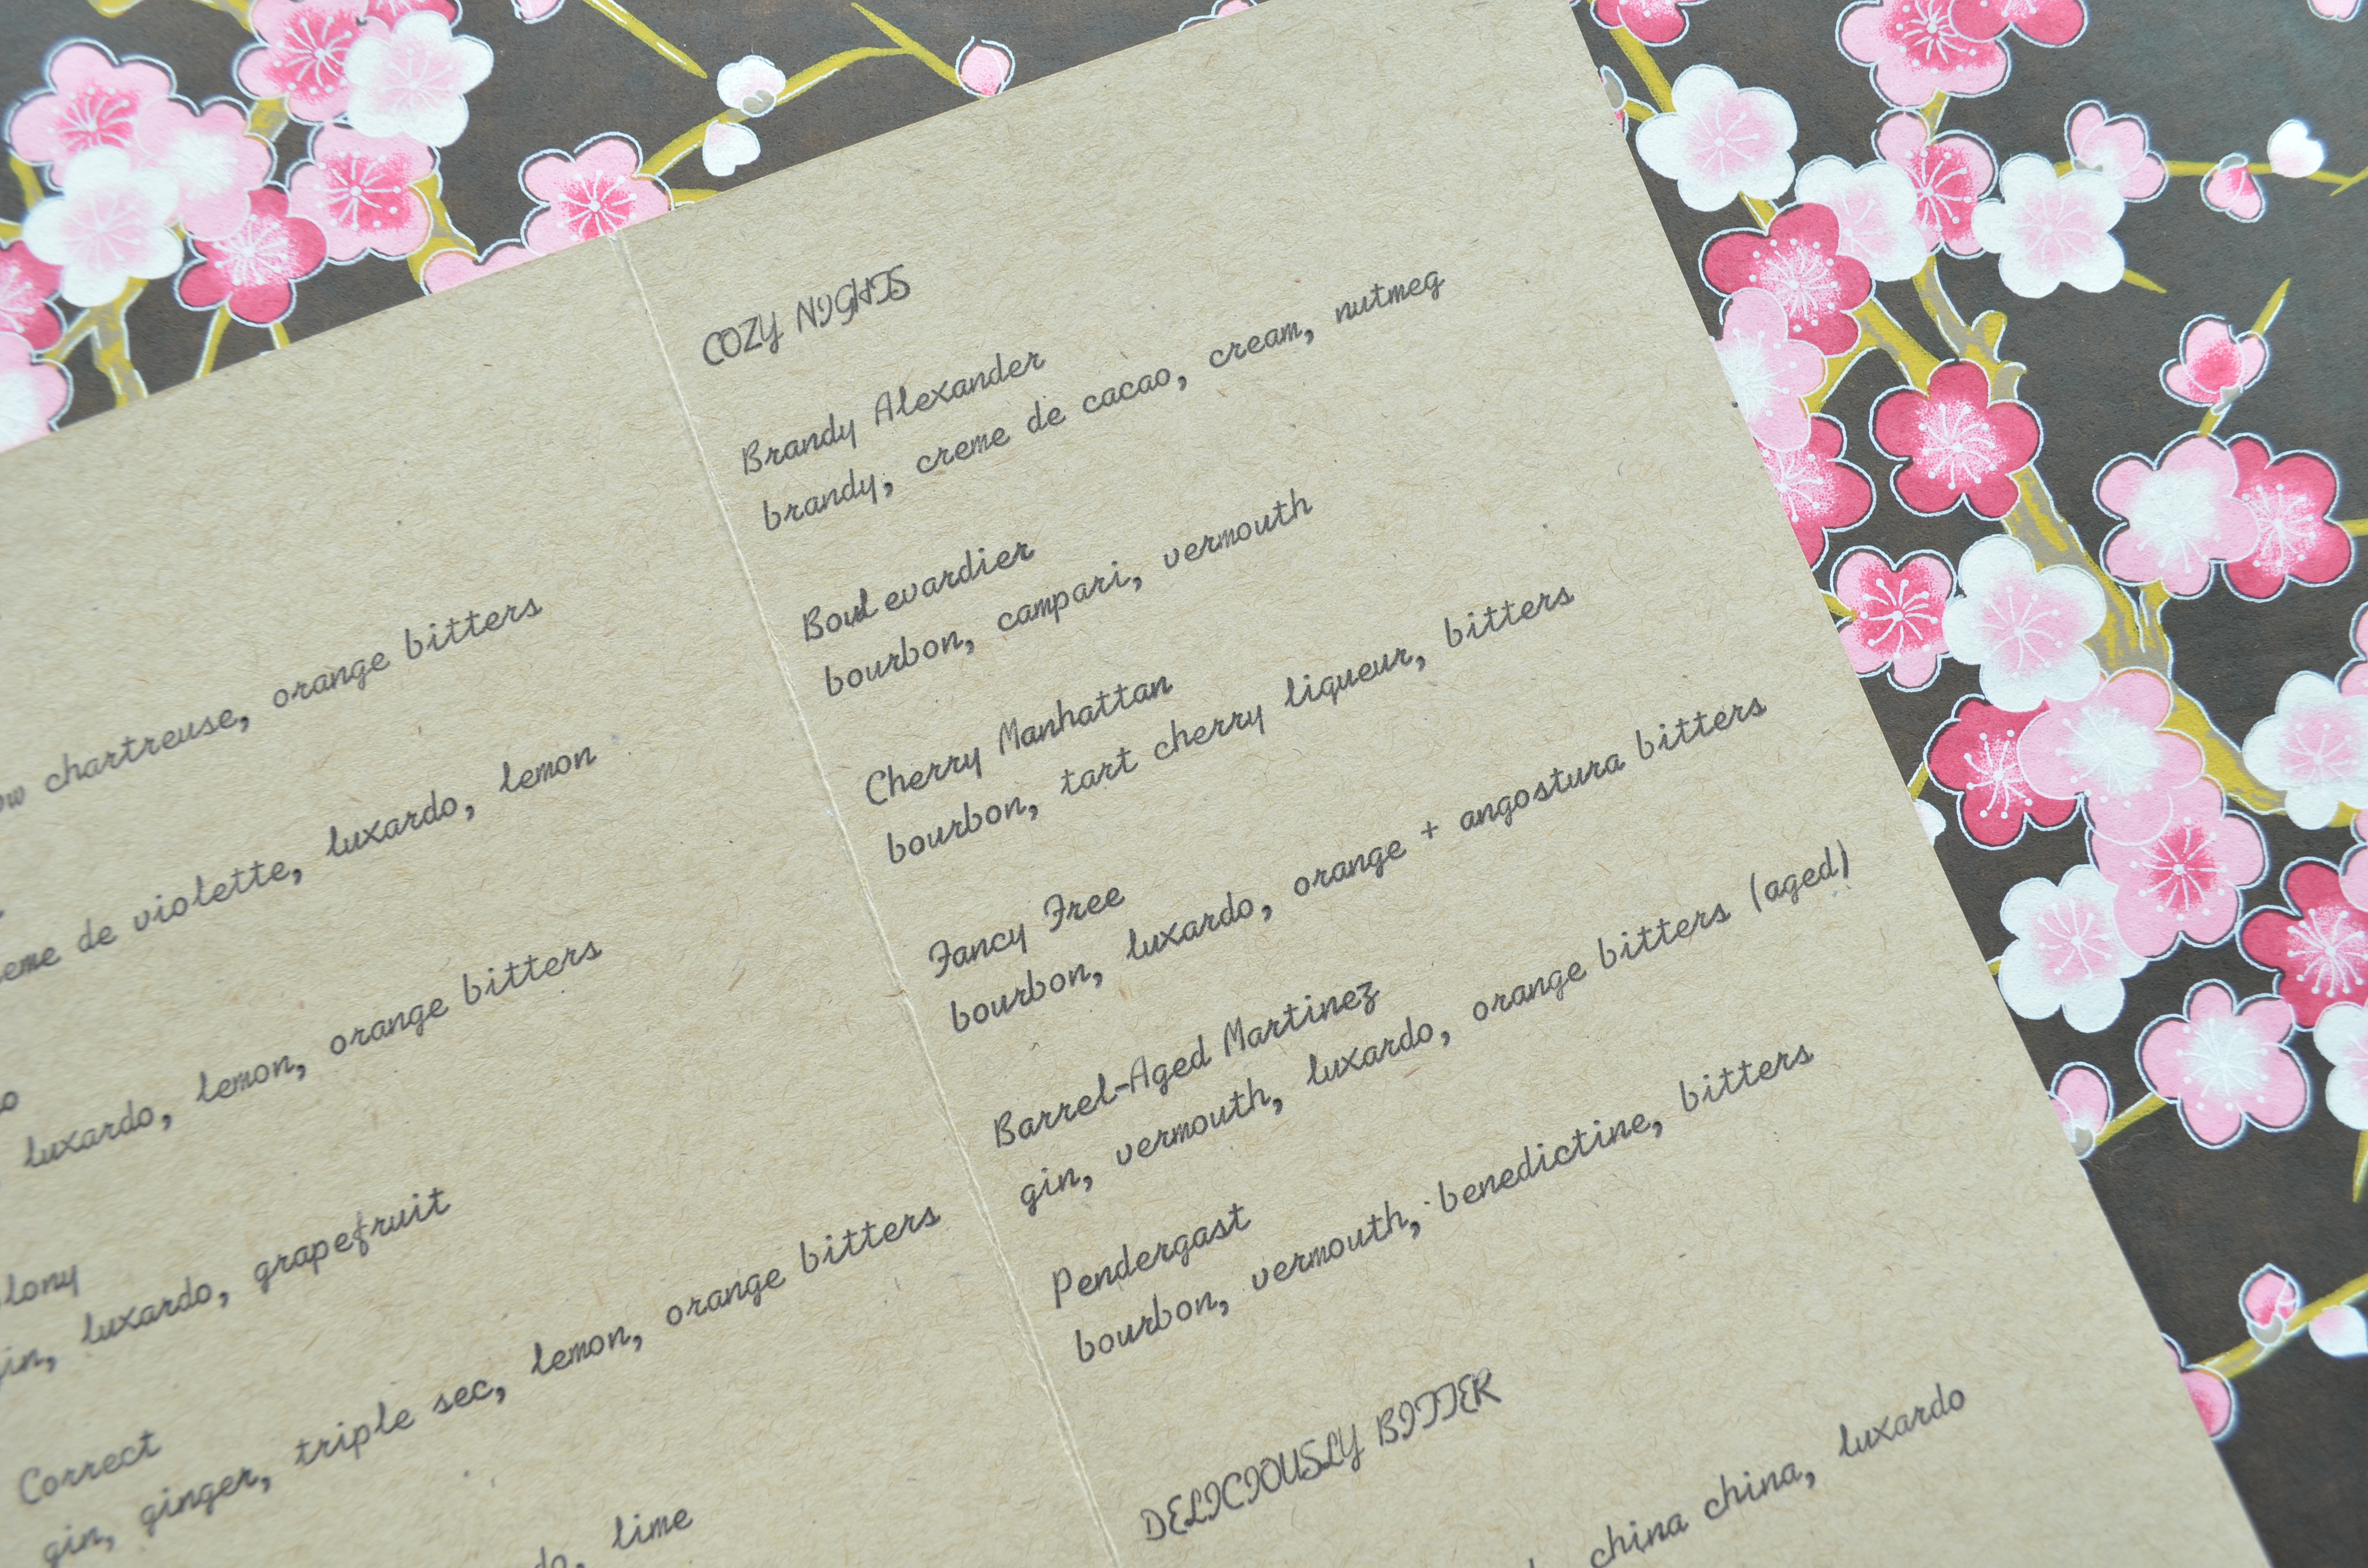
Then there’s a section for “Cozy Nights” that includes mostly whiskey cocktails, perfect for right about now when it’s damp and cold outside. Hasegawa Happy Hour menu 4
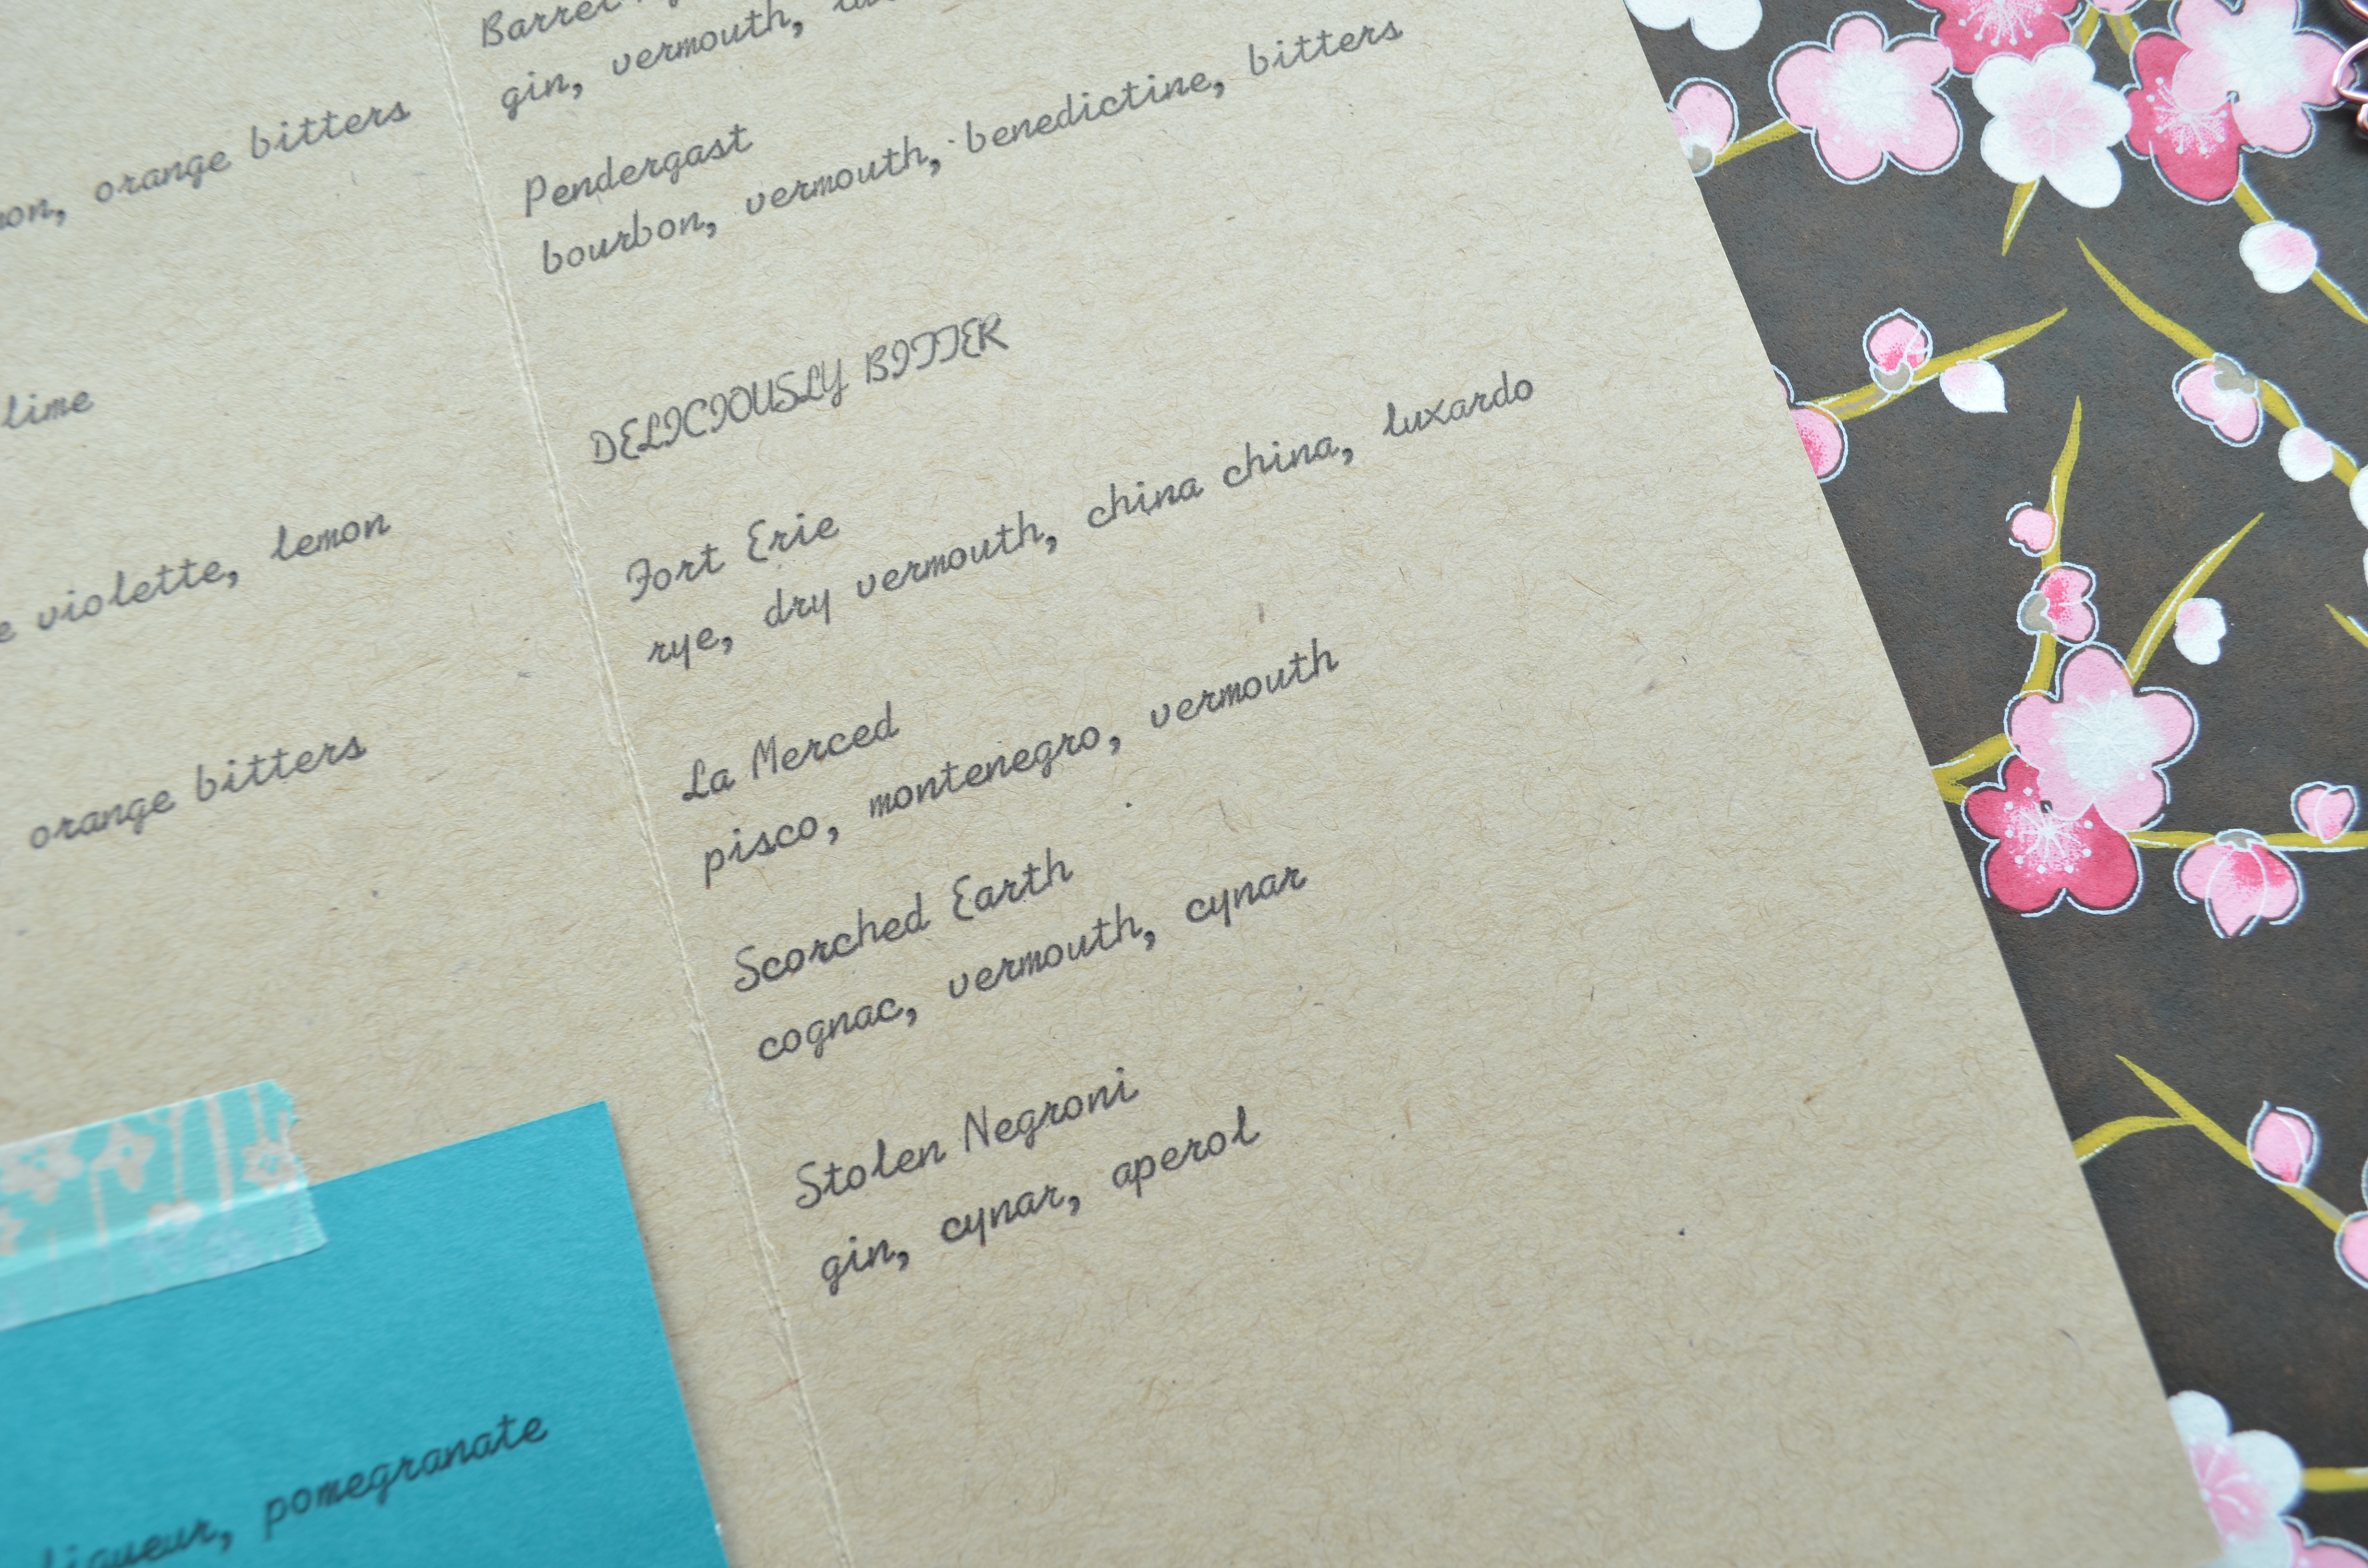
In the “Deliciously Bitter” section, I have a small list of bitter cocktails. I’ve added several bitter liqueurs to my collection this year and these four are tasty winners. Hasegawa Happy Hour menu 3
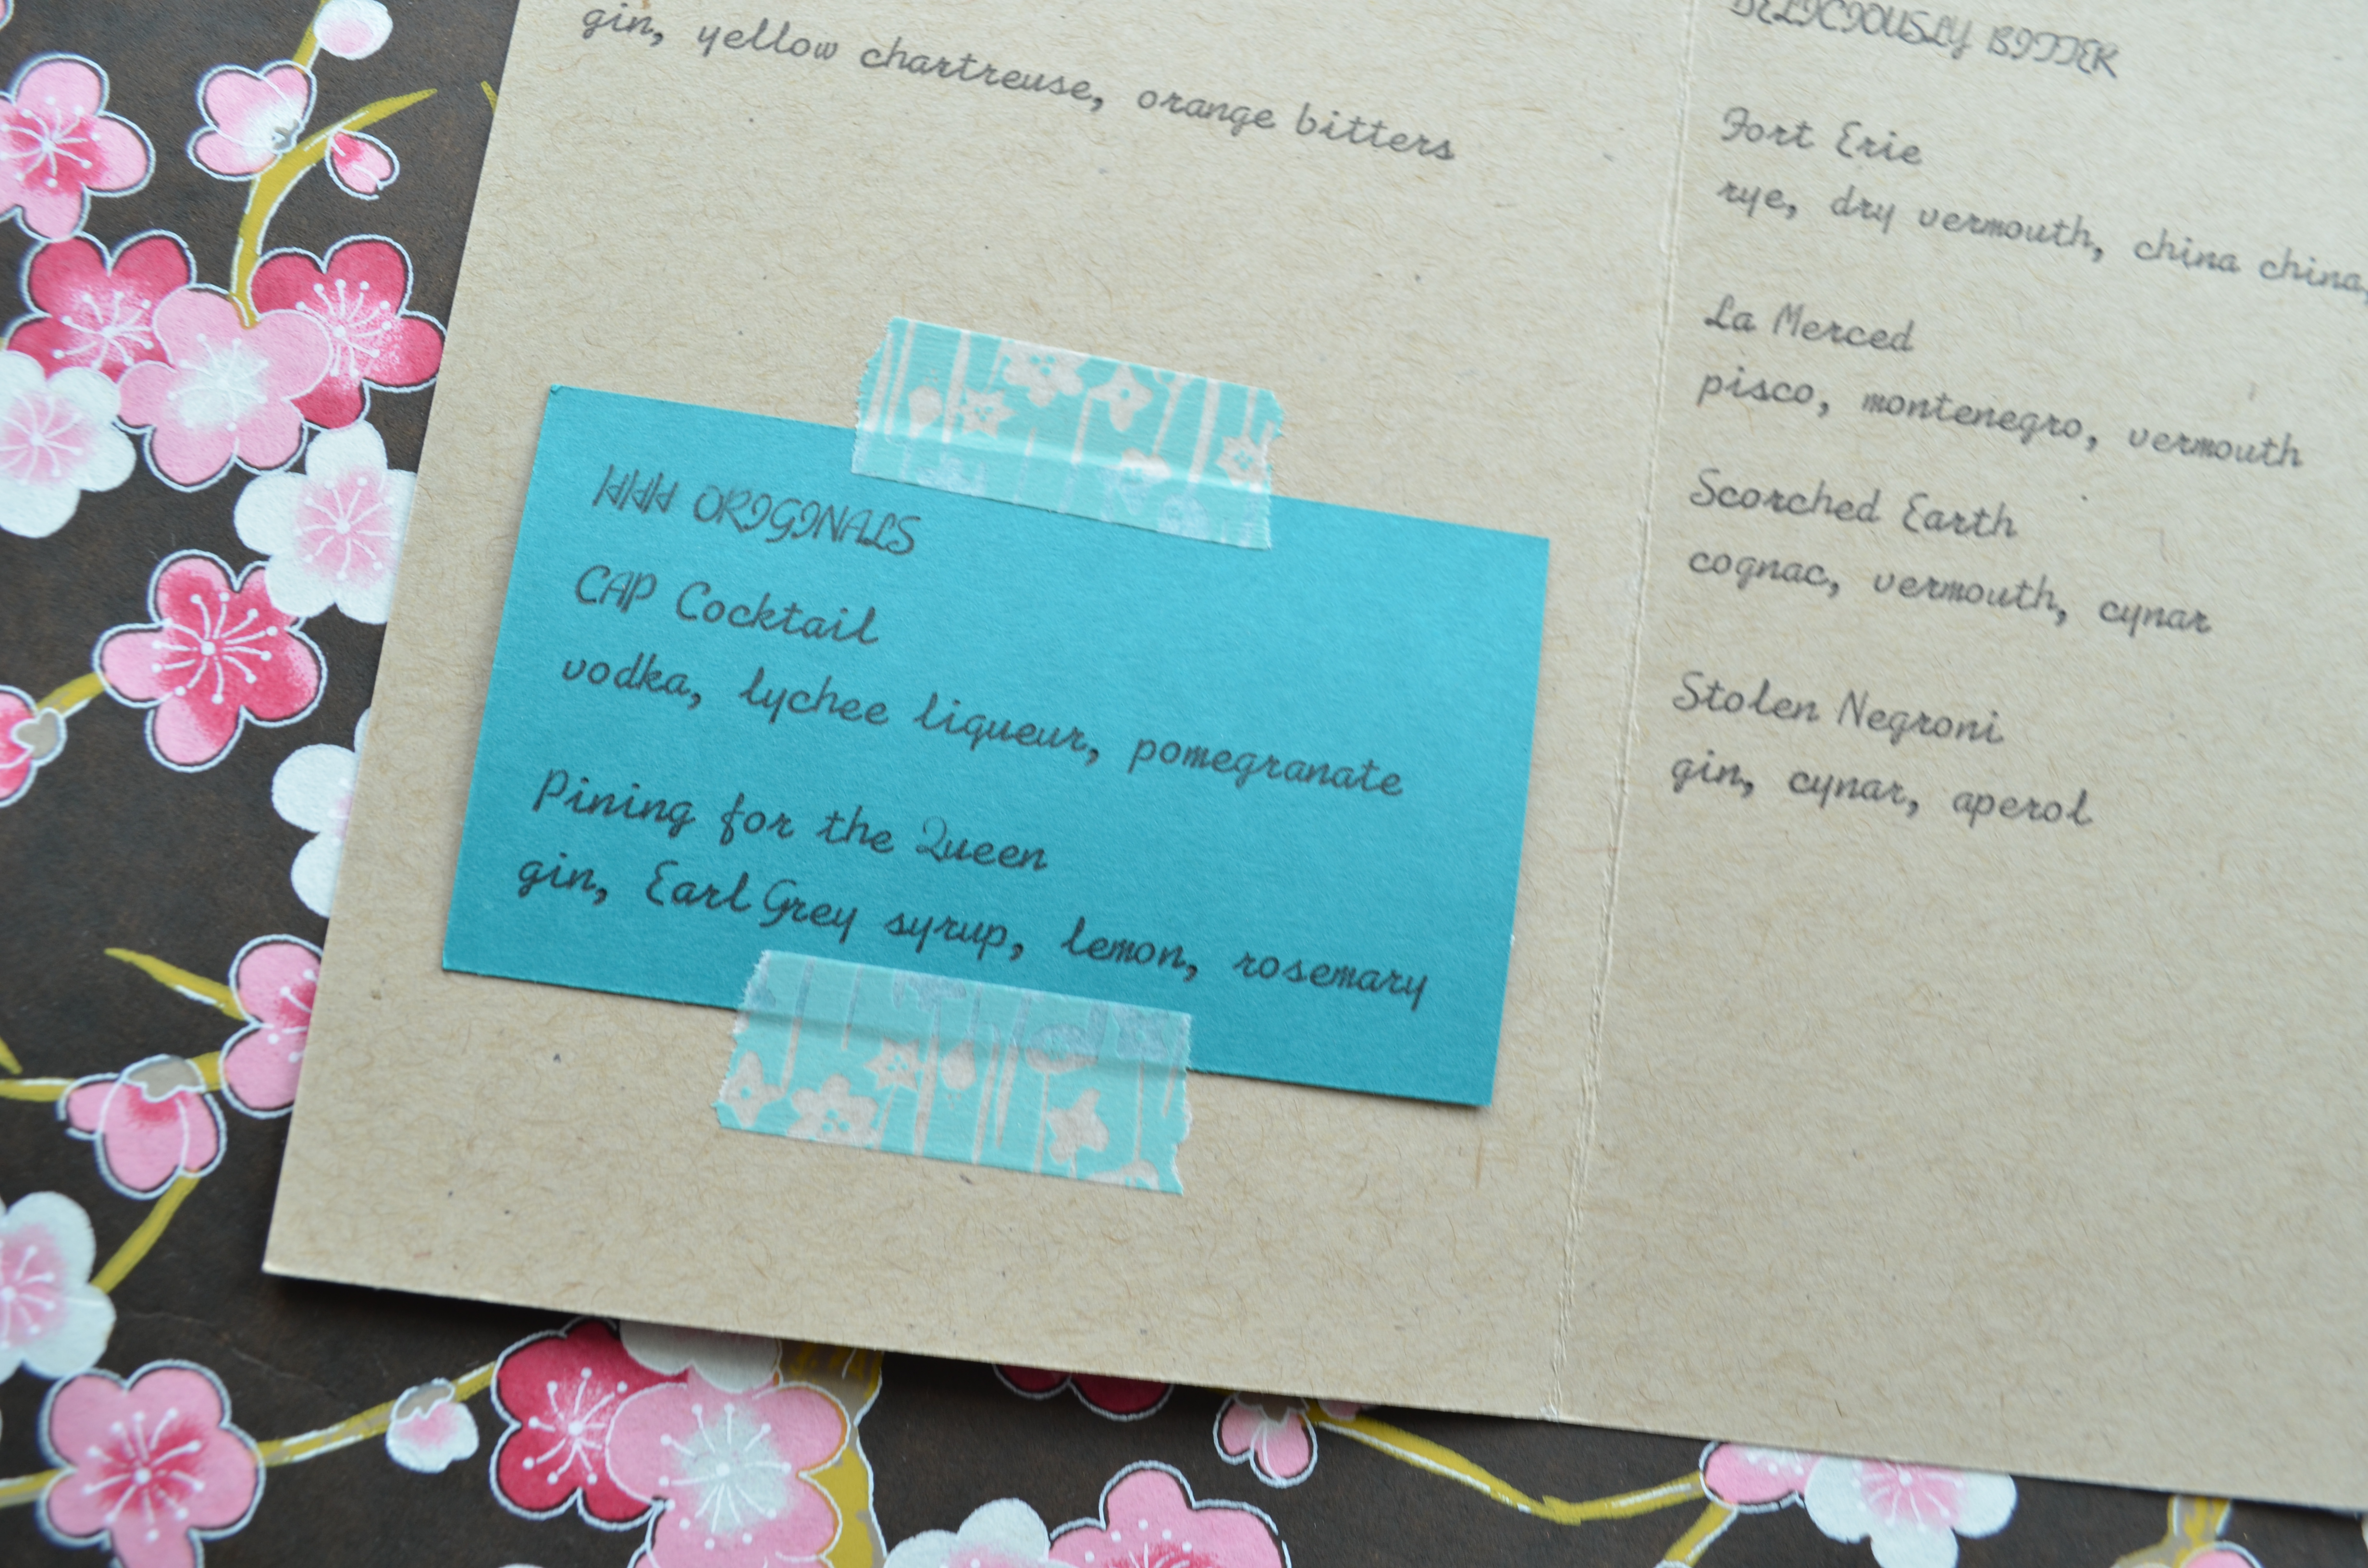
And, on a removable tiny business card, I typed up two Hasegawa originals, the CAP Cocktail and Pining for the Queen. It’s harder to keep those ingredients readily on hand around here, so I like to be able to remove the card if we don’t have any pomegranate juice or rosemary in the house.

Hasegawa Happy Hour, sushi night
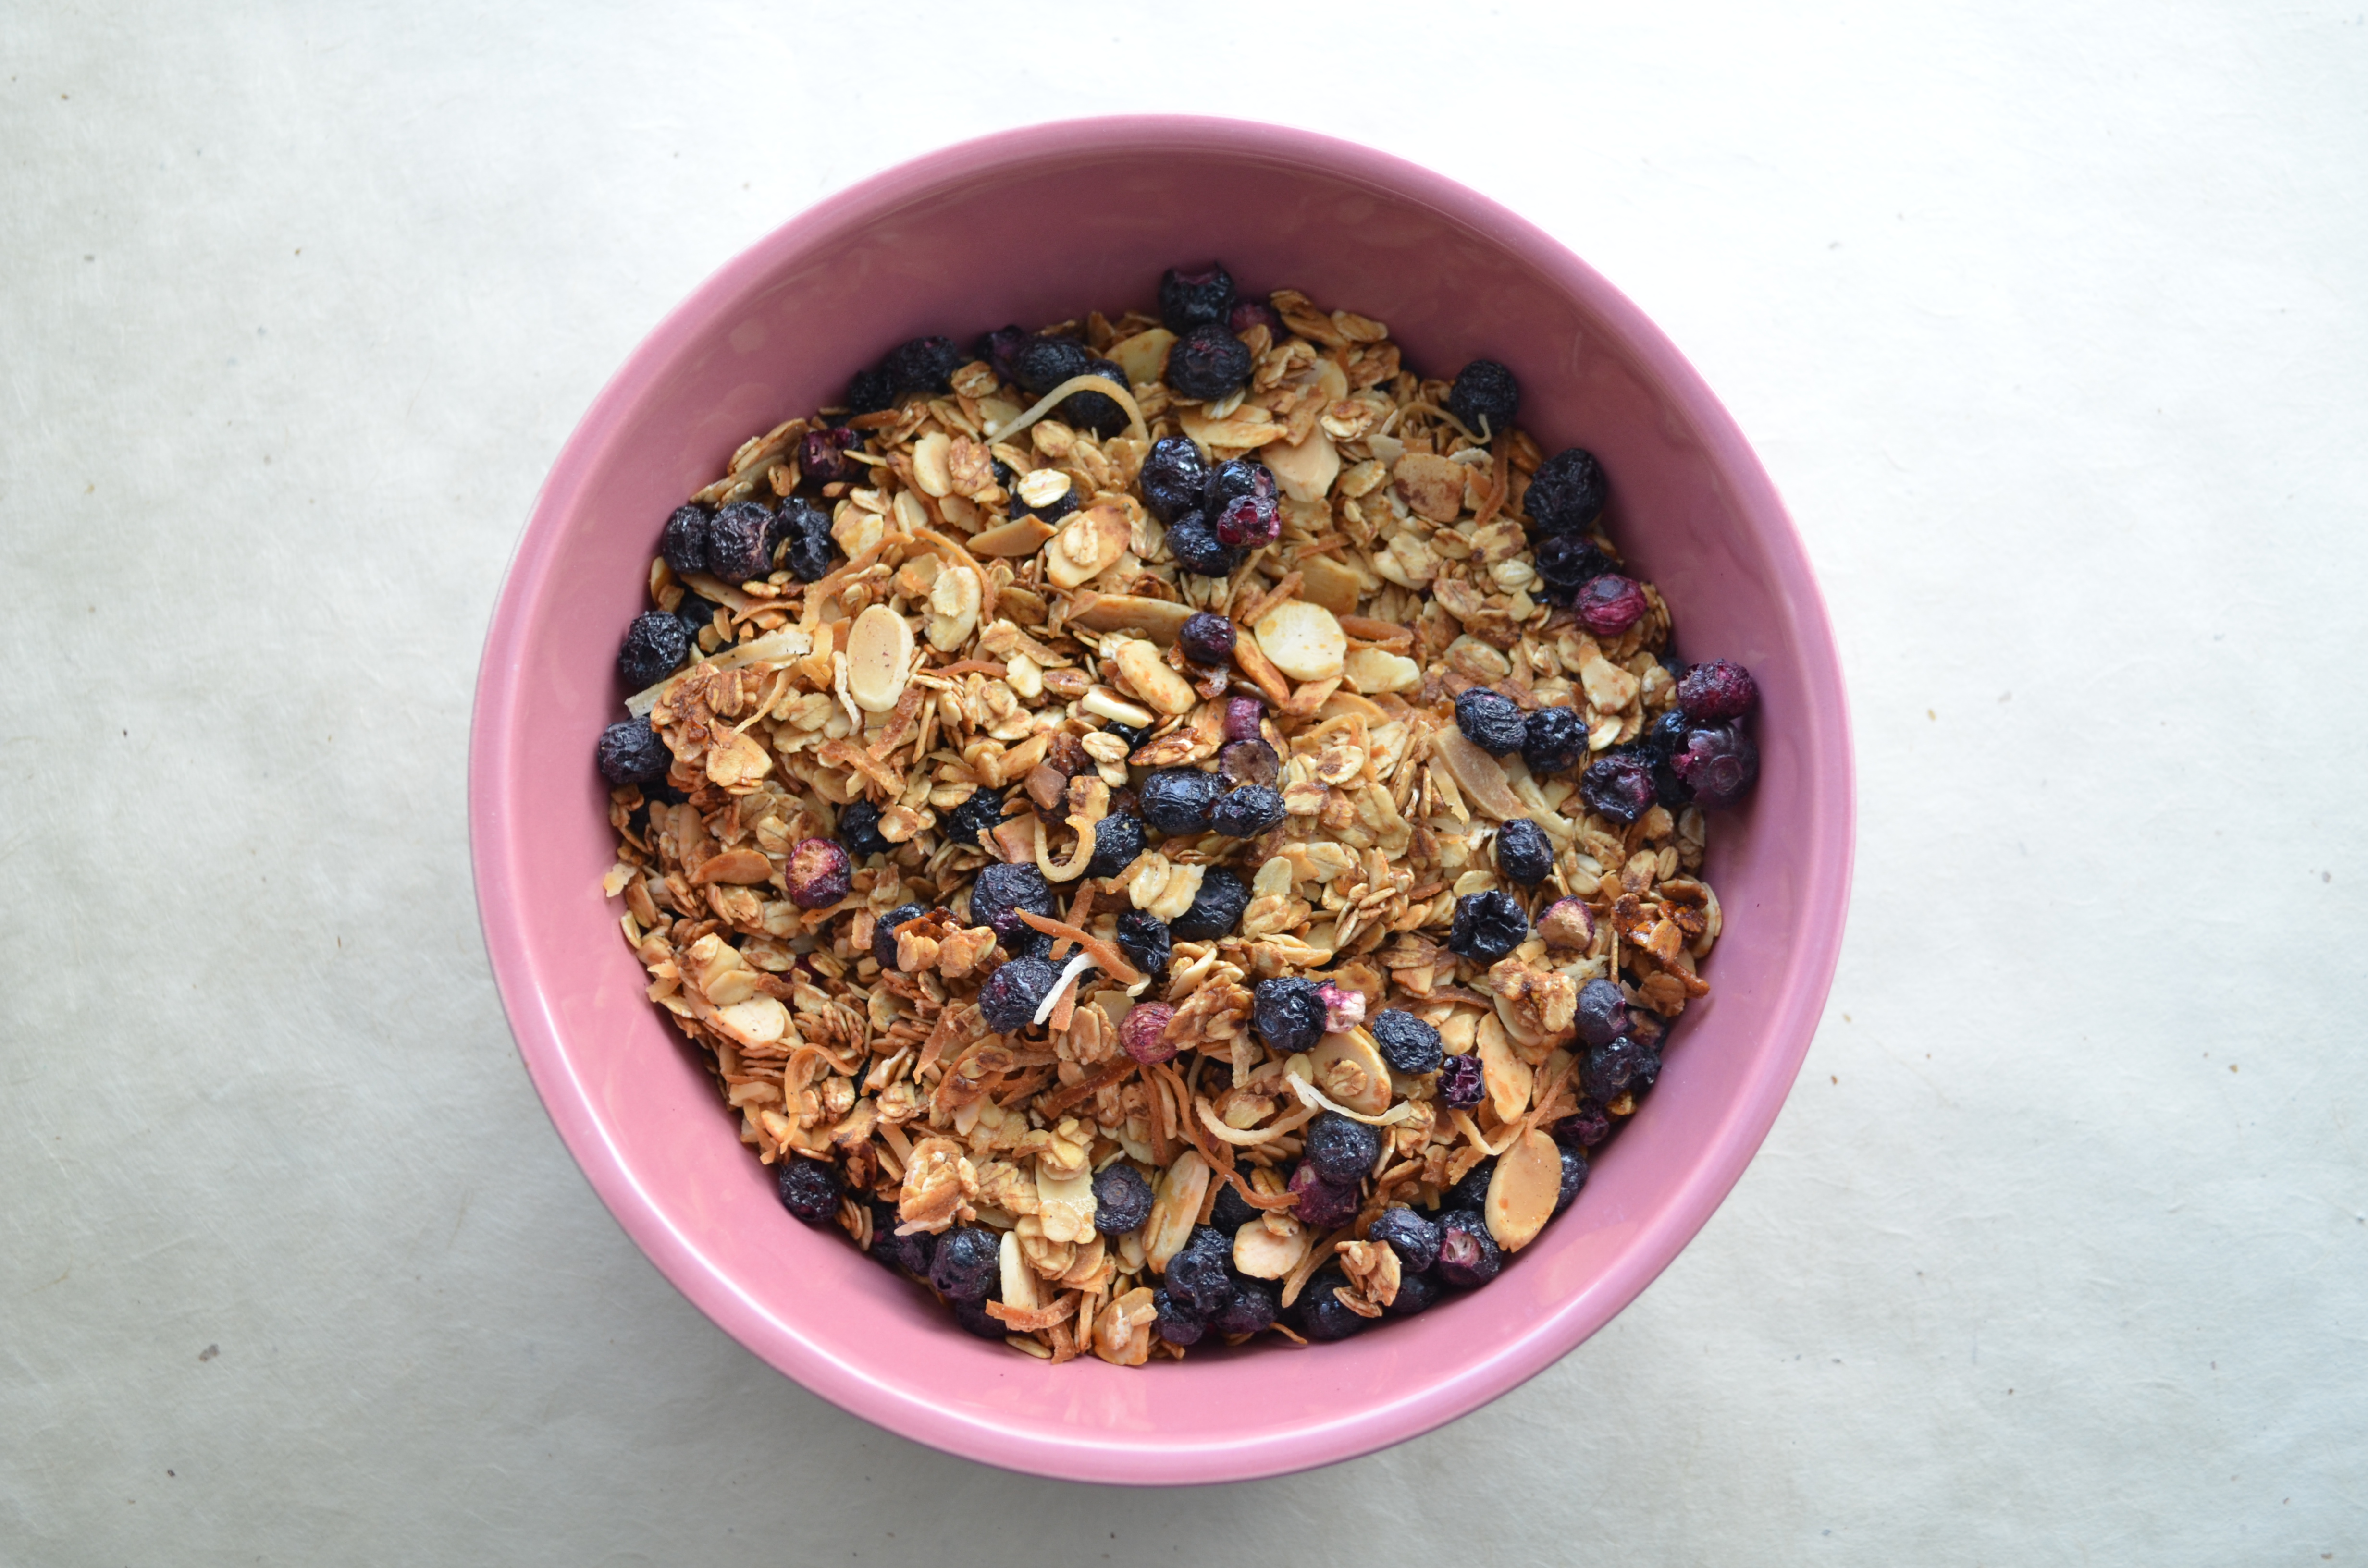
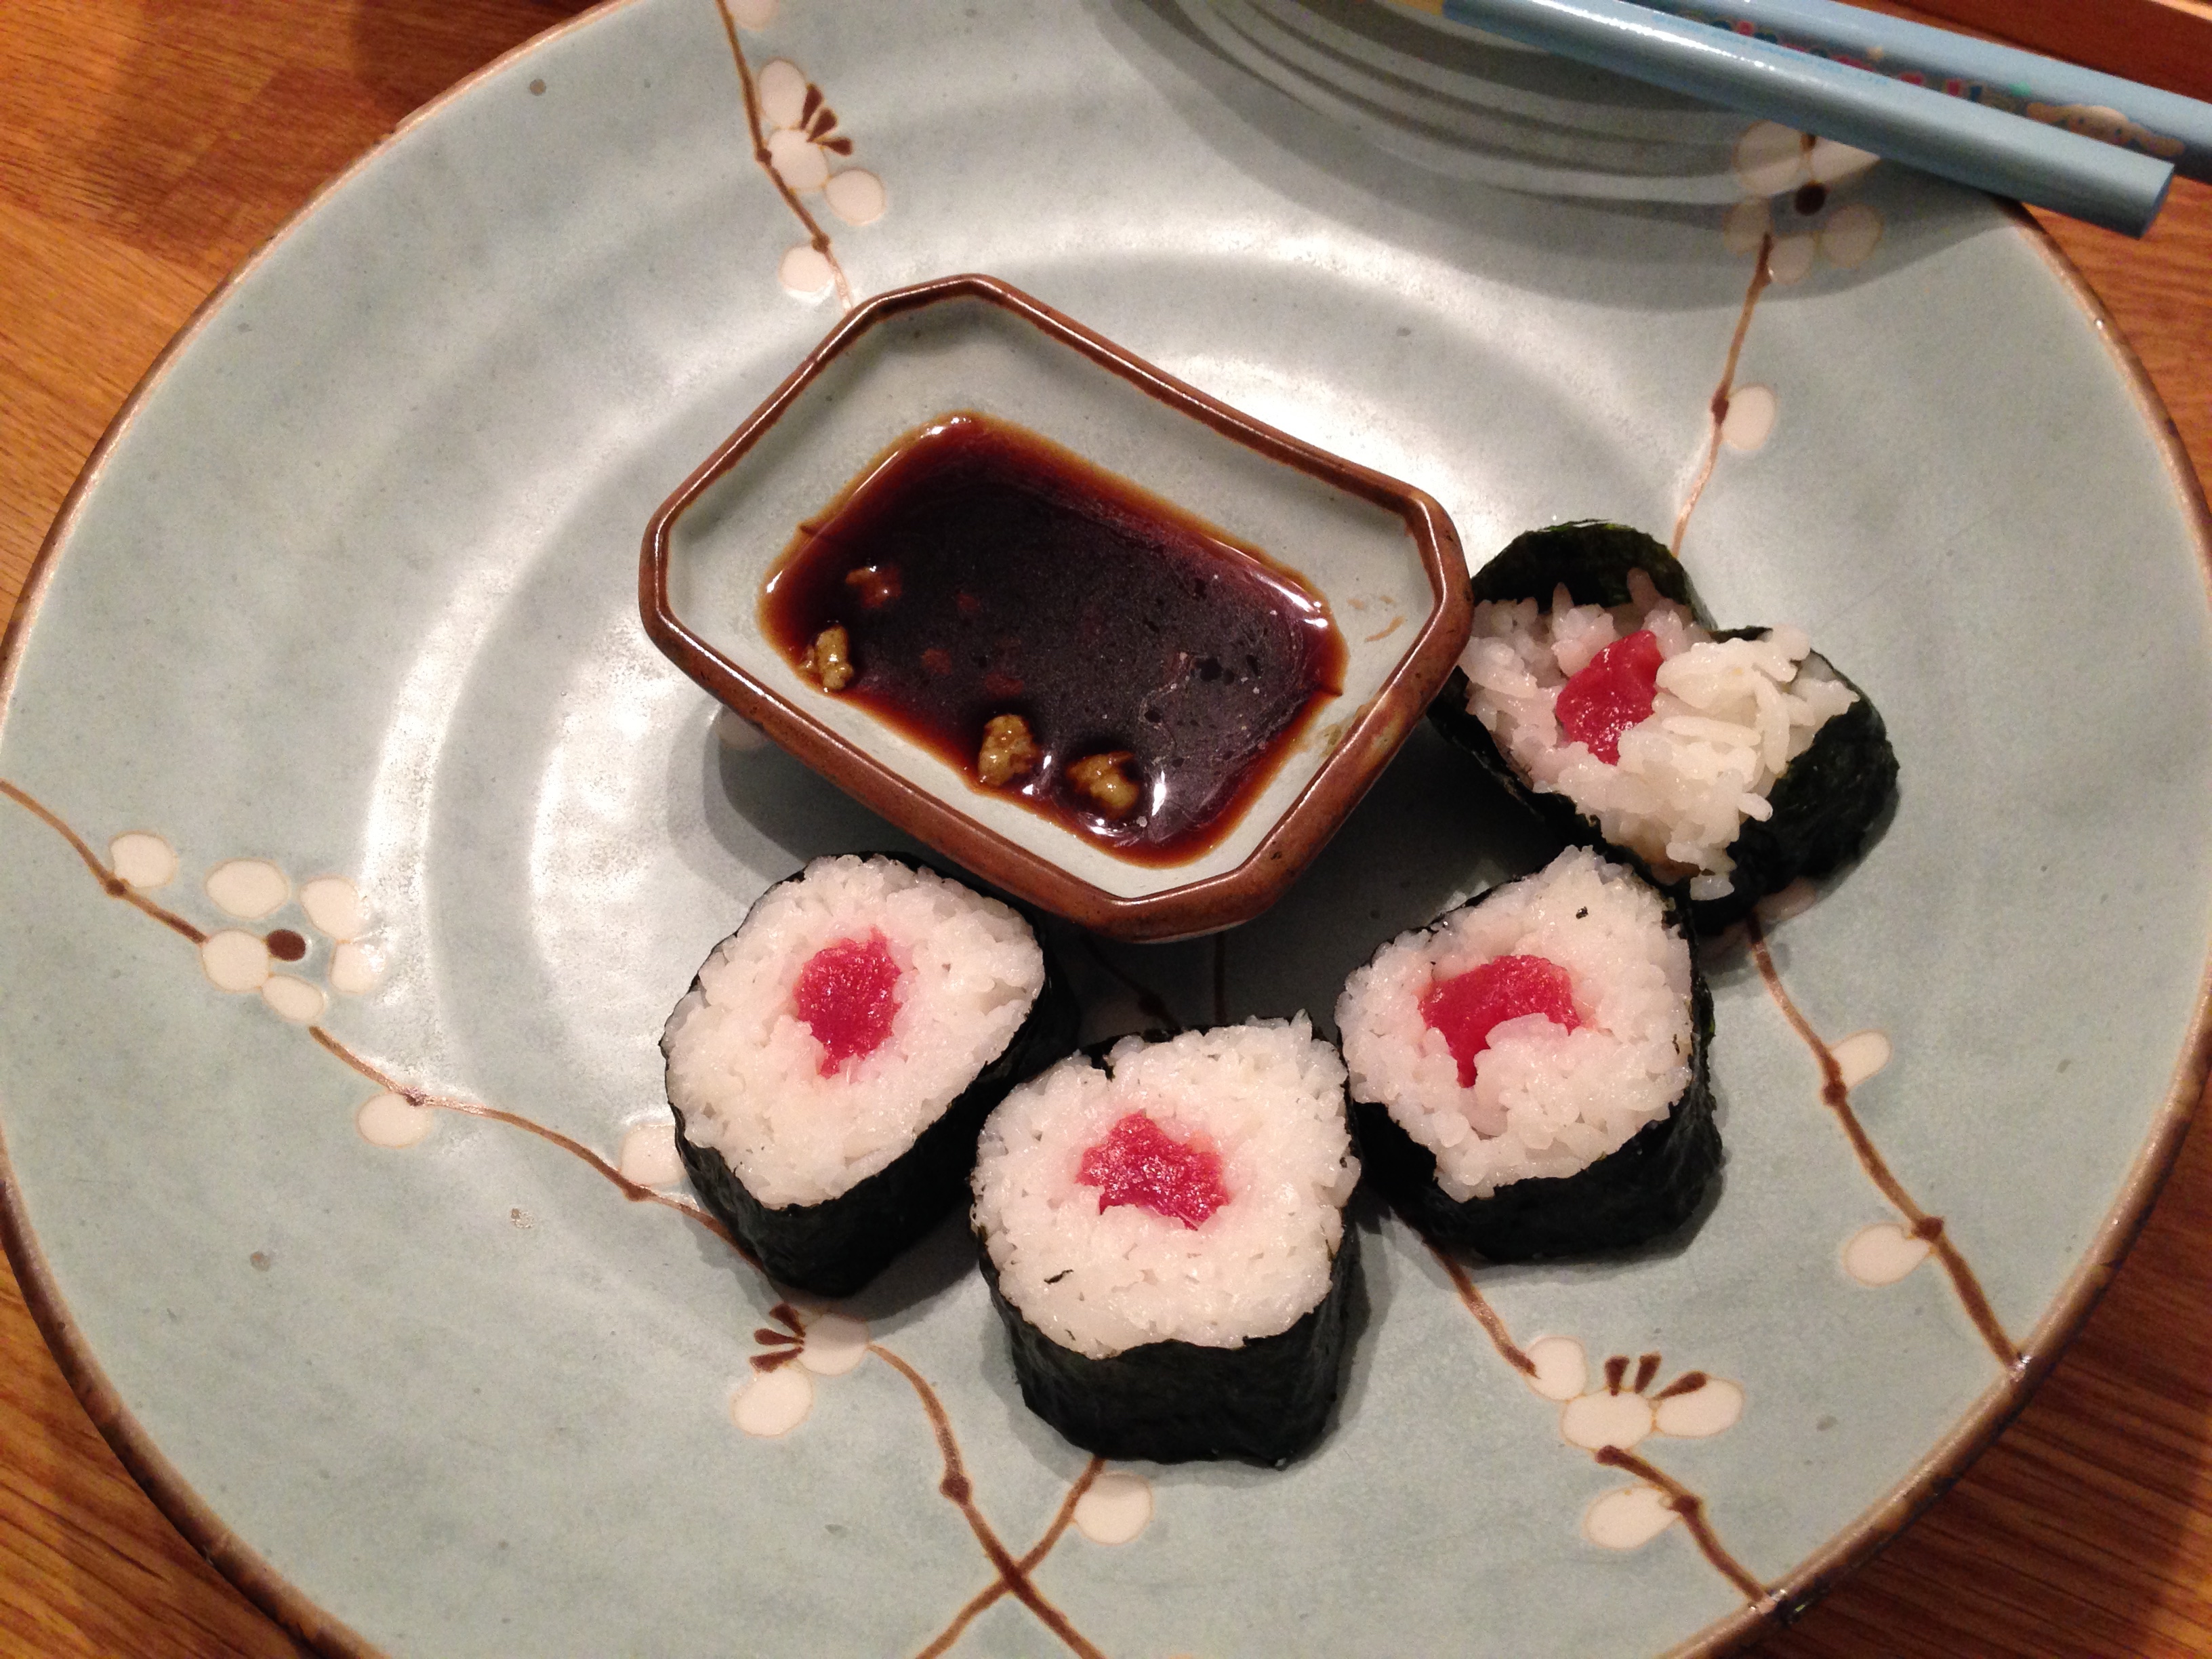
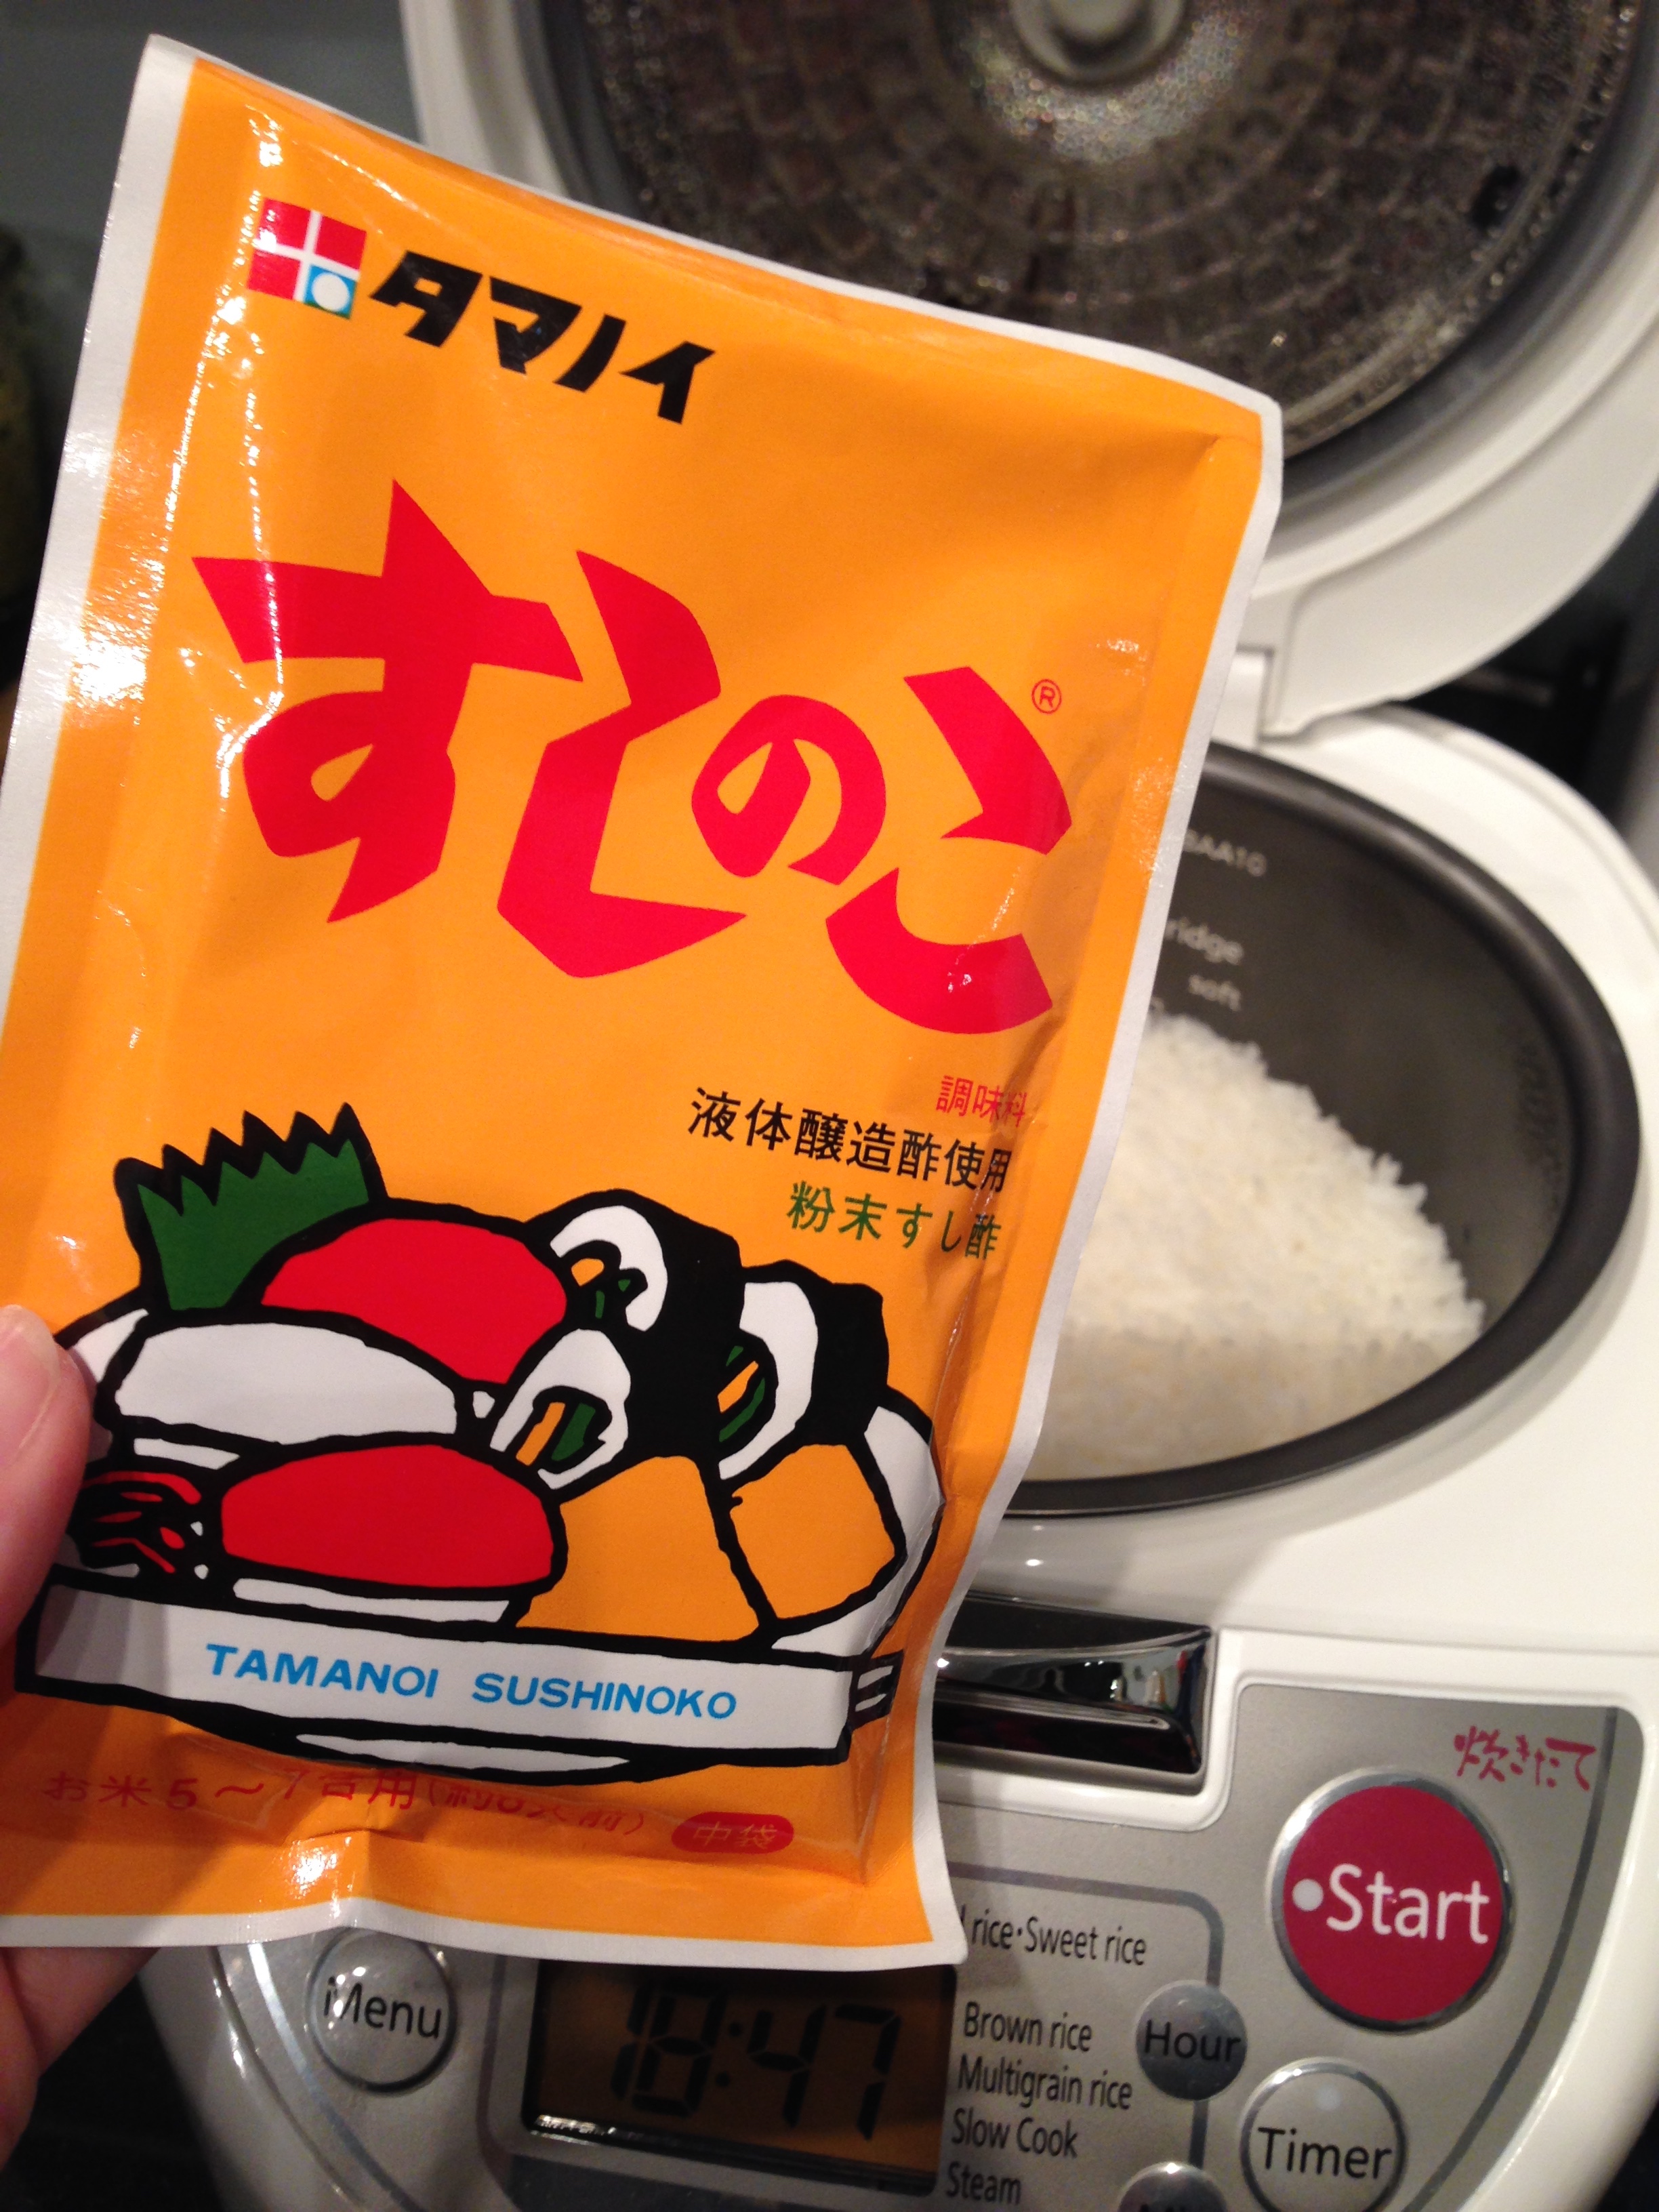
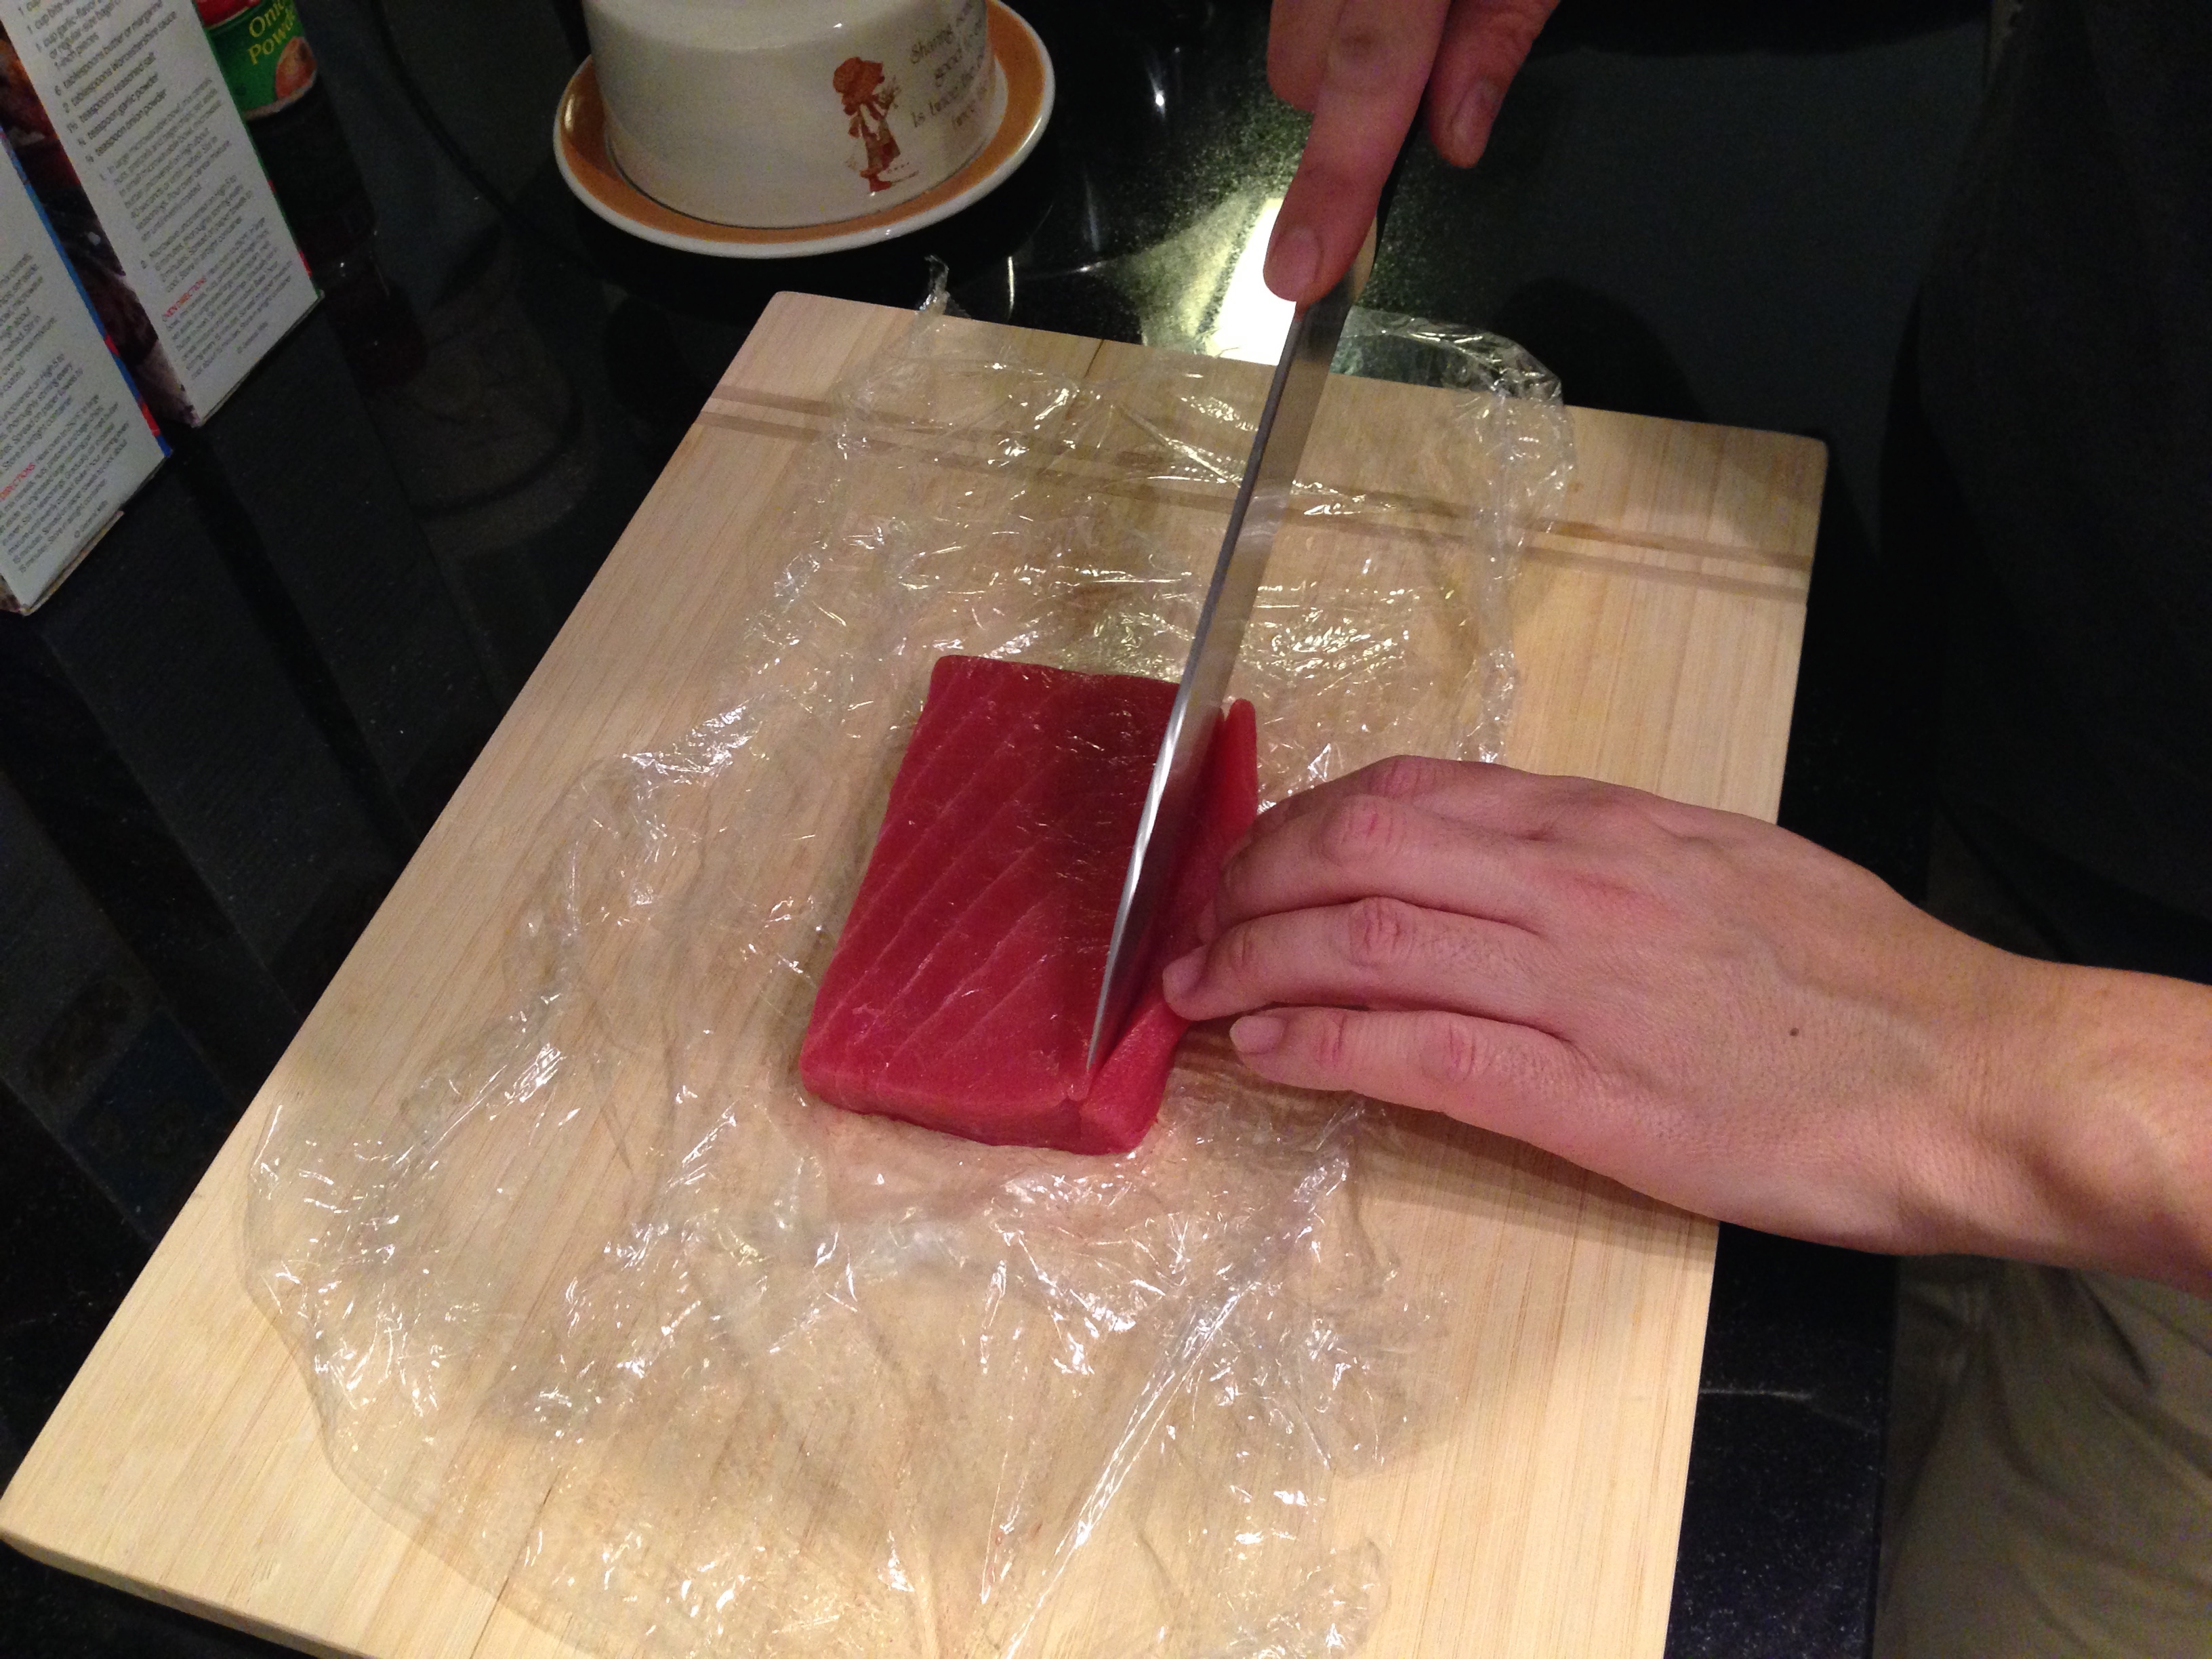
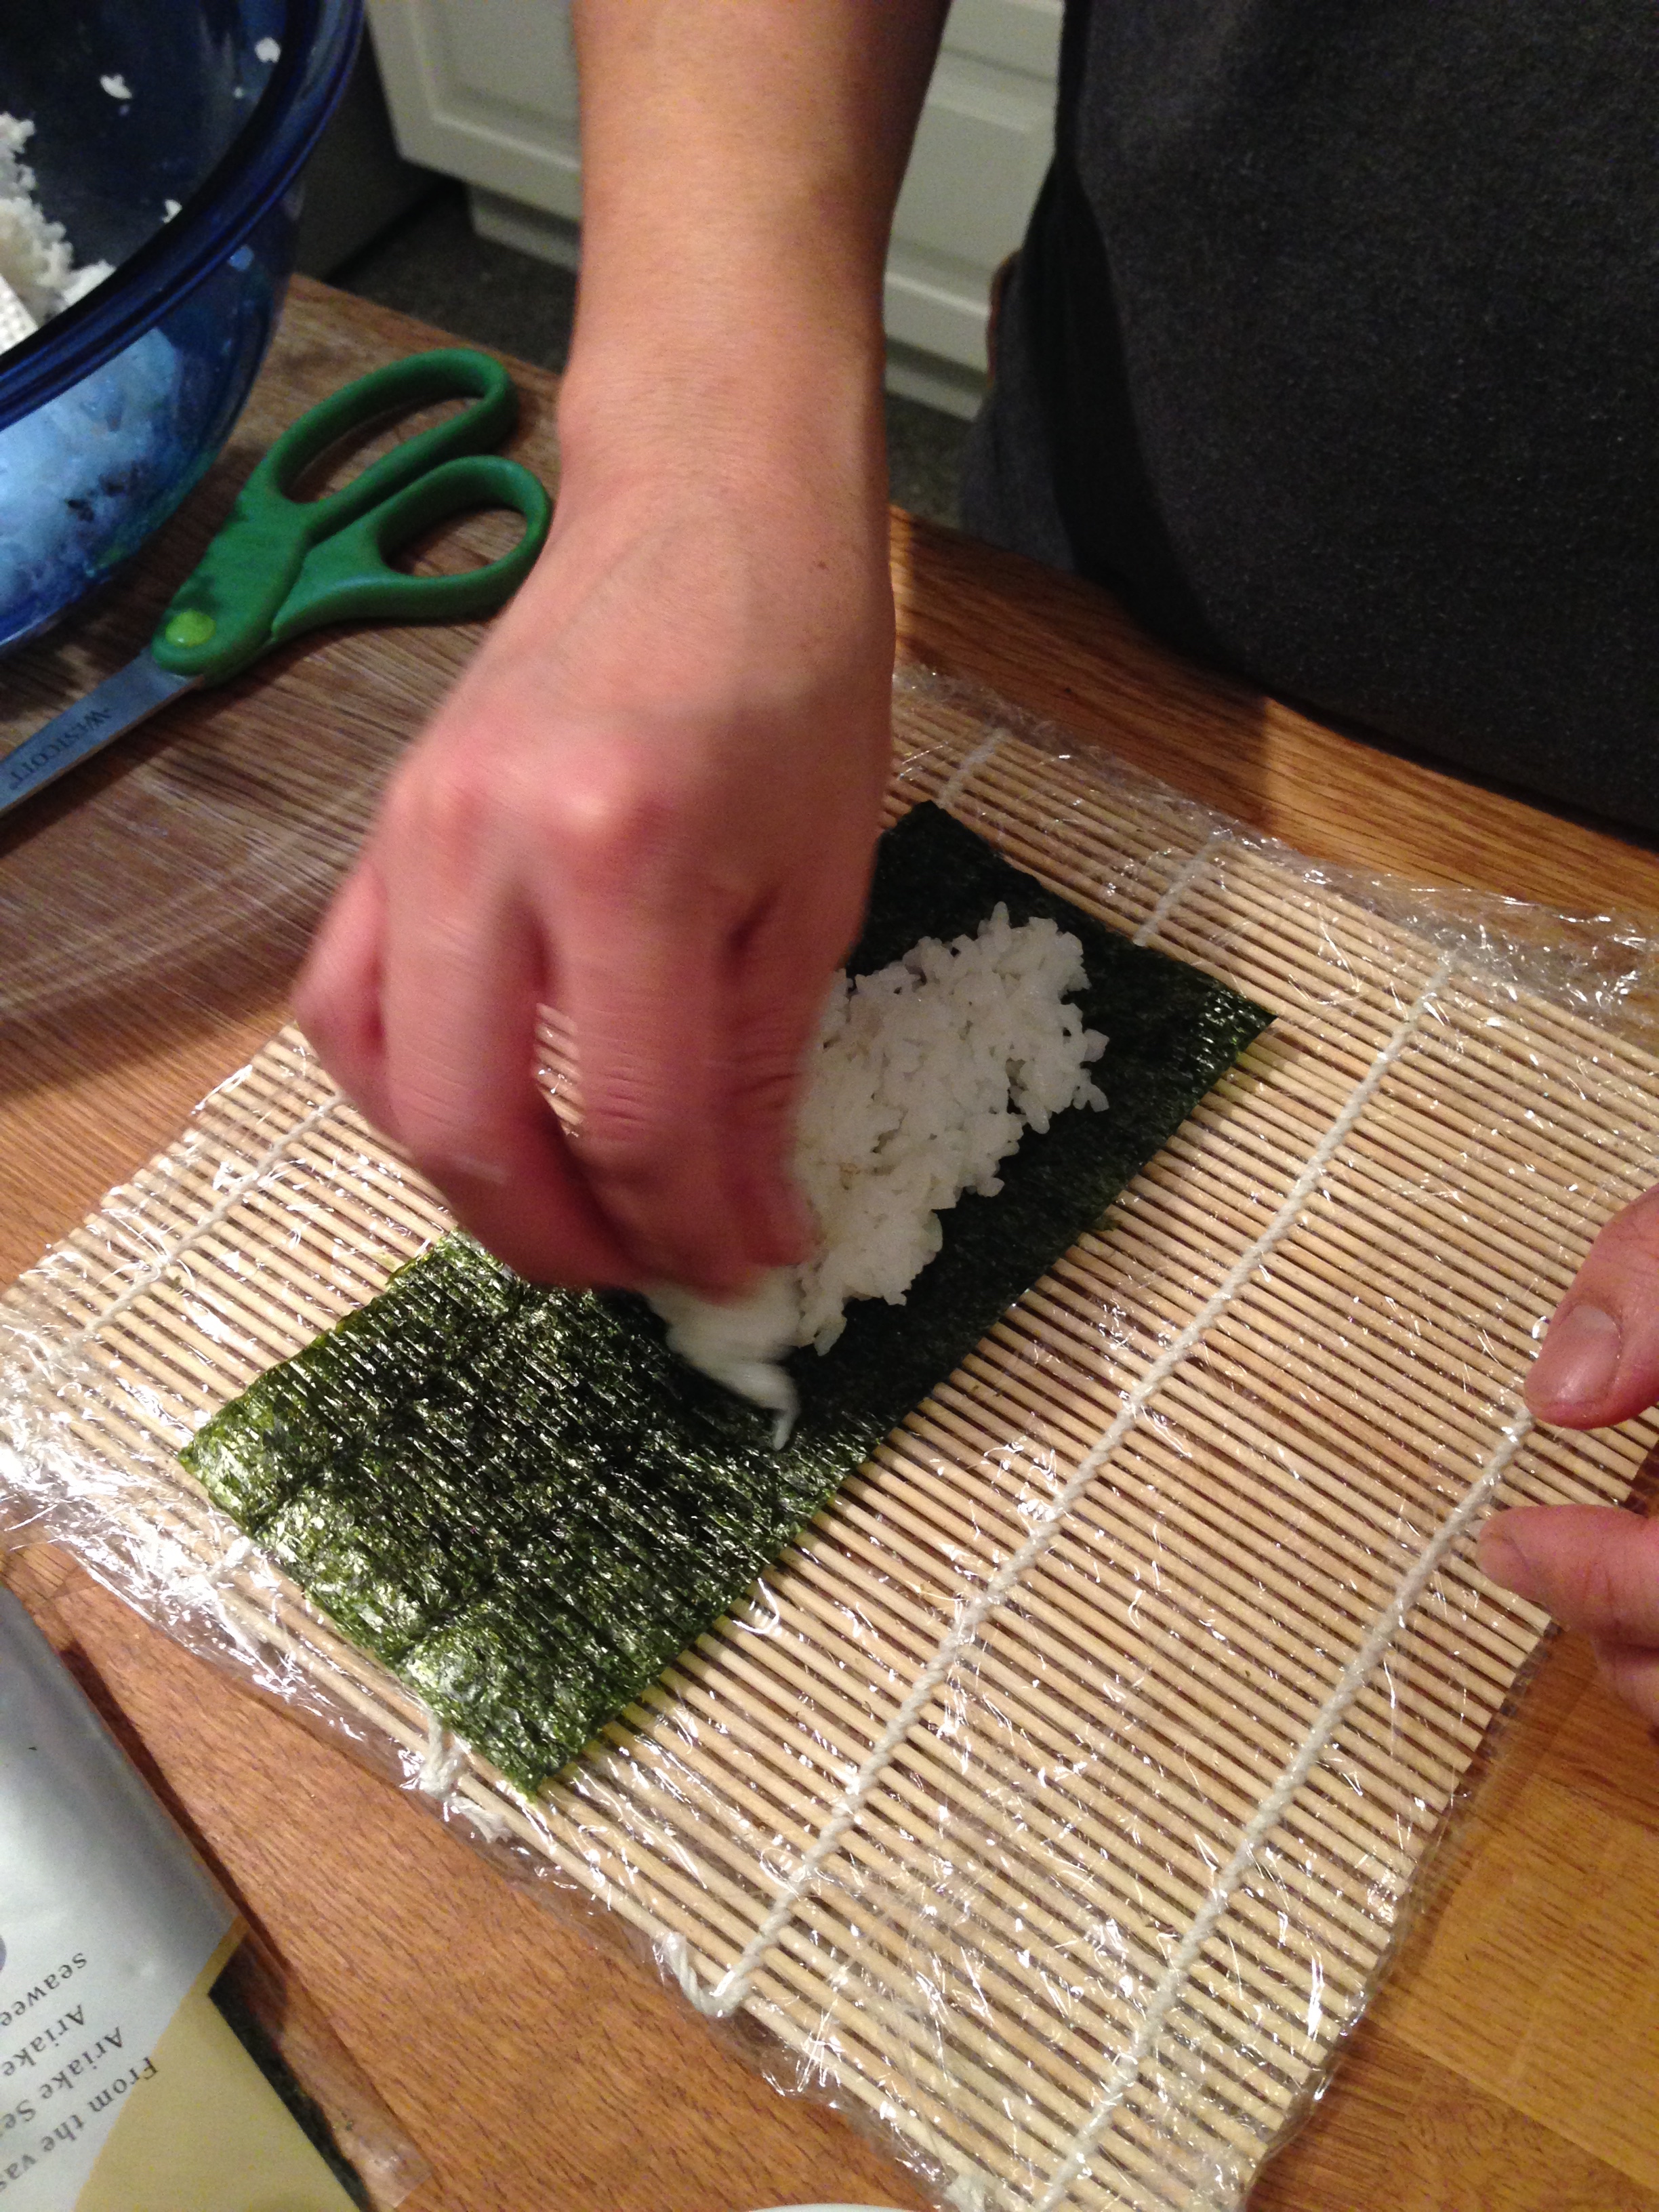
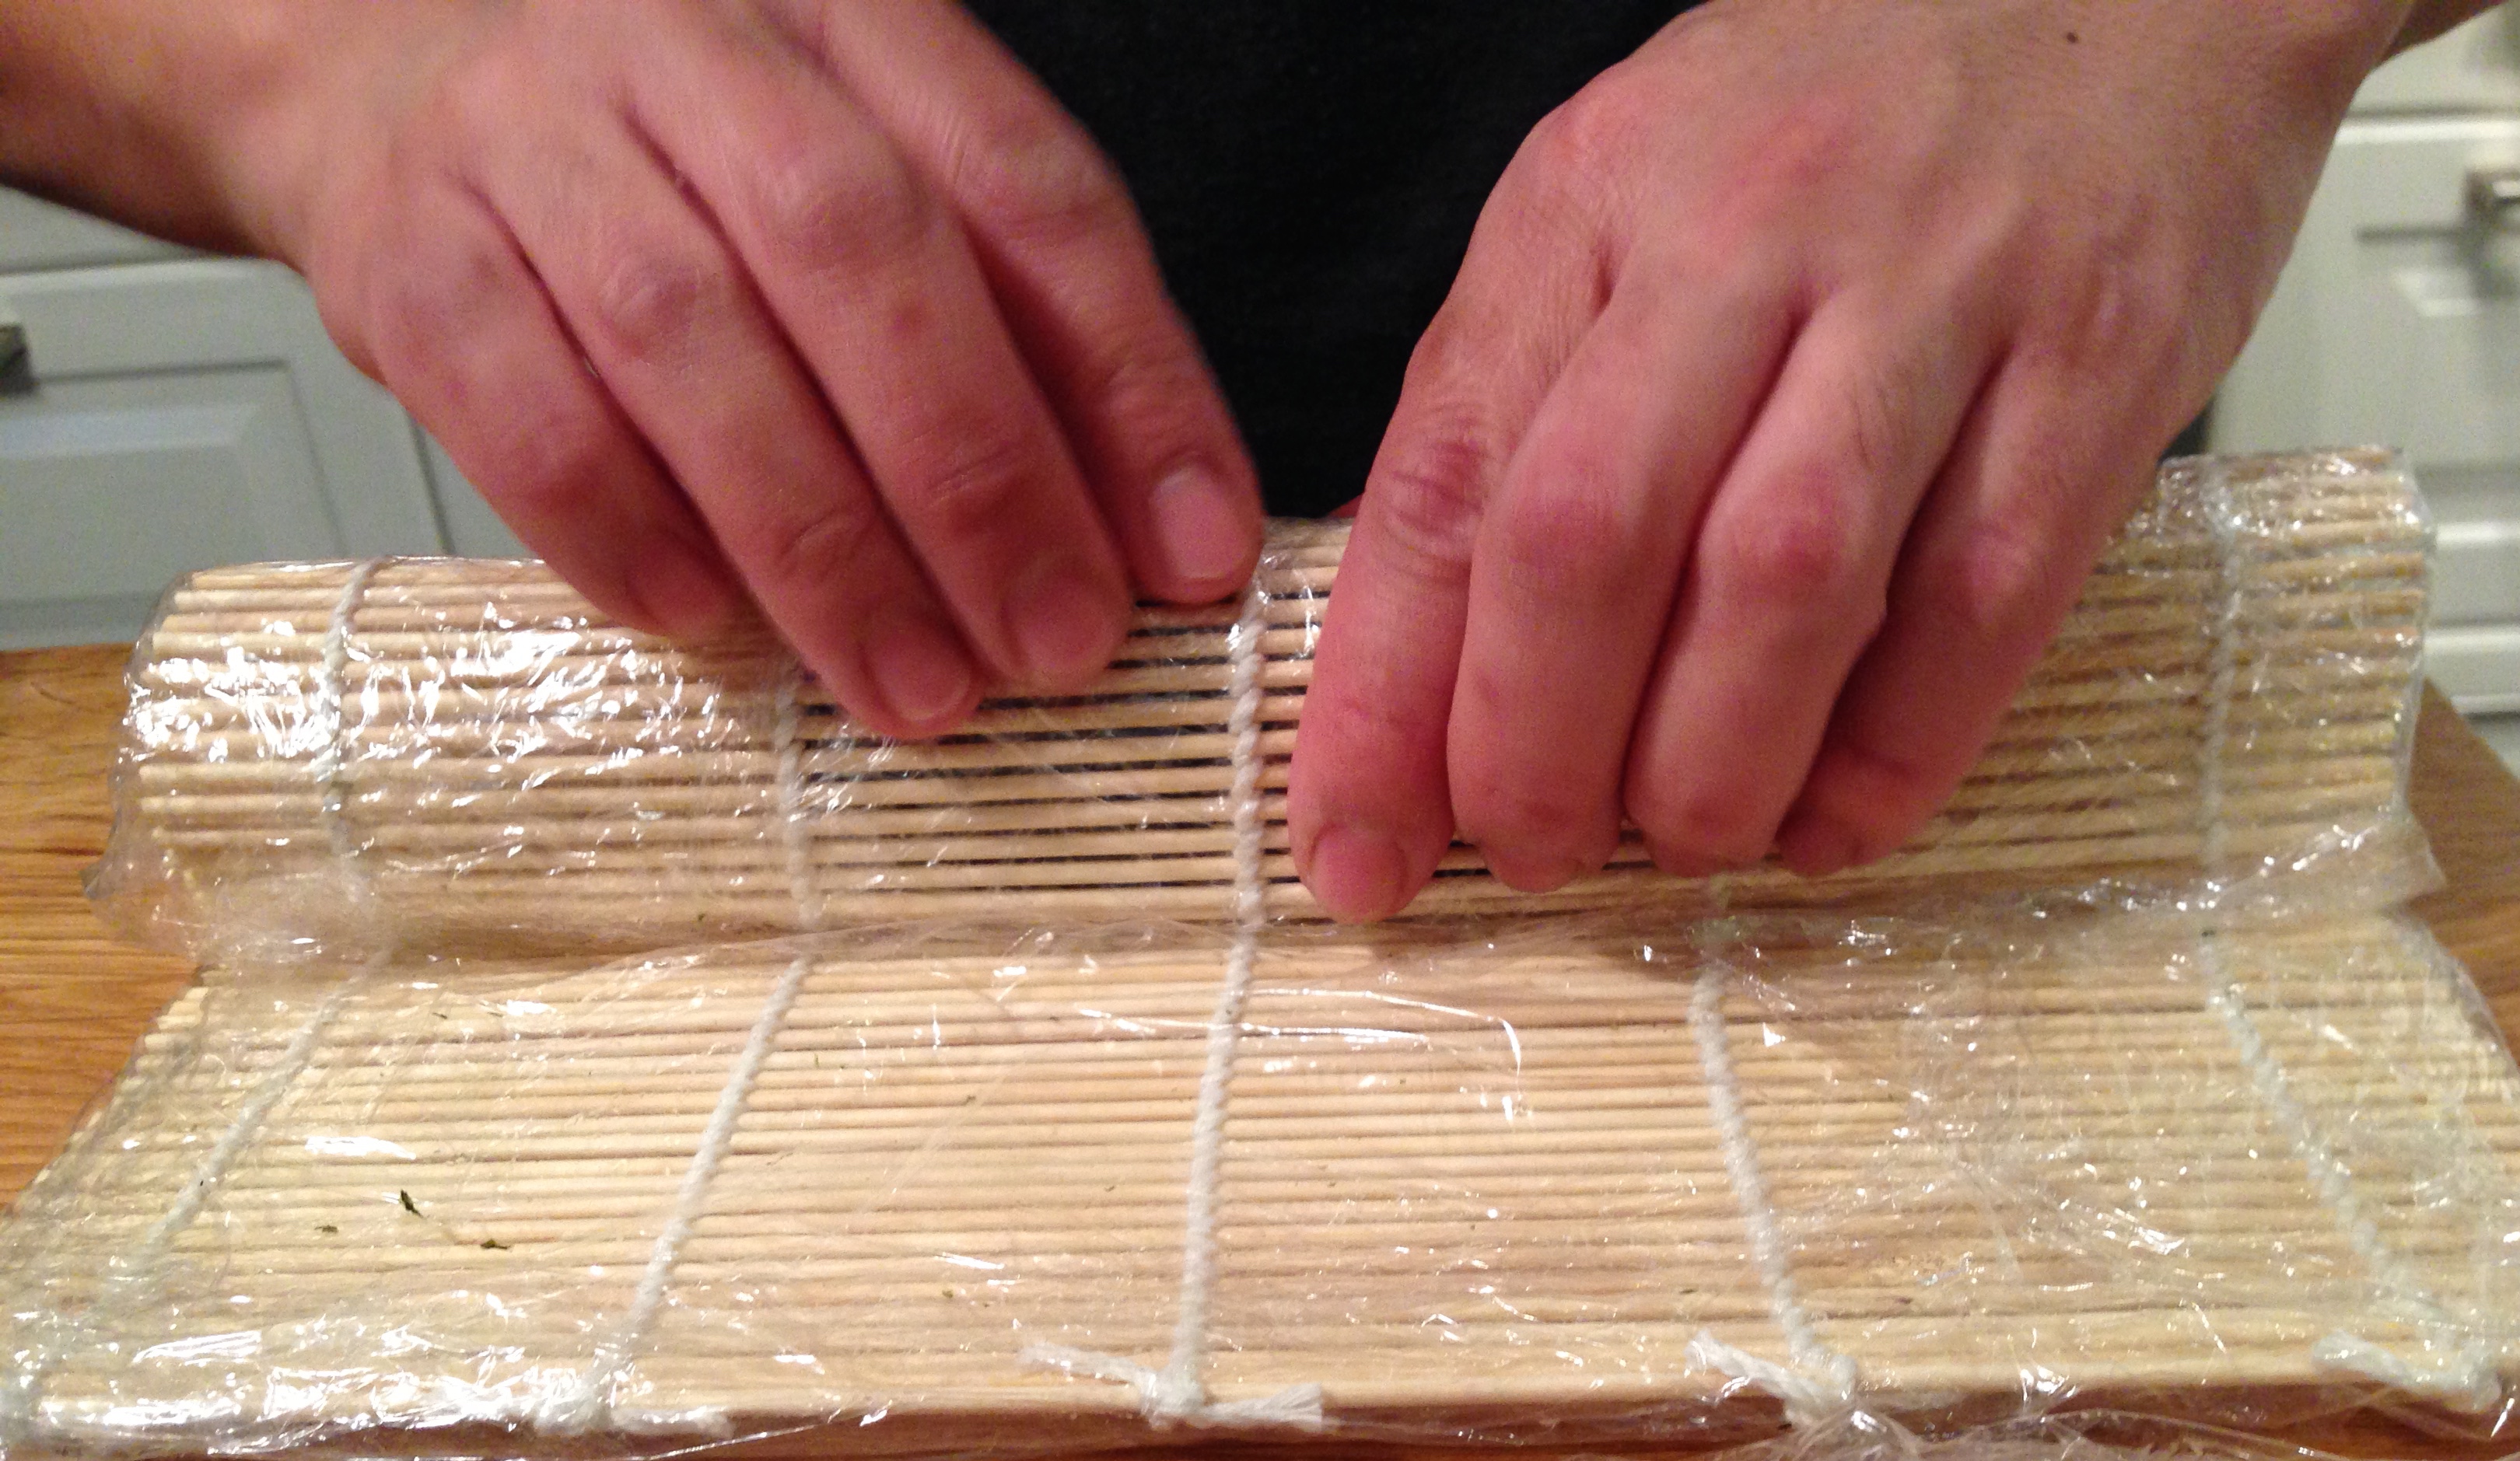
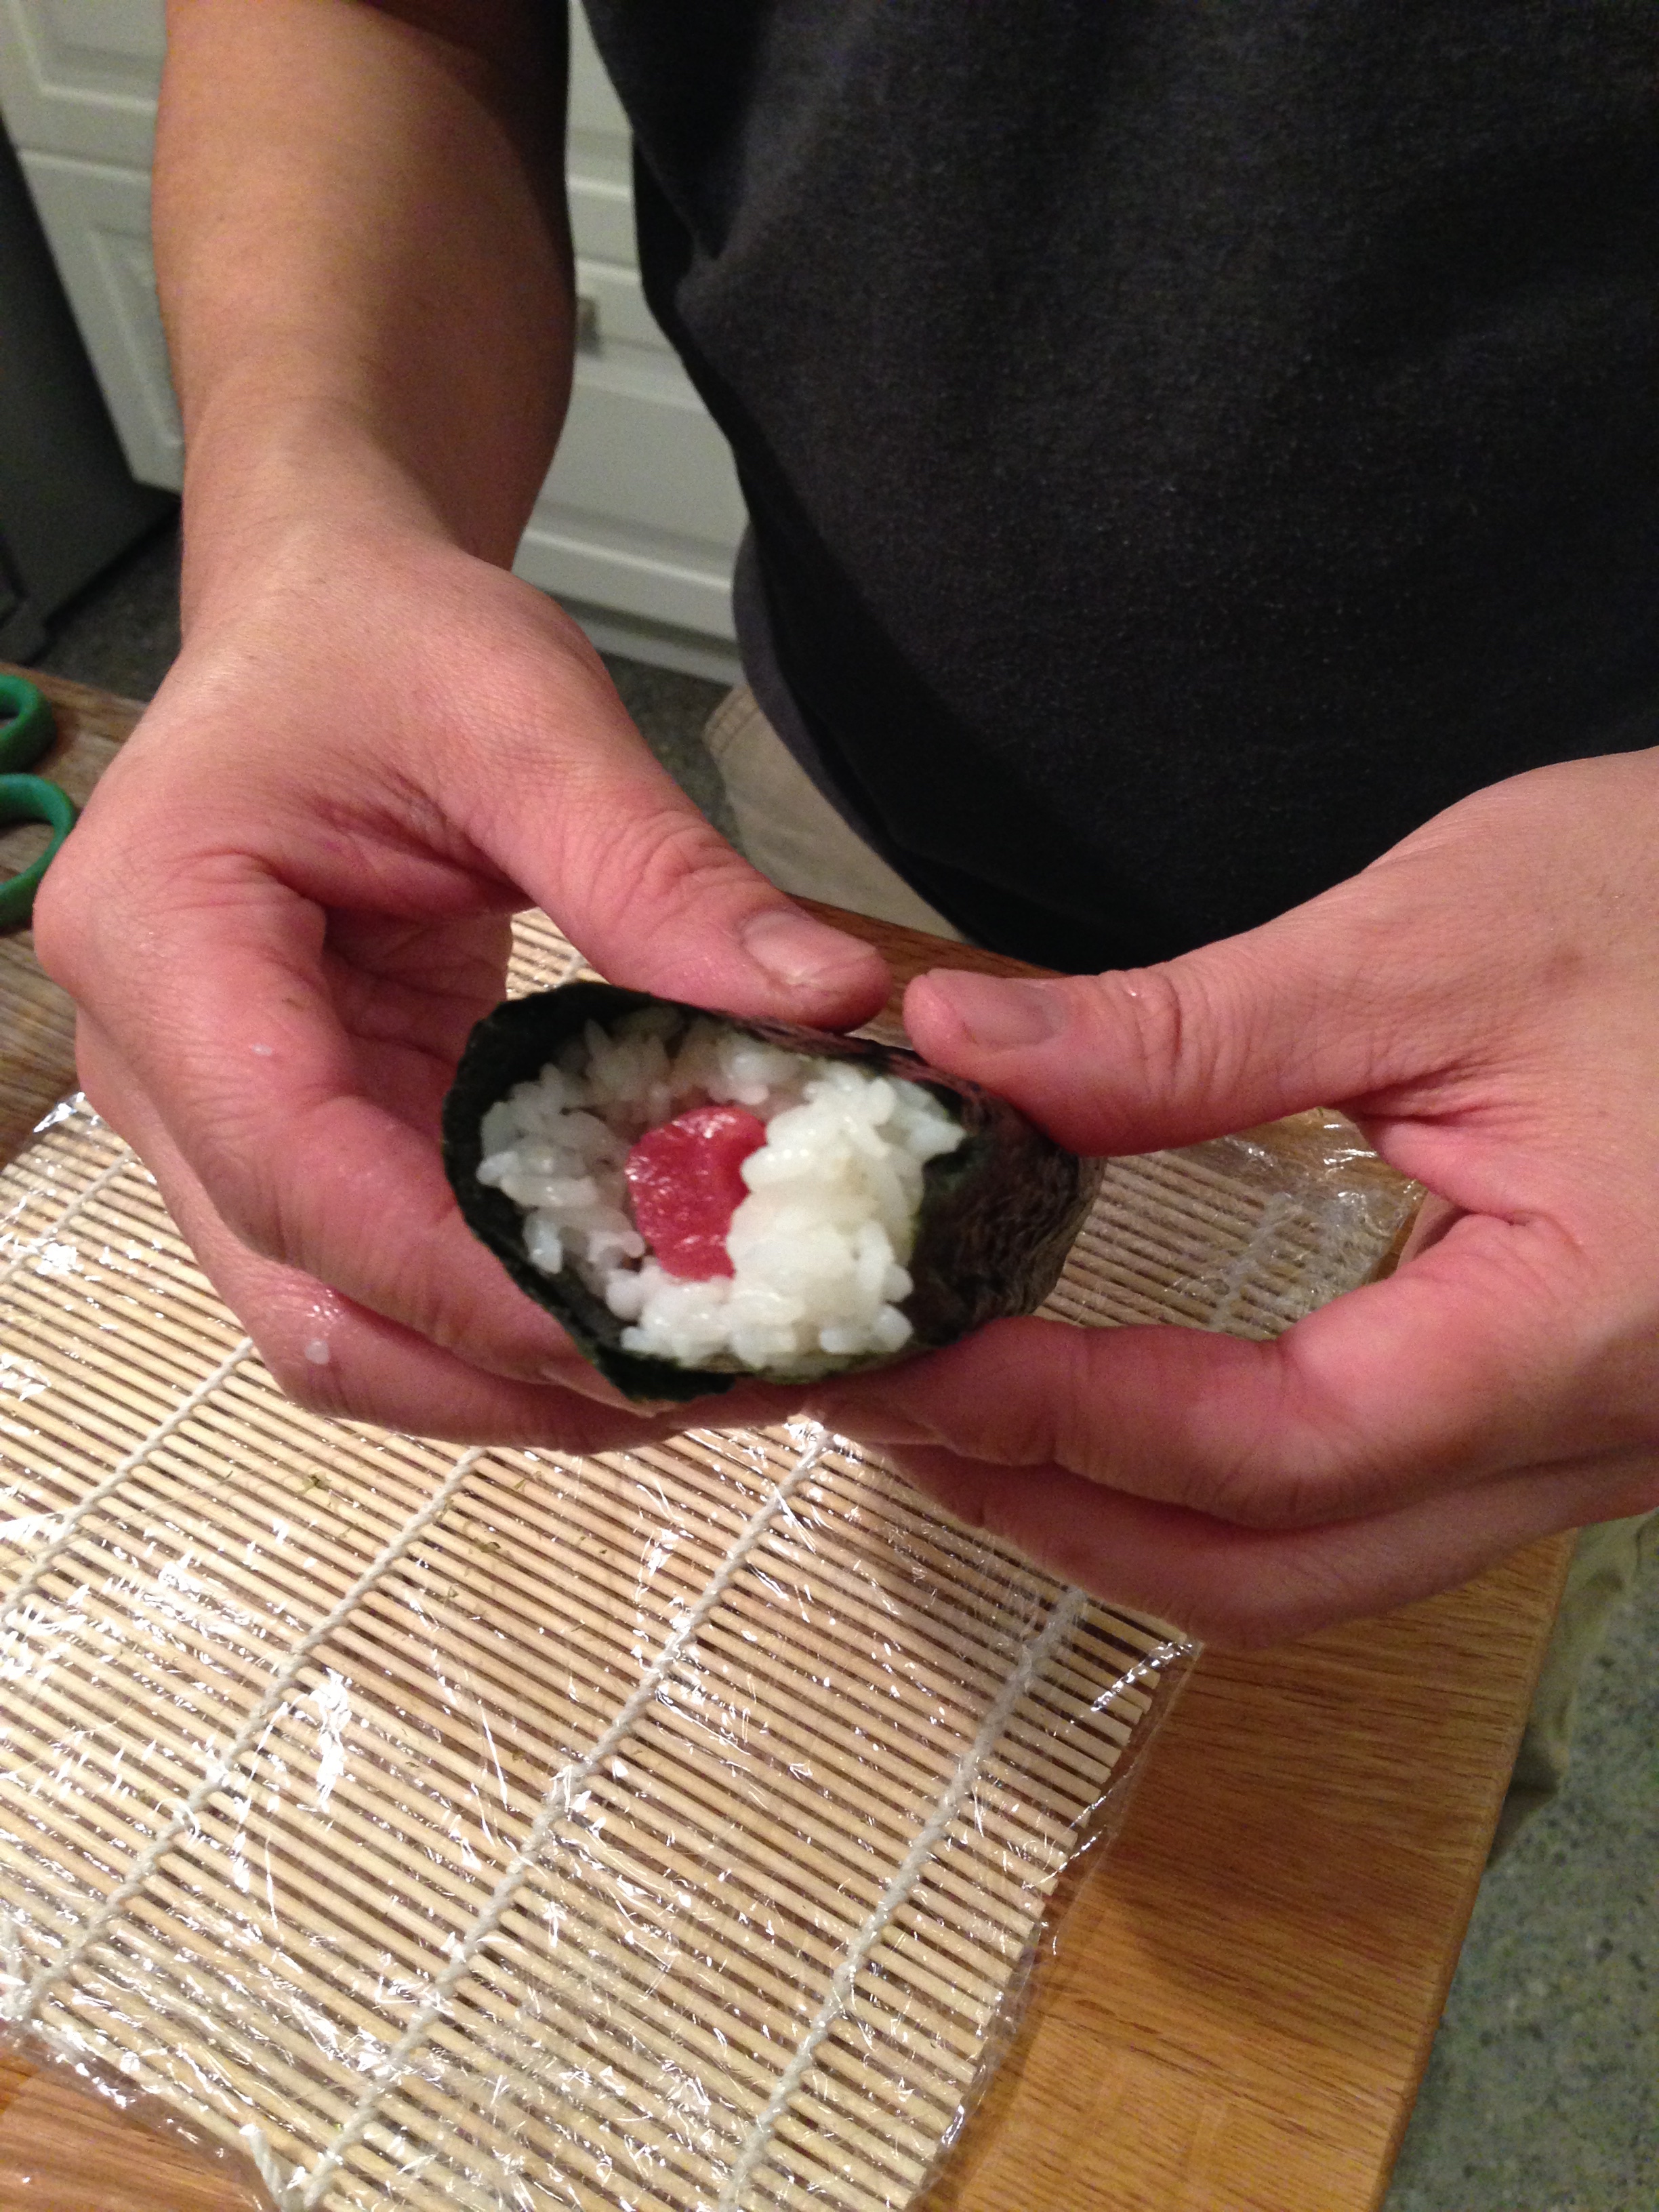
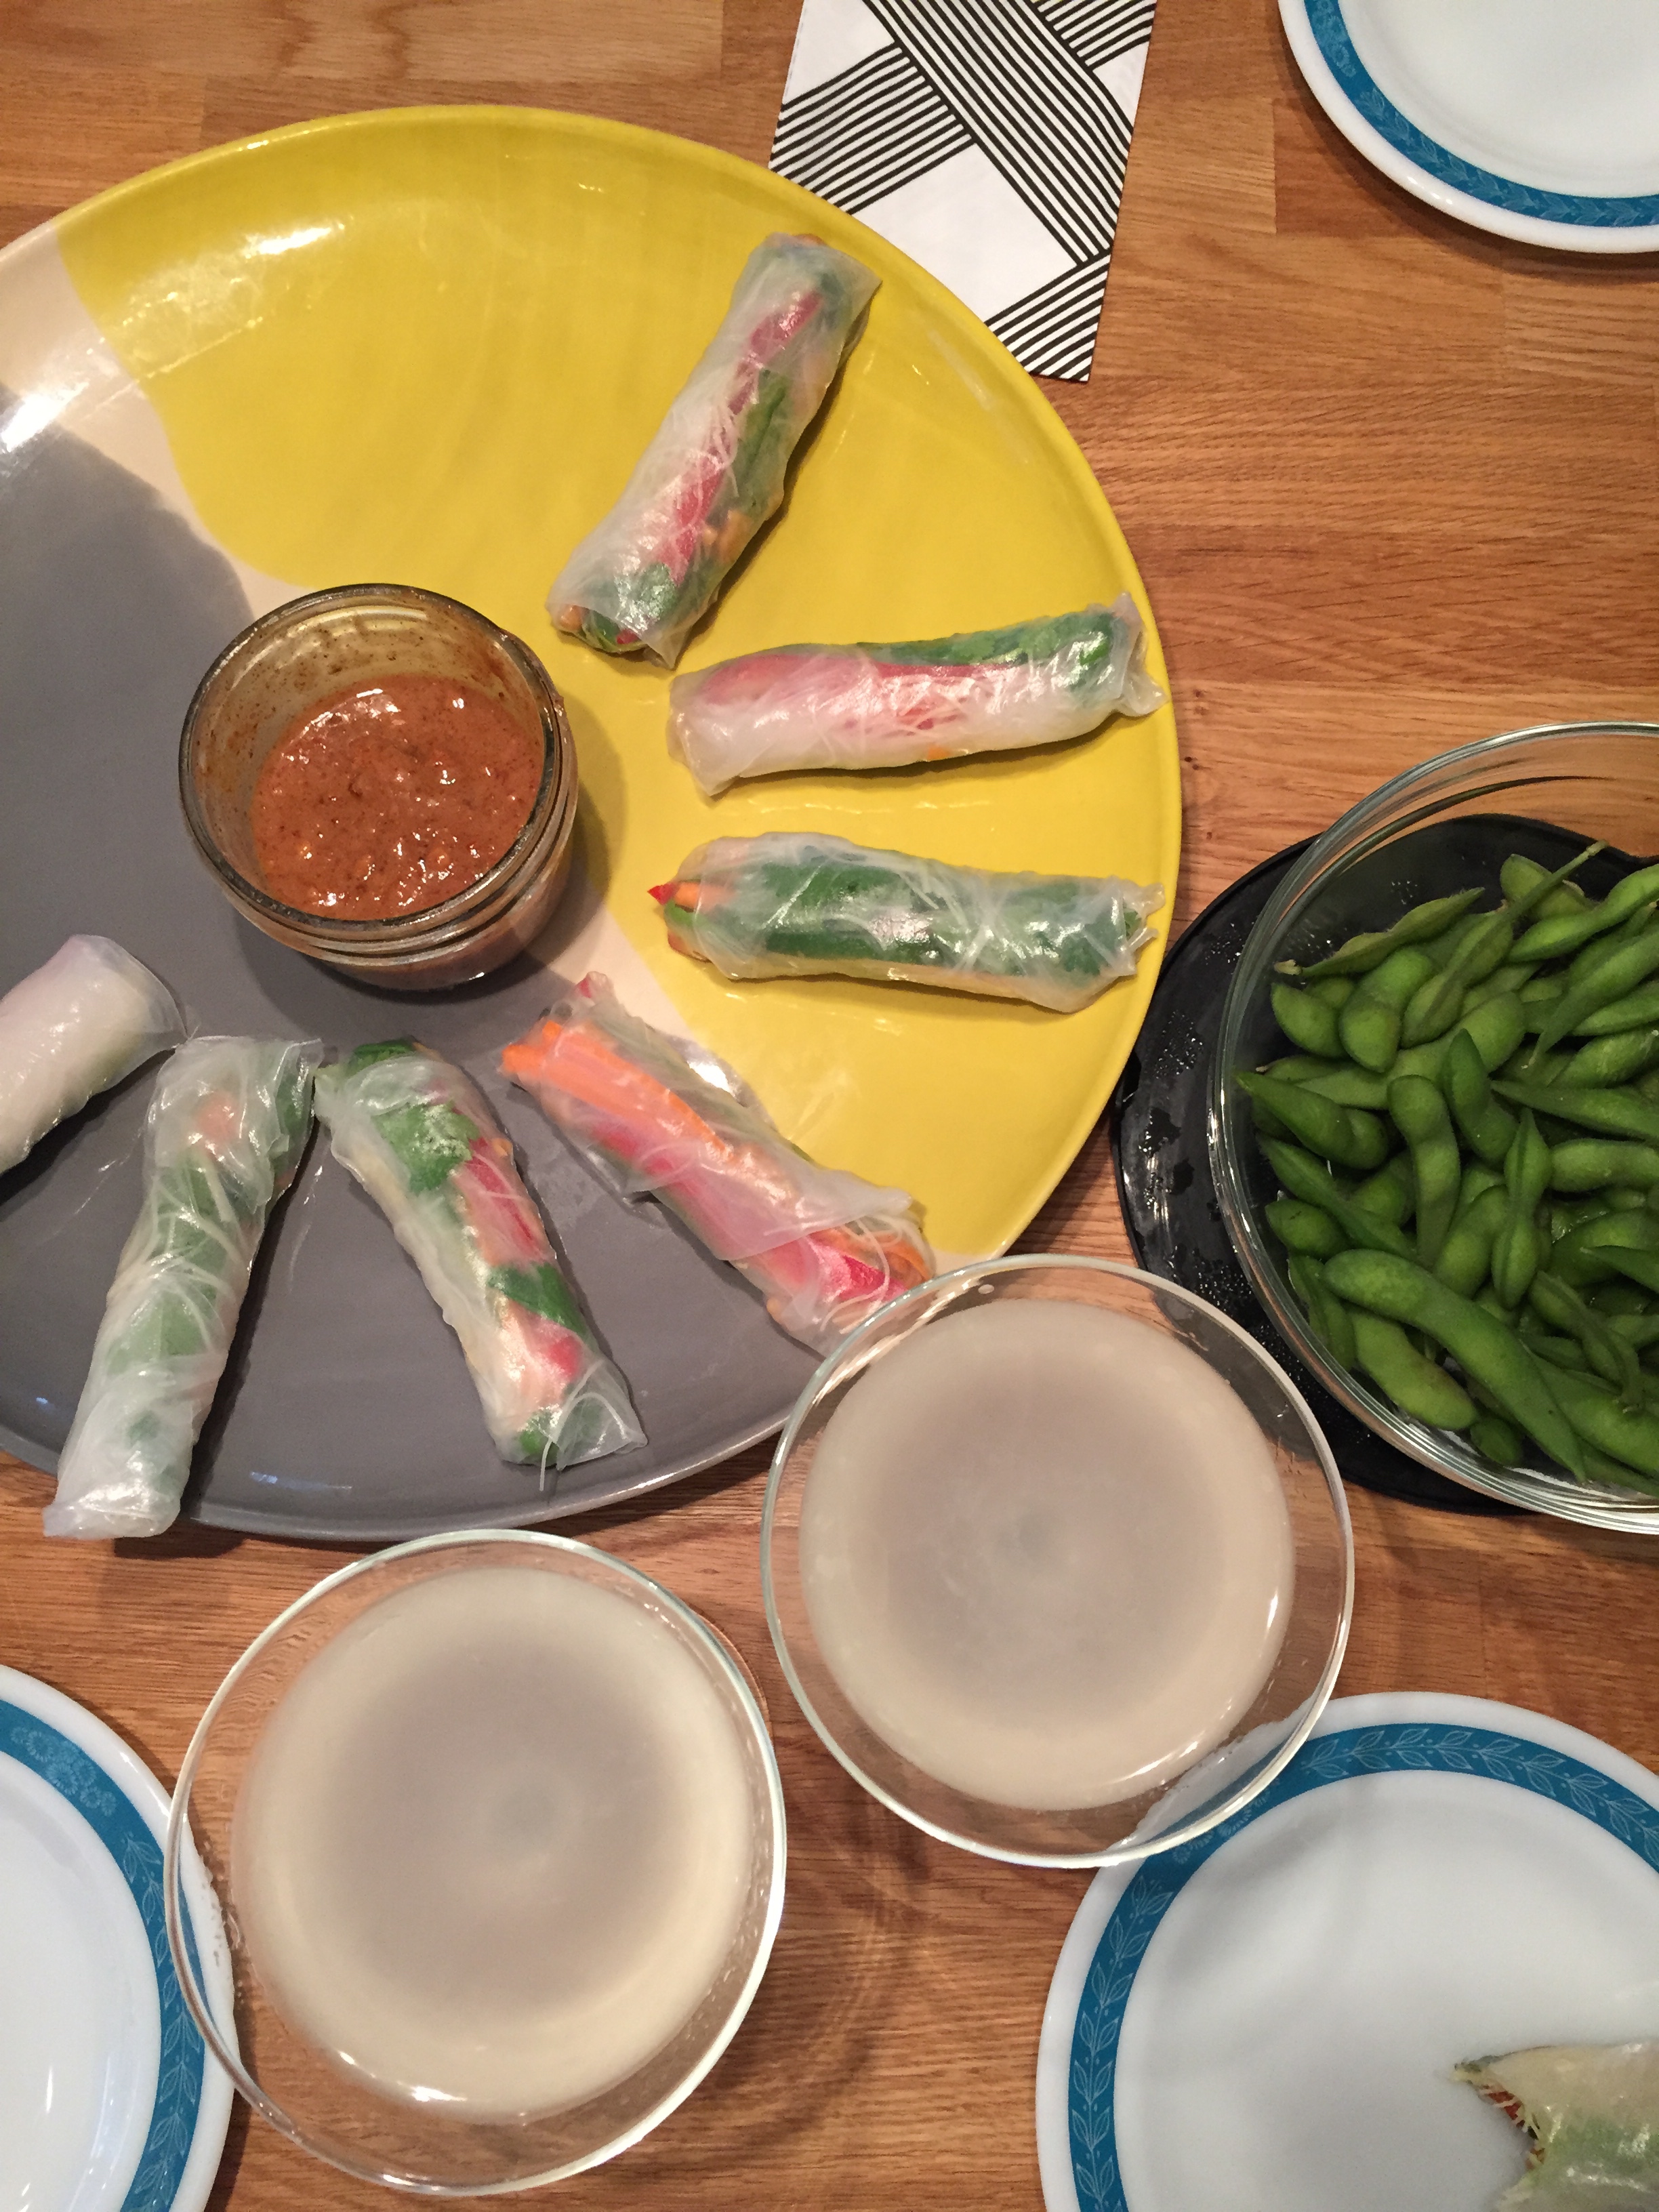
We tested the menu out last weekend when we had friends over for a little sushi-making party. It worked like a charm!

Tagged , , , ,

Plot #6: Winter Sowing Experiment

winter sowingI started gardening this week!! Back in December, Peggy (who seriously should be a contributor to my blog since she provides me with so much blog fodder!) sent me this blog post from A Garden for the House about winter sowing. Neither of us had tried it before but we both found the idea intriguing. I always feel like it’s late summer before all of my balcony flowers are really in bloom and by then, it’s sometimes too hot and busy to enjoy them. And last year, I had my best balcony garden but I also spent more than I normally do on flowers because I was addicted to having a lush, full garden. (I didn’t break the bank or anything…it was just more than usual.) Hopefully, if this winter sowing thing works, I can get a jump start on gardening, and I can start more things from inexpensive seeds instead of buying a lot of full-grown potted plants this year.

Winter sowing involves planting certain types of seeds in winter and keeping them outdoors in little protective “greenhouses”. Depending on your zone, you can plant perennial and hardy annuals as early as January. I waited until Tuesday (March 3) to start planting, so I planted some tender annuals, too. This blog post tells more about what you can plant when. winter sowing, seedsI worked on my winter sowing in my kitchen on Tuesday afternoon. For my greenhouses, I used distilled water jugs that I’ve been collecting all winter. (Naoto has been very suspicious of this “garbage collection”.) I drilled ventilation holes in the top and drainage holes in the bottom of each one.winter sowingThen I cut around the middle of the jug, leaving a little hinge underneath the handle. (Presley decided to take a bath while this was happening.) winter sowingI worked in my kitchen sink, filling each jug with a few inches of soil. Then I soaked the soil with running water and let the water drain out into the sink. After that I planted my seeds, one type per jug, labeling as I worked.

I only made it through seven jugs before I ran out of soil, but I’m hoping to run out today and buy more so I can finish the job this week. So far, I’ve planted broccoli, snow peas and lettuce in preparation for our community garden plot. And I’ve planted Evening Primrose, Columbine, Zinnias, and Achillea for the balcony. I have at least ten more potential seed packets waiting for winter sowing, depending on how adventurous I feel.

I put all of my seeds outside on the balcony. (I’m hoping my neighbors do not complain about the unsightly water jugs…condo living is challenging sometimes.) The seeds are sharing a table with my perennial sedum for now (which looks dead in the top picture, but I promise it’s just resting). That table gets the most sunlight and it gets snowed and rained on, so I figured the seeds will have the best chance there. For now, I wait…the hardest part of gardening!

Tagged , , , , , , ,

A Tiny Matchbox Valentine

matchbox valentine, vintage stamp, chocolateAt work we exchanged Valentines, grade school style with a handmade Valentine box and everything. I made a simplified version of my vintage stamp Valentine and I got a lot of great ones, too. One of my favorites was this tiny matchbox Valentine from Laura. It’s hard to see in the pictures, but it’s a plain matchbox covered with map paper–in my case, a map of Japan!matchbox valentine, vintage stamp, chocolateInside, there was a tiny piece of chocolate and a vintage stamp tied up with pink twine. matchbox valentine, vintage stamp, chocolateOnce I untied the twine, I saw that the stamp was actually two stamps sewn together to make a little card. There was a kind message inside.

I love that Laura used non-traditional Valentine colors and created something really special. I love working with such creative people!

P.S. Laura has a blog! And she wrote up a little tutorial about her Matchbox Valentines in case you want to make your own…for next year or another occasion! 🙂

Tagged , ,

Vintage Stamp Valentines

vintage stamp valentinesI’ve been making some handmade Valentines for pen pals and friends since January. Yet, somehow, I am not done. I get distracted too easily, and Presley joins me and naps on my supplies, which slows things down too.

vintage stamp, pun valentinesI decided to make some cards that looked a little bit like envelopes (similar to my calling cards for ex Postal Facto last year.) I started with some 4-bar cards and added pink and red vintage (or Japanese) stamps and a variety of washi tapes. I typed the message “You put the stamp on my envelope, Valentine!” on labels or directly on the cards. The labeled ones kind of look more like envelopes, but hopefully the silly message kind of makes sense.

They were a lot of fun to make and I was happy to be able to spend out some of my vintage stamp collection…although now I feel compelled to build up my red and pink stash again!

Happy Valentine’s Day! I hope your mailbox is full of love this weekend!

Tagged , , , , , , , ,

Easy Printmaking For Kids (& Adults)

printmaking for kidsLast week, I quickly shared about my thrift store find, Tomie dePaola’s Things to Make and Do for Valentine’s Day. When I got to this printmaking craft, I was really excited because I’ve done something like this before. I think it’s a really fun project–for kids and adults–and a good introduction to block printing without investing in a ton of materials.

Here are the instructions starring Tomie’s cute kids and cuter cat:Tomie de Paola Things to Make and Do for Valentine's Day styrofoam print project 2, Tomie de Paola Things to Make and Do for Valentine's Daystyrofoam print project 3, Tomie de Paola Things to Make and Do for Valentine's DayA few notes:

  • I know styrofoam is a horrible thing for the environment and a few cities in the U.S. are banning the use of styrofoam take-out containers. Think of this as re-purposing something evil. I got my styrofoam trays with fish and vegetables at Mitsuwa.
  • I used a brayer because I already had one on hand from a printmaking class, but a rolling pin works just fine and may be even better for kids since it’s bigger and easier to handle.
  • The book suggests poster paints. I used Martha Stewart craft paint because I had some already. It worked fine, but it did dry quickly. So, I tried oil-based printmaking ink, which I also had. It worked perfectly but I would highly suggest you don’t use it if you are working with kids. It’s messy, permanent and dries so slowly.

printmaking for kidsI made my “block” by tracing the outline of the Japanese character for “friend”. I flipped it around and traced it onto my styrofoam with a sharp pencil. I went over the outline a couple of times to make a deep enough channel to get a clean outline. If I had pressed too lightly, the outline would not be as clear.printmaking for kidsMy prints are imperfect, but that’s okay. It takes some practice to get the right amount of ink on the styrofoam–I need some more practice! And, if this oil-based ink ever dries, I will cut them apart into little cards and send them out as Valentines.

If you try this project, I’d love to hear about it! Happy Valentine making!


Tagged , , , , ,

Homemade Granola

trader joes, homemade granola, blueberry almondI hosted book club on Saturday morning. I knew, since we were going to get home late from the Blackhawks game Friday night, that I wouldn’t feel like getting up to bake muffins or something in the morning. So, I tried to think of something tasty that I could make a day in advance, that would still taste fresh and “homey” the next morning. Then the idea of a yogurt bar popped in my head and I decided that would be easy enough, even if I made homemade granola instead of serving store-bought.

This Martha Stewart recipe for Blueberry Almond Granola looked like a winner and -best part ever- I could buy all of the ingredients at Trader Joe’s!! (That’s always a bonus for me…I like my tiny Trader Joe’s and hate having to go to a second grocery store for one ingredient.)

On Friday afternoon, I whipped up a batch of granola and even though I followed the directions to the letter, the granola was over-toasted. It wasn’t really burnt. (I still liked it, but I also like my toast one step below blackened.) But the coconut was really toasty and it kind of affected the taste of everything else. I didn’t feel like I could serve it to guests. So, I gave it another go and so I’m sharing the recipe and method that worked best for me in hopes that no one else will burn their coconuts.

Blueberry Almond Granola

2 cups rolled old fashioned oats

1/2 cup sliced almonds

2 tablespoons vegetable oil

2 tablespoons honey

1/2 cup shredded coconut (sweetened or unsweetened)

1 cup dried blueberries

Pre-heat oven to 350°

Place the oats and the almonds in a large bowl. Mix oil and honey in a small bowl and drizzle over the oats and almonds. Stir to coat evenly. Spread the oats and almonds on a large baking sheet and place in the oven for 15-20 minutes, stirring every 5 minutes or so. (Mine was done at 15. Keep an eye on it.)

Place shredded coconut on baking sheet and put in oven to toast separately. I left my oven door open and stirred every minute or so for about 4 minutes. You can also toast the coconut on the stove using the method explained here.homemade granola, trader joes Once the coconut is toasted, add it to the oats and almonds and allow to cool. trader joes, homemade granolaStir in the dried blueberries and it’s ready to eat! I served mine with vanilla yogurt and fresh raspberries and blackberries. I think the book club enjoyed it, too…either that or they’re a bunch of good actors!

The granola is a lot less sticky sweet than store-bought granola but you don’t really miss the sugar because the toasty, oaty deliciousness is enough. And I have to say, even my coconut-hating husband liked it!

Tagged , , , ,

Homemaker’s Challenge #5: Sushi

making sushi at homeNaoto and I made homemade sushi in December. (Naoto did all of the work, but someone had to be in charge of taking photos, right?) It’s something that’s been on our to-do list for awhile, and Naoto saw a holiday sale for sashimi-grade tuna so he brought some home on a whim. He also bought a sushi maki, the bamboo contraption that helps roll the sushi rolls. making sushi at home, seasoning riceWe made regular rice using our rice cooker and, once the rice was cooked, we seasoned it with sushi rice seasoning (sushinoko). All of the instructions were in Japanese but I think we used two tablespoons for two cups of rice. It gave the rice a little bit of a vinegar flavor, which apparently helps to highlight the fish. making sushi at home, slicing tunaWhen the rice was cool, Naoto worked on the tuna. To make sushi, you have to use sashimi-grade fish. You can’t just go to the grocery store and choose any piece of fish, leave it raw and call it sushi. (This article muddies the waters…it’s unclear what determines if fish is “sashimi-grade”. I think the bottom line is…only shop at trusted places and this is not the time to be shopping for day-old specials.) Naoto got our piece of tuna from Mitsuwa, where sashimi-grade tuna is about $32/pound (regular price). Thankfully, the small piece of fish (a little larger than a deck of cards) was the perfect size for our sushi appetizer.

Naoto sliced the tuna into 1/2 inch pieces. making sushi at homeHe cut the nori (seaweed sheets) into pieces just long enough to fit the tuna. Then he spread the rice, leaving two and a half inches at the top empty for rolling. (He also covered the sushi maki with plastic wrap. Apparently this is a restaurant tip to keep the sushi maki clean.) Keeping a bowl of warm water on hand to wash off the sticky rice was helpful, too. making sushi at home, adding wasabi and tunaAfter dabbing on a bit of wasabi, he laid down the fish about one inch up on the rice end of the nori. making sushi at home, rolling sushiNext, he rolled up the sushi tightly. making sushi at homeI don’t think it was a bad first attempt, but it was hard to get the right amount of rice. Next time, we need to work on using less rice or cut thicker pieces of tuna to make up for the rice. It’s definitely harder than it looks to get the perfect amount of rice and a nice, tight roll going on. Sushi chefs make it look too easy! making sushi at home, presley tries tunaEven Presley got into the sushi action with a taste of fresh tuna. She loved it, obviously.

All-in-all it was a lot of fun and a tasty experiment. I think we are going to devote a Hasegawa Happy Hour to sushi making soon, where we will add some more ingredients like avocado and cucumber and maybe another type of fish.

To see the other Homemaker’s Challenge posts, go here.

Tagged , ,

Thanksgiving Invitations 2014

thanksgiving invitation with Paper Source acorn kitThanksgiving crept up on me this year. My mind has been occupied with other things and I didn’t have any real inspiration for an invitation. So, I went with leftovers…fitting, eh?

A few years ago, I made our Thanksgiving place cards with this Acorn kit from Paper Source. I had some leftovers, which I saved and used as a garland or something last year. Anyway, one acorn got a new life as an invitation. I typed out a basic note on vellum and cut it out with a circle punch. Then I tied the vellum on with a little gold and white twinethanksgiving invitation with Paper Source acorn kit and vellum envelopeI used a vellum envelope embellished with some squirrel and leaves washi tape and I used one of my “vintage” Thanksgiving stamps (a purchase from the Stamp King of Chicago.) vintage Thanksgiving stampSeriously, that stamp is a cornucopia of postal goodness. (If you’re interested, here is a little article that shows the USPS Thanksgiving stamp offerings.) thanksgiving invitation with Paper Source acorn kit and vellum envelopeHere it is, all packed up.

And now…back to cleaning and menu planning!

Tagged , , , , , ,

Missouri Star Quilt Company


Missouri Star quilts, Hamilton, MOVisiting the Missouri Star Quilt Company made me want to rush home and cut up the fabric I bought for a quilt a few years ago. It also made me want to buy more fabric…which I did. We only visited the main shop and the seasonal fabric shop but Missouri Star has eight stores in Hamilton devoted to quilting. Missouri Star quilts, Hamilton, MOAs usual, I regret not taking more pictures. There were aisles and aisles of fabric to choose from in the main store. I had a hard time not going overboard…I figured since I haven’t actually started making a quilt, I should resist buying every single fabric that caught my eye! (Besides, Missouri Star has an online store, so really, I can shop anytime!)fabric from Missouri Star Quilt COI chose a two patterns to add to my future quilt (the grey and yellow ones) and the forest animals one to make a pillow cover. Christmas fabric from Missouri Star Quilt COAt Sew Seasonal, the holiday fabric store, I found a Scandanavian-style fabric and some coordinating red dots. Missouri Star quilts, Hamilton, MOMissouri Star has opened the doors for more business opportunity in Hamilton. There is a new fancy restaurant in town, Blue Sage, which I didn’t have a chance to try but there is a burger place and a bakery that were both quite tasty. It would be easy to make a day of fabric shopping in Hamilton! Missouri Star quilts, Hamilton, MO

Tagged , , ,

Renegade Craft Fair 2014

Renegade Chicago, Peg & Awl, New Academy PressLast year, we were in Japan during the Chicago Renegade Craft Fair and I really missed it as part of my “end of summer” routine. I love going to Renegade, so when it rolled around again this summer I knew to keep the weekend open.

I didn’t buy very much and as usual I had “non-buyers remorse”. I wish I had researched better before we went. I usually comb through all of the sellers’ sites and make a wishlist of things to look for, but I didn’t do as much investigative work this year and I missed out on a couple of things that I wish I’d seen. We got about two-thirds of the way through the fair and the crowds were picking up and we were hungry!! So, we skimmed through part of the fair, which was fine by me because tacos were waiting for us at Naoto’s office. Plus, there’s always the internet…I picked up a lot of business cards and can purchase from the comfort of my pajamas!

Renegade Chicago, Peg & AwlSo, what did I buy? I have been eying this Peg & Awl bag for almost a year now. (Mine is a slightly larger version of this one.) I love its polished rustic feel–it’s neat and tidy and not too bulky, but also has a worn, casual feel. I love the waxed canvas and the antique deadstock red gingham fabric trim. When I read that the straps were made from antique WWII gun slings, well that sealed the deal. So far, I’m loving this bag…it’s the perfect size for my planner and my wallet and a few other necessities and the front pocket is perfect for my phone and a lip balm (the real necessities!)Presley and her Peg & Awl bag nap matI should also note that the bag makes an excellent cat nap mat, according to Presley. (Thanks for leaving your fur behind, cat!) Renegade Chicago, New Academy PressThe Into the Night postcard set from New Academy Press is so good that I came home and ordered two extra sets (because I couldn’t imagine parting with this one.)  Renegade Chicago, New Academy PressThe set comes in a screen printed folder with a screen printed band. I’m thinking I will be able to turn it into a tiny staple-bound notebook when I’m all done with the cards. It’s just too fancy to throw away! Renegade Chicago, New Academy PressThe postcards are gorgeous screen prints that create a scene together and also work really well as a single card.We are going to frame this set for our bedroom wall. (The bedroom is lacking in wall art, style and creative direction.)

I also bought a paper tape (which is less than exciting) and a small gift (which I will share after Christmas). All in all it was a great Renegade. The weather was perfect–cool and sunny–and the company was wonderful. It’s always fun to meet the creative people behind the wares.

If you’d like to read more from Renegade Chicago, Rebecca from Hugs are Fun has a great post on Renegade with detailed shots of some of the booths and Robyn from Robayre has a lot of great stuff to share too.

OH, and if you missed Renegade, Show of Hands is coming up on November 22 and 23. Karen and I went last year and it was as great as Renegade, only smaller. I highly recommend is as a kick-off to your holiday shopping!

(My 2012 Renegade post is here.)

Tagged , , , , , , ,