Tag Archives: homemaking

Twinkle Lights

condo balconyA few weeks ago, my dad put in an outlet for our balcony. We’ve been here four years exactly this weekend and I can only say whyyyy didn’t we do this sooner? The outlet gave us the option to add twinkle lights outside. I plugged them in last night and they seriously transformed the humble balcony into an extra summer room for relaxing, for Hasegawa Happy Hours, for parties…endless possibilities.
condo balconyThe balcony is alllllmost done. I still have a few things I want to do, like plant a climbing flower, either a morning glory, black-eyed Susan vine (thanks for the suggestion, Mr. Brownthumb!) or a cardinal climber. And I have a couple of other flowers on my wish list (as always).

I’m meeting my parents today to do a little bit of plant shopping. I’m really hoping to have the balcony all set by the weekend. The weather has been so weird here–either blazing hot or unseasonably chilly or raining. None of those situations are making it easy to finish things up out there. Spring in Chicago…I wouldn’t have it any other way.

Tagged , , , , ,

Behind on the Balcony

potted plants for balconyI’m behind on getting our balcony all summer ready.

I looked back into the blog archives to find that in 2012, I was all planted by May 9th. And last summer, I was potting flowers on May 15th. This year…well it’s May 23rd and I’m still not quite started.

potted plants for balconyYesterday I went to look for flowers but came home pretty empty handed. I bought one big hanging pot of geraniums since most of mine didn’t make it through the winter. (They may have been a little bit neglected in the water department.) And last weekend I bought the fuchsia above. Its flowers are so interesting and fun. The two fuchsia plants don’t quite fill out the pot as much as I’d like so I bought an accent plant to tuck into one side. We have a few perennials leftover from last year and two mint plants potted, but it’s looking rather bare out my window at the moment.

Oh and in other devastating news, my hen & chicks, which I’ve had since we moved here in 2010, died this year. I’ve left them out over the winter every year, but this year proved too cold for them. Poor things. I feel like I’ve lost some old friends.

My dad put in an outdoor outlet for us, so we can hang lights and make it a party-like atmosphere out there and I bought some fun new pillows for the love seat. Yesterday I spent some time sweeping up and moving furniture around. Hopefully we’ll make some progress out there this weekend (and in our community garden plot too!) and I’ll have more to share next week!

Have a good weekend!

Tagged , , , , , , ,

Easter Sunday & Roasted Grapes

dunkin donutsYesterday was Easter, but even better than that, it finally felt like real spring outside–warm enough to wear a dress and spend some time outside writing letters, and warm enough to sleep with the windows open. Bliss. blue skyEven my “anniversary tree” is budding and looking more spring-like. I’m excited to plant some flowers and plan a balcony party or two. roasted grape appetizerWe spent Easter evening at our neighbor-friend, Karen’s. We joined her family party, which included Karen’s ninety-nine year old grandmother (who didn’t look a day over seventy-five!)

I made an appetizer of roasted grapes and manchego cheese and like last week, it seemed like a hit. (It really is hard to tell if people are just being polite or if they truly love your cooking.) I love easy and unique recipes (much like my beloved ricotta) and this one is going to be a new go-to for happy hours and dinners around here. Also, I bet it would be tasty with the ricotta…

Roasted Grapes with Honey & Thyme

(adapted slightly from Right at Home)

1 pound seedless red grapes

1 tablespoon olive oil

1 tablespoon fresh thyme (stems removed)

1/4 teaspoon salt

1/4 teaspoon pepper

1 tablespoon honey

Preheat oven to 400°F. Line a cookie sheet with foil and set aside.

Wash grapes and remove from stems. Dry the grapes on a tea towel to remove excess moisture and place in a large bowl. Add olive oil, thyme leaves, salt and pepper. Stir to coat.

Pour grapes onto cookie sheet and place in oven until skins pop (about fifteen minutes). There will be a little bit of grape juice in the pan.

Remove from oven and drizzle with honey.

Serve warm or at room temperature with manchego cheese and crackers.

Because I was serving the grapes with cheese and crackers, I used a slotted spoon to transfer them from the pan to the serving bowl. If you were serving the grapes with chicken or desserts, the juice would be a delicious addition. And while the original recipe called for two teaspoons of thyme, I think extra thyme is a welcomed flavor, especially with the manchego cheese.

appetizer tableKaren made her famous pimento cheese (along with a traditional Easter dinner) and made us feel like family. Thanks for a fun time, Karen!!

Tagged , , , ,

Japan Does It Better 7: No Shoes

minnetonka moccasins, no shoes in the houseWhen we first moved into our apartment, we had new hardwood floors installed and I decided we would officially become a “no shoes” household. Naoto and I were both accustomed to taking our shoes off at the door, but in our old apartment, with its worn hardwoods, we didn’t really think about asking our guests to take off theirs. But the hardwoods in our new apartment were the most expensive upgrade to our home and I wanted to take good care of them. Wet shoes, snowy, salty shoes, un-maintained high heels, rocks…they were all the enemy (not to mention dog doo, spit, food, dirt and other unmentionables from the outside world).

But my mom pointed out that as a good hostess, you want people to feel comfortable in your home. For some people, that means keeping their shoes on. I know deep down that my mom is right, and I do want to be a good hostess, but it’s hard–especially with the snowy, slushy weather we’ve been having–to not cry when I think about muddy boots traipsing across my floors and rugs.

This is where Japan Does It Better…

In Japan, there is no question whether or not you should remove your shoes. Everyone removes their shoes. You walk into a tiny vestibule, take off your shoes and step into the rest of the home. Outdoor shoes never step up into the rest of the home. And most people have an array of house shoes that you can wear if you choose.

The aversion to outdoor shoes being worn indoors goes beyond homes in Japan. In some restaurants and shrines, you are asked to remove your shoes. Oftentimes at izakayas there are lockers where you place your outdoor shoes to keep them safe while you eat. (It can be hard to keep track of your locker key when you drink too much!) Some places have communal slippers you wear while inside, other places you just wear your socks. I often wonder how the communal slipper thing would be accepted in the US…I am pretty germ-phobic, but I never thought twice about putting on communal slippers in Japan. (Everything just seems very sanitary there.) And luckily, I’ve always had cute, hole-free socks in my suitcase during my trips to Japan!

What do you think? Shoes, no shoes? Would you think it was weird to take your shoes off in a restaurant?

No shoes indoors…just another way Japan Does It Better!

For more JDIB posts, go here.

Tagged , , , ,

Scenes from Hasegawa Happy Hours-January Edition

margaritas and chipsHasegawa Happy Hour has been in full swing around here. Every week (usually on Thursday nights), I’ve been trying a little snack recipe and mixing up a cocktail for Naoto and me (and usually friends, too). I am loving this new tradition because it’s pushed me out of my comfort zone and into making some fun things, like bread and biscuits.

For the first HHH, I whipped up classic margaritas and carefully opened some Whole Foods chips and salsa. We made Martha Stewart tacos, too. Simple and perfect for the two of us. naoto and his cardiganThe next week, Karen joined us for Last Words and homemade Avanti’s gondolas. This Hasegawa Happy Hour has set the standard for all others…
limoncello martinis
tomato cobblerNaoto received homemade limoncello for his birthday, so I decided to use it for martinis for our next Happy Hour. Our neighbor friends joined us for drinks and my first attempt at making biscuits. I found Joy the Baker’s Tomato Cobbler with Blue Cheese Biscuits and decided to give it a try. There were some things about the recipe I loved (the caramelized onions and the blue cheese biscuits) and some things that I would change on my next attempt (blazing hot whole cherry tomatoes exploding in my mouth were not fun). duck fatAnd finally, last Thursday…I taught a workshop that evening and didn’t plan ahead for cocktails. And since Naoto and Brett did not carry the Hasegawa Happy Hour torch, we went out to a neighborhood bar for drinks and dinner…well worth it!

We already have fun plans tonight for HHH, and next week I’ll be in San Francisco, so February is shaping up to be another good cocktail month. Although, Naoto gave up drinking in February, so I’ll have to come up with a few fun mocktails for him!

My plan is to compile our pictures and maybe even some favorite recipes into a little mini-book at the end of the year. I love a good paper project, you know…

Cheers!

Tagged , , ,

Dinner Party 1 & a Sweet Hostess Gift

dinner party one, tonkatsuLast Saturday, we hosted the first dinner party of the year. I invited my book club friend Peggy and her husband over for Naoto’s tonkatsu. It was a fun night, filled with tasty cocktails (which I will be sharing next week), delicious food and of course good company. The dinner party made me wonder why we don’t entertain more often…I’m thinking I might need to increase my dinner party goal for the year–three seems so few now. This time we kept things simple, because last week got a little crazy for us. Hopefully over the course of the year, we can fancy the dinners and the tables up a bit…you know, stretch the goal.
hostess gifts
Much to my surprise, Peggy brought me a hostess gift! Of course, hostess gifts are unnecessary but I was completely delighted with Peggy’s thoughtfulness. She found this vintage martini pitcher and vintage relish dish–be still my heart!vintage martini pitcherThe martini pitcher is heavy and has its own glass stirrer with a frosted ball on top. It has a lip that holds the ice in during pouring, too…things were so practical back in the day! Tonight, I’m going to whip up some martinis for Hasegawa Happy Hour and use it for the first time. vintage relish dishThe divided relish dish is so sweet. There are pictures of celery (the large section), olives and pickles (the two smaller sections) etched into the glass. I don’t have any pretty relish dishes, so I know this is going to get a lot of use. Whether it’s just Hasegawa Happy Hour for two or a larger gathering, pickles and olives and yes, even celery are going to be making more classy appearances around here.

Thank you, Peggy, for being such a thoughtful and fun guest. You must come back soon for an Aviation cocktail (and maybe some more lychee cocktails, too!) 


Tagged , , , ,

Vanilla Steamers, Cozy in a Cup

vanilla steamerOh the weather!

I make it a rule to never complain about snow until March. I mean, it’s only fair…winter begins in December and ends in March. It’s only sensible to expect it to snow once or twice (or a million times) in those months. Naoto and I are lucky that we can walk just about anywhere to get what we need. I’m sure if we were forced to drive on slick and snowy streets, I would feel a little bit more resentful of the weather…but for now, I’m accepting of the fact that I live in the Midwest and we get the best and worst of the four seasons.

But this winter, with its polar vortex, arctic blasts, constant snow and ice…is testing my patience. Today it is -5°F with a possible -40°F wind chill. There are wind chill warnings until Wednesday when it will warm up to a balmy 17°F. And, for the third time this year, Naoto is working from home because it’s too cold for his commute to work. Being outside for a mere ten minutes can be dangerous, so his company decided everyone should work from home just to be safe. (Most people commute by train, so walking to and from the stations and waiting for trains can be quite miserable.)

I haven’t left the apartment since Sunday afternoon…we bought a ton of groceries and prepared to hunker down at home. But last night, I was feeling a little bit stir crazy. And then I got a serious craving for a vanilla steamer. Starbucks is only two blocks away, but I thought it was rather silly to risk the tip of my nose for a drink. Plus, the steamer wouldn’t be steamy for long in sub-zero temperatures. And then I remembered that someone had given me a recipe for steamers at home…and we happened to have all of the ingredients on hand. It was meant to be.

vanilla steamer ingredientsVanilla Steamer

1 cup milk

1 tsp sugar

2 tsp vanillawarm milk on the stoveWarm milk, sugar and vanilla over medium/low heat in a saucepan. Stir until sugar is dissolved and the milk is hot but not boiling.vanilla steamer before frothPour into a mug. You could go ahead and drink it now, but part of the fun of a steamer is the frothy milk.frothing milk We have this handy, inexpensive milk frother and it froths the milk perfectly. If you don’t have a frother, the internet says you can use a blender (immersion or regular) to get the same effect, but I’ve never tried it. vanilla steamer target cat mugSteamers are perfect winter night treats, especially when you’ve hit your caffeine limit for the day. (I’ve been drinking so much coffee and tea lately just to stay warm that I was beginning to think heart palpitations are my normal heart rate…)

Stay warm this week, everyone!

Tagged , ,

Homemaker’s Challenge #3: Avanti’s Bread

Avanti's GondolaI grew up in a tiny town in central Illinois. Peoria was the closest city with things to do (like shopping, buying groceries, eating at chain restaurants, meeting boys other than the fifteen I had known since kindergarten…) and quite often we would eat at Avanti’s. Avanti’s is an inexpensive Italian restaurant with several locations in Peoria, East Peoria, Pekin and Normal (near ISU). We ate there as a family growing up and my friend Leah and I would go there almost every weekend throughout high school and college (when we were home for the summers).

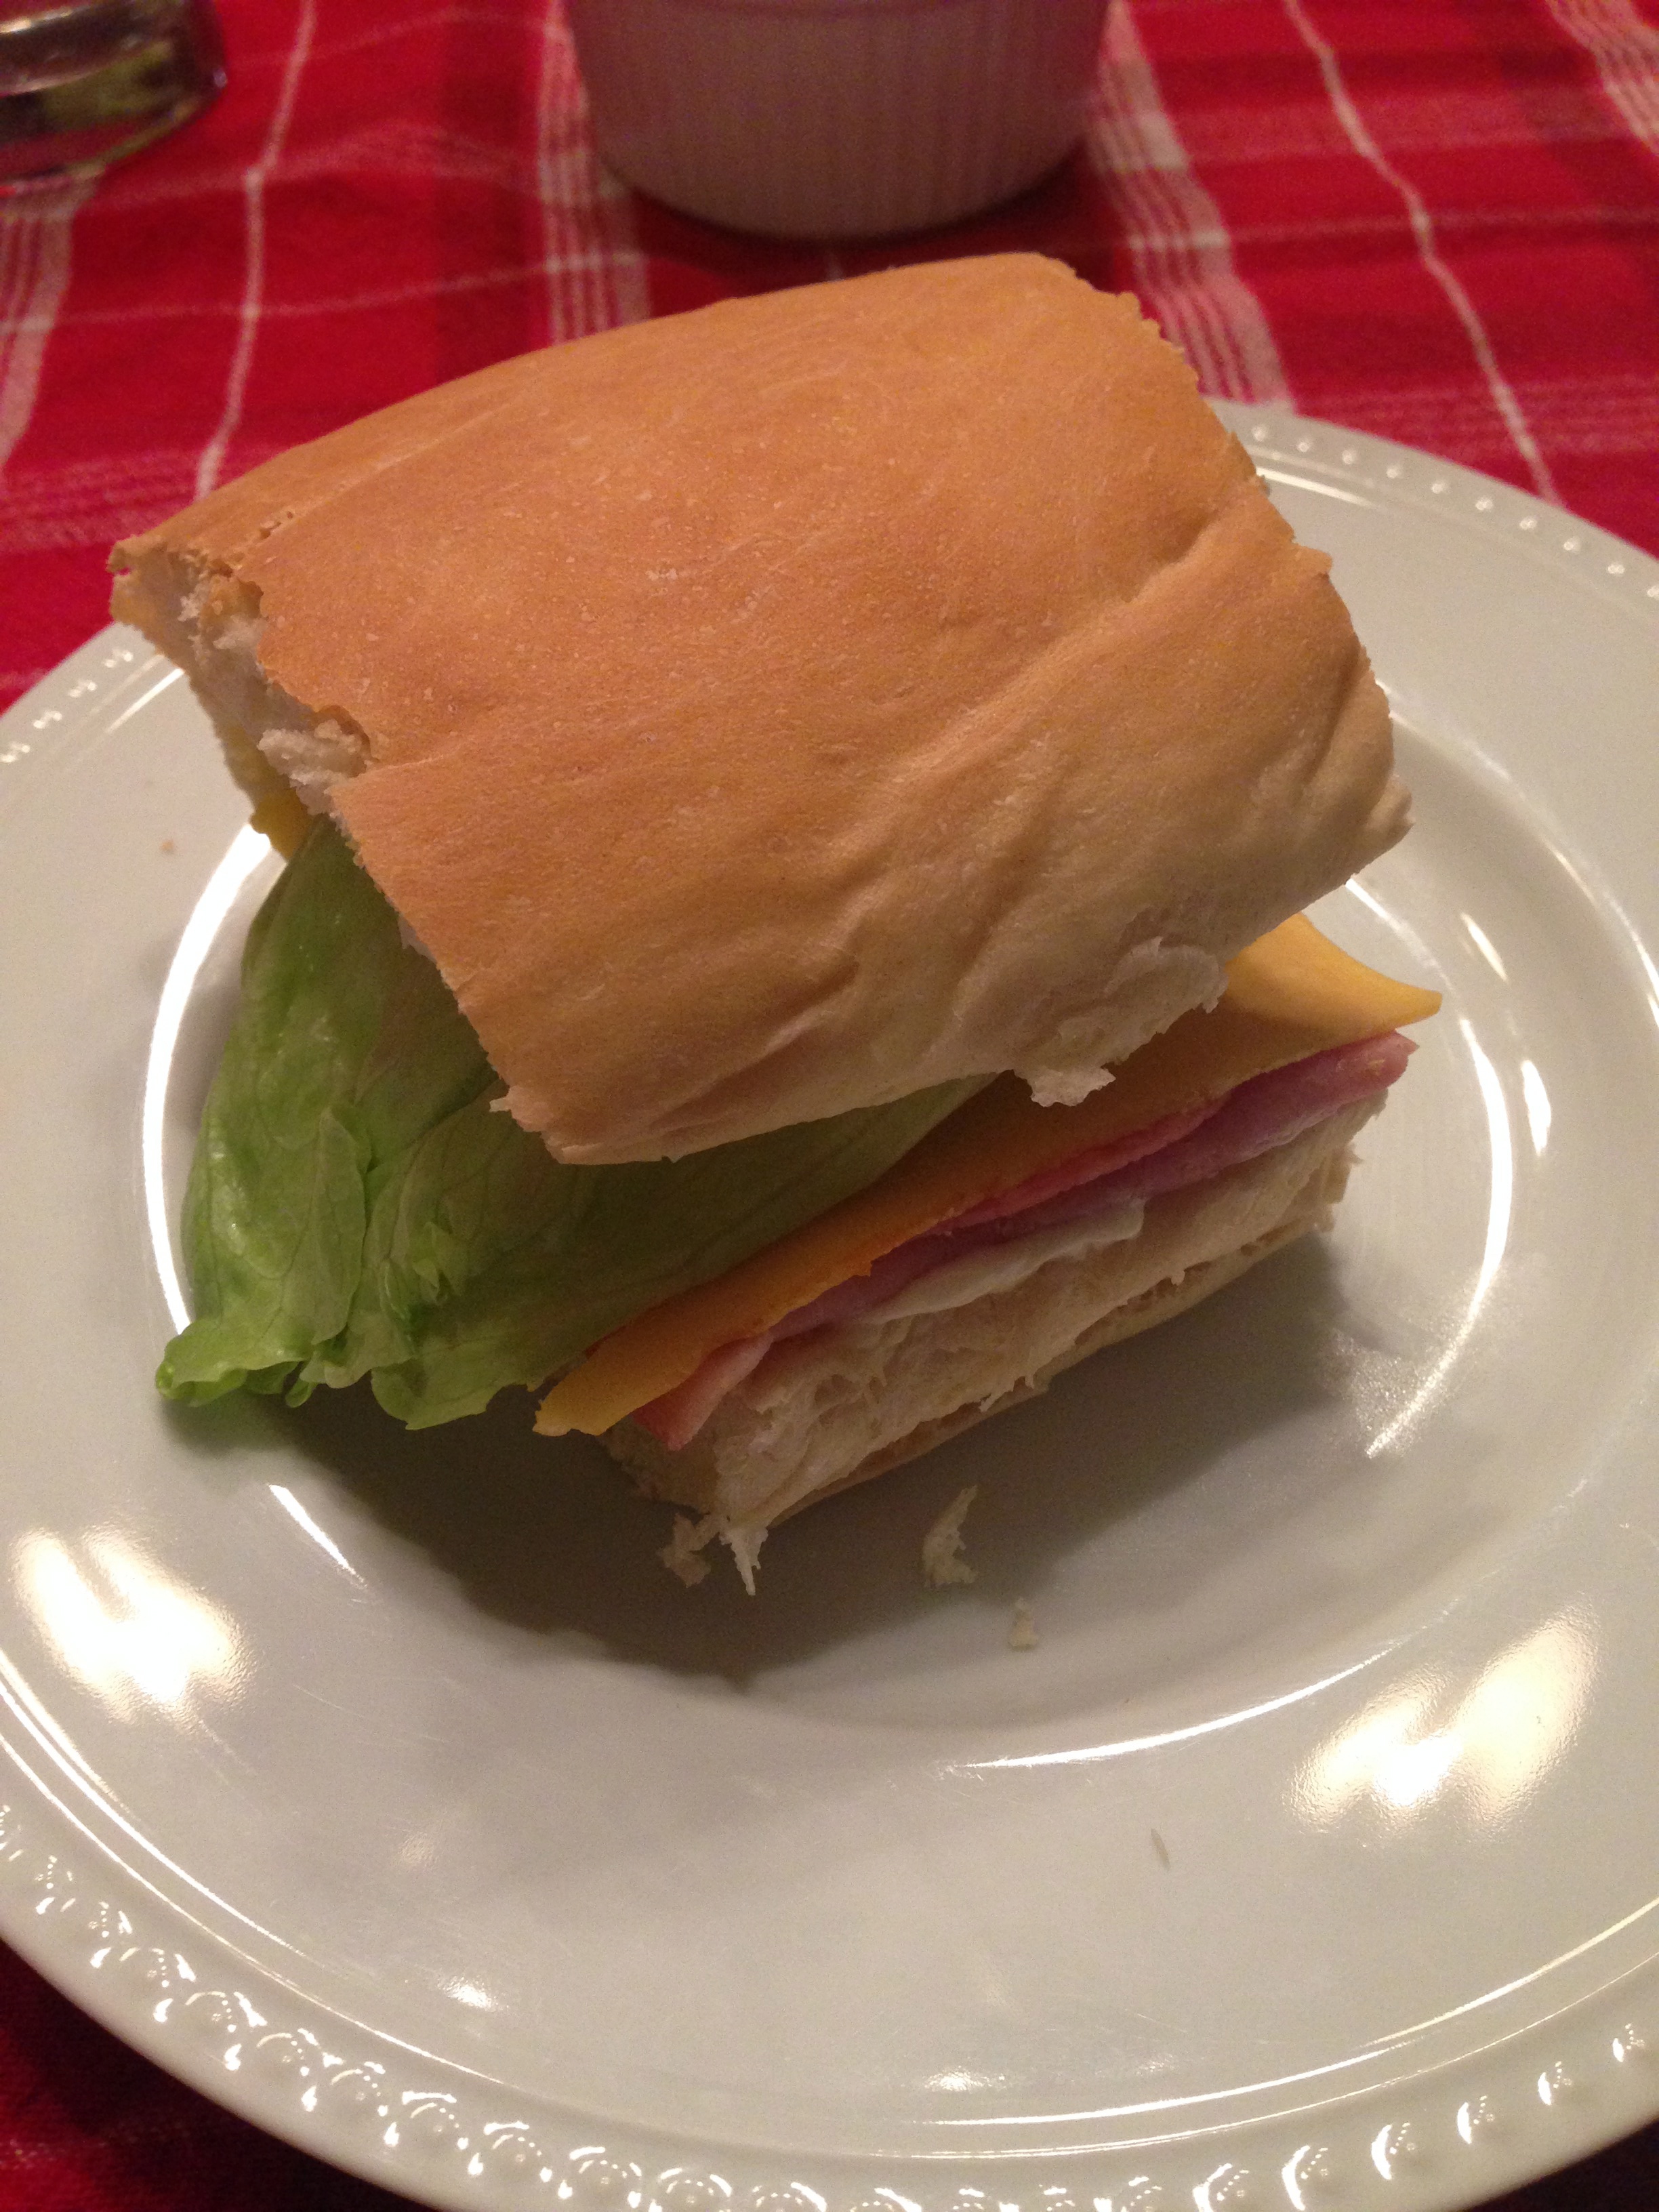
Avanti’s bread is sort of famous in the area. It is a sweet Italian bread that is something dreams are made of. It makes a perfect treat to sop up Avanti’s red sauce, it makes a tasty garlic bread and it’s probably most famously used to make a gondola: a sub with mayo, lettuce, ham, salami and American cheese. It’s a taste memory so clear that I could still taste a gondola, even though I hadn’t eaten one in years. Last week, I set out to create the gondola on my own, which meant, baking some Avanti’s bread.

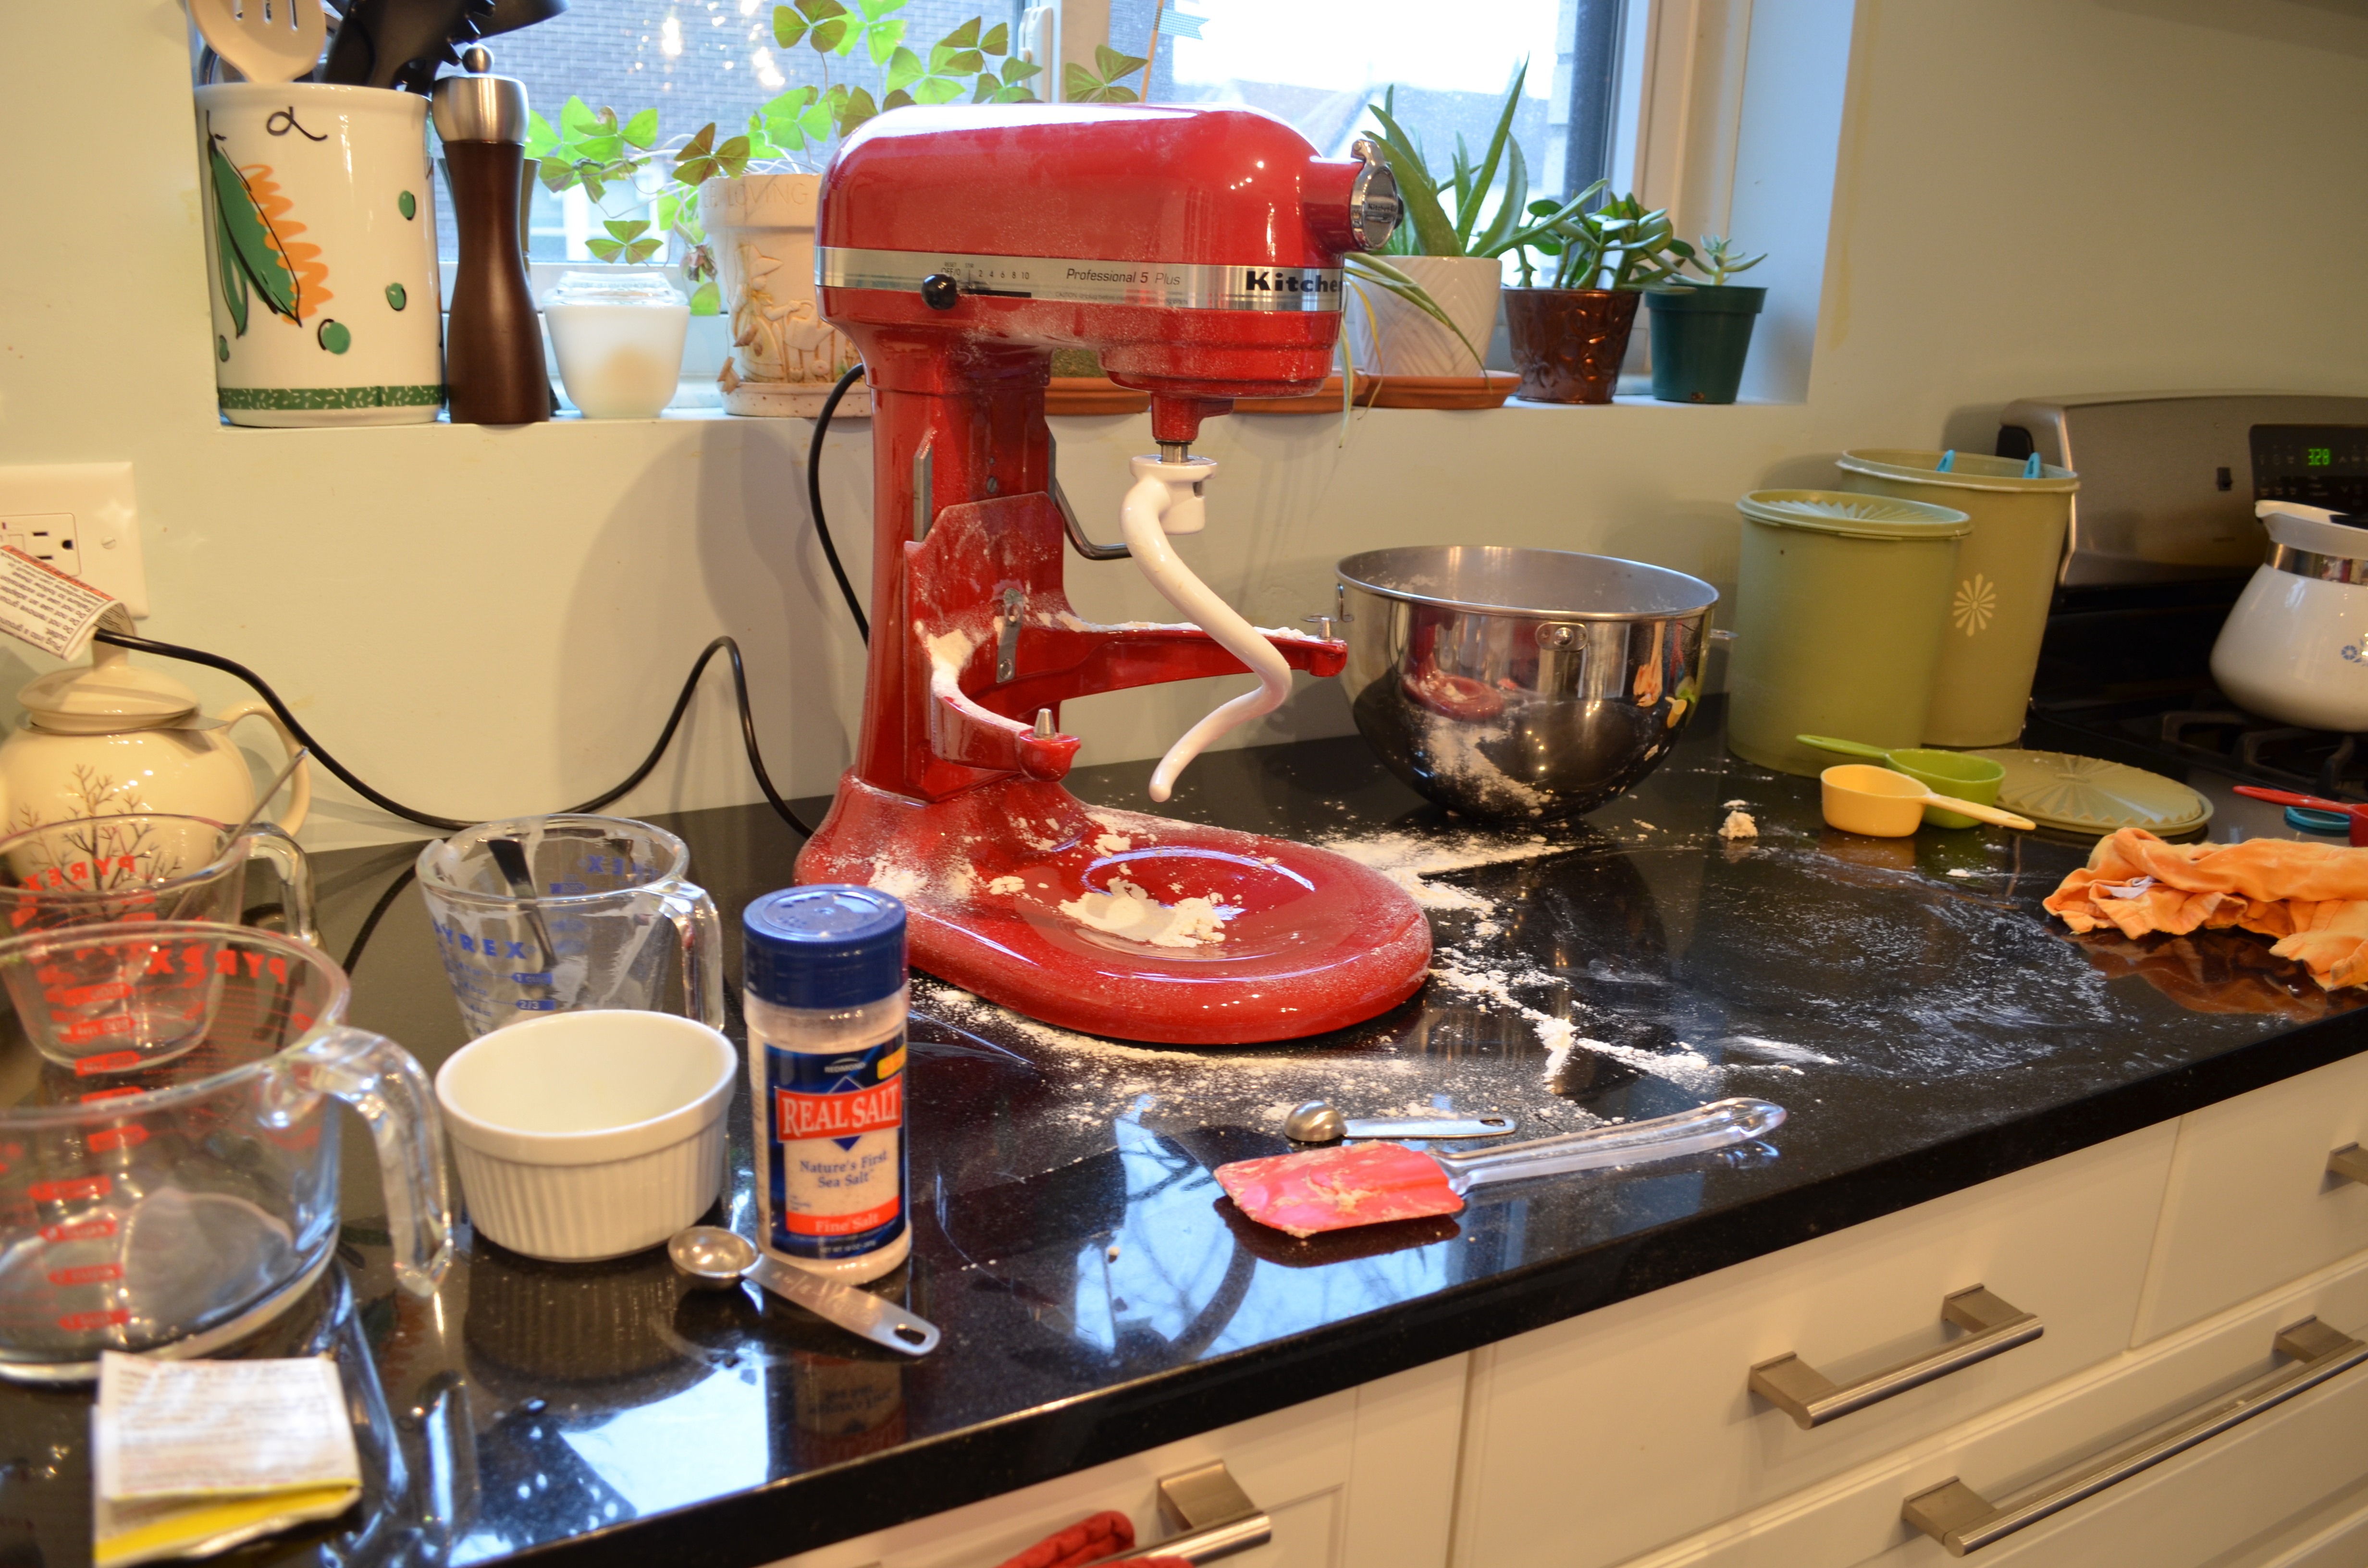
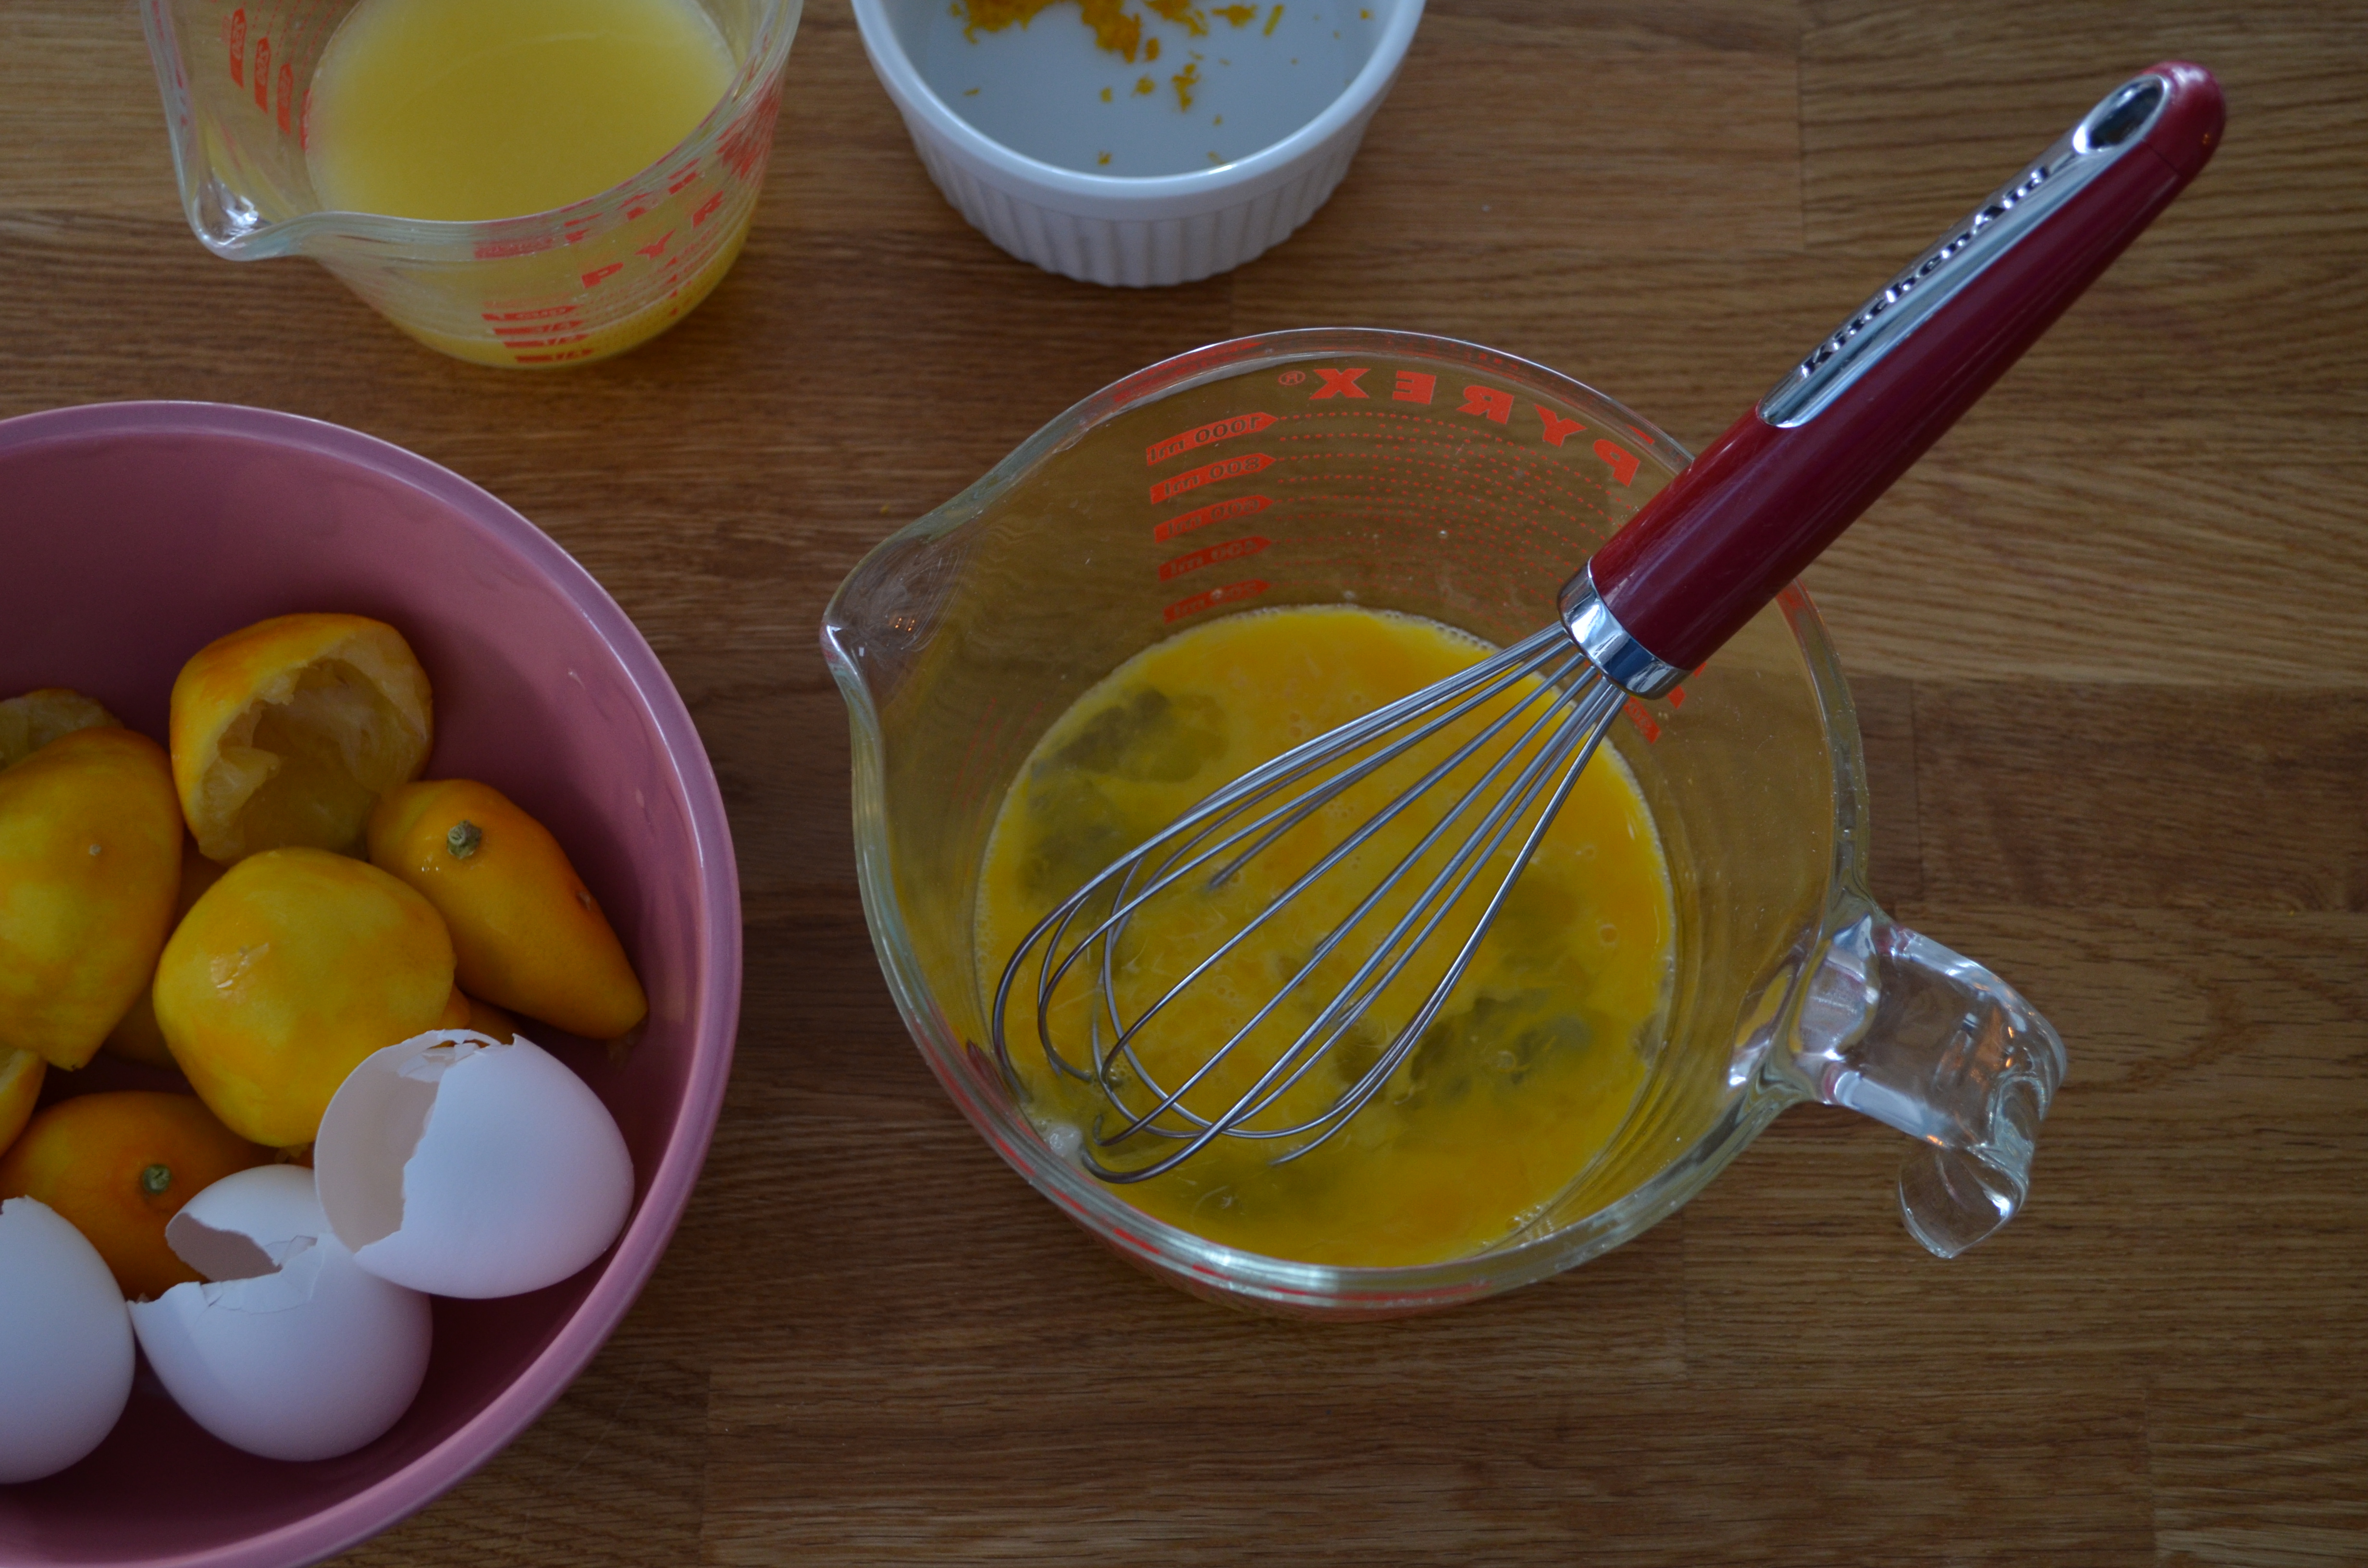
My dad has a sweet bread recipe that he makes all the time that is kind of like Avanti’s bread, but sweeter. He mailed me the recipe almost two years ago and because it looked complicated, I’ve been putting off making it. I have never baked bread before. In 2011, I was on a bagel-making kick all winter and then got kind of burnt out on the bread-making…which is why I added “make bread” to my 2014 goal list…it was time to try some more breads. Dad’s recipe still felt complicated (it involves scalding milk) so I googled “Avanti’s bread” to see if I could find another recipe. I found this one…it was the winner. messy kitchenEverything on Thursday afternoon pointed to me not baking bread. I couldn’t find the yeast (I know we had some leftover from “bagel days”…it was probably expired.). I got home from buying yeast and realized Naoto had used up all of our oil for Christmas tonkatsu. Our neighbors had oil but it was too old to use. Then my Kitchen Aid mixer died. Twice. During the kneading process. I had to use my hands while the motor cooled off. The dough didn’t feel right so I added a couple of tablespoons of water and it felt better…but I really had to idea through the whole process if anything was going to taste good.

Did the yeast activate properly?

Did I put in nine cups of flour or ten?

Was overworking the dough going to make my bread tough and chewy?

Was starting and stopping the kneading so many times going to mess up the yeast?

Was all that flour that flew out of the mixer important?

Was using butter in place of oil going to ruin everything?

It turns out…bread baking is less about an exact recipe and more of a feeling…this dough is supposed to be a little bit sticky and very elastic. This dough doubles in size when it rises. This bread is done when it sounds hollow. These tips in the recipe made me feel better about my steps along the way. And, encouragement from experienced bread bakers on Twitter and on the phone (I called my dad three times) helped me feel like I was on the right track as I went through the process. I have to say, after all that worrying and hand-wringing…my bread turned out perfectly…I was jumping up and down in the kitchen. Beginner’s luck.avanti's bread ingredients

Avanti’s Bread

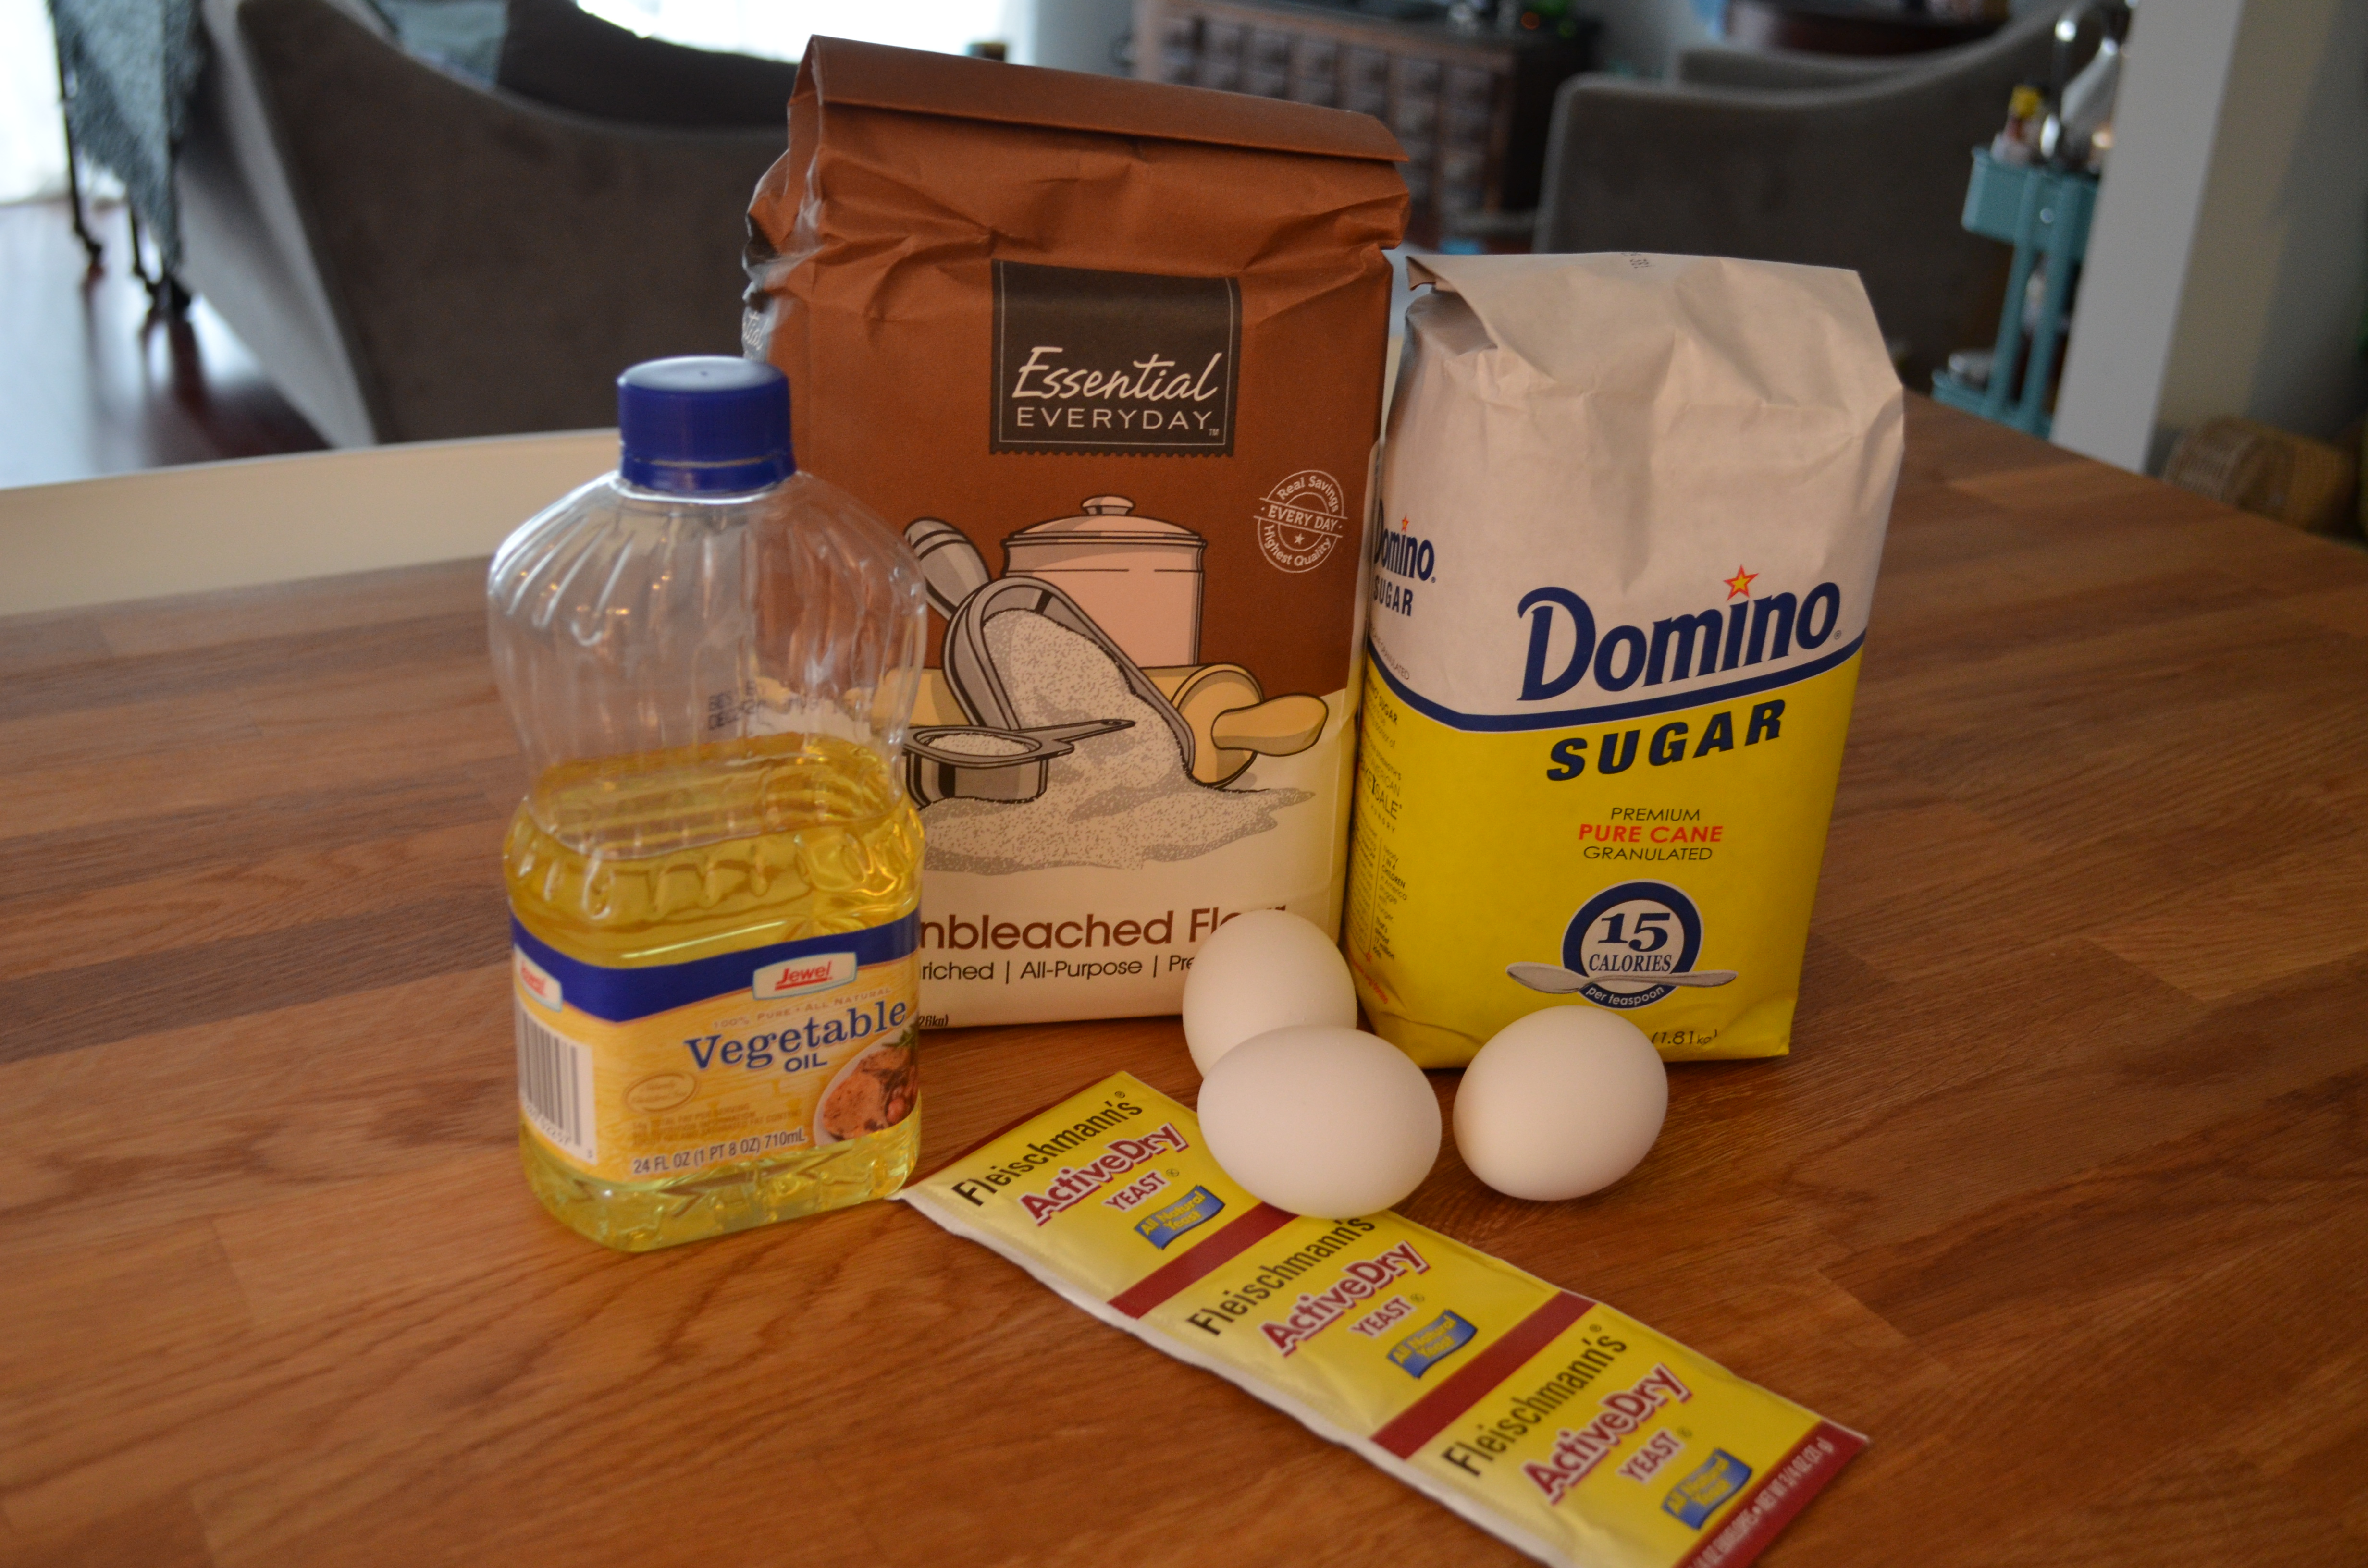
2 packets of dry active yeast

3 cups of water + some for yeast activation as indicated on packet

3 tablespoons softened butter or vegetable oil

3 eggs

1 teaspoon salt

1 1/4 cup sugar + some for yeast activation as indicated on packet
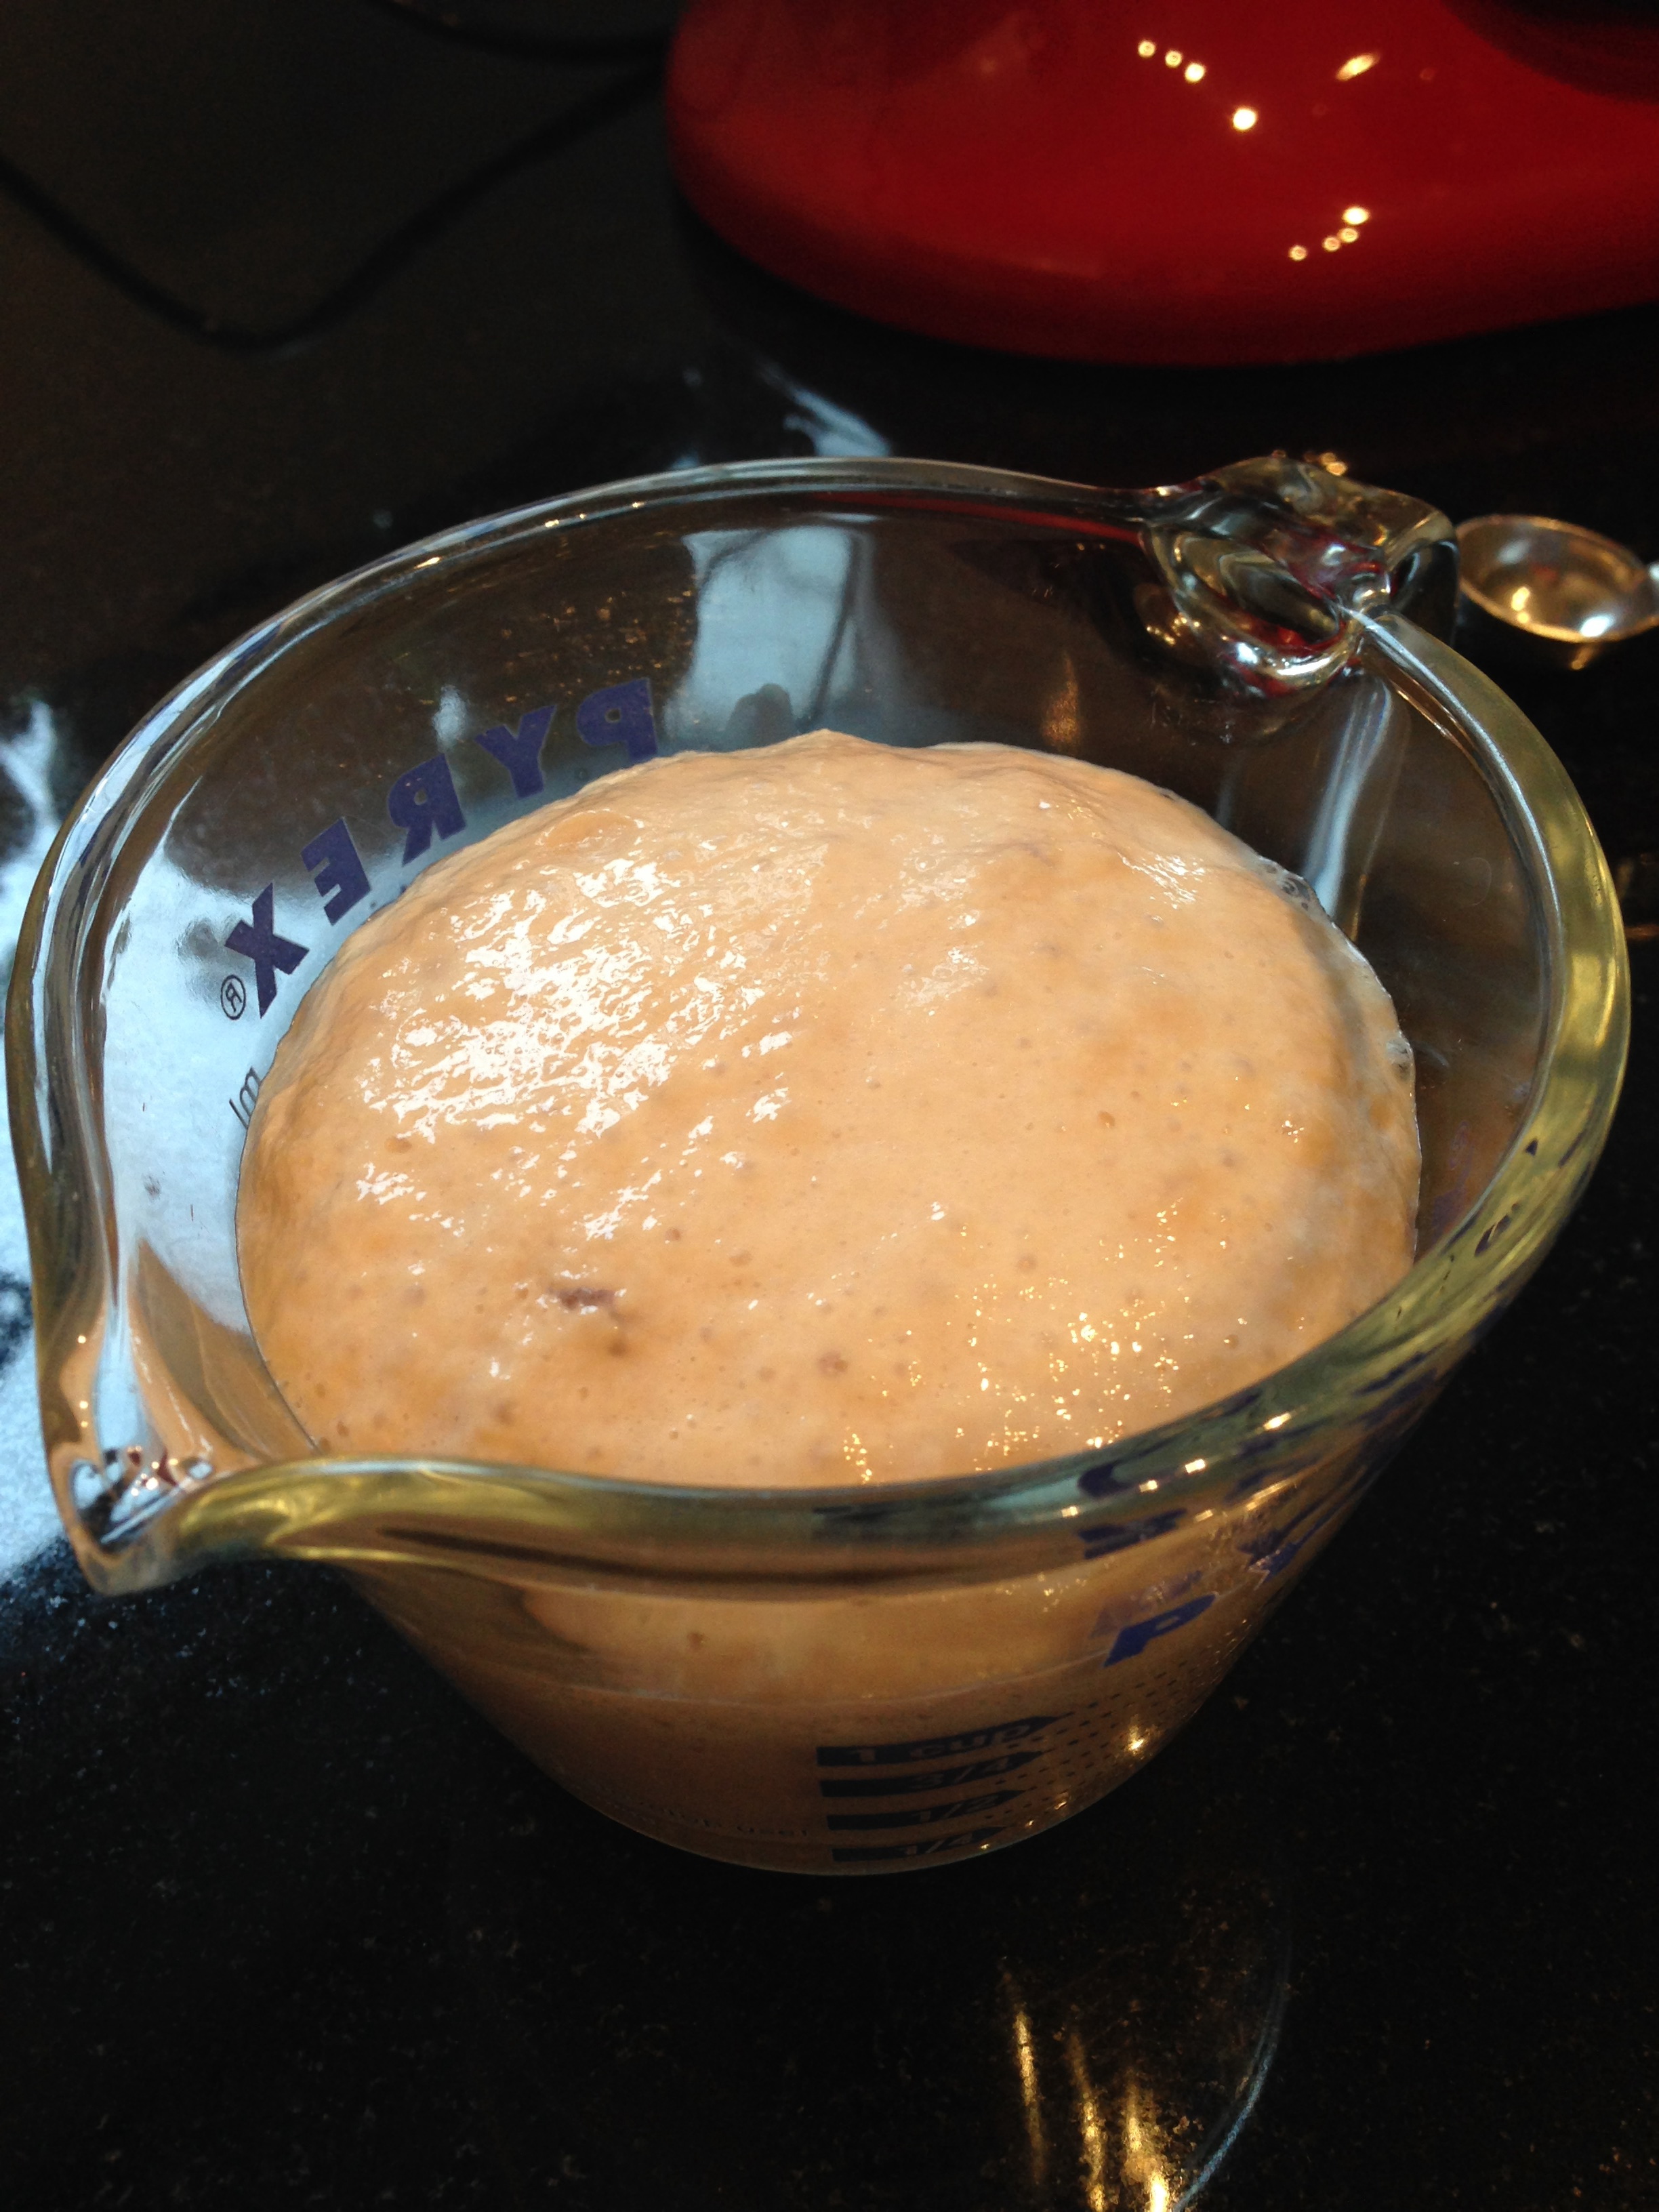
10-11 cups flour activated yeastActivate the yeast according to the package.

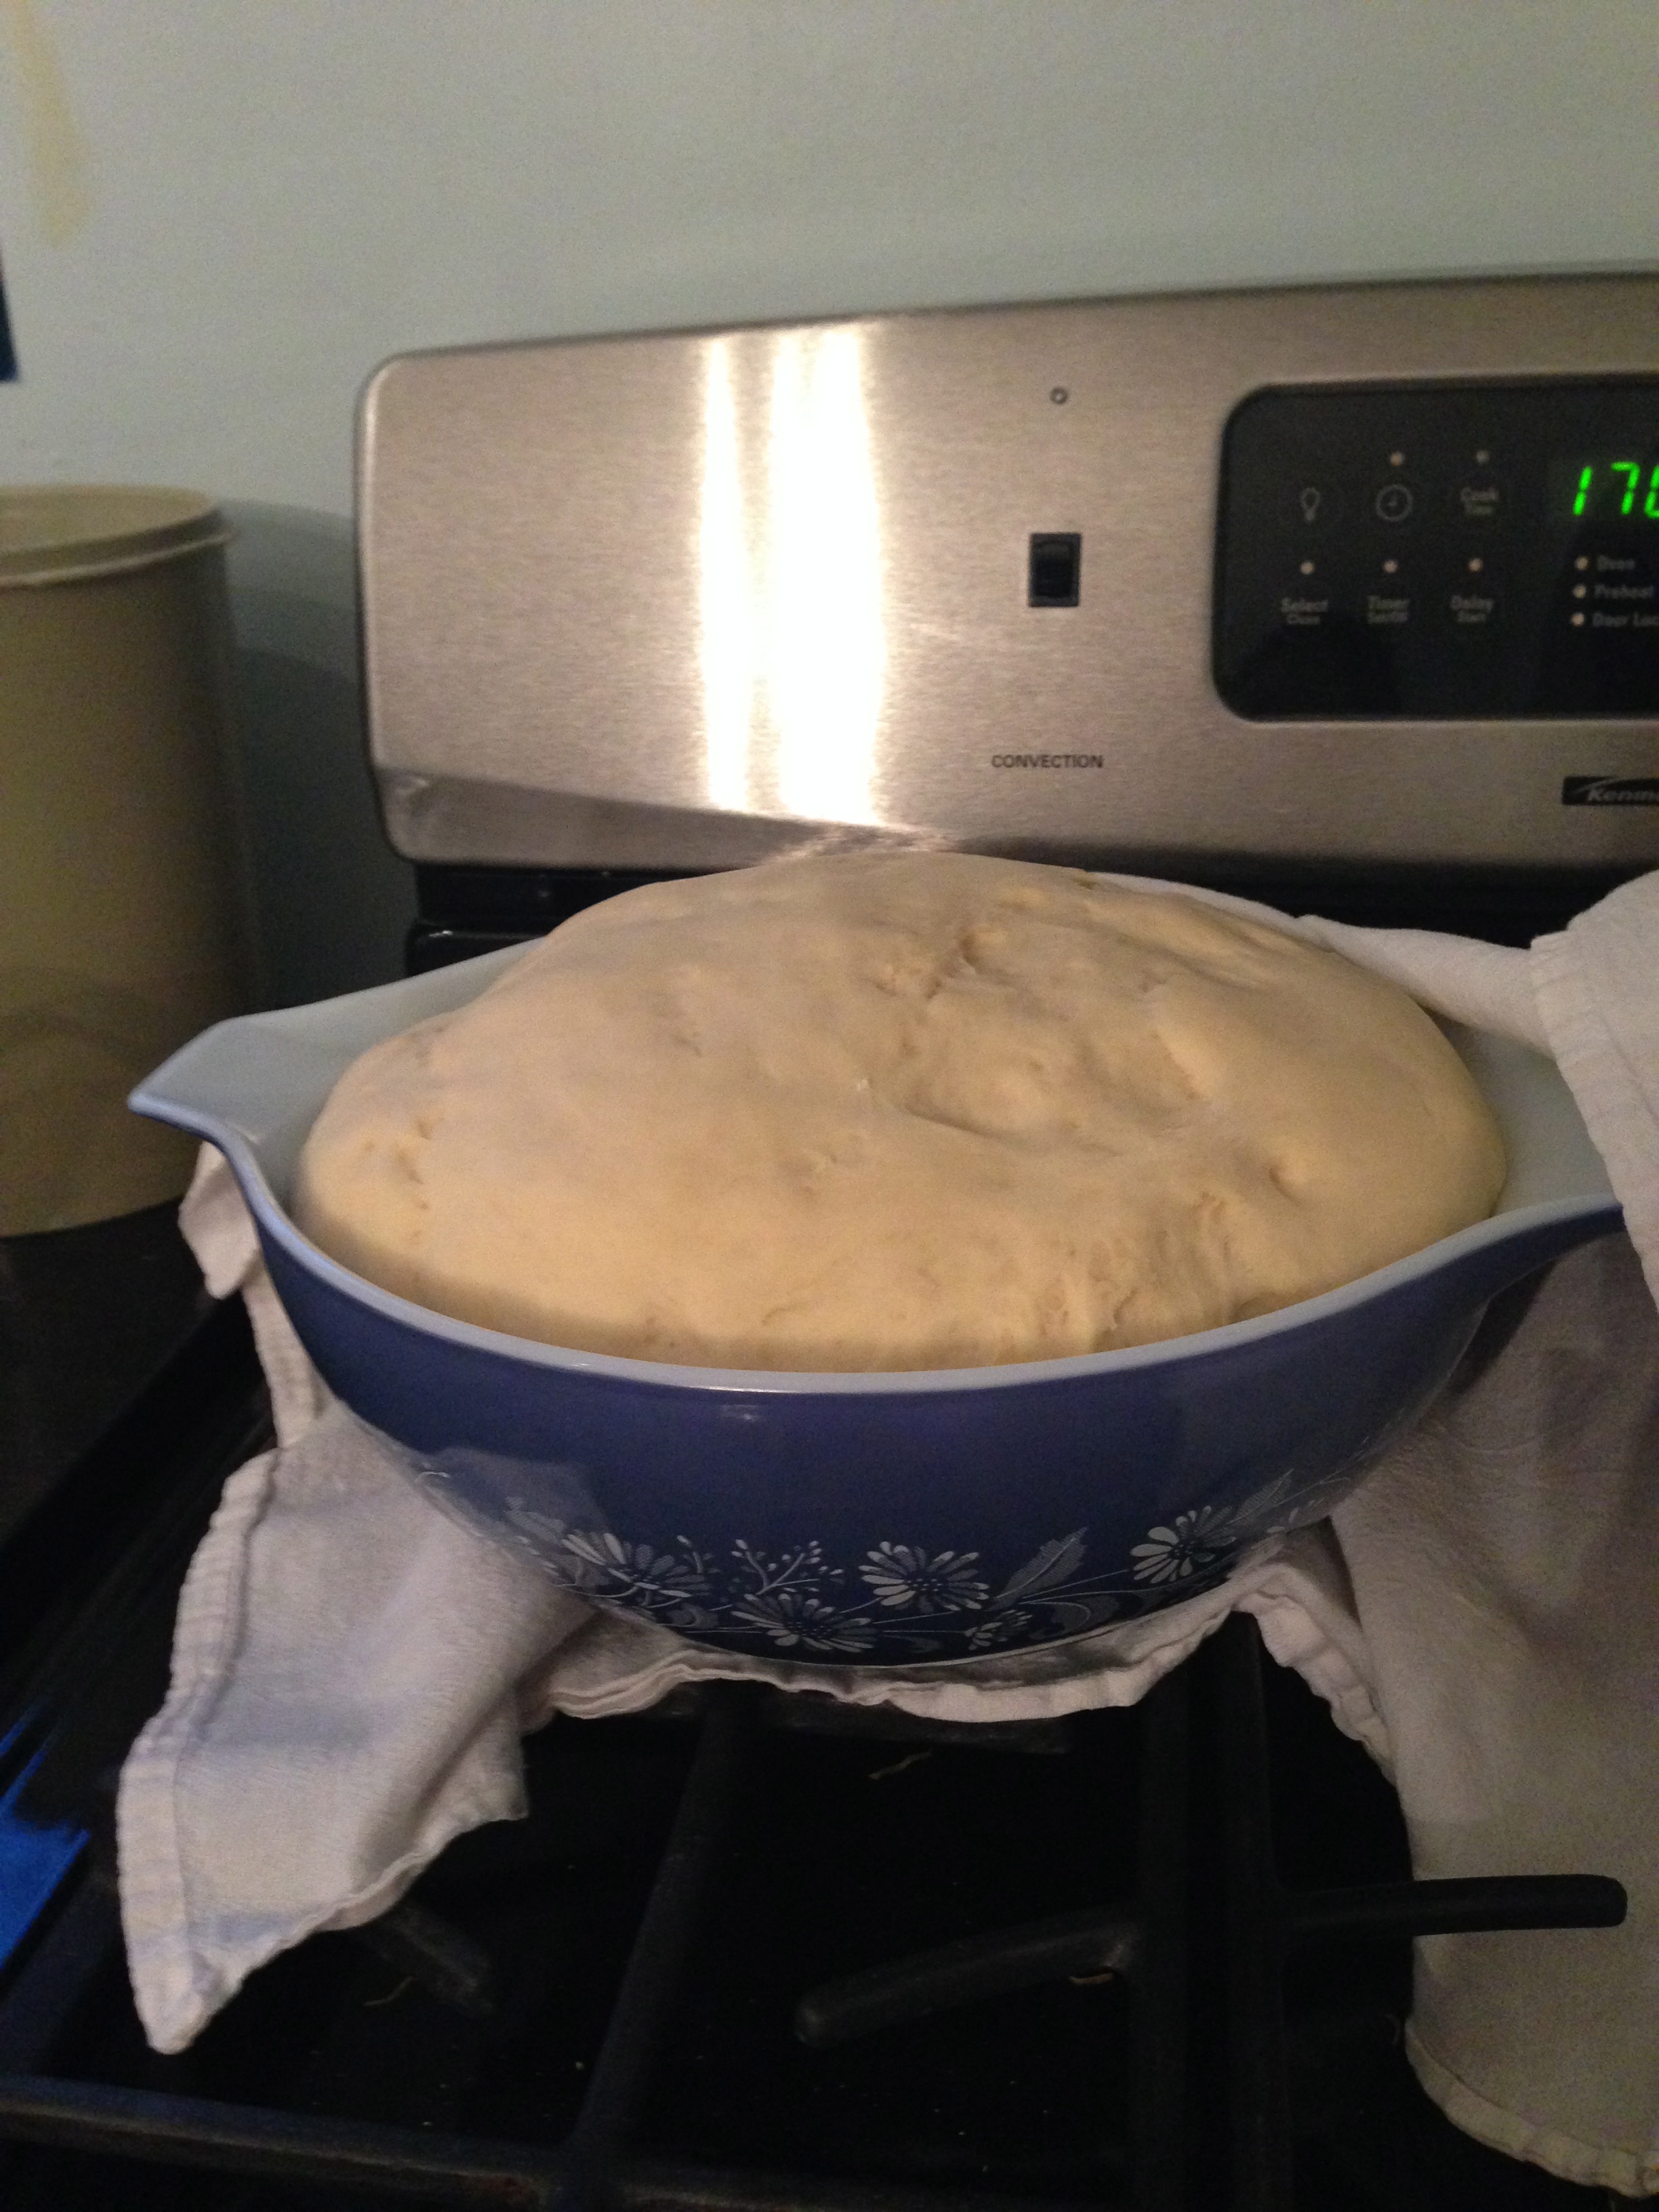
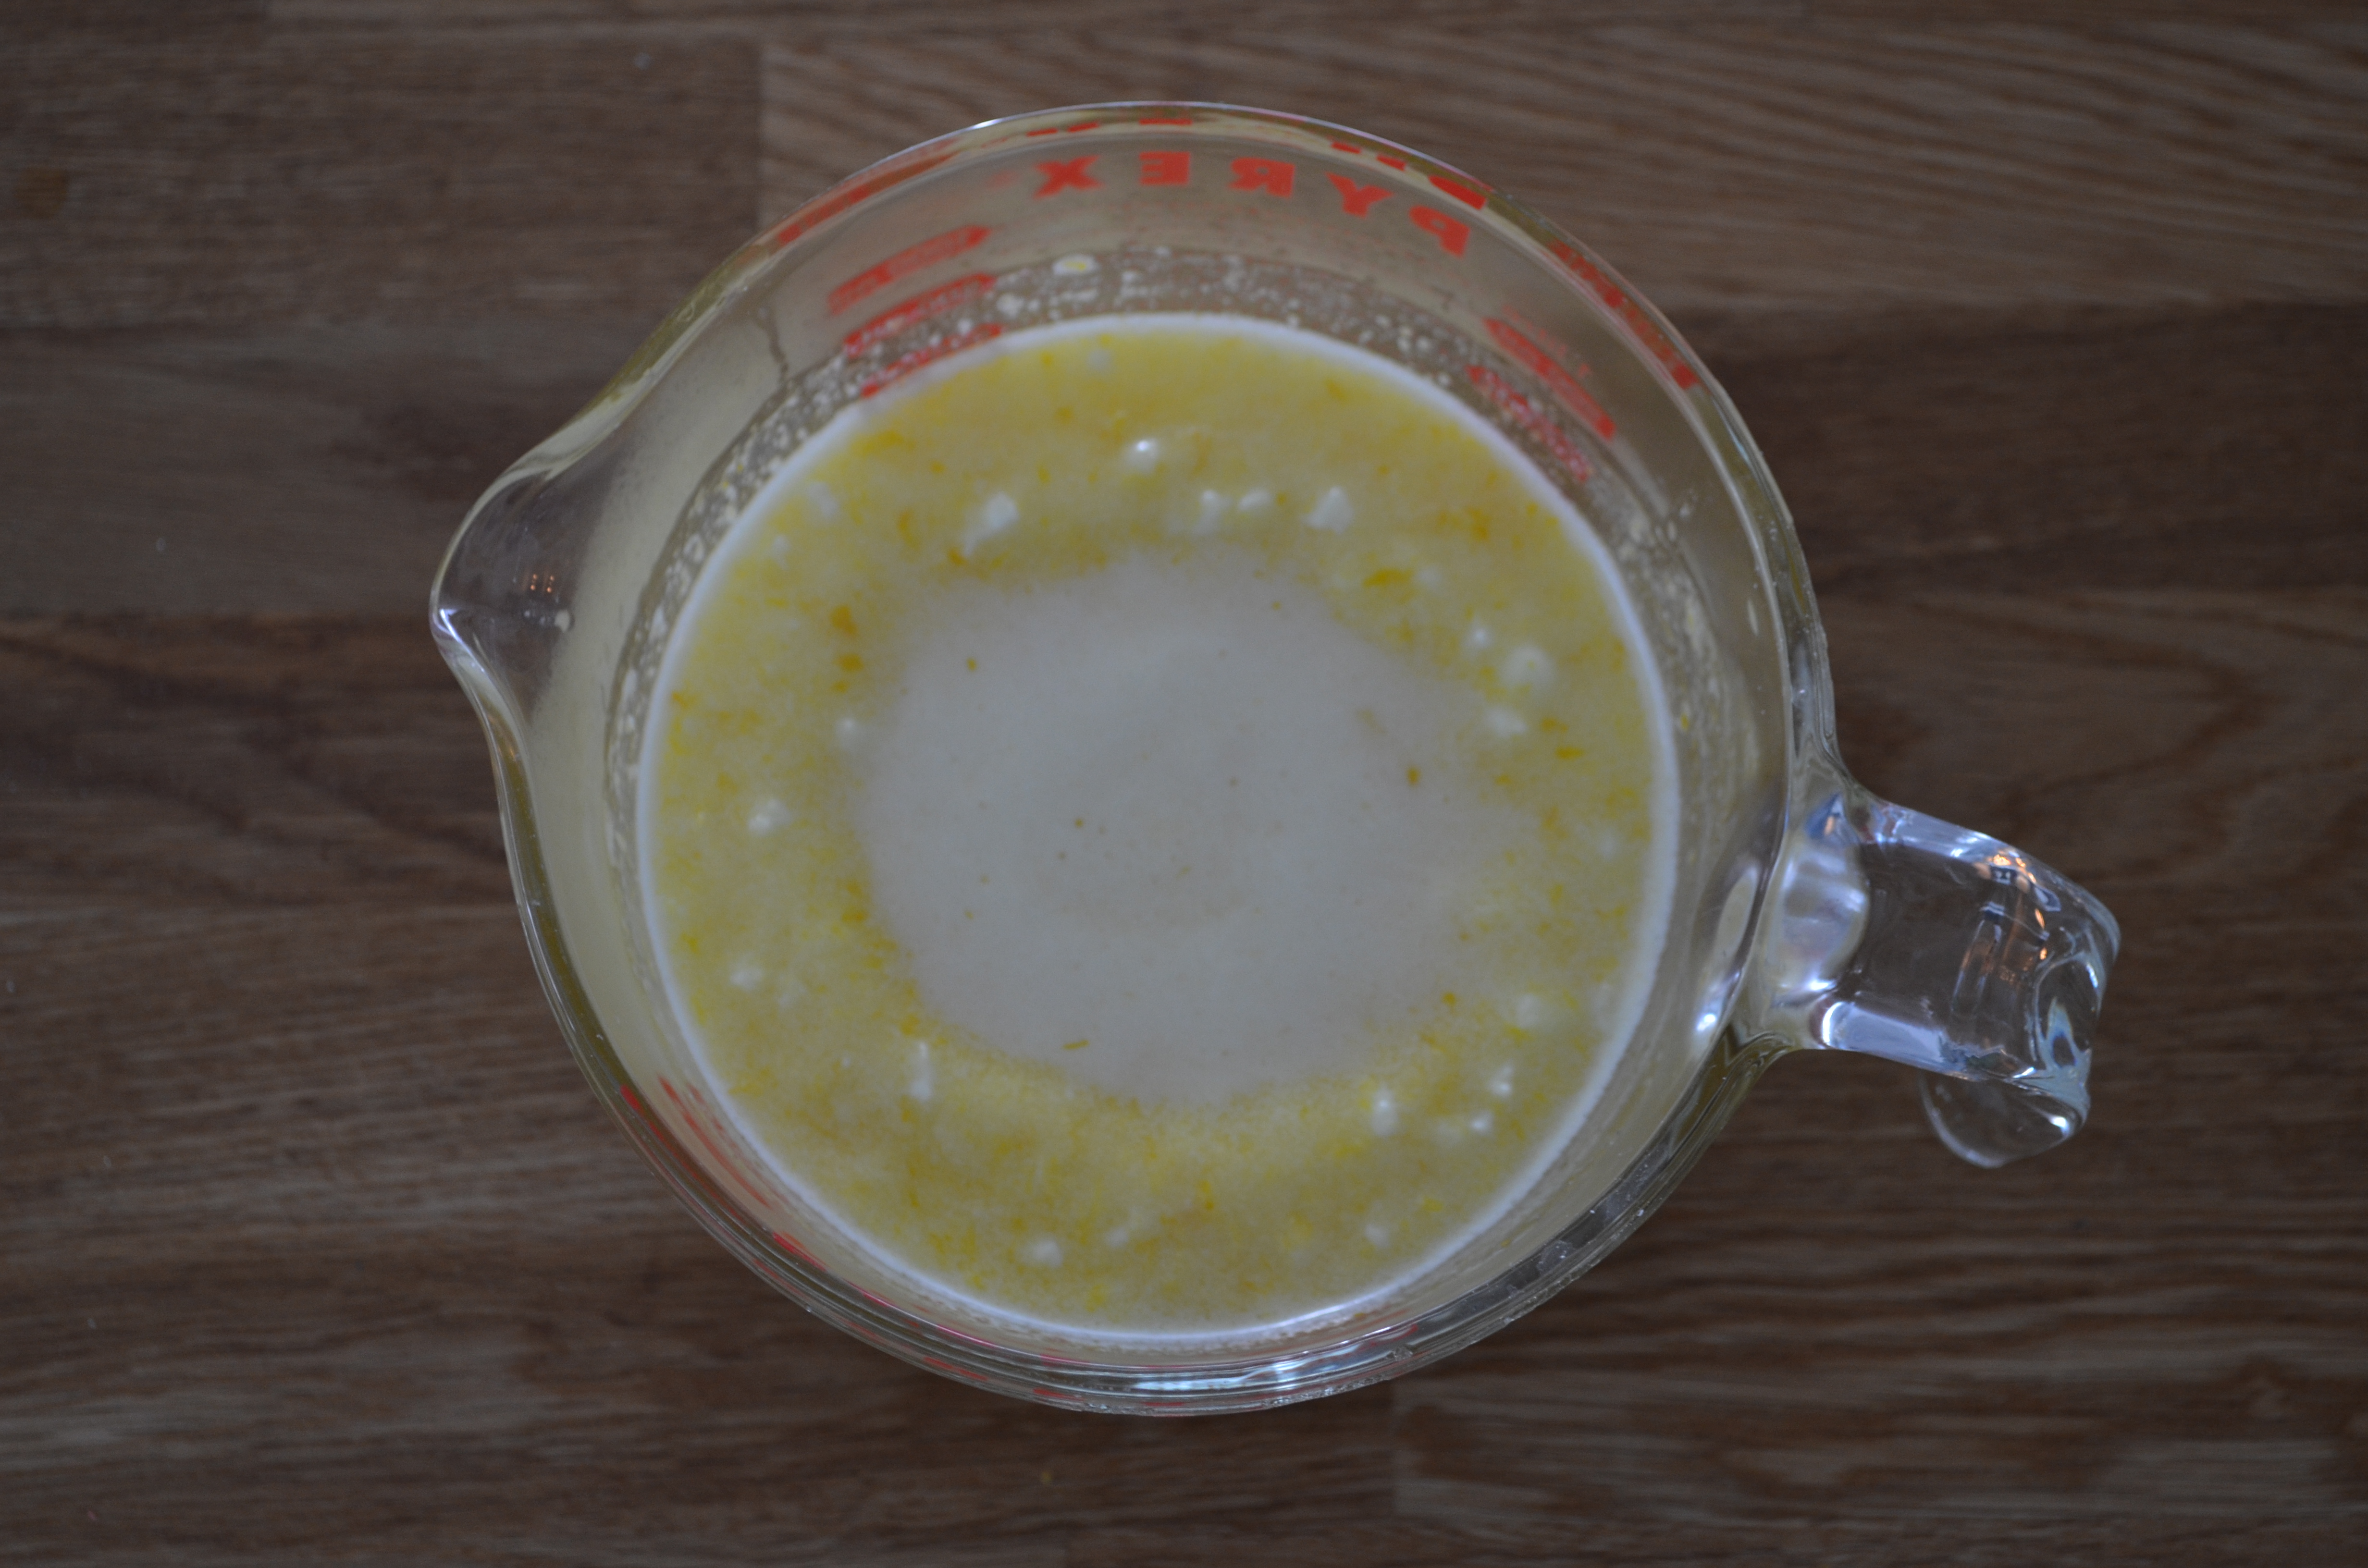
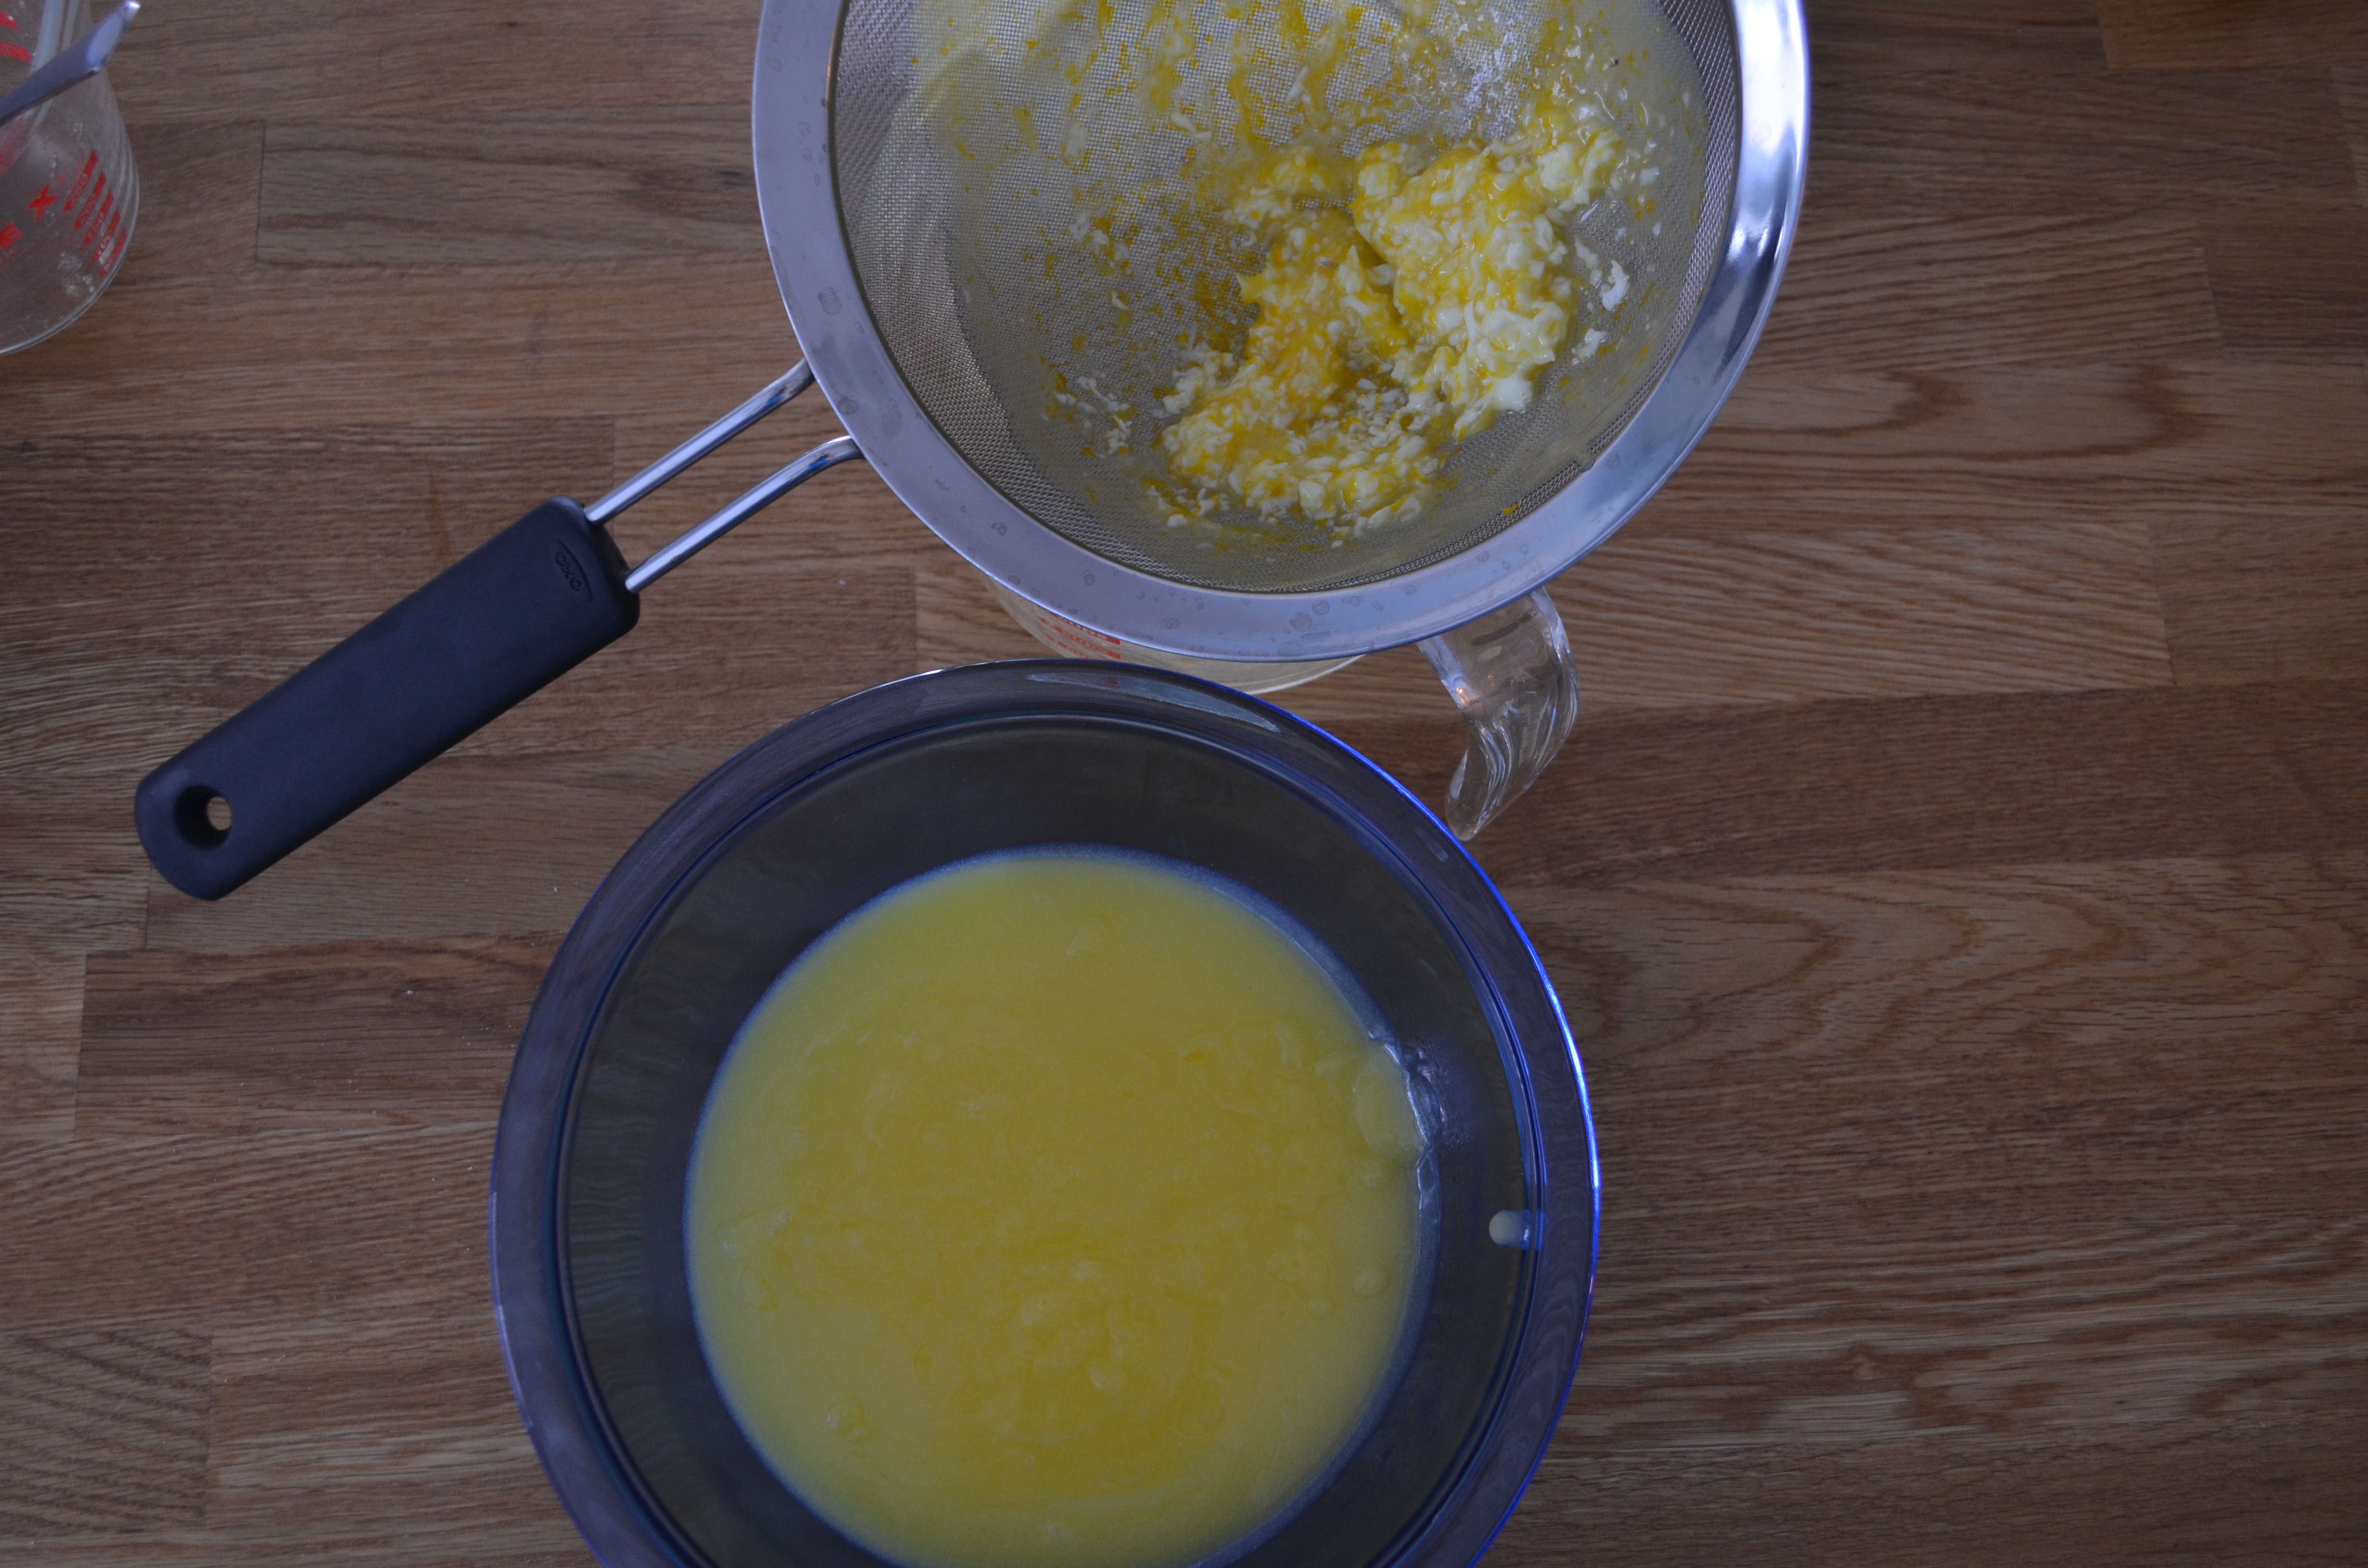
Once activated, add the rest of the ingredients to the bowl of a stand mixer. Once you get to the flour, slow down and count out cups carefully. After two cups, start mixer and slowly add the rest of the flour. Stop at the tenth cup and determine if you need the eleventh. (I only needed ten in my dry winter apartment.) Once the dough is smooth and elastic, it’s done. (Confession: my dough was a tiny bit lumpy but very elastic…)Avanti's bread doughPlace the big ball of dough in a greased bowl, flip it over in the bowl and cover with a tea towel. Place the bowl of dough in a warm spot in your kitchen. (I feel like my kitchen is chilly, so I turned my oven on low and set the bowl on the stove top. The dough rose like a champ!) After 1 1/2-2 hours, it should double in size.

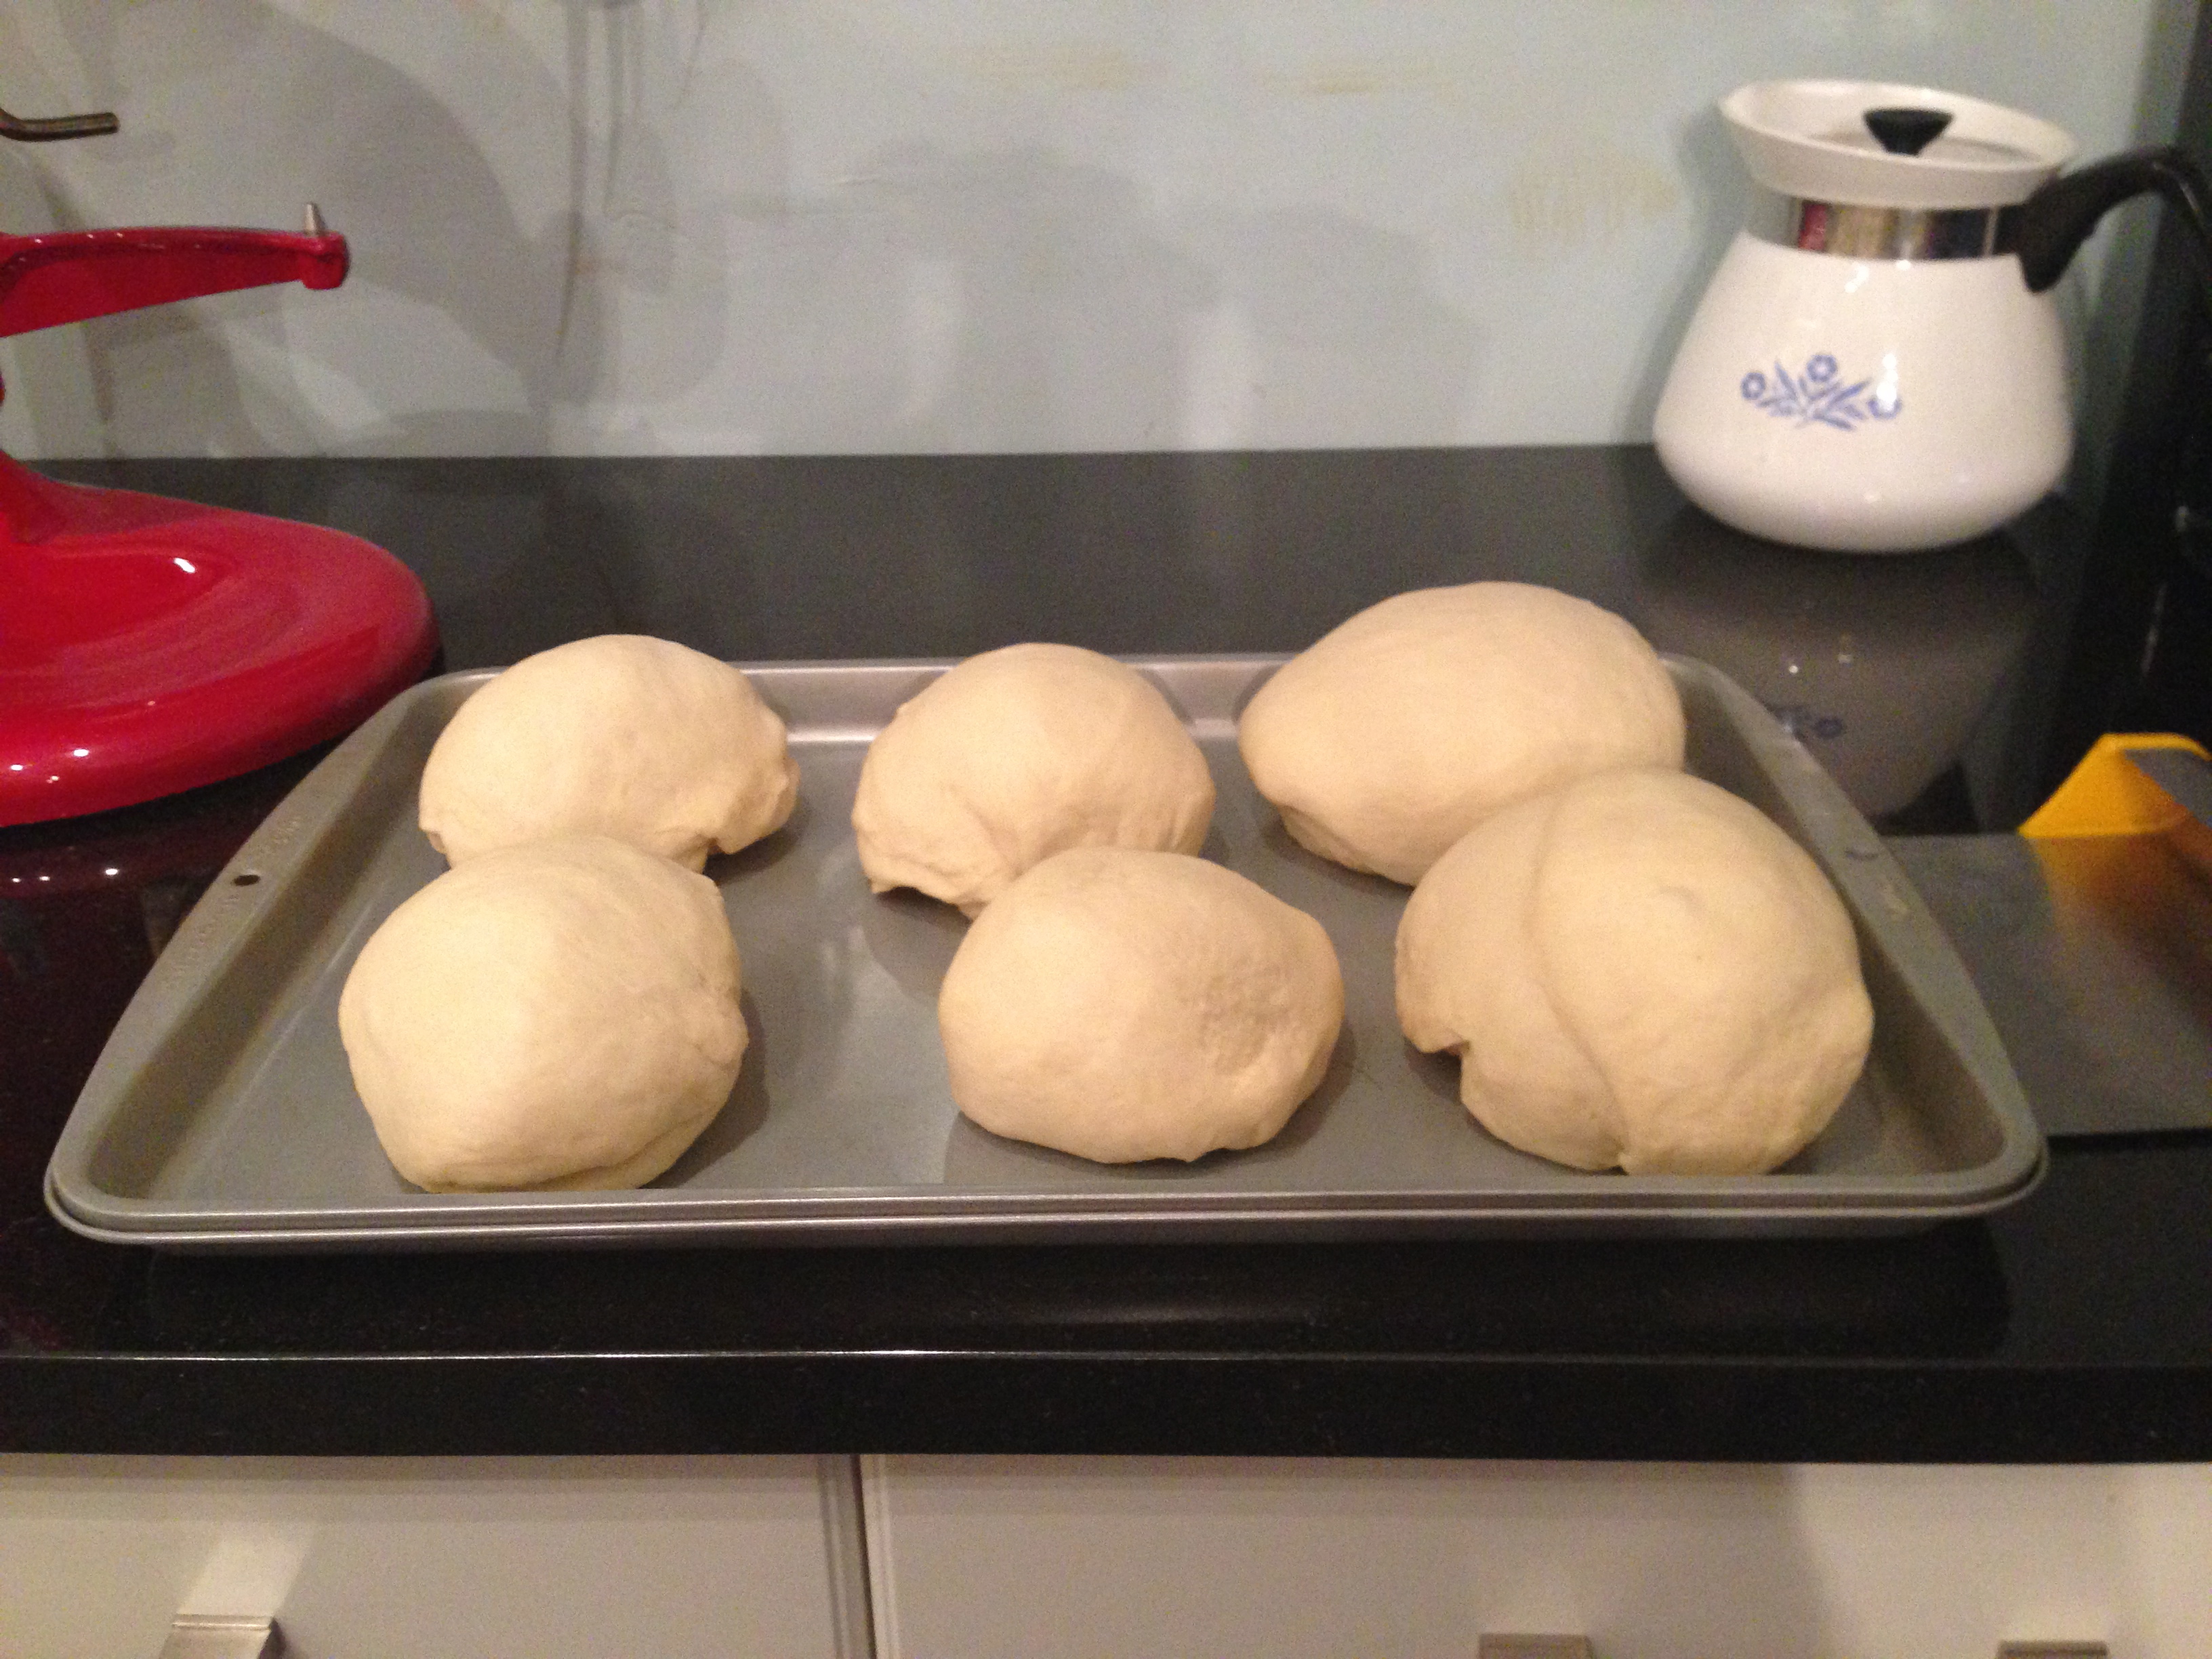
After the first rise, punch down the dough in the bowl, flip it over again and re-cover. Put it back in the warm part of the kitchen. After another 30-45 minutes, it should double in size again. avanti's bread doughTake the dough out of the bowl and divide it into six equal portions. They should each be the size of a grapefruit. (Mine were not perfectly equal, as you can see.) Cover these and let them rise for 10 minutes.

avanti's bread loaf
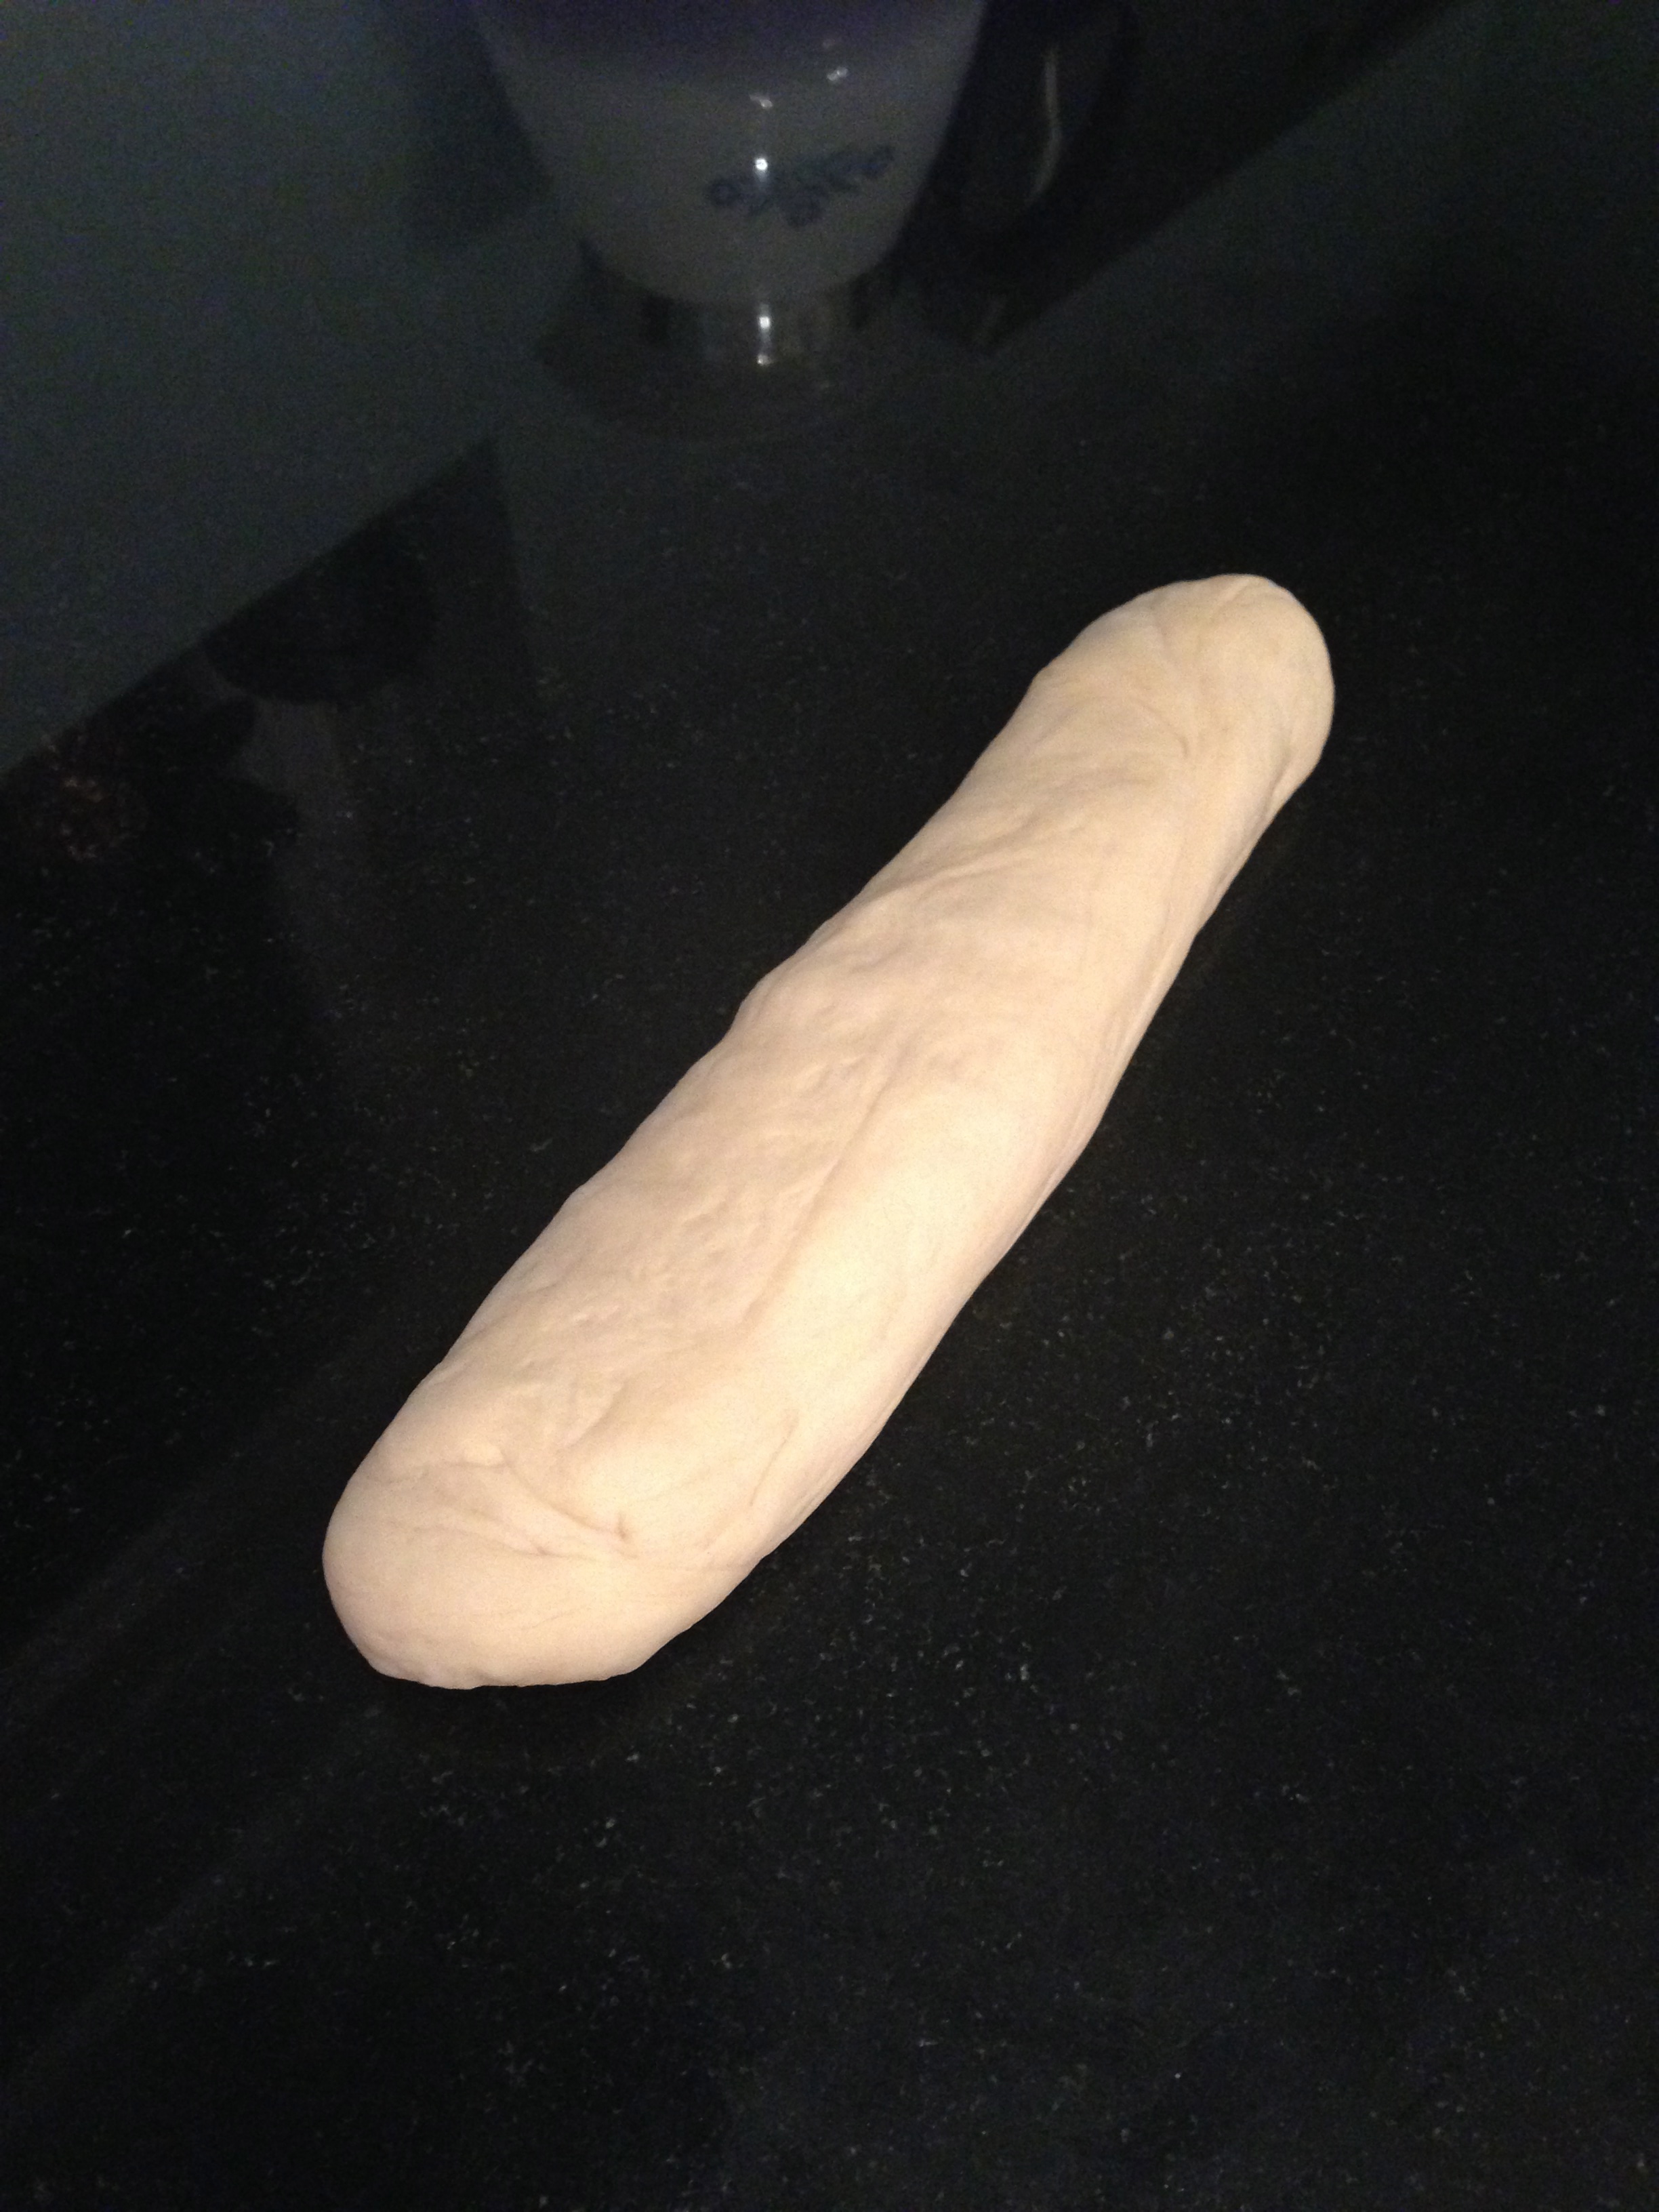
After 10 minutes, flatten each ball of dough, pressing out the air. You will hear some air escaping…it’s a good sign. Then form the loaves. avanti's bread dough
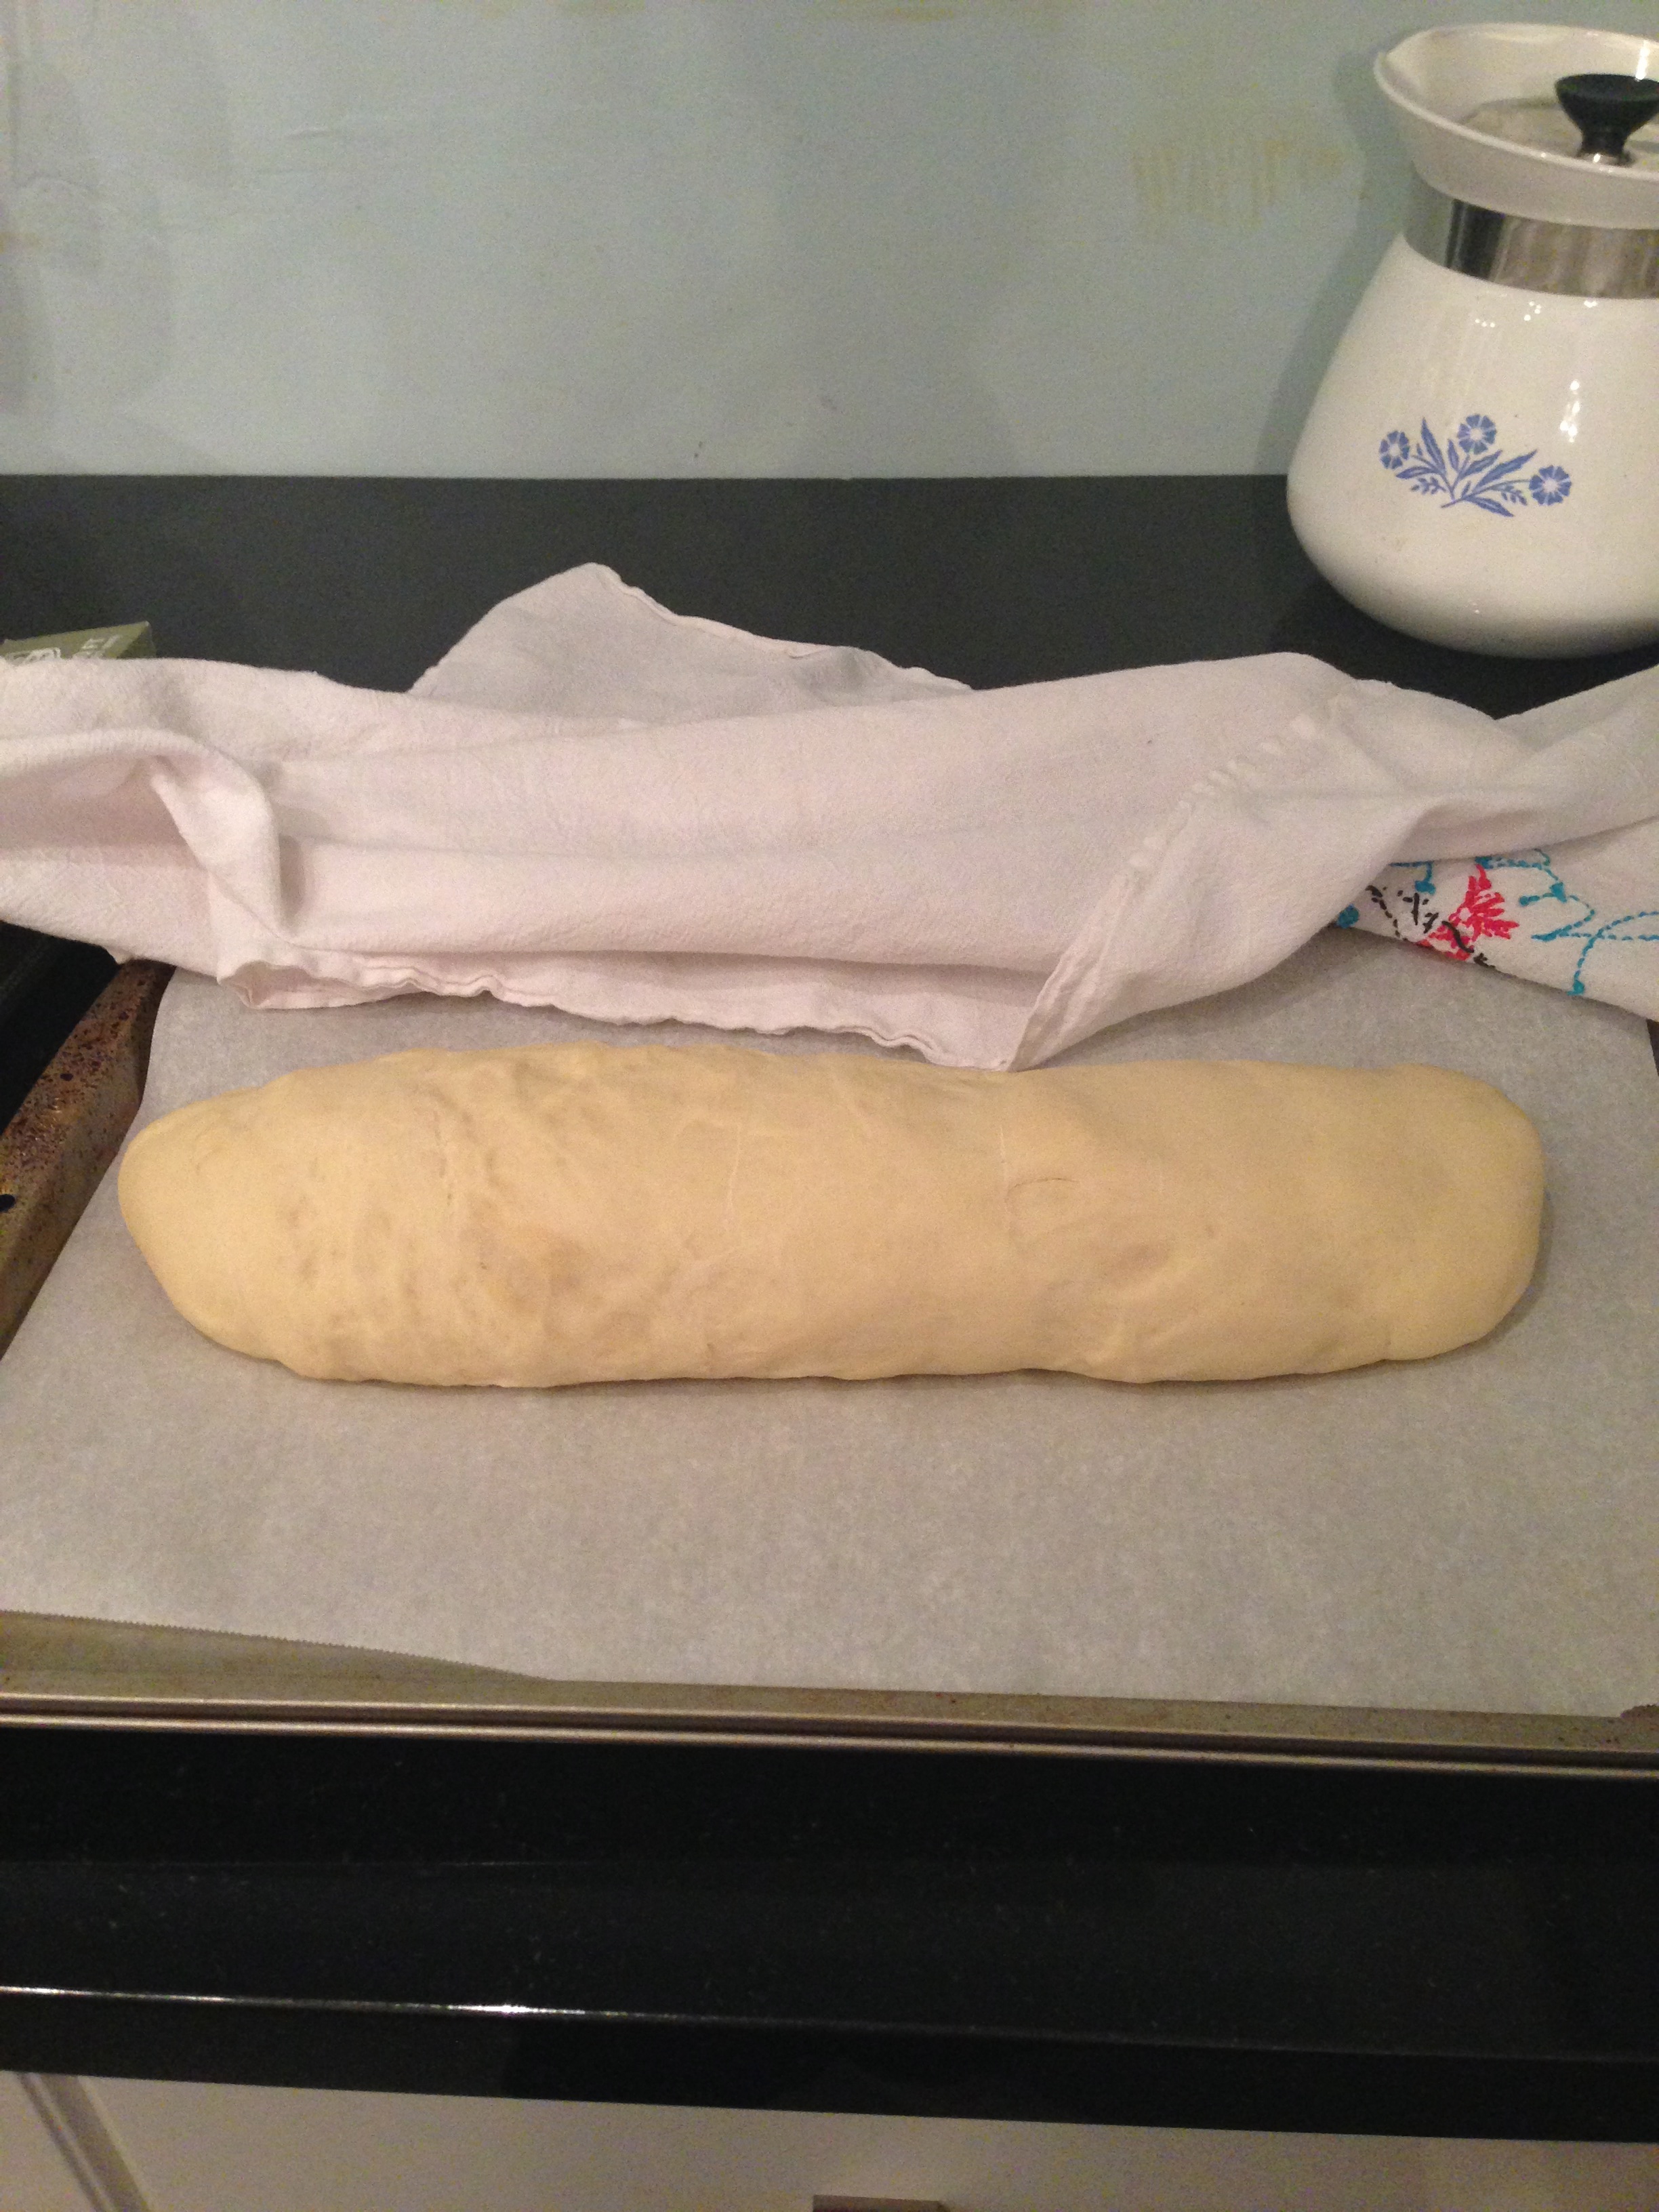
Place the loaves on a prepared baking sheet (I used parchment paper, but a greased & floured baking sheet works, too.) Cover loaves and let them rise for another hour. Use this time to pre-heat the oven to 350°F.

Finally, it’s time to bake!
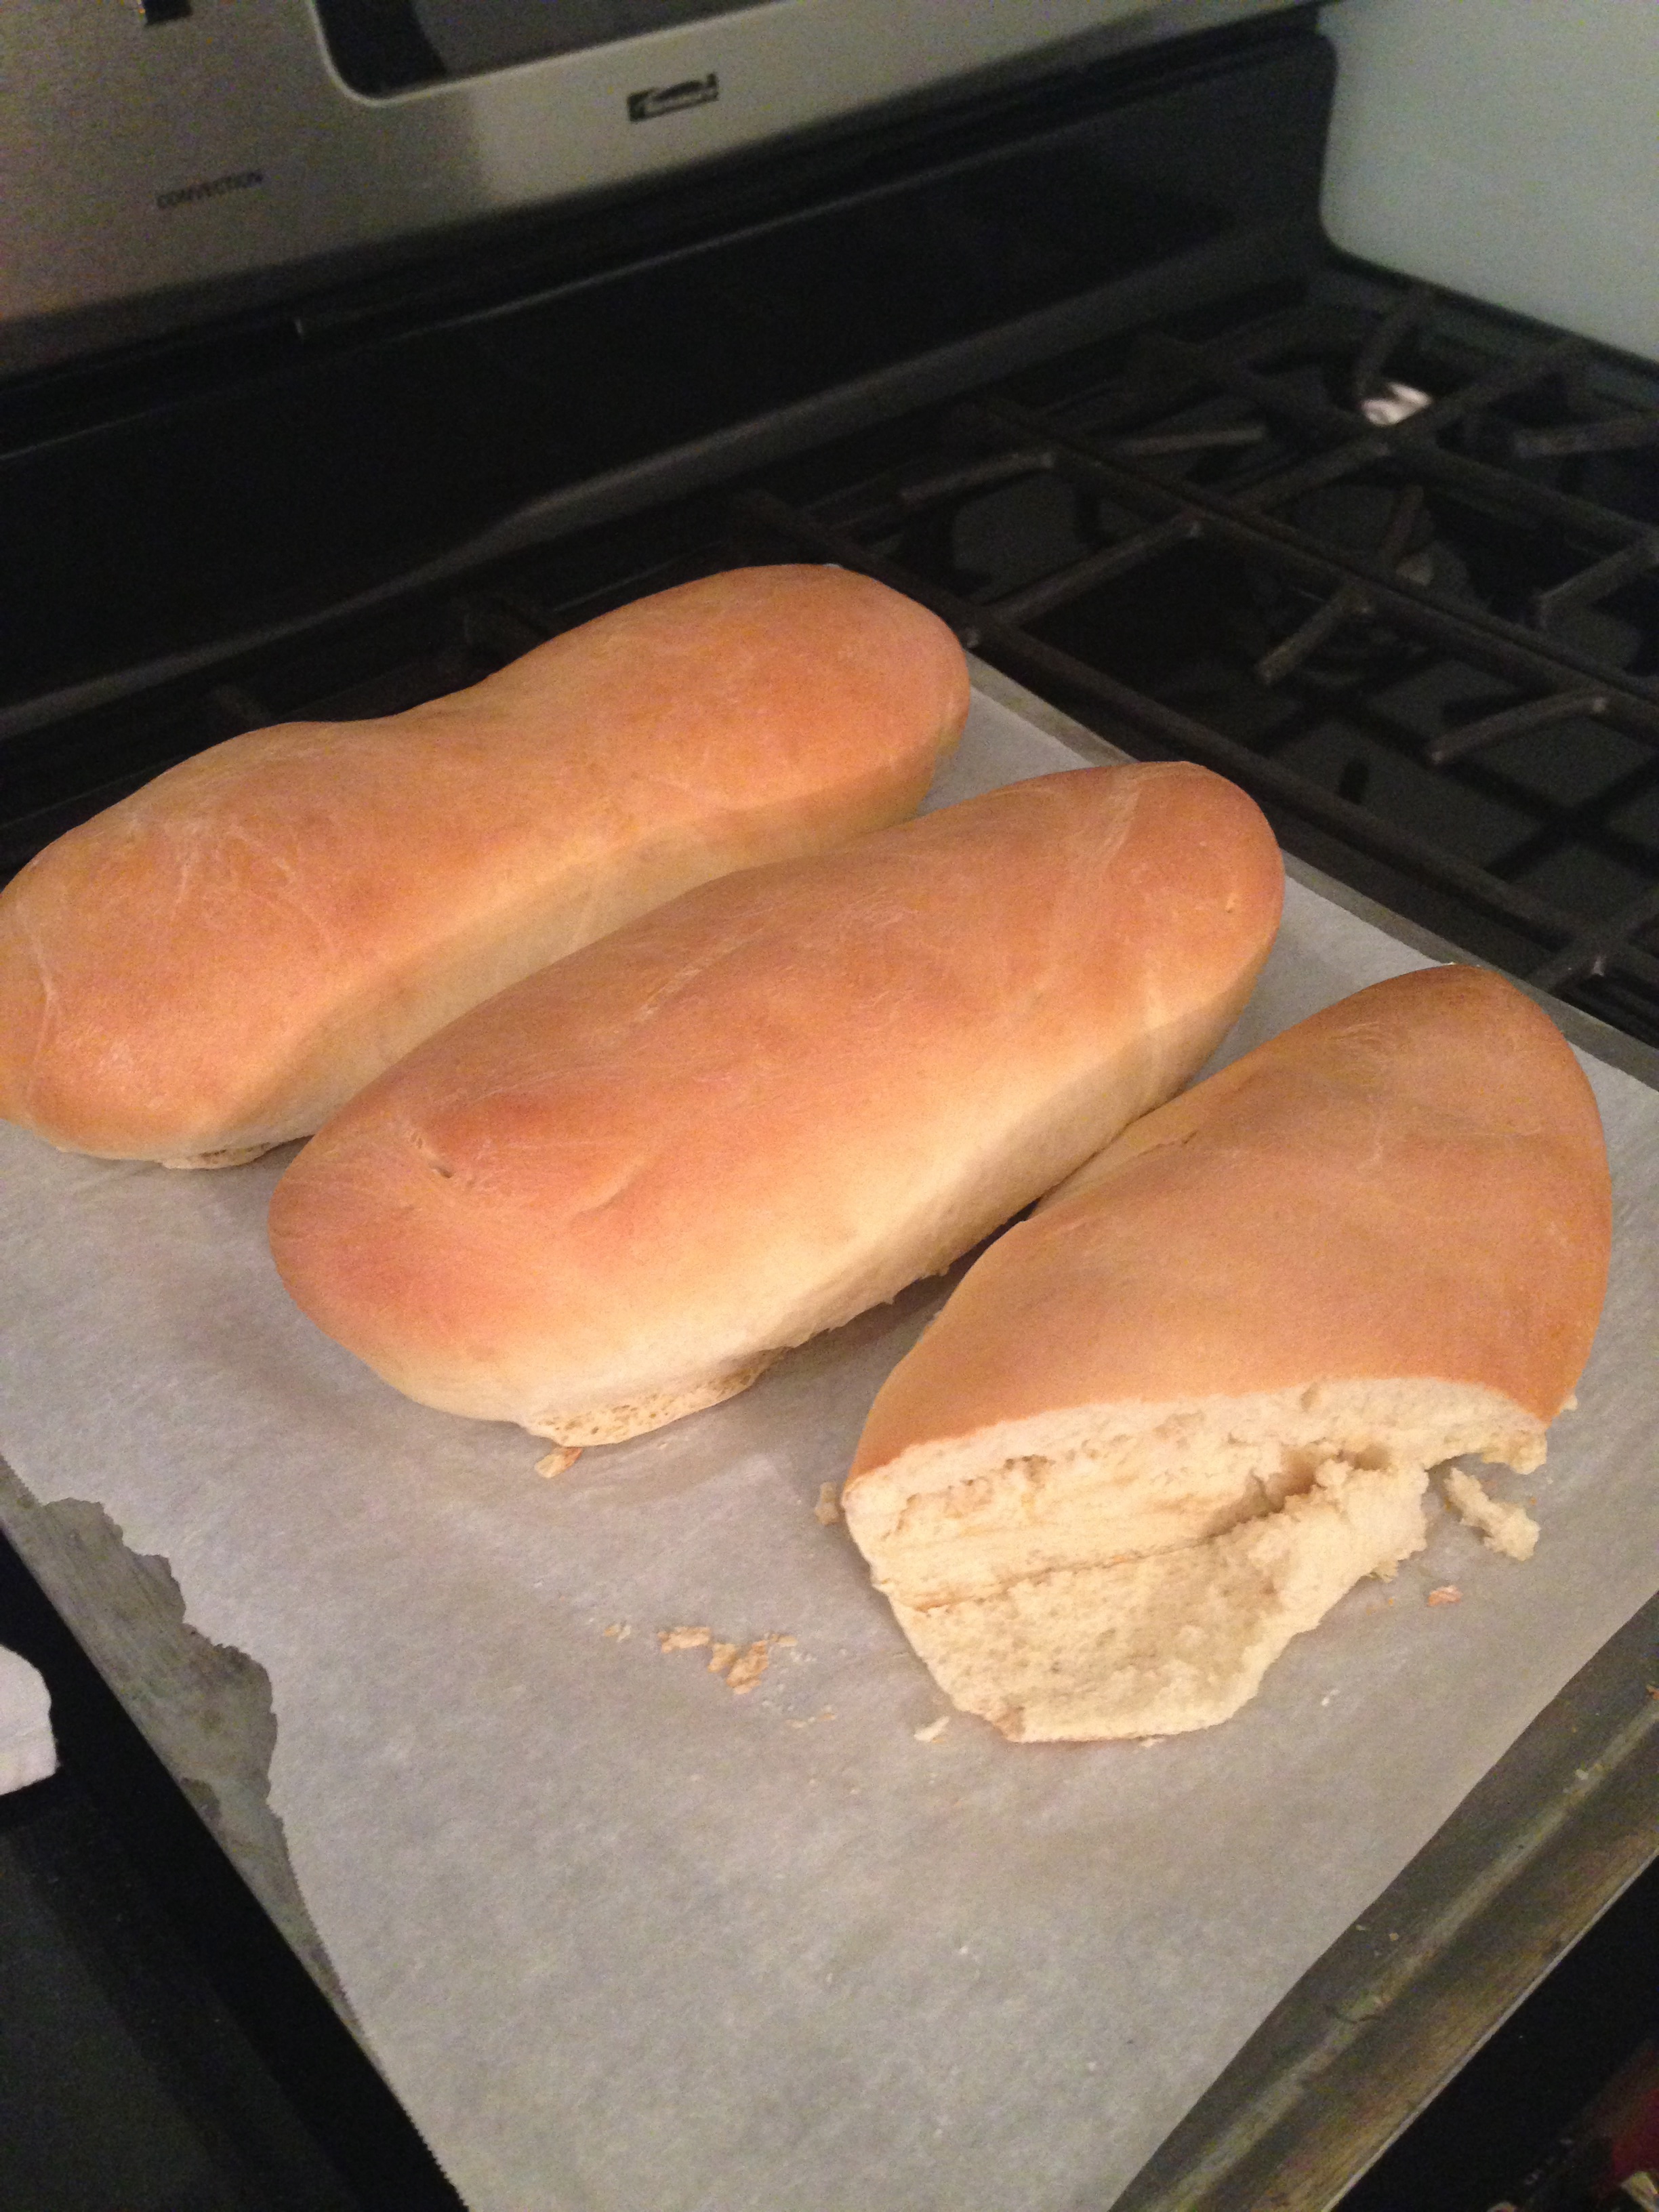
Bake for 20-25 minutes.Avanti's bread loavesI baked mine three loaves at a time and 23 minutes was the magic number. The first batch seemed ready (it was a nice shade of brown and sounded pretty hollow) after 18 minutes, but when we cut into the “test loaf” you could tell it was still a little gooey/sticky/undone inside. After five more minutes (at the 23 minute mark), everything was perfect–the tops were golden and they really sounded hollow! The biggest thing I would change is to make the loaves a little skinnier and longer next time…they were kind of short and plump, but made excellent sandwiches anyway.

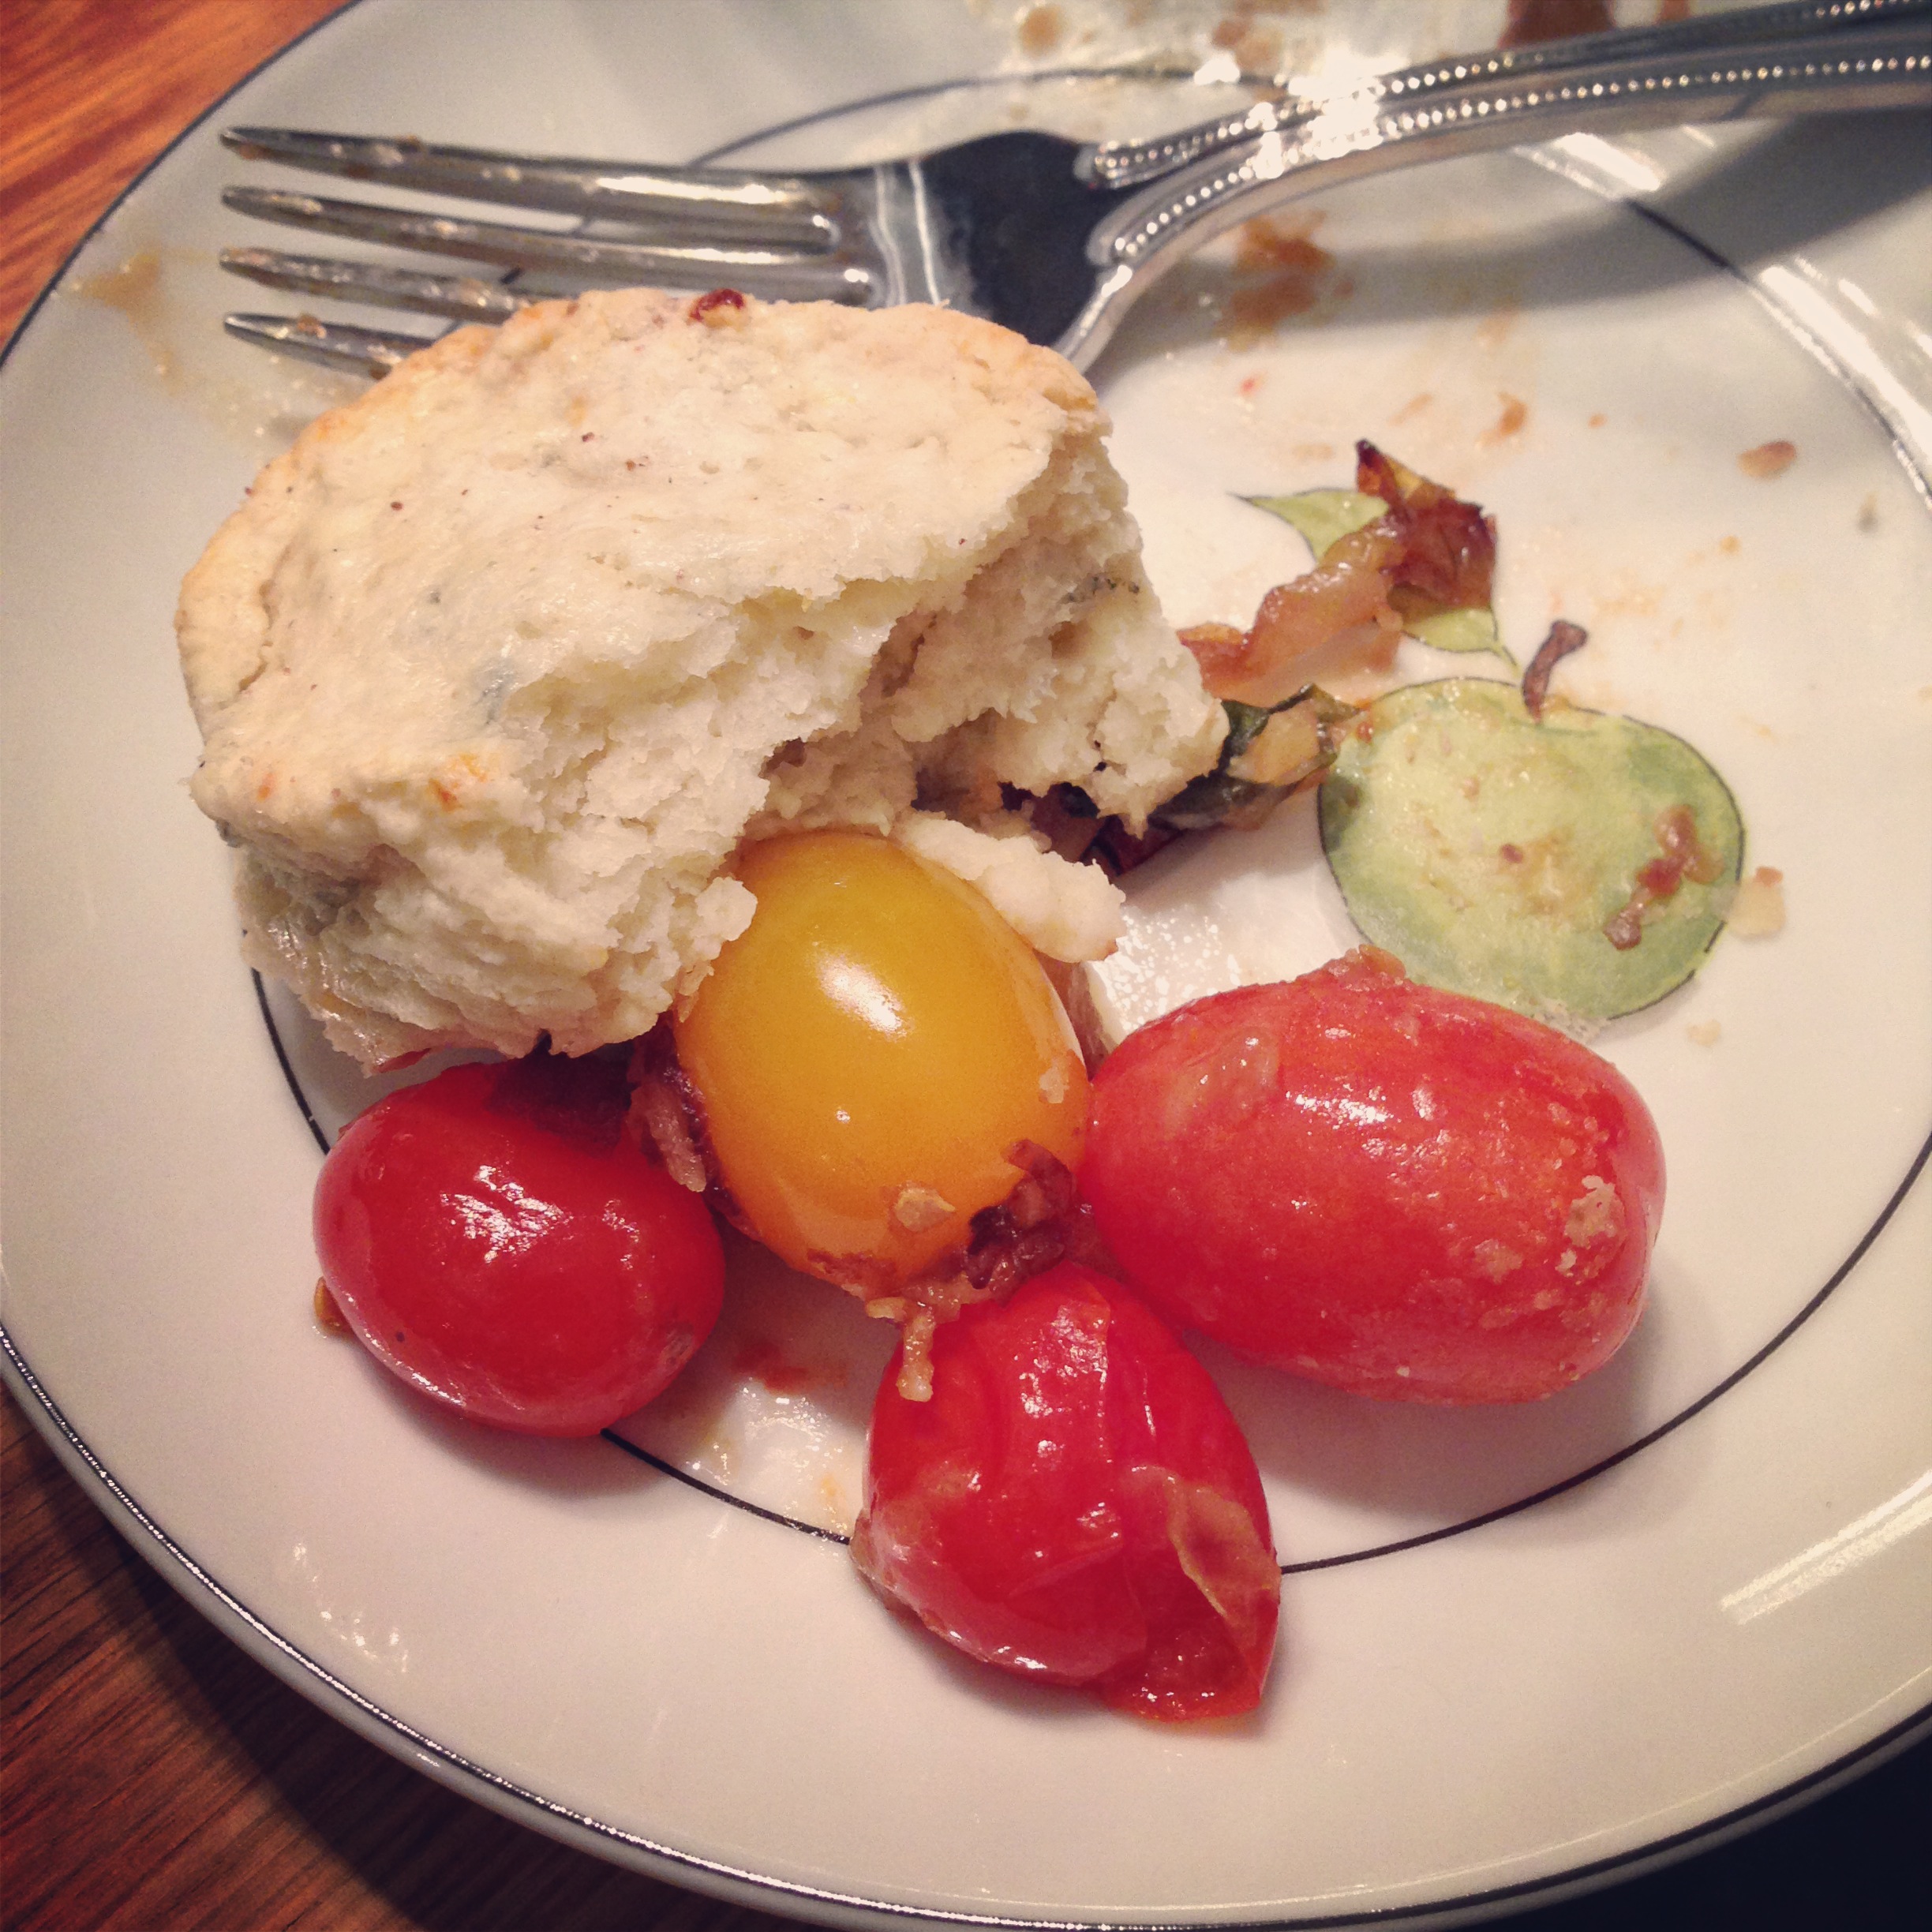
We sampled the bread during Hasegawa Happy Hour. It got our friend Karen’s approval for authentic Avanti’s taste. (She went to ISU and loves Avanti’s too.) For dinner, we made gondolas and walked down memory lane…Avanti’s bread with ham, salami, American cheese, lettuce and mayo…the best taste memory ever.

***This post is part of a series of Homemaker’s Challenges: activities that get me (and hopefully you, too!) out of the everyday routine of cooking, cleaning and laundry and into a routine of trying something new and experimental. I’d love it if you’d play along!

Tagged , ,

Homemaker’s Challenge #2: Meyer Lemon Curd

Meyer Lemon CurdLast month for our Christmas tea, Peggy made two kinds of lemon curds, regular lemon curd and Meyer lemon curd. The taste between the two was remarkable. Regular lemons made bright and fresh tasting curd. Meyer lemons though, made rich, deep, citrusy curd…so different but in my mind, Meyer lemons are perfect for winter.

Using Peggy’s recipe (which is from What’s Cooking America), I made Meyer lemon curd for Naoto’s party and it was a hit. In fact, lemon curd just might be my new party staple. I love serving simple, no-stress foods that my guests don’t see at every other party. And let me tell you, curd is simple…you can even use a microwave!

Meyer Lemon Curd

3-4 Tablespoons Meyer lemon zest

1/2 cup Meyer lemon juice (freshly squeezed!)

1 cup sugar

1/2 cup butter (unsalted and never margarine!)

3 eggs

zesting and juicing meyer lemonsZest and juice the lemons. Five Meyer lemons gave me the proper amount of juice but I was lacking in the zest department…I imagine that the lemon-intensity would be out of this world if I’d had a few extra lemons to zest.butter Chop up the stick of butter and put it in a dish to melt in the microwave. Mine only took thirty-ish seconds, with a stir in the middle. beating eggsWhile the butter melts, crack and lightly beat the three eggs in a microwavable bowl (or Pyrex). Then mix in the sugar, zest and lemon juice. meyer lemon curd before cookingOnce the butter is melted, incorporate it into the lemon/egg mixture. (My butter was lukewarm, so I didn’t have to worry about curdling at this point, but be careful of curdling if your butter is blazing hot!)

1 minute lemon curdNext, put the curd in the microwave for one minute intervals, stirring after each minute, for 3-4 minutes. This was mine after the first minute. You can see there was a bit of curdling. (I think my microwave runs a little bit hot.) After this first minute, things are going to look weird and slightly disastrous. Have no fear and keep going. lemon curd, minute 2Here was mine after minute two, before stirring. You can tell the mixture is getting thicker.lemon curd, minute two, after stirringAnd after stirring.lemon curd minute 3And in the last minute, you can see things thicken a lot. final lemon curdAfter stirring on minute three, I felt like mine was ready. The curd should be nice and glossy and thick enough to coat your spoon. And it should taste delicious. curdled lemon curdBut what about the curdling? Both times I made this lemon curd, I had plenty of curdling, in spite of the fact that my mixture never boiled in the microwave. It still must have gotten hot enough to cook some of the egg. So I ran mine through a mesh strainer and then it was perfectly smooth and dreamy. lemon curd in a mason jarPour into a jar and refrigerate until set. It will thicken up even more as it cools.

At the party, we served the Meyer lemon curd with my homemade ricotta (shared here in Homemaker’s Challenge #1!) on crackers. But really, lemon curd is decadent on a scone or toast…and I have my eye on this recipe for Lemon Bars…yum!

***This post is the long-overdue second in a series of Homemaker’s Challenges: activities that get me (and hopefully you, too!) out of the everyday routine of cooking, cleaning and laundry and into a routine of trying something new and experimental. I’d love it if you’d play along!

Tagged , ,

New Year, New Calendars

Sakana Saijiki calendar, orange beautiful calendar, wild olive calendarThe new year is catching me completely off guard. Thankfully, I have a few calendars to keep me on track.

I bought the Sakana Saijiki fish calendar for Naoto. It is full of amazing illustrations of sea life and calligraphy that I cannot read. I’m excited to have a grid again. The calendars that I bought last year were all more decorative than functional. The fish calendar will hang in the kitchen, so it will be nice for Naoto to see what we have planned for the month.

The little “Things With Faces” calendar was a gift from Mollie. I’m looking forward to breaking out my colored pencils or watercolors and filling the pictures in each month.

And the Orange Beautiful calendar was a gift from Donovan. The colors and the fonts are perfect.

As far as a datebook for 2014…well, I’m still waiting. After a couple of months of waffling, I decided yesterday to go back to using Franklin Covey. Once my pages come in (MID-JANUARY!!) I will do a little post on my set-up.

Today I am cleaning house and stringing up a garland for our teeny New Year’s Eve party tonight. We are having dinner at Golden Steer and drinking cocktails at home and maybe making a few resolutions…

Happy New Year!

Tagged , , , ,